Hello everyone, it's time for our monthly look at projects that can be completed in fifteen minutes or less, brought to you by the Design Team as a whole. We aim to inspire you with quick and easy projects, sharing our top tips and time saving ideas. If you are a beginner stamper, or someone simply looking to complete a card in a hurry, then these blog posts are for you. We can show you great ideas for batch cards, craft fairs or cards to stockpile for later, for those unforseen occasions. We hope that you will enjoy this month's selection. Grab a cuppa, and take a look.
We have two cards from
Rachel to start this month's post. Her first card was created by stamping the silhouette image from the
Rose Duo stamp set over a Distress Ink background using black ink. She stamped the
On The Tiles image directly onto the card blank, and then placed the coloured background over the top.
To create her second card, she embossed the feathers using Versamark and white embossing powder, then added Brushos over the background, spritzing them with water.
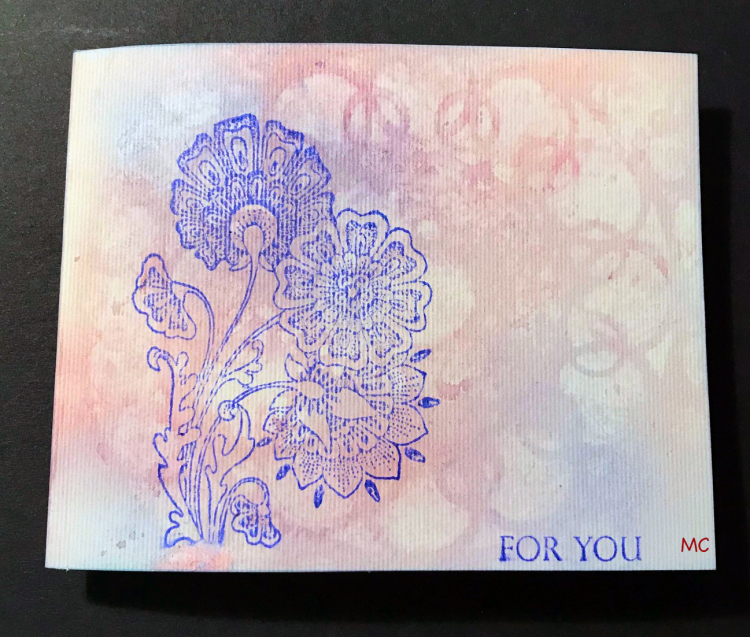
Another fabulous Brusho background from
Brenda here, she has used beautiful Autumnal colours, stamped her main image, and bleached the colours from the image.
She has created two cards using the fabulous feather stamps next, showing how you can create very different looks by varying the colours of your inks. The first card uses coloured Distress Inks for the feathers, and then black ink for the sentiment:
The next card uses a monochrome colour scheme, and she has added a few sequins for embellishment:
Her final card, again sticking to a simple colour scheme has been created very quickly, but looks very elegant with the addition of a beautiful bow, and toning blue card as a matting layer. She has added the very versatile
Square Bubbles stamp to form a frame around the main image:
We have a real mixed bag of projects from
Magda this month. This delightful first card has been created with some of our seaside stamps, and would be perfect for the men in your life, or someone who loves the sea. A gentle hint of watercolour is all that has been used to complete the card.
For her second card, she has created layers of stencilled Distress Ink:
To create this next card, she blended a background with Distress Ink, then dabbed a wet piece of kitchen towel through a stencil to remove some of the ink. The image and sentiment were stamped with more Distress Ink.
The flowers on this next cheery card were simply stamped with Distress Ink.
Her final two projects show how you can create very different looks using the same stamp. She has used watercolours to colour the stamp on white card first of all:
Secondly, she has used white and brown pencils on a kraft tag:
We have a burst of colour from
Anne up next. She created the background by embossing the
Square Bubbles stamp with Versamark and white embossing powder. The feather was stamped and embossed using an aqua coloured embossing powder, and the sentiment with white embossing powder. She then added water to the background and dropped colour from sparkle pens into the water. She blew the colour around using a straw. Her final touch was to add some sequins.
Anne's second card was created using shaped dies to cut the card blank and subsequent layers from black card and watercolour card. She stamped the background and sentiment with Versafine Onyx Black ink. She then stamped the foliage with a multi-coloured dye based inkpad, and spritzed it with water to soften and spread the images slightly. She edged the card with a black alcohol marker.
She placed a strip of copy paper over the sentiment to act as a mask, and stamped the foliage again, repeating without re-inking to create depth. Finally she added a tiny die cut bird.
For her final card, Anne stamped the rose image onto watercolour card with Versafine, and coloured the image with watercolour pens, colour was added directly into the darker areas and dragged out with a damp brush. She covered her image with a ready prepared mask and stamped the background with a pale coloured ink. Anne keeps a stash of masks for later use which she reuses over and over. As she says, you could just stamp around the edges, avoiding the image. She edged the card with a pen, and added faux stitching.
A very elegant card from
Marga next, she has stamped a single feather, coloured it with Distress Ink, and cut it out. She has added it to the background with a matching bow.
Two cards from
Carole, using kraft card are next. Carole has created a feminine card using the rose image, combined with elements from
Loving Sentiments and
Butterfly Poppy Collage. She embossed the images with gold embossing powder, the rose and message on white card, and the butterfly on parchment paper. She cut around the butterfly and tore around the rose.
Her masculine card was created using stamps from
Eccentric Edwardian,
Steampunk Travel,
Punky Expressions and
Loving Sentiments. She used Sepia Versafine for the sentiment and background. The man, hat and message were stamped onto white card and cut out. The hat was coloured. The script and Best Wishes were stamped onto the card, and the card was edged with a border using a fine black pen.
Julie has created a very striking card this month, stamping the image from the
Lords and Ladies stamp set using Versamark and silver embossing powder. She has added dots with a white paint pen around the image. She has then added a border using a ruler and a silver pen, before mounting the background onto a card blank.
Finally,
I have created a background using a piece of drawing cartridge, adding lots of water, and brushing watercolour inks over the top. I sprinkled sea salt over the ink while it was wet and dried the background with a heat gun. (If I was not up against a fifteen minute deadline, I would have left the background to dry naturally). Once the background was dry, I brushed the salt away, and I stamped a leaf from the
Tangled Garden stamp set, which I then masked, before stamping a large and a small feather twice. I drew some antennae using a fine liner pen, and added a touch of colour to the butterfly that I had created using Distress Ink. I blended the same colour of Distress Ink around the edge of the background. I added the main sentiment from the
I Shall be Your Wings stamp set. A tiny bit of stickles glue was brushed over the wings to finish.
We hope that you have enjoyed this month's projects, and we will be back next month with more projects to share with you. Do keep visiting the blog for a daily dose of inspiration from the Design Team.
Thanks for stopping by,


Beautiful cards from all the ladies. just shows what you can do in 15 minutes
ReplyDeleteWow, such amazing projects!! Great use of inks and stamps and there are a lot of inspirations to take!
ReplyDeleteGreat inspiration as usual ladies. I especially love all the feather cards.
ReplyDeleteThank you for all these wonderful examples of quick cards Judith, really inspirational. x
ReplyDeleteWhat a marvellous selection of inspirational cards, each and every one is gorgeous, such a talented DT, Kate x
ReplyDeleteGreat collection of inspiration - as always, what a great team!
ReplyDelete