Pin It button on image hover

Friday 30 November 2018

Decadent Garden by Penny

Goodly morning peeps,  I hope I find you all warm and well, there's been a definite nip in the air lately!  It is my turn today to share another of my samples from last month's shows.
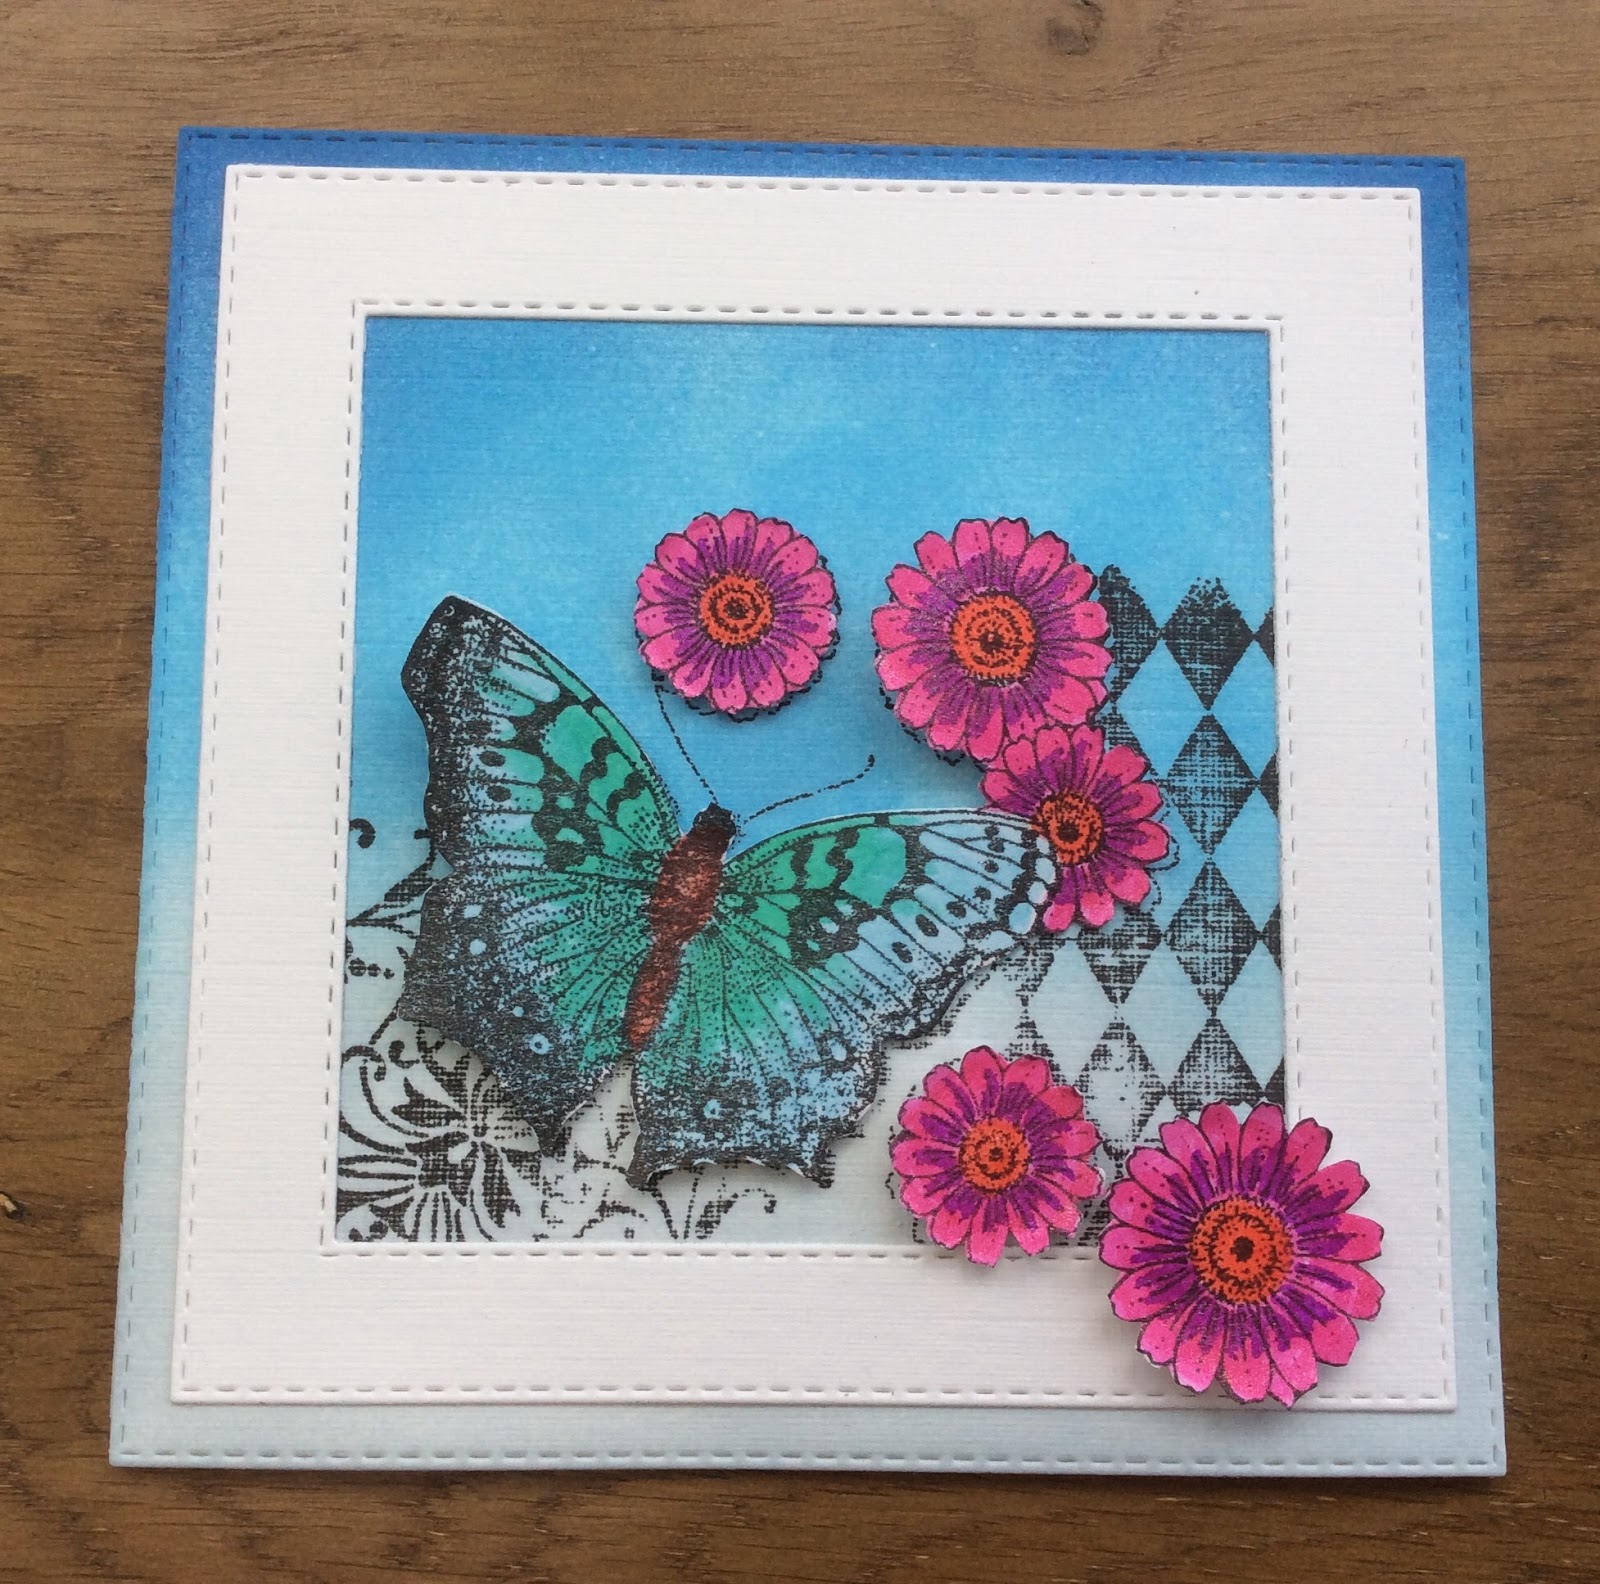
I have used stamps from the Butterfly Daisy Collage set, Distress Inks, gold embossing powder and the CB Useful Leaves stencil.


I took a piece of white card and stamped and embossed the large floral image.  I then masked it off and repeated.  I painted the images with bright jewel colours, then added some foliage using Distress   Ink through the stencil.  I blended DI around the edges of the panel and matted it onto coloured card.  I then attached it to a white base card.
On a piece of spare white card I stamped and embossed the other floral images and painted them as before.  I then cut them out and built the flowers up in 3D, and added some clear glaze to the centers. 


I stamped and embossed the collage butterfly image onto a piece of vellum then coloured it with pens.  I cut it out and attached it to the card.  I didn't put a sentiment on this card but I think it would suit several occasions. 

Thank you for dropping by today and joining me for a bit of crafty fun.  One of my teamies will be here tomorrow  with more inspiration for you. 

I'll be back next month with some more projects to share with you, so until then

                                                                 
                                                              x  Penny  x

Wednesday 28 November 2018

Stamping on Fabric (by Judith)

Hello everyone, I am here for my final post this month, sharing two projects using the stamps that we showcased on last month's TV shows on Hochanda. This time, I have created my projects using fabric, showing how you can create a quick card, and a decorative panel.

For my first project, I painted a piece of spotty fabric with yellow and green paint, blending the two where they met. I used coloured Archival inks to stamp all of the images, creating a meadow scene in first and second generation stamping, just as I would when creating a card. I added a couple of Butterflies, and then painted the images with Koh-I-Noor paints and a waterbrush.

For the larger panel, I used the large corner stamp from the Butterfly Daisy Collage stamp set, and stamped around the edge of a piece of patterned fabric, overlapping the image as I went along. Again, I used coloured Archival Ink. I used iron on interfacing on the back of both pieces of fabric, fraying the edges of the top panel, and adding rust coloured ink to the bottom panel. I used a thick piece of greyboard as a base.

I had a piece of the spotty material left over from my first project, and stamped two of the large butterflies from the Butterfly Daisy Collage stamp set onto the fabric, adding shading with the Koh-I-Noor paints. I also stamped some words from the Amazing Mackintosh Words stamp set, and frayed the edges of the little panels.

I created a wrinkle free distress panel using tones of green and yellow on a piece of watercolour card for a background. I stamped a leafy sprig in second generation stamping randomly over the background. To complete the card, I used a small piece of eco printed fabric, with a lovely leaf printed in the centre.

Thanks for stopping by,

Judith xx

Tuesday 27 November 2018

Flutterbys and Florals (by Zoe)

Good morning and a warm welcome to my final post this month featuring these gorgeous stamps.

Simple stamping and ink blending with these samples.

I used Sparkle brush pens to colour the flowers and butterfly on the first card.

The circular card I just used Distress Inks to watercolour the flowers and a simple stencil for the background.

A greyboard tag which was gessoed first. I used watercolour markers to colour the image in and blended with Distress Ink around the edge.


I used the wrinkle free distressing technique with a gold mica powder in the spritzer and then covered with wrinkled up cling film until dry on the harlequin card.

My little specimen jar is a die of course, I used Distress Ink for the background. I stamped  the flowers using Versafine inkpads in various colours and the butterfly was coloured in using watercolour markers.

Thank you once again for taking the time to visit.
Have a wonderful day xx Zoe xx

Monday 26 November 2018

Grungy Flower (by Nikki K)

Hello everyone, today sees the final post by our Guest Team member Nikki K. Nikki has created another sneak peek card using the fabulous new stamps that we shared on this month's TV shows on Hochanda. The rest of the Design Team will be sharing their projects next month.

Nikki writes:

Morning everyone,

this is my third Guest post this month, and I've loved using the brand new stamps from Chocolate Baroque. Today I'm sharing a card I made after the TV shows, with some leftovers!

Start by stamping Floral Grunge around a card blank in black ink. You just need to cover enough of the card to show behind a panel.

Stamp end emboss one flower in black ink with clear embossing, cut out just the flower, no stem.


I had a leftover piece of card with Brushos on from another make, and liked part of it, which I cut into a panel and distressed around the edges. I stamped the Floral Grunge flower and embossed in clear onto the panel.

I used acrylic paint in Yellow Oxide to colour the flowers on the card and the single flower, and coloured the centres in Pyrole Red. I watered the paint down to a wash, to imitate watercolour.

Before assembling the card, I spattered Pyrole Red paint over the centre panel, to tie in the centres of the flowers to the rest of the card.

Attach the panel to the centre of the card base, and layer the single flower up on top with 3D foam pads, and it's done.


Best Wishes,

Nikki K
xxx


Sunday 25 November 2018

Let the Adventure Begin by Brenda


Morning all, Brenda here with my last post for November featuring lots of lovely Butterfly stamps.

For the card above I used one of the images from Butterfly Daisy Collage, stamping with Versafine black onto a Distress Ink background, quickly created by randomly brushing three different colours. The harlequins on the background layer are from Decorative Edges and the sentiment from Artistic Affirmations.


A little wall hanging using Briar Rose Butterfly stamped onto a piece of  stamp board which I first coloured with Distress Inks and added some stencilling using Useful Leaves. The image is coloured with Distress Pens and mounted onto a piece of hessian and some beads added to decorate.


I used a rattan heart shape to create this piece stamping images from Butterfly Daisy Collage onto different coloured vellum's using Versafine and detail white embossing powder.  After cutting out I layered the flowers, added a few ready made flowers and leaves from Tangled Garden which are also stamped onto coloured vellum and heat embossed.


This one features Harebell Butterfly stamped onto a background of Distress Ink which then had some of the coloured removed by sponging diluted bleach through a stencil. The image is coloured in with Distress Pens.

Many thanks as always for taking a peek at today's post.

Saturday 24 November 2018

The Magic of Cristmas ( By Marga)

Hello everyone, today it's my turn again to show you a card, this time again a Christmas card. I made a lot this year so I'm sure I have more than I need, but I like to make them.


I used my stamping tool to make this card. I first inked the image with two colours of ink and stamped it and then I sprayed water on the stamp and stamped it again. This gives a watercolour look.

Stamps I used are: Robin the Spruce , Pears and Baubles and Let's get Festive.


Hugs Marga


Friday 23 November 2018

Autumn Notepad (by Gerrina)

This week sees the last post for this time from our lovely guest designer Gerrina.  She has already shared with us two beautiful projects and her third is no exception. With her wonderful reminder of Autumn I shall hand you over to Gerrina.


Hello I am back again for my last post this month for the Guest Designer Team here at Chocolate Baroque. You will find this one not only here, but also at my blog.  This week again I didn't make a card. I made a cover for a notepad:


Materials used:

Stamps: Chocolate Baroque Autumn Poppy and Artistic Affirmations

Ink: Versafine Onyx black and Distress Ink in a variety of autumnal shades
Other: Notepad, aquarelpaper, water brush, brush and water


The cover of the notebook was stamped using Onyx Black with the mushroom stamp from Autumn Poppy. This image was coloured with the Distress inks and a pale colour wash of Hickory Smoke for the background. Finally I stamped the words from Artistic Affirmations again with the Onyx Black. This makes a sweet little gift I think, how about you?

Hope to see you back here next year,

Creatieve groetjes,
Gerrina 


I think this would make a fabulous gift for a Teacher this Christmas.  Thank you Gerrina for your wonderful contributions over the past three weeks, we definitely look forward to seeing what you have in store for us next year.

In the meantime please drop by again to catch up with our regular design team girls, who always have something amazing to share with us.