Pages

Friday, 30 September 2022

Occasions Strips Part 2 (by Zoe)

Good morning Lovelies and welcome to my final post for this month.

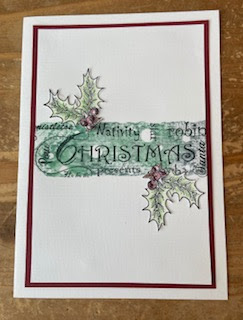
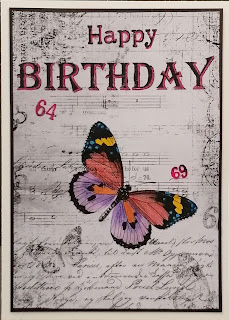
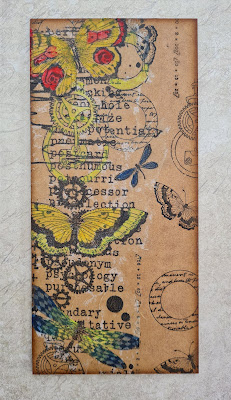
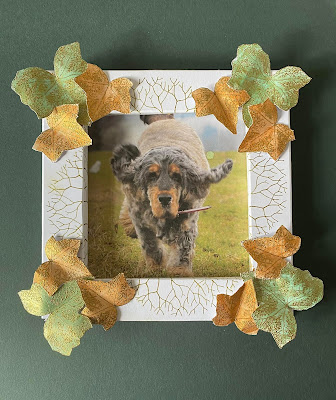
Here are the last of my samples I made for August's fantastic shows featuring these wonderfully versatile stamp sets.

I so enjoyed using these stamps, the strips in particular are definitely living on my desk and will be used frequently, they are genius.

I hope you like them? 


Thank you so much for visiting today.

Have a craftastic day.

Big hugs xx Zoe xx


Wednesday, 28 September 2022

A Tree for Christmas (by Linda)

Hello, how are we all? Finding a bit of "me" time for crafting I hope.

For this card I used the bare tree from The Tree of Knowledge stamp set showcased in the August shows on Create and Craft. I confess, I did not at first realise these trees are sprouting from books, what a beautiful design!

I stamped the tree onto kraft card as I like the contrast in the finished piece with the black and white tree, coloured baubles and beige colour of the card. You, of course can experiment with any colour tree, it would be great to see some of your ideas on the Chocolate Baroque Facebook Page! 

I decided where I wanted the tree to be dusted with snow and to help me keep the "snow" on the correct sides of the branches, I stand something like a pencil sharpener on the side the snow is falling to remind me. This also works for me when adding shadows.

I used a white gel pen to draw along the branches. This is easier if you emboss the tree with black embossing powder so the pen follows the raised edge.

I then added "baubles". These I created by drawing round the lid of my water spray which happened to be the right size. They are coloured in with metallic pens, a line is then drawn up to the branch above, and a simple bow drawn, like rabbit ears.

I extended the base of the tree stamp with a black pen to ground it.

The "Christmas" is from the Slim Word Strip 2 stamp set. That section being stamped on a separate piece of card, rubbing the ink off the words that I did not want. I cut the card into a rectangle and rounded the corners with a punch. I attached it to the card with foam tape. This is actually an easy, quick card to make that looks far more complicated than it is. Perfect.

I think this technique may well have been used by a Chocolate Baroqu'er some time ago. If this is you, please claim the well deserved praise!

I hope you have enjoyed my first three blog posts ever, and look forward to your feedback.

Linda x

.

Tuesday, 27 September 2022

Don't you just love Versatility ? (by Doreen)

 Don't you just love Versatility ?

Hello everyone, for todays blogpost I have included several different makes, all from the same wonderful set of stamps along with a couple of other stamps from other sets.

The stamp set is one of the brilliantly designed word strip sets A4 Slim Word Strip 2 the other sets used are Rejoice! and A Tomte Christmas. I have used several different techniques which I am fairly certain you are familiar with they are Distress Inks applied with blending brushes mainly either to use on their own or through stencils or to colour Chocolate Baroque Black and White printed DL card. Versafine Clair Inkpads are also used throughout in Black, Dark Blue, Versamark with White Embossing powder.


If you have any questions on any of the above card do not hesitate to ask.

Thank you for looking in today

Love Doreen


Sunday, 25 September 2022

Travel With Nature


This is my last post for this month using samples made for August's shows.  I started with the background and in tones of green and brown I stamped leaves from the stamp set From Nature 2,   Then using the Nature strip word stamp from Word Strip 1 I stamped it across the background in black.  I lined up the Tree Of KNowledge to sit on the strip word.

`````````````````````````````


This card I started with the Word Strip 1 set and using the solid strip I inked it up in several colours of Versafine Clair, the colours reminded me of tropical colours to go with the Travel texts, I stamped some leaves from  From Nature 2, coloured them and cut them out.  I added them to the centre strips then matted and layered everything up.  

Thank you for popping by

Happy crafting

Tracy x


Saturday, 24 September 2022

Tomte Christmas (by Veronica)

For my last post I am sharing two quick cards using stamps from the August shows on Create and Craft.
Both cards use the slim word strip 2 and the Tomte gnomes and the same method


I cut a square of white card to fit a 6" square card blank and fastened it down on my stamping platform - mine will take an A4 sheet, so i could get the christmas word where I wanted it.
I coloured the word using a distress marker pen, stamped it and repeated to get a stronger colour.
The card square was edged with the same marker pen and added to the card blank.


The gnomes were stamped onto spare card, coloured with distress marker pens, cut out and glued in place. 


As you will have seen in Judith's post earlier, 
 the DT blog will sadly be ending at the end of the month. I will still be adding projects to my own blog and to facebook - one of these days I will get how to use  instagram properly, just don't hold your breath!

Thank you for following us, and I hope you will still be able to keep up with Chocolate Baroque

Friday, 23 September 2022

Some Wall Art by Sandra


Hello, I am sharing some more of my samples from the August shows on Create and Craft.

My first piece is a wall hanging made with The Tree ofKnowledge, From Nature 2 and  Slim WordStrip 1 and Slim Word Strip 2 stamp sets.

First, I used an A5 sheet of grey board which I used gesso and acrylic paints on. I used ink to distress the edges and stamped some leaves using From Nature 2.

I then tore out some pages from an old dictionary and used gesso and distress inks to age them. I stamped on the pages using parts of the stamp from Slim Words Strip 1 and 2. On the front page I stamped The Tree of Knowledge in Archival Ink and coloured with distress ink.

I then sewed the pages together and glued onto the grey board along with the sentiment.


Here is a closer view of the pages. 


For my second piece I used a grey board heart which I coloured with acrylic paints.

I stamped the Positivity words from Slim Word Strip 2 and tore along the edges and inked them.

For the background I used Distress inks and more stamping.  I assembled all the pieces adding some die cuts for texture. I finished with an MDF butterfly and some cord.


A close up of some of the detail. 


 Thanks for looking

Sandra x


Thursday, 22 September 2022

End of an Era (by Judith)

Hello everyone, I hope that you are keeping well. Firstly, before I share my project for today, I have to announce that we will be bringing the Design Team Blog to a close at the end of this month. We will no longer be posting on the blog, as we are finding that our vistor numbers are sadly dwindling, and the preference these days is for Facebook and Instagram. We have a dedicated Facebook Group which is very friendly, you can join and see lots of inspiration over there. The Design Team share their projects there too, and we are always dropping in to answer questions if you want to ask us anything. You can post pictures of projects you have made with Chocolate Baroque stamps, we would love to see them. We have an Instagram Page too, which is full of fabulous projects. You can give us a like, or leave a quick comment, we really appreciate a visit.

We would like to thank you for your support over the years, and appreciate all of your visits and comments. The Blog was created for you, our readers, and would not have kept going for so long without you.

Now onto my project for today. I decided to create a panel using one of the long collage stamps from last month's TV show, stamped onto a serviette for this project. We often use patterned serviettes in our mixed media projects, and peel away the two or three layers behind, which get discarded or do not get used for anything. These plain layers are great for stamping on, and using just like their patterned counterparts.

I stamped the large The Phenomenal Butterfly Slim Strip image using Versafine Clair Nocturne and left it to dry for a few moments. Also using Versafine Clair Nocturne, I stamped some of the images from The Phenomenal Butterfly Elements and Out of the Trees Elements over the MDF panel, checking that they were in the area that would not be covered by the serviette once it was stuck down. 

I covered the reverse of the serviette with Matte Medium and adhered it to the panel. Now this worked fine twice at home, but in the studio, with the air conditioning blasting away, it was a completely different matter! The serviette was wafting about all over the place, and anyone who saw the show will have seen that I had a heart stopping couple of minutes while they turned the air con off and I attempted to lay the misbehaving serviette onto the MDF panel. Phew!

I gently brushed a bit more Matte Medium over the top, and this does take a very gentle touch, as too much can cause the serviette to disintegrate. I left the surface to dry completely before moving on to the next stage. I painted the image using transluscent paints in several colours. You could water your opaque paints down obviously, but I wanted to paint my colours neat, so this option worked for me. I chose a limited palette of colours.


I really like the unfinished MDF against the painted area, and hope that you will try this idea for yourselves.

Thanks for stopping by,

Judith xx

Wednesday, 21 September 2022

Fab Frames Number 2! (by Linda)

I have used the From Nature 2 stamps again, from the August Create and Craft show. If you watch on rewind, you will see this frame in the background. More about the photograph later.

I made a frame with Chocolate Baroque Super Smooth Card, keep the excess for later.

I folded the frame into shape without sticking it down and marked where to stamp the tree tops so they would all be up the right way. I stamped the top of the tree from The Tree of Knowledge stamp set, roughly centrally on each of the sides. Fold and stick the frame.

I then stamped 4 large ivy leaves and 8 of the smaller ivy leaves from the From Nature 2 set, on the spare card with Versamark and embossed with gold powder. I painted them with various mica/metallic paints to give a bit of a glow. I find it easier to do it this way then cut out as the embossed lines act as a resist so you do not have to worry about going over the lines. If I cut then colour, I tend to end up with very messy fingers and you can bet that a finger print will end up somewhere I do no want it!!

As I mentioned in my last blog post, the leaves are very forgiving to cut out, any little slip just makes them more natural looking. 

I folded and creased the leaves arranged, then glued on the corners. Add your photograph. You can then mount the piece on a card, on top of a box, or leave it as it is.


Now about the photograph that I used. Sadie is a beautiful dog we loooked after for a friend. She was a rescue from a puppy farm, with the most fantastic nature ever, not wanting to get up before 9, thank you very much, perfect. She was an incredible friend to her family through really tough times, but sadly, she passed away as I was making my samples for the August shows. She always loved a good sniff amongst the leaves so this frame was perfect for her. I have since made another for her family with a selection of photos they could swap around. We were all thrilled when she became the TV star she deserved to be for a few moments.


Thank you for spending some time reading my blog post.

Have a go, but most of all, enjoy!!

Linda x


Tuesday, 20 September 2022

Tree of Knowledge ( by Doreen)

 Tree of Knowledge

Hello everyone, welcome to the second blog of the month for me, which gave me the opportunity to use one of my favourite dies in conjunction with this beautiful stamp set. If you were not already aware I love trees no matter of size shape etc I am just fascinated by all of them !!

   The Tree of Knowledge I feel lends itself to this die not that I can remember where I purchased it from it just lives on a magnetic sheet waiting for me to put it to use.


I have used the largest of the dies for a base and the next size for the image. I stamped the image using Versafine Clair Morning Mist, then coloured the edges with Distress Inkpad Olive applied using a blending brush. The sentiments were also stamped in the Versafine Clair Morning Mist ( I really do like this grey) and then I coloured the image using
 Derwent Chromaflow Pencils.

I made my own stand for the back of the card as I didn't want to mount this on a blank and wanted it as a stand alone card in its own right. I simply scored a piece of card applied it to the back of the card and cut off an angle at the bottom to make it stand with a bit of a tilt.

Below is another sample made on watercolour card using Brushos and stamped in Black.


Thank you for looking in today

Love Doreen


Occasions strips by Zoe

Good morning Lovelies and welcome to my second post for this month.

Here are a few more of my samples I created for last months shows.

I think these strips are genius, they are very long and just so versatile.
As you can see I’ve used them in different ways, of course incorporating envelopes, I have to live up to my “envelope Queen” title lol.
My moon on the first card is using Versamark ink and Pan Pastels through a Stencil.


I hope you’ve enjoyed looking at and been inspired by my creations.
Thank you for visiting today, have a wonderful day xx Zoe xx 

Sunday, 18 September 2022

Journaling and Tag (by Magda) - Autumn Edges, Essence of Nature, Floral Edges, Words to Dazzle & Sparkle

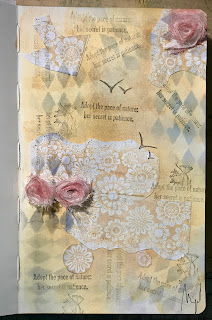
 Welcome back,  today I share with you my outcomes using the "Edges" stamps of Chocolate Baroque. As you can notice, with Floral Edges I realized the decoupage pieces for my Journaling page and with Autumn Edges the tag. I list here below all the materials I made use for these projects :  The stamps are Floral Edges, Essence of NatureAutumn Edges and Words to Dazzle & Sparkle.  The colours are Distress Ink Pad,  Archival Jet Black, color pencils, in addition perfect pearls, stencil and fabric roses.


I hope you enjoyed my projects, hugs 

Magda

Friday, 16 September 2022

A Bit Of Christmas And A Tree

I have popped by to share a couple of creations from August's show, for the first one I used the Word Strip 2 stamp set.  I started by doing an inky background in Distress Oxides, then stamped the background strip first in light blue, it has circles in it which I hoped looked like falling snow.  Then in a darker blue I stamped the words which are lots of Christmas words.  I then added some glitter to the word Christmas to finish it off.


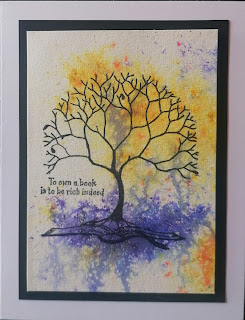
For my second card I used the stamp The Tree Of The Knowledge, starting with the background using Distress Oxides and a mask I created some hills,  I used a mask to create a sun in yellow and orange Distress Oxides.  I then moved onto the sky using a cloud mask, before stamping my main image.  I stamped the tree in Versafine Clair, and with a white gel pen coloured in the fruit/blossoms.  I added the sentiment to the bottom.

Thank you for looking
Happy crafting
Tracy x

Thursday, 15 September 2022

Luscious Christmas card nr. 2 (by Miranda)


Hello there,


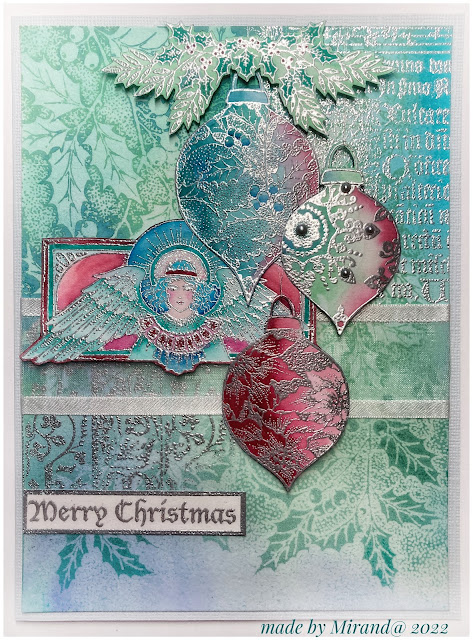
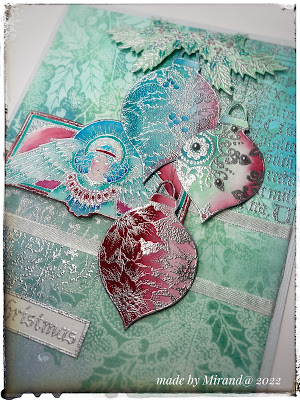
Miranda here with another Christmas card. A bit similar to the previous one but with different colors.

I have used:

Big Bold background Holly and the baubles from the Big bold background Christmas baubles. Also used some elements of the Gothic Angels sheet, all beautiful Christmas sheets.

I have made the background using Distress Oxydes and some resist embossing.


Hope you like my take on this one, have a lovely day and enjoy crafting!


Tuesday, 13 September 2022

tree of knowledge (by Veronica)

For my second post this month I am sharing samples using the lovely tree stamps that were featured on the Create & Craft shows last month.

I may not be a tree hugger, but I am a sucker for tree stamps - aprt from looking good, they are great for all occasions. As an avid reader, I loved the books as tree roots!

The first is very simple, if you already have a ready made background - in this case using distress inks splodged onto a crafrt mat and spritzed with water - then this literally takes only moments to do.Tree and sentiment stamped in black versafine ink and the fruit coloured with a marker pen, edge with a black marker pen and mount onto a card blank.

The second version also has a distress ink background, but overstamped in green with the large leaf stamp from nature 2 . The winter version of the tree stamped in black versafine ink again, sentiment on a scrap of card and cut out


For the final sample i made a book mark using a die cut tag shape in green card. A torn page from an old paperback was given a thin coat of gesso and smudged round the edges with distress ink. The intention was to make a pile of books, buit once I had cut them out they looked more like birds (seagulls?), so were added at angles with the sentiments stamped between them


Monday, 12 September 2022

Autumn Leaves by Sandra

Hello, I am sharing some more of my cards from the August shows on Create and Craft.

My cards today use the lovely From Nature 2 stamp set.


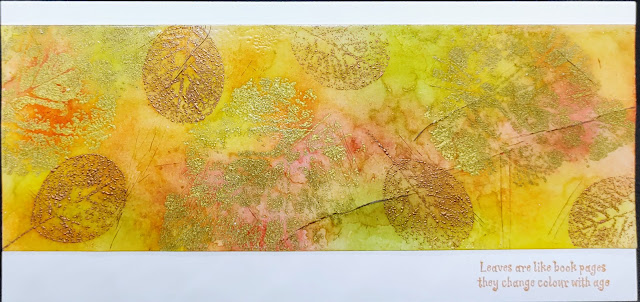
First I started with a slim DL sized panel used lengthwise and masked off the top and bottom with low tack tape. I then used some autumn colour Distress Inks and heat set. Next I used some Versamark ink and randomly stamped one of the leaves and embossed in gold. I then stamped a different leaf and embossed in copper. I then covered everything with Versamark and embossed in clear. I repeated for three layers being careful not to heat too much as the embossed leaves will start to melt into the clear layers! Once it was cool I put it into the freezer. After about 15 minutes I took  it out of the freezer and cracked the embossed layer - so satisfying! I then rubbed some brown Distress Ink over the top to reveal the crackles. I trimmed and glued the panel to a DL card base and added a sentiment.


Close up of the crackles.


My next card is a quick and easy make. You may have seen that Judith has started an album on the Facebook Group for 15 minute cards and this was my contribution. 
I used the large Oak Leaf from the set and inked it with yellow, red and green Distress Inks in random areas, overlapping to blend the colours. I used Archival ink for the numbers and words.


 Thanks for looking

Sandra x

Saturday, 10 September 2022

Dotty Strip (by Judith)

Hello everyone, I hope that you are keeping well. I have a couple of projects to share with you today showcasing stamps featured on last month's shows from Create and Craft.

I started my project with a large card blank, and drew along the opening edge using one of the Chocolate Baroque Draw and Tear Rulers Set 1 using a pencil. I cut the excess card away. On the inside of the card, I stamped the long dotty strip from Slim Word Strip 2 with a yellow dye based ink. I stamped a word strip from Slim Word Strip 1 over the top. I used one of the leaves from the From Nature 2 stamp set to stamp randomly over the front of the card using second generation stamping. I wanted a paler background because I did not want to detract from the other parts of the card.I added a splatter stamp from Timeless, using green and yellow ink. 

I took a whiteboard heart and coloured it with the same yellow and green inks, and then stamped the same word strip as I had used along the card edge. I filled the heart, moving the strip across each time I stamped, to get a random compilation of the words. It looks great on one of these hearts. 


This card was fairly quick to complete, and I can see lots of possibilities for adapting the design to suit lots of occasions. Using the big word strips, especially now we have two sets for you to choose from gives lots of choices, and I hope that you will try out this idea, or a variation of the theme.

I decided to make another card featuring the dotty strip from the Slim Word Strip 2 stamp set. I stamped the strip onto a piece of Drawing Cartridge several times using shades of green and orange Distress Ink to create an ombre effect. I stamped the fruit tree from The Tree of Knowledge stamp set onto a piece of book paper, and coloured it with markers. I added some shading around the edges using green distress Ink. This card would be suitable for lots of occasions- a graduation, a book lover's birthday, or even just to show someone you are thinking about them.


 Thanks for stopping by, take care,


Judith xx

Thursday, 8 September 2022

Hint of Autumn ( by Doreen )

Hint of Autumn 


Today I would like to share a simple but very effective card.


 The leaves are from the Nature 2 set of stamps, using a Multi Coloured Dye Inkpad of which there are in mine colours of Autumn but I also think it would look lovely in purple, pink and blue..... The stamp used is the largest in the set and I used second generation stamping to fill in the background. The bolder images have had their colour dragged out using a fine paintbrush that was wet but not too wet enough to flood the image. The sentiments and numbers are all stamped using Versafine Clair Acorn.

I mounted the topper onto a card blank which I made myself using Chocolate Baroques Kraft Card it really does make a sturdy Card Blank.

Here are two more samples using the Nature 2 stamp set


Thanks for looking in today

Love Doreen