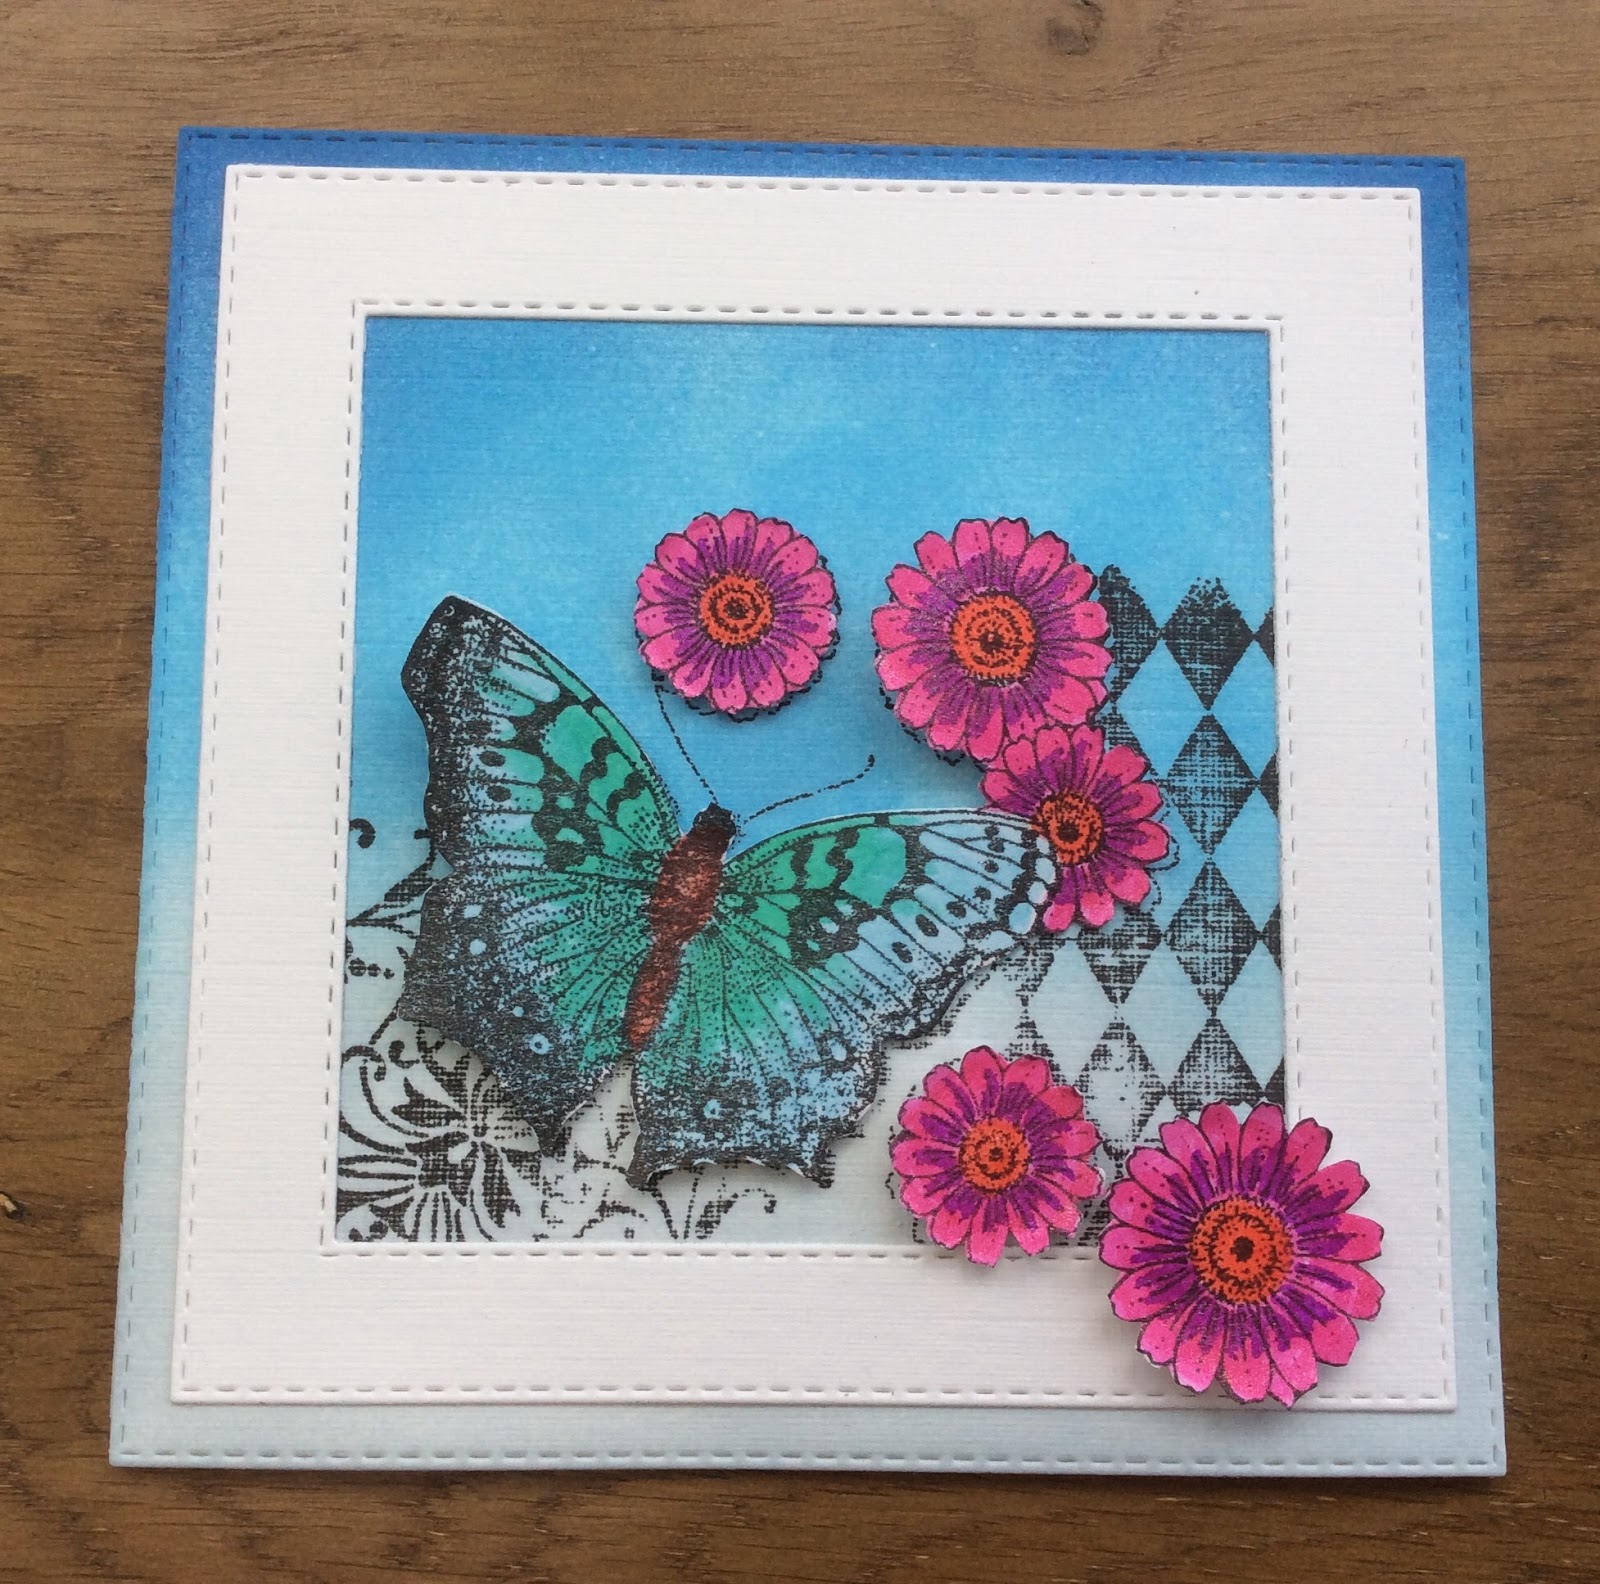
Hello everyone, today sees the first of three posts from our Guest Design Team member Deborah Wainwright. Deborah has created a beautiful Christmas cad for your inspiration today. If you are still making some last minute cards, here is a lovely take on this image for you.
Deborah writes:
Hello everyone, Debs back with you for my Guest Design spot with some Christmas inspiration.
For this post, I made a pretty Christmas card using the lovely Serena stamp. For those of you that know me, you will know that I just love faces and flowers, so this stamp has it all for me.
I stamped the image with permanent black ink and heat dried it to set the ink. Then using watercolour paints I painted the image. First I added layers to the face to build up her complexion, then moved onto the foliage. I mixed different greens for each foliage to add richness. I then painted the flowers keeping the colours traditional for Christmas. Once it was completely dry I mounted it onto a sparkly pink paper to add to the Christmas spirit.
There isn't long to go until the big day, but there is always time for a few extra cards, so I hope I've inspired you to make a few extra. I'll be back next week with some Christmassy ideas. Until then, take care and hugs, Debs xx
Friday, 14 December 2018
Thursday, 13 December 2018
Floral grunge two ways (by Rachel)
Good morning! I hope you are well! Rachel here today with two more makes using the Floral Grunge stamp - ths time the first one is a ceramic heart plate.
I stamped the image in ink and then overpainted in glaze using reds and browns for the floral grunge stamp and also greens for the fern stamp I added around the edge.
For this second one I stamped in versamark and added white embossing powder to my kraft card. I thin added more embossing powder around the edges and heated from below - my idea was to continue the grunge effect. Finally I used pencils to colour in the image.
I hope this has given you a little more inspiration of ways to use your stamps.
Have a great day!
Hugs
Rachel x
Labels:
Floral Grunge
Wednesday, 12 December 2018
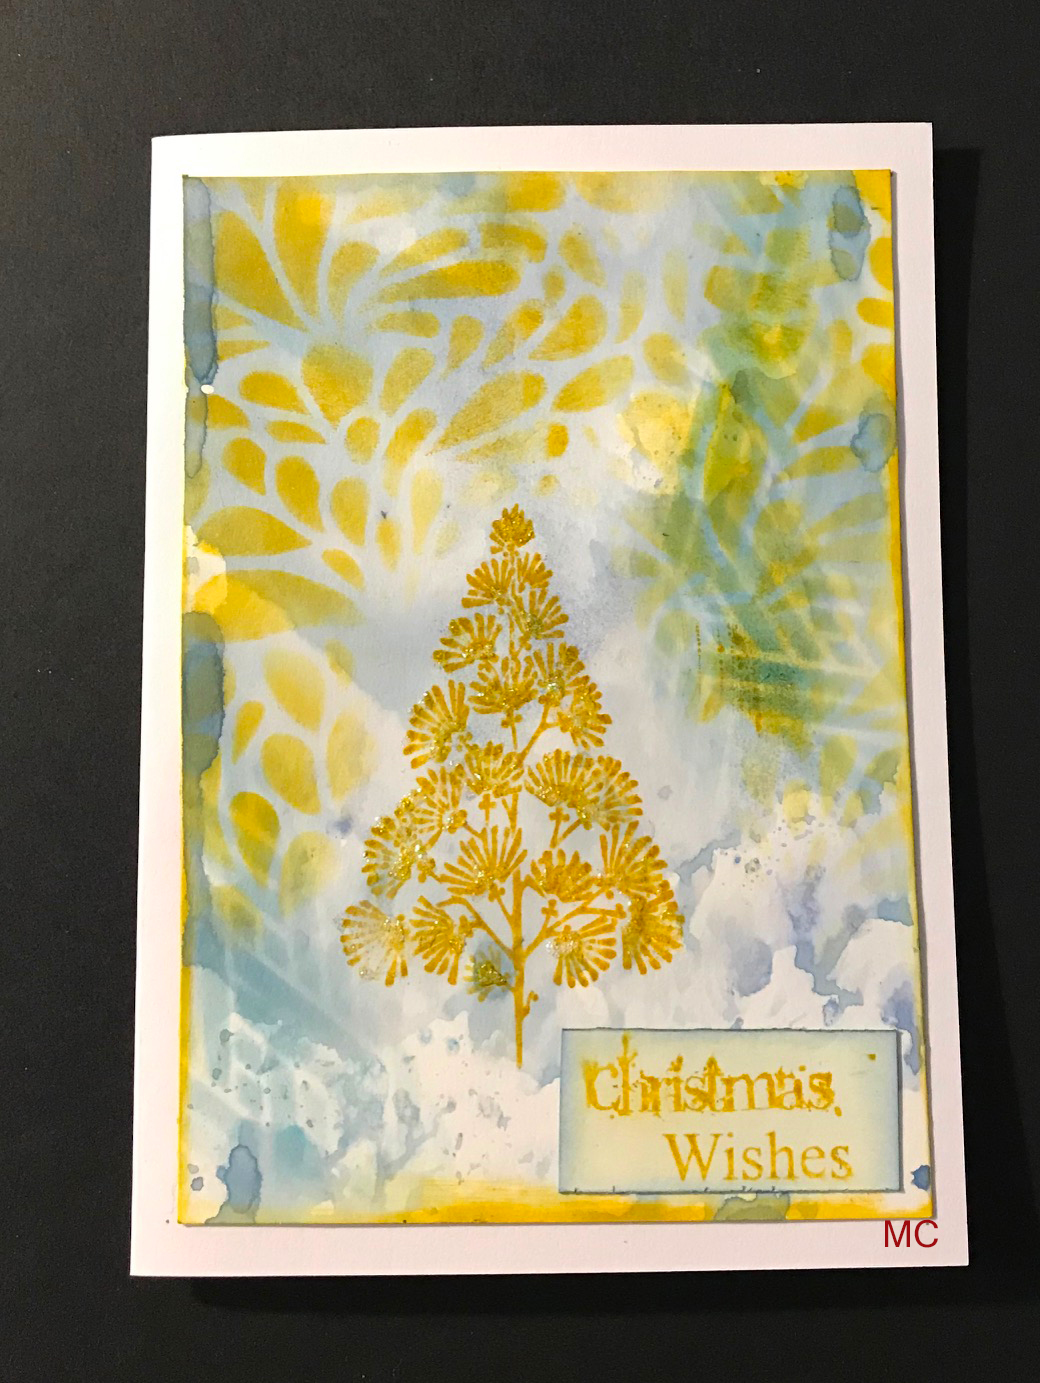
Last Minute (by Magda) - Fat Robin, Frosty Trees, New England Winter, Let's get Festive
Hello,
just few days at Christmas and and you still need some cards to do ? Perhaps I can inspire you with those 3 last minute cards.
I used Brusho colourwash for the 3 backgrounds
The lovely trees are in Chocolate Baroque plates Fat Robin, Frosty Trees and New England Winter
You can find the sentiments stamps in Let's Get Festive plate
For stamping I used Distress Ink Pad Pine Needles, Fossilized Amber, Moved Lawn
Stickles gold and crystal for some shine on the trees
Stencil and Embossing paste.
just few days at Christmas and and you still need some cards to do ? Perhaps I can inspire you with those 3 last minute cards.
I used Brusho colourwash for the 3 backgrounds
The lovely trees are in Chocolate Baroque plates Fat Robin, Frosty Trees and New England Winter
You can find the sentiments stamps in Let's Get Festive plate
For stamping I used Distress Ink Pad Pine Needles, Fossilized Amber, Moved Lawn
Stickles gold and crystal for some shine on the trees
Stencil and Embossing paste.
I wish you all a very Merry Christmas and see you again before the end of this year.
Magda
Tuesday, 11 December 2018
gift box (by Veronica)
I had some hexagonal boxes lying around that hadn't been used, and one just fitted this stamp....
The box was white, so it got a base coat of peeled paint distress oxide ink, and was then stamped with the fern from wild meadow in iced spruce distress oxide ink.
I stamped the image several times in black versafine and clear embosssed them.
On one image I coloured the ferns and leaves with green brusho powder, the word with yellow, and the flowere with orange then I cut the entire image out and stuck it onto the lid.
Once they were dry, I cut out sections of the flower and decoupaged them onto the original base image.
I also made a very grungy looking card with this stamp, using a white embossed image and black brusho powder.
The background was randomly stmaped with the ferm from wild meadow using a dark blue ink pad, and the same ink sponged round the edges.
Monday, 10 December 2018
Heartfelt Anniversary (by Pat)
Hello everyone, today sees the first of three posts from our Guest Design Team member Pat Moore. Pat has created a very pretty anniversary card for her first post.
Pat writes:
Hi everyone.
It's good to be back again as part of the Guest Design Team with this anniversary card for which I used the Fluttering Hearts set of stamps, gold embossing powder, a stencil, some Distress Inks and a sparkle pen.
I started by stamping four of the hearts from the set and heat embossed them using gold embossing powder. I then fussy cut them out omitting the bird which sits on top of one of the hearts, as I decided on this occasion I didn't want it. I coloured them using blue and purple Distress Inks applied with a waterbrush, with the addition of just a little green. When dry I added some sparkle to each one.
I then made the background by applying the same blue and purple Distress Inks to the stencil itself, spritzed with water and turned face down onto a piece of white card, leaving it for a few seconds and mopping up any excess ink before carefully lifting it away. If the coverage is not to your liking you can re-ink the stencil and repeat, but luckily this worked well first time.
I cut the background and also a slightly larger white mat using some pierced rectangle dies and added these two layers to the 7" x 5" card. I then added the hearts as you can see using some dimensional glue gel and stamped a sentiment and heat set with the gold embossing powder.
Thank you for joining me today and I'll look forward to seeing you again next week.
Best Wishes,
Pat.
Pat writes:
Hi everyone.
It's good to be back again as part of the Guest Design Team with this anniversary card for which I used the Fluttering Hearts set of stamps, gold embossing powder, a stencil, some Distress Inks and a sparkle pen.
I started by stamping four of the hearts from the set and heat embossed them using gold embossing powder. I then fussy cut them out omitting the bird which sits on top of one of the hearts, as I decided on this occasion I didn't want it. I coloured them using blue and purple Distress Inks applied with a waterbrush, with the addition of just a little green. When dry I added some sparkle to each one.
I then made the background by applying the same blue and purple Distress Inks to the stencil itself, spritzed with water and turned face down onto a piece of white card, leaving it for a few seconds and mopping up any excess ink before carefully lifting it away. If the coverage is not to your liking you can re-ink the stencil and repeat, but luckily this worked well first time.
I cut the background and also a slightly larger white mat using some pierced rectangle dies and added these two layers to the 7" x 5" card. I then added the hearts as you can see using some dimensional glue gel and stamped a sentiment and heat set with the gold embossing powder.
Thank you for joining me today and I'll look forward to seeing you again next week.
Best Wishes,
Pat.
Sunday, 9 December 2018
Autumn Harvest by Penny
Hello peeps I hope I find you all well, I have my first project of the month to share with you today. I know everyone is probably up to their eyes with Christmas preperations but if you have a couple of minutes why not grab a cuppa and join me for a bit of crafty fun!
I cut a piece of the paper to size and stamped the Shared Beauty image in one corner, using Versamark ink, and embossed it with copper EP. I masked the image with masking tissue then stamped and embossed some images from the Wild Meadow set. I removed the masking tissue then used Koh-I-Noor paints to colour the focal image.
I stamped more meadow images around the edges of a white base card, using DIs and blended some ink around the outer edges. I matted and layered the focal panel before attaching it to the card. I stamped and embossed a sentiment onto white card, die cut it and added ink before attaching it to the card. A cheerful, colourful card for many occasions.
Thank you for dropping by and I hope this project inspires some of you to have a go!
I'll be back later in the month with some more crafty fun, keep well evryone and try not to stress too much over Christmas!
xx Penny xx
Saturday, 8 December 2018
Colourful Tags (by Judith)
Hello everyone, I have a project to share today using some of the stamps and papers that we brought to you on last month's TV shows on Hochanda. I wanted to use a little bit of everything in this project, and incorporate lots of colour to cheer up these gloomier days that we are having at the moment.
I started by stamping three of the Tagtastic tag shapes with Versamark, and covering them with white embossing powder. I also added three of the little tag 'hole' shapes onto the background of each tag, and then heat set everything. I stamped and embossed three of the flower designs, Shared Beauty, Floral Grunge, and Movie Strip Collage, and a little butterfly from the Wild Meadow stamp set onto some of the lovely papers designed by Lesley, and used the papers to help me decide on the colours that I used to colour each tag. I settled on three colours of Distress Ink for each tag.
Once the tags were coloured, I stamped the sentiments from the Shared Beauty stamp set over each tag in the same colours of Distress Ink. I cut the flowers and butterflies out of the papers, and adhered them to the tags, and then attached the tags to a tryptich made from corrugated card. Finally, I added some rainbow coloured ribbon to each tag.
Thanks for stopping by, Judith xx
I started by stamping three of the Tagtastic tag shapes with Versamark, and covering them with white embossing powder. I also added three of the little tag 'hole' shapes onto the background of each tag, and then heat set everything. I stamped and embossed three of the flower designs, Shared Beauty, Floral Grunge, and Movie Strip Collage, and a little butterfly from the Wild Meadow stamp set onto some of the lovely papers designed by Lesley, and used the papers to help me decide on the colours that I used to colour each tag. I settled on three colours of Distress Ink for each tag.
Once the tags were coloured, I stamped the sentiments from the Shared Beauty stamp set over each tag in the same colours of Distress Ink. I cut the flowers and butterflies out of the papers, and adhered them to the tags, and then attached the tags to a tryptich made from corrugated card. Finally, I added some rainbow coloured ribbon to each tag.
Thanks for stopping by, Judith xx
Friday, 7 December 2018
A Plethora of Floral Delights (by Zoe)
Good morning Lovelies, how are your Christmas plans coming along?
So here's a selection of my samples from last months Hochanda shows featuring the gorgeous new stamps and papers.
I hope you managed to tune in, the shows were fab.
I used one of the papers to create the flower in the first card.
Another backing paper, I stamped the flower and masked using masking tissue from the website and then stamped the tag, I coloured the flower using sparkle brush pens.
I used a whiteboard heart from the website and just straight onto with Oxides which were laid down on my craft mat and spritzed and dried between layers. I used a stencil and white pigment inkpad to creat a Bokha effect.
I had some scraps in my stash which I'd used alcohol inks on my Gel press for this one.
I matted onto one of the backing papers, I used Gilding flakes for the gorgeous image.
Thank you so much for visiting, I'll be back later this month.
Have a wonderful day xx Zoe xx
So here's a selection of my samples from last months Hochanda shows featuring the gorgeous new stamps and papers.
I hope you managed to tune in, the shows were fab.
I used one of the papers to create the flower in the first card.
Another backing paper, I stamped the flower and masked using masking tissue from the website and then stamped the tag, I coloured the flower using sparkle brush pens.
I used a whiteboard heart from the website and just straight onto with Oxides which were laid down on my craft mat and spritzed and dried between layers. I used a stencil and white pigment inkpad to creat a Bokha effect.
I had some scraps in my stash which I'd used alcohol inks on my Gel press for this one.
I matted onto one of the backing papers, I used Gilding flakes for the gorgeous image.
Thank you so much for visiting, I'll be back later this month.
Have a wonderful day xx Zoe xx
Thursday, 6 December 2018
Tagtastic book by Brenda
Good morning, Brenda here with some samples made using the gorgeous new stamps and papers Lesley showcased on Hochanda.
My first share is a little book which I made using my Zutter, something that's not see the light of day for far too long.
I used Distress Oxides to created the pages and pockets to hold the tags which were all made using the new Tagtastic stamp.
I cut each down slightly to enable them to fit into the pockets.
I managed to incorporate all the new stamps into this one:
Shared beauty, Movie strip collage, Floral grunge and Be Kind
I used a variety of inks and stencils along with sentiments from Floral Delight.
Also used are some of the stamps from Wild Meadow which is a really beautiful stamp set and so useful.
The pages also had a liberal helping of structure paste and stencilling to add interest and texture.
This one uses one of the new Designer papers along with a little wooden frame I bought at Stamp Magic from Lesley and David stand there. I felt it lent itself to rustic colours so inked the edges and fixed over the DP, the bloom is from Movie strip collage which I stamped several times onto vellum and heat embossed with detail gold, cut out and layered up, adding a little gold glitter as well. The corn is a die cut also glittered with gold and copper ultrafine glitters. The sentiment is from Birthday words.
I hope I have offered a little inspiration to get out your stamps and get inky.
Wednesday, 5 December 2018
Gothic ( By Marga)
Hello everyone, today it's my turn to show you something.
Today I show you a Gothic card I made. I used Distress Ink for the background I used Fossilized Amber, Abandoned Coral and Twisted Citron.
I stamped all the images with Versafine Onyx Black and then I used a brush and bleach to make the white parts of the card. At last I stamped the clocks and cut them out and put them on the card.
I used the stamp sets: Gothic Fragments and Eccentric Edwardian
Hugs Marga
Labels:
Eccentric Edwardian,
Gothic Fragments
Tuesday, 4 December 2018
November's Blog Comment Winner
Hello everyone,
We truly appreciate the time you take to let us know your thoughts about our designs, so each and every comment is very important to us.
Each comment in November was assigned a number and we used Random Org to draw a winner.
Congratulations to Redanne, you have won this months £15.00 voucher to spend on Chocolate Baroque stamps. To claim your prize, please email here to confirm your email address and Lesley will send your gift certificate.
Lesley will be giving another £15 gift voucher to another lucky winner drawn from December's comments. The more comments you leave the better your chances of being the winner.
Did you manage to catch Lesley on Hochanda earlier today? Don't worry if you missed her as you can pop over to Hochanda and watch on Catchup or tune in again at 3:00pm pm this afternoon where you can see Lesley for her final show of the day.
Thank you so much for all the kind comments you leave.
Good luck from the Design Team
Meadow-tastic (by Julie)
Hello, today I have two meadow themed cards stamped with Wild Meadow to show you.
I started my first card by inking up various floral stamps from Wild Meadow with dye inks and stamped onto smooth stamping card. I find it easier to start with the lighter coloured inks and then gradually overlay the images with darker inks. Once I had completed the background I carefully blended Broken China Distress ink over the entire card and stamped the sentiment which is from Words of Inspiration. For the tag I inked up the Tagtastic design and stamped it onto a separate piece of stamping card. Then I inked up the floral images as before and stamped onto the tag. It doesn't matter if the images overlap the edges of the tag as you need to cut the tag out anyway. Choose a decorative eyelet from the Tagtastic set and stamp it where you would thread your ribbon. Punch a hole through the eyelet using a crop-o-dile or something similar and then thread your chosen ribbon.
Cut your background to size and mount on top of black card, before attaching to your card blank. The tag was then stuck into place with 3d foam pads.
My second card is a quicker DL version of the first card. I kept the background clean and simple by just stamping the floral designs onto the card blank and leaving the clean white card showing.
The Tagtastic was stamped onto spare card as before and the floral images added before cutting out. To make the tag stand out I blended Broken China over the entire tag. Threaded the tag with ribbon, before attaching to the front of the card with 3d foam pads.
Thanks for stopping by and please call again for daily Design Team inspiration.
Julie x
Monday, 3 December 2018
Where imagination meets reality (by Rachel)
Hello there! Rachel here today with the first of my posts from the November shows. I did so love working with those papers - and I thought the new stamps were just gorgeous.
I started off by using one of the papers to fill the back of this box and then stamped on it using some stamps from the wild meadow stamp set. Next I stamped the Shared Beauty image onto a piece of the paper and fussy cut it and hung it from the washing line in the box. Finally I repeated this process with the Floral Grunge stamp and then decoupaged that image up.
I do hope you feel inspired by this piece - I was so pleased to see it displayed so prominently in the shows!
Big hugs
Rachel xx
Saturday, 1 December 2018
grunge and brusho
Good morning everyone, if you have seen Nikki's guest designer posts then you will have had your appetite whetted for this month's DT offerings!So as not to disappoint anyone here are my brusho offerings - and yes, I can do a card without brusho......I just love the random effects of the stuff!
I used the lovely floral grunge stamp, perfect for brushos, though I am sure Sue didn't design it deliberately.....
The first one was stamped with versamark and white embossed before sprinkling black brusho all over and spritzing with water. Once dry, torn edges, mat onto black card, then onto a white sqaure blank card - done. A very quick card, takes longer for the brusho to dry than for anything else!
My second version took a bit longer, started out the same with white embossed image. Then I carefully sprinkled grey brusho round the image, and activated it using a wet paintbrush - you still get the random colour effect, but only where you want it. Once dry,I tapped off any excess grey powder before sprinkling the flower with orange brusho and activating it the same way.Torn round the edges again, double mats of black and orange and mounted onto a white square card blank.
I almost always do my cards without any sentiments, then they can be used for almost any occasion, that and brusho are my main crafting perversions!
There were some fantastic samples on the TV show, so keep checking, my teamies will be keeping you inspired this monthm, that's for sure!
Friday, 30 November 2018
Decadent Garden by Penny
Goodly morning peeps, I hope I find you all warm and well, there's been a definite nip in the air lately! It is my turn today to share another of my samples from last month's shows.
I have used stamps from the Butterfly Daisy Collage set, Distress Inks, gold embossing powder and the CB Useful Leaves stencil.
I took a piece of white card and stamped and embossed the large floral image. I then masked it off and repeated. I painted the images with bright jewel colours, then added some foliage using Distress Ink through the stencil. I blended DI around the edges of the panel and matted it onto coloured card. I then attached it to a white base card.
On a piece of spare white card I stamped and embossed the other floral images and painted them as before. I then cut them out and built the flowers up in 3D, and added some clear glaze to the centers.
Thank you for dropping by today and joining me for a bit of crafty fun. One of my teamies will be here tomorrow with more inspiration for you.
I'll be back next month with some more projects to share with you, so until then
x Penny x
Wednesday, 28 November 2018
Stamping on Fabric (by Judith)
Hello everyone, I am here for my final post this month, sharing two projects using the stamps that we showcased on last month's TV shows on Hochanda. This time, I have created my projects using fabric, showing how you can create a quick card, and a decorative panel.
For my first project, I painted a piece of spotty fabric with yellow and green paint, blending the two where they met. I used coloured Archival inks to stamp all of the images, creating a meadow scene in first and second generation stamping, just as I would when creating a card. I added a couple of Butterflies, and then painted the images with Koh-I-Noor paints and a waterbrush.
For the larger panel, I used the large corner stamp from the Butterfly Daisy Collage stamp set, and stamped around the edge of a piece of patterned fabric, overlapping the image as I went along. Again, I used coloured Archival Ink. I used iron on interfacing on the back of both pieces of fabric, fraying the edges of the top panel, and adding rust coloured ink to the bottom panel. I used a thick piece of greyboard as a base.
I had a piece of the spotty material left over from my first project, and stamped two of the large butterflies from the Butterfly Daisy Collage stamp set onto the fabric, adding shading with the Koh-I-Noor paints. I also stamped some words from the Amazing Mackintosh Words stamp set, and frayed the edges of the little panels.
I created a wrinkle free distress panel using tones of green and yellow on a piece of watercolour card for a background. I stamped a leafy sprig in second generation stamping randomly over the background. To complete the card, I used a small piece of eco printed fabric, with a lovely leaf printed in the centre.
Thanks for stopping by,
Judith xx
For my first project, I painted a piece of spotty fabric with yellow and green paint, blending the two where they met. I used coloured Archival inks to stamp all of the images, creating a meadow scene in first and second generation stamping, just as I would when creating a card. I added a couple of Butterflies, and then painted the images with Koh-I-Noor paints and a waterbrush.
For the larger panel, I used the large corner stamp from the Butterfly Daisy Collage stamp set, and stamped around the edge of a piece of patterned fabric, overlapping the image as I went along. Again, I used coloured Archival Ink. I used iron on interfacing on the back of both pieces of fabric, fraying the edges of the top panel, and adding rust coloured ink to the bottom panel. I used a thick piece of greyboard as a base.
I had a piece of the spotty material left over from my first project, and stamped two of the large butterflies from the Butterfly Daisy Collage stamp set onto the fabric, adding shading with the Koh-I-Noor paints. I also stamped some words from the Amazing Mackintosh Words stamp set, and frayed the edges of the little panels.
I created a wrinkle free distress panel using tones of green and yellow on a piece of watercolour card for a background. I stamped a leafy sprig in second generation stamping randomly over the background. To complete the card, I used a small piece of eco printed fabric, with a lovely leaf printed in the centre.
Thanks for stopping by,
Judith xx
Tuesday, 27 November 2018
Flutterbys and Florals (by Zoe)
Good morning and a warm welcome to my final post this month featuring these gorgeous stamps.
Simple stamping and ink blending with these samples.
I used Sparkle brush pens to colour the flowers and butterfly on the first card.
The circular card I just used Distress Inks to watercolour the flowers and a simple stencil for the background.
A greyboard tag which was gessoed first. I used watercolour markers to colour the image in and blended with Distress Ink around the edge.
I used the wrinkle free distressing technique with a gold mica powder in the spritzer and then covered with wrinkled up cling film until dry on the harlequin card.
My little specimen jar is a die of course, I used Distress Ink for the background. I stamped the flowers using Versafine inkpads in various colours and the butterfly was coloured in using watercolour markers.
Thank you once again for taking the time to visit.
Have a wonderful day xx Zoe xx
Simple stamping and ink blending with these samples.
I used Sparkle brush pens to colour the flowers and butterfly on the first card.
The circular card I just used Distress Inks to watercolour the flowers and a simple stencil for the background.
A greyboard tag which was gessoed first. I used watercolour markers to colour the image in and blended with Distress Ink around the edge.
I used the wrinkle free distressing technique with a gold mica powder in the spritzer and then covered with wrinkled up cling film until dry on the harlequin card.
My little specimen jar is a die of course, I used Distress Ink for the background. I stamped the flowers using Versafine inkpads in various colours and the butterfly was coloured in using watercolour markers.
Thank you once again for taking the time to visit.
Have a wonderful day xx Zoe xx
Monday, 26 November 2018
Grungy Flower (by Nikki K)
Hello everyone, today sees the final post by our Guest Team member Nikki K. Nikki has created another sneak peek card using the fabulous new stamps that we shared on this month's TV shows on Hochanda. The rest of the Design Team will be sharing their projects next month.
Nikki writes:
Morning everyone,
this is my third Guest post this month, and I've loved using the brand new stamps from Chocolate Baroque. Today I'm sharing a card I made after the TV shows, with some leftovers!
Start by stamping Floral Grunge around a card blank in black ink. You just need to cover enough of the card to show behind a panel.
Stamp end emboss one flower in black ink with clear embossing, cut out just the flower, no stem.
I had a leftover piece of card with Brushos on from another make, and liked part of it, which I cut into a panel and distressed around the edges. I stamped the Floral Grunge flower and embossed in clear onto the panel.
I used acrylic paint in Yellow Oxide to colour the flowers on the card and the single flower, and coloured the centres in Pyrole Red. I watered the paint down to a wash, to imitate watercolour.
Before assembling the card, I spattered Pyrole Red paint over the centre panel, to tie in the centres of the flowers to the rest of the card.
Attach the panel to the centre of the card base, and layer the single flower up on top with 3D foam pads, and it's done.
Best Wishes,
Nikki K
xxx
Nikki writes:
Morning everyone,
this is my third Guest post this month, and I've loved using the brand new stamps from Chocolate Baroque. Today I'm sharing a card I made after the TV shows, with some leftovers!
Start by stamping Floral Grunge around a card blank in black ink. You just need to cover enough of the card to show behind a panel.
Stamp end emboss one flower in black ink with clear embossing, cut out just the flower, no stem.
I had a leftover piece of card with Brushos on from another make, and liked part of it, which I cut into a panel and distressed around the edges. I stamped the Floral Grunge flower and embossed in clear onto the panel.
I used acrylic paint in Yellow Oxide to colour the flowers on the card and the single flower, and coloured the centres in Pyrole Red. I watered the paint down to a wash, to imitate watercolour.
Before assembling the card, I spattered Pyrole Red paint over the centre panel, to tie in the centres of the flowers to the rest of the card.
Attach the panel to the centre of the card base, and layer the single flower up on top with 3D foam pads, and it's done.
Best Wishes,
Nikki K
xxx
Subscribe to:
Posts (Atom)