Pin It button on image hover
Showing posts with label Pretty Birdcage. Show all posts

Saturday, 12 February 2022

Pretty Birdcage (by Sandra)

Hello everyone. I'm sharing a card I have made using the Pretty Birdcage stamp set.

First I stamped the floral stamp randomly over the card base in purple archival ink.
I then stamped the main image onto some linen textured card with black archival ink.
I used my pencils to colour in.
Once I had finished colouring I used a small pair of scissors to "fussy" cut the stamped image.
I then mat and layered onto white and purple card.
I finished by adding a sentiment and sticking onto my card base with foam pads.


Thanks for looking

Sandra x

Monday, 26 September 2016

Wild Roses (by Asha)

Good morning, fellow Chocolate lovers! We are continuing our adventures with textures here on the DT Blog. Today I want to show you that you can have plenty of textural interest on a simple and delicate project.

My card features the beautiful sprig of wild roses from the Pretty Birdcage A5 sheet.

Here's how I put together this card:
  1. With a stamp from the Texture Fragments A5 sheet stamp along the outer edge of a piece of square card stock with VersaMark ink. 
  2. Apply white embossing powder and heat set.
  3. Ink the card with Distress Inks. I used: Mowed Lawn, Cracked Pistachio and Mermaid Lagoon. 
  4. Stamp the wild rose image from the Pretty Birdcage A5 sheet with Memento Tuxedo Black.
  5. With a stencil apply Texture Paste around the stamped imaged and let it dry. I used Tim Holtz Layering Stencil Flourish.
  6. Colour the image with alcohol markers.
  7. Apply VersaMark on the raised texture paste design, sprinkle with WOW Clear Sparkle embossing powder and heat set.
  8. Back with foam tape and adhere the design panel to the prepared background piece. 

Thank you so much for stopping by today. Please visit the DT blog often for more design inspiration by the rest of the team. I've got more pictures on my blog.

Have a beautiful day!

Beijinhos,
Asha

Wednesday, 8 April 2015

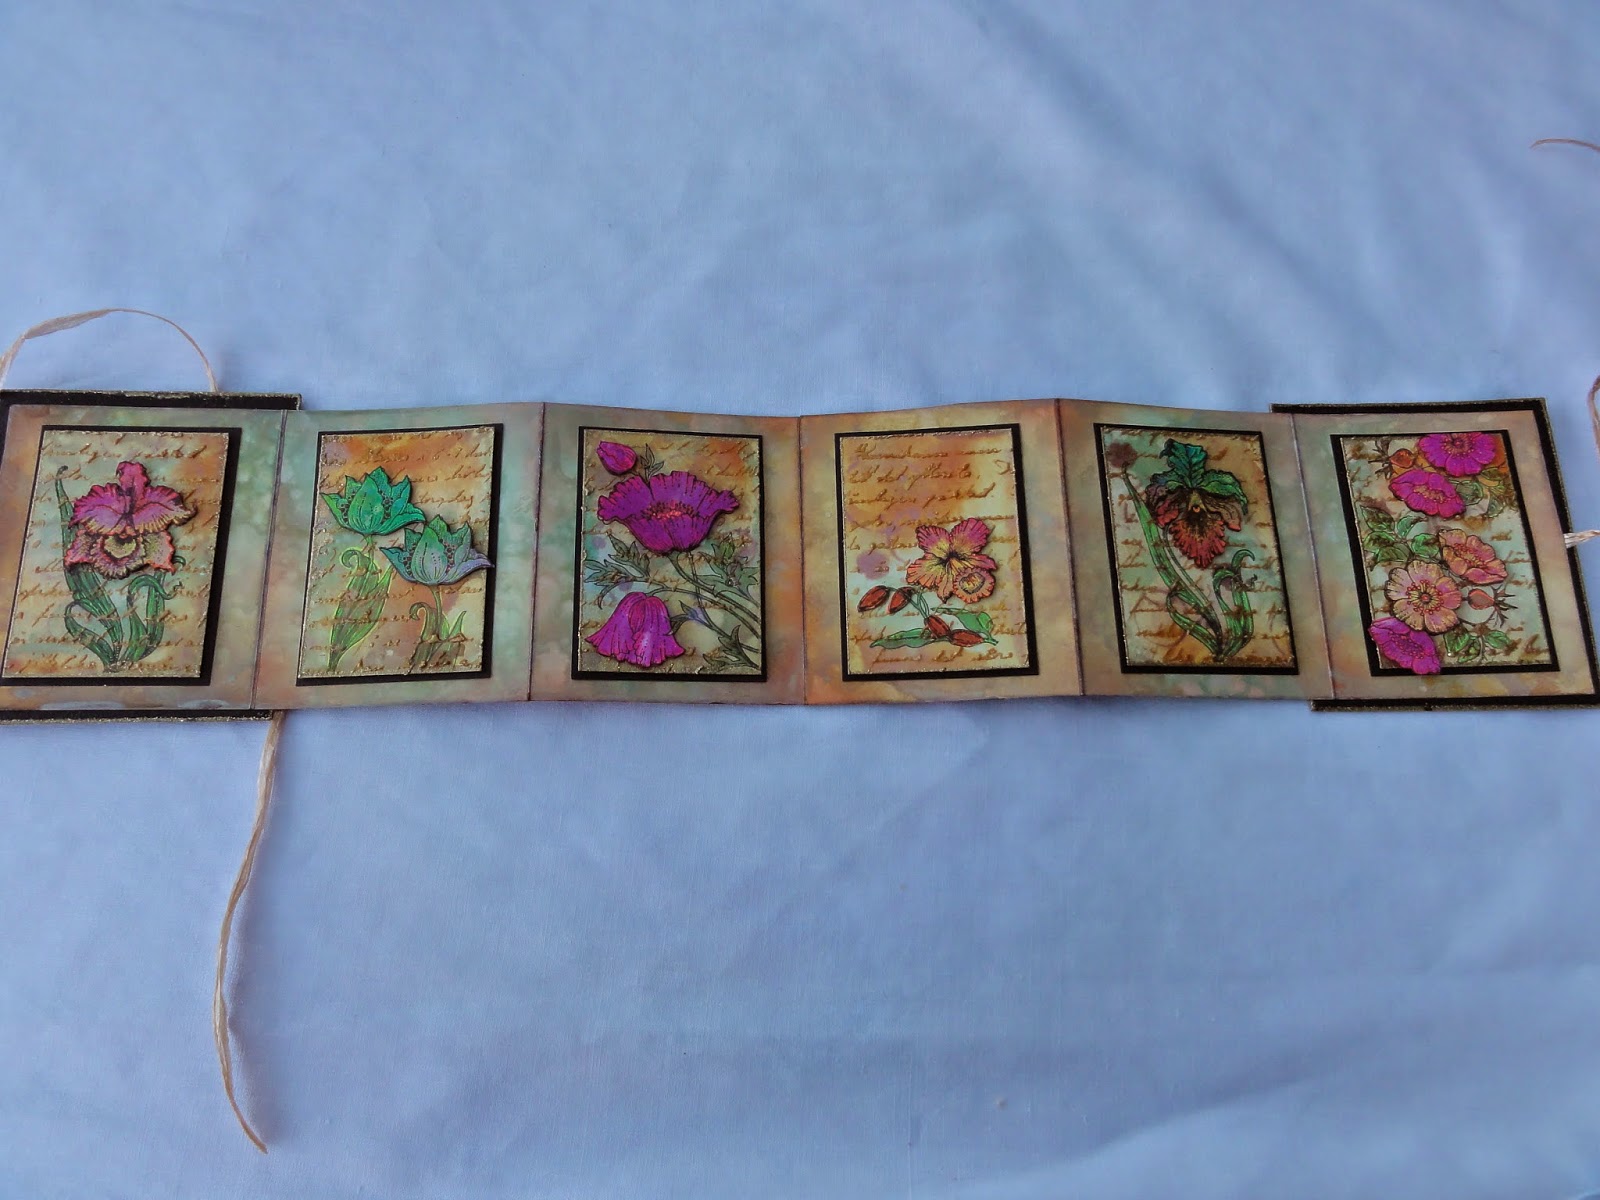
ATCs themed book "FLOWERS" (by Maria)

Hello everyone, I hope that you are enjoying the new stamps available on the website. Today I am going to show you how to make an ATC book using both new and old stamps. I hope you will enjoy it.

I made this ATC book with the following stamp sets :
Awesome Orchids clear stamp sheet, Poppy Meadow stamp set, Pretty Birdcage stamp set, Spring is in the air stamp set.


The products I used  are: Distress Paint Antique Linen, Distress Stain Spiced Marmelade and Distress Spray Stain Cracked Pistacchio. For the golden text I used a mask and some metallic gold embossing paste.
The flowers are cut out of a paper that I coloured with Dylusions and metallic spray. I made this paper a long time ago, and so I cannot remember the colours. I added some accents with yellow, orange, rose and green gelly pens.


White paper (10.5cms x 30cms) x4
Golden embossing powder, Versamark and heat tool
Black card stock 6 x (8.9cms x 6.4 cms) for the ATCs
Black acrylic paint

Instructions:
I started with my backgrounds; I put some Distress Paint on my craft sheet and with my Distress Spray Stain I sprayed some green on the paint. I added some orange Distress Stain further down, and I sprayed some water all over it. I took my white paper and went through the paint and the stains, covering my white paper. I sprayed some water over the whole paper while drying it with my heat tool. When everything was dry, I did it again to have more variation on my background.
I did the same with my second paper, so that my colours where almost the same, then I cut out 6 pieces of 8.5cms x 6cms, these pieces became my coloured parts of the ATCs. The two other papers (10.5cms x 30cms) I coloured on both sides in the same way.

Now the ATCs: I first stamped my flowers with black Versafine ink on the ATCs and added some colours. I used a stencil and with some embossing paste I gave some structure to the ATCs. I took the paper that I had coloured with Dylusions and metallic spray and stamped the flowers on the areas where I liked the colours the most. I cut the flowers out and placed them onto the ATCs with some 3D foam.
With some golden embossing powder I made a small border around the ATCs, then I took my gelly pens and added some nice accents here and there. Then I glued the ATCs on the black cardstock with some double sided tape.

Then I started with my book (9cms x10.5cms) x6. I took the two other pieces of coloured paper (green and oranges) and scored at 9cms, 18cms, and 27cms, I did this on both papers. I then glued them together to make a long strip, with one of the left over 3cms, placing it behind the other panel so that the front looked neat. I cut away the second 3cms strip. I took some orange Distress Ink and went around all of the edges, so that everything blended together.

For the covers I took some cardboard (10cms x 11.5cms) x2 and painted them with black acrylic paint. I dried them with my heat tool. I also put some embossing powder on the edges. I placed a ribbon in the middle of my last page on the outside of the book. Both sides of the ribbon were the same length. I did this also at the other end of the book. I placed the book in the middle of the cover, and then added the other cover on the other side of the book. To decorate the front of my book, I made another card (8.5cms x10cms) and placed it on my front cover.

I hope you enjoy making this project, it was a lot of work, but worth the end result.

Have a nice stamping time,
Maria


Monday, 2 March 2015

Spring Birds (posted by Judith)

Hello everyone, I would like to show you some cards made using the Spring Birds multibuy stamp set. These stamps are perfect for this time of year, as our thoughts are turning towards the Spring time, and the warmer weather.

I started my first card by making a wrinkle free distress background; placing some Distress Stains onto a craft mat, and spritzing them with water. I also spritzed a piece of watercolour paper with water and then placed it onto the craft mat, ensuring that the paper was covered with colour. I dried the paper with a heat gun, and then patted it randomly onto the droplets of colour left on my craft mat, creating a second layer of colour on the background. I also dried this with the heat gun.

 I stamped some dog roses and a bird from the Pretty Birdcage stamp set along with a bird taken from the Spring birds stamp set onto the background. I masked the main dog roses before adding the birds and extra roses. I coloured the images with pencils. I added a sentiment from the Mackintosh Sentiments stamp set to finish.


I decided to create an easel card for my second project, and if you would like the full instructions for the assembly, you can check out the details on My Blog. I stamped the Leafy Trails Big Bold Background stamp twice onto plain card, and coloured this with waterbased markers. I edged the card with Distress Ink.

I die cut two circles, and whilst the dies were still in place, I added some colour with Distress Ink. Once I had removed the dies, I then stamped the bird image onto the larger circle, and a sentiment from the Amazing Birthday stamp set onto the smaller circle. I hand cut the mounts for the circles, by drawing around the dies onto some card left over from the easel card. Some toning ribbon completed the card.
   
My Design Team mates have been very busy this month making some beautiful projects with these stamps, so be sure to keep checking back to see what they have made. Thanks for stopping by, Judith xx

Monday, 11 March 2013

Birdsong (posted by Judith)

Hi Folks, here's another project using the new large background unmounted stamps. This time, I have tried to create a vintage feel by stamping the Belle Flowers unmounted stamp onto sticky back canvas. I then coloured the image with Distress Markers. After some experimenting, I found that they were the option that did not bleed.

I have stamped a floral design using gold embossing powder from the Texture Fragments stamp set onto a piece of background paper. I have also added some little birdcages stamped onto acetate. These are from the Pretty Birdcage stamp set. I added some gold ribbon to 'hang' them from, and made little bows to add to the top of the birdcages. I embossed a bird from the Fly Away with Me stamp set, adding co-ordinating inks. Finally, I added a sentiment taken from the Sing Your Song stamp set to complete the project.


I have even used some recycled cardboard and dragged out my sewing machine for this one! Keep checking back for more fabulous projects from my Design Team mates over the coming days, thanks for stopping by, Judith xx

Sunday, 1 January 2012

Honey jar label (posted by Elaine)

This is my last project from the delicious new Honey Bee plate. I love making preserves and so wondered about combining stamps from the bee set and the flower from the Pretty Bird Cage plate to make a label for a jar and a cloth lid cover. Here are the results.


For the label I stamped in brown memento ink, before colouring with Coloursoft pencils. I pieced the beehive and flower images together, adding the word honey at the bottom. A friend has just given me a Xyron adhesive machine and I realised after I had finished this label, this would probably have been a great project to try it out on and stick it down more evenly.


For the lid I cut a circle of natural calico with pinking shears to stop the edges fraying. I stamped the image with Versacraft ink which is especially designed to stamp onto fabric. I coloured the image with Inktense colouring pencils. Finally I edged the lid with honey coloured ric rac and tied the lid cover onto the jar with yellow and white baker's twine.

I hope you have enjoyed the variety of projects that my DT teamies have been posting with the newly launched stamps recently - aren't they great?

Happy New Year crafters!


Elaine

Thursday, 15 December 2011

Springtime Stamps

I know, I know, Christmas isn't even here and we're already releasing stamps with a definite springtime theme.

Well I wanted to get these on the website before our Christmas break, so here they are, two new A5 stamp sets:


Pretty Birdcage

Honey Bee


Main image coloured with prismacolour pencils
The team have come up with some really lovely ideas for these stamps and over the Christmas break we'll be scheduling some posts featuring their gorgeous artwork.

In the meantime I have one of each set to give away so leave a comment to be in with a chance of winning.  I'll pick winners in a week (Wednesday 21st December) so I can get the prizes sent out before Christmas.


PS - if you think these stamps would make an ideal addition to your Christmas stocking, check out this article on my blog about the Amazon Universal Wish List button - it's such a neat idea!