Pin It button on image hover
Showing posts with label Fairyland Words. Show all posts

Thursday, 14 April 2016

Fairy Meadow (posted by Claire)

Good morning, Claire here with a project made using lots of my favourite stamps. We're getting some warmer days and seeing some sunshine so I was inspired to create a project to remind us that Spring and Summer will soon be here. I've made a little concertina book with a little fairy magic.


I began by cutting 4 squares of white card (12.5cm) and lining them up to stamp the main flower images (from Poppy Meadow) and masked them with Pebeo masking fluid. Next  creating a distress ink background using shades of blue and green inks, misting with water and swooshing my card through the inky puddle. Once this was dry I stamped lots of foliage from Wild Meadow using different shades of green ink. 

I removed the masking fluid and coloured the flowers with coloured pencils. I decided my meadow scene needed some butterflies and a touch of magic too. The butterflies were stamped onto the project and also onto some of the lovely sparkly self adhesive acetate which is perfect for wings using Black Stazon ink. I cut out the butterfly wings and removed the backing before dusting over with mica powders. I layered the butterfly wings up with silicone glue.


I stamped the fairies with black archival ink and gave them some sparkly wings too. You can find the full fairy collection here


Lastly I made a cover for my concertina book using distress inks and mica powder applied to copier paper. While still wet I crumpled the paper up and left it to dry. Once this was dry I used it to cover two greyboard squares, one for the front and one for the back. On the front cover I stamped another fairy using black archival ink. It can be a bit tricky to stamp on such an uneven surface but if you do get any little areas that don't stamp properly you can just use a black fineliner pen to fill in the gaps.


To assemble my little book I glued my 4 squares onto a long strip of paper that I'd folded into four panel concertina. I attached the ribbon to the inside of the back cover and then glued the inner section to both front and back covers.

I hope you're enjoying all the inspiration from the DT this month
Happy Crafting and a big thank you for visiting today

Claire xx

Friday, 28 November 2014

A couple of Autumn projects (posted by Claire)

Good morning, Claire here with a couple of quick projects. This time of year is so hectic there isn't always time for elaborate projects. The first is a card made using Autumn Edges. I'm really trying to come up with some fairly flat designs that can be posted cheaply, hopefully this one will fit the bill.


I'd seen a few images around blogland that had been stamped and embossed with white before being coloured and decided to give this technique a try. I coloured the mushrooms with Graph'It markers and then crated a background with PanPastels. The fairy is from the August Fairy set, again stamped with versamark and embossed with white embossing powder. The sentiment is from Fairyland words, this time I stamped with a Memento inkpad in Teal Zeal.

For my second project I've covered a little notebook to be used for jotting down recipes. I began by cutting a strip of red card slighly wider than the book. Using the book as a guide I scored the card to create a spine and left about an inch of card to overlap the back of the book.


Next I cut white card slightly smaller and stamped the images and 'Recipes' from Mellow Fruitfulness in Memento Tuxedo black ink. I coloured the images with my Graph'It markers and distressed the edges with Tumbled Glass Distress Ink

Hope you like these two quick projects, we're all getting in the mood for some steampunk fun with the gorgeous new stamps! See you soon
Claire xx

Thursday, 19 June 2014

Magic in Fairyland by Glenda

Today I wanted to share a couple of cards I made with the Summer Fairies.

This first one features a background that I made with PanPastels for issue 2 of Monday Mojo Magic last year.  I stamped the fairy with a mixture of black and blue Versafine, then embossed with clear.  It looks black in the photo, but it's actually a very dark navy.  The sentiment and fuchsia are stamped with Versafine and I've coloured the fuchsia with ColourSoft pencils.  The strip of paper behind the stamped panel is from the Essence of Nature CD.


This one has a subtle landscape background - again something I have covered in detail in one of my Monday Mojo emails - this is in issue 24, complete with a downloadable landscape template you can print and cut up.


The fuchsias have been repeat stamped along the top in a soft pink, then coloured with pencils.  I stamped the fairy on a separate piece of card and coloured her with pencils before cutting her out.  I stuck the body down, but left the wings free to give some dimension. 

The foliage along the bottom comes from a mixture of stamp sets, mainly Wild Meadow which is one of those really versatile sets that I keep coming back to time and time again.  The sentiments on both cards are from Fairyland Words clear stamp set.

If you buy the Summer Fairy collection at the moment, you will get a wonderful downloadable leaflet sent to you automatically free of charge.  It's packed with beautiful artwork by the DT, each with a great step by step write up of how the piece was made.

http://www.chocolatebaroque.com/Summer-Fairy-Inspirations-Leaflet--FREE-with-purchase-terms-apply_p_6129.html#

I hope you're enjoying the absolutely delicious artwork that our DT are producing - I know I am and there's lots more yummy artwork to come!


Friday, 13 June 2014

Summer Fairies in Greens & Blues (by Shirley)

Hello everyone, I hope you are doing well. 

I have a few designs to show today using the beautiful Summer Fairies Collection.     


The first design above features the beautiful fairy and butterfly from July Fairy and the Freesia from June Fairy.  The sentiment is from Fairyland Words.
 
I blended Peacock Feathers Distress Ink at the top and Mowed Lawn on the bottom of the background.  I used a ripped piece of cardstock to vary the shades.  I also used Mustard Seed Distress Ink with a piece of cardstock with a circle cut out as a mask for the sun,  which I also outlined with a white Gelly roll pen.    The Freesia was stamped with Mowed Lawn Distress Ink.

The rest of the stamping was done with Cobalt Archival Ink and the colouring with Intense pencils.   The butterfly is decoupaged and popped up.  I also used lots of stickles on the fairy wings and a little on the butterfly.  I added holograph glitter with a glue pen on her dress.

You can see the glitter in this close up below:


This next design above features one of the silhouette fairies, vine & miniature sunflower from June Fairy along with flowers from Sunny Sunflowers (which compliment the Summer Fairies very well). 

The large background above was created with Mowed Lawn Distress Ink using the Acrylic Block technique.   I also stamped the Vine and Freesia with Mowed Lawn DI.

The smaller background above was created with Mustard Seed DI using the Acrylic Block technique.  The flowers were stamped with Peacock Feathers, Mustard Seed and Mowed Lawn Distress Inks.  The Fairy was stamped with black Archival Ink.  I bleached her wings and added Diamond Stickles.

The little flowers and leaves were coloured with Distress Inks as well.  I highlighted with a white Gelly roll pen.    The flourish are die cut using Crealies CL CS 02.


The third and last design today features the beautiful August Fairy and the mushroom from November Fairy.    Joy is from Artistic Expressions.

The background was created using Lemon, Calypso Teal & Cut grass Dylusions Inks.   I spritzed with water and then sprinkled course sea salt.   After letting it dry & shaking off the salt,  I stamped the images with Cobalt Archival Ink.   I bleached out the colour from all the images and then painted with Dylusions Inks (on my craft mat, using water & brush).   When everything was dry I outlined with a white Gelly roll pen and added stickles to her wings.

Thanks for stopping in and have a great day,
Shirley

Saturday, 31 May 2014

A little bit of Summer (posted by Judith)

Hi Folks, I have some samples to show you today showcasing the Summer Fairy Collection unmounted stamp set. This set is full of lovely fairy images, and some great floral images as well.

My first card uses one of the large silhouette fairies, which I have placed on an inked background, made using Distress Inks. I chose several colours which I blended across the page, and then placed a leafy stencil over the top, and used the same colours again to stipple colour through the stencil. I added some deeper colour around the edges of the background to create a frame, and then stamped the trailing ivy across the top of the page, using a navy blue ink. I added a border around the bottom half of the card, using a tree stamp taken from the Fantasy Woodland stamp set. The two trees are a stamp from the same stamp set. I added some shading underneath the trees using a paper mask, and a toning green ink. I stamped the silhouette fairy, and the little butterfly, which comes from the Autumn Fairy stamp set, using Versafine ink.

I added some glitter glue to the fairy and butterfly wings for a little bit of sparkle.


My second card uses a couple of the flower stamps from the collection to create a fairly clean and simple card. I cut a rectangle of smooth watercolour paper, and stamped the freesia stamp at the bottom of the card. I covered the image with a mask so that I could stamp the image again on either side of the original image.

I coloured the silhouette freesia stamp with Distress Markers, blending several colours, and stamped the background with the mask in place. I placed the mask on top of each freesia image in turn, so that I did not stamp over them. I then coloured the three freesia images with Distress Markers and a waterbrush.

I matted the picture onto a piece of dark green card, and then placed this onto a larger square of light green card, adding some orange and green ribbon to my main image. I added three Crealie butterflies to the large background.


My last card was created using lots of masking again, and a hand cut stencil. You can buy Stencil Blanks from the website and cut your own stencils very easily.

I used one of the large fairies from the collection, which I stamped and masked off, before stamping poppies from the Poppy Meadow stamp set. I then masked these flowers and stamped the little silhouette flower from the same set. I added the stencil and coloured the sun rays using Distress Inks, before inking the remaining sky with blue. I have added a shimmer spray over the top.

I have coloured the fairy and flowers with Distress Markers. The two tiny butterflies are half of a butterfly stamped twice, taken from the Spring Fairy stamp collection. I simply covered half of the stamp with masking tape before I inked it up, then removed the masking tape before I stamped it onto the page. I have decoupaged them, and added glitter glue to their wings. The sentiment is taken from the Fairyland Words clear stamp set.

 Thanks for stopping by, Judith xx

Tuesday, 22 April 2014

Magic Happens (posted by Claire)

Good morning, I hope you've all enjoyed the Easter Weekend. It seems to have gone so quickly but although Easter is over Spring is well and truly here and the Springtime Edges stamps are perfect for so many different projects.   I've used them with one of the beautiful Spring Fairies for this card she is from the March set


I began by stamping the fairy with Memento Tuxedo Black ink and masked her with Masking Tissue to stamp the lovely primrose edge in the background (this time I used Memento Bamboo leaves). I left the mask in place while I created the background. Using PanPastels I added some shades of green to the foreground of the scene and then took shades of Yellow to create a sunny effect behind the image. I sealed the PanPastels with hairspray and used distress inks through the Lucious Leaves Dylusions stencil. I removed the mask and coloured the fairy and the primrose edges with Graph'It Markers. To finish off I added some tiny die cut flowers and stamped the sentiment which is from Fairyland Words.

Thanks for visiting today
Claire xx

Monday, 24 March 2014

Sprinkled with Fairy Dust (posted by Claire)

Good morning, Claire here with another sample using the beautiful Spring Fairy stamps and the Fairyland Words which complement them perfectly.


I began by brayering the scene by masking the moon and using torn paper masks and Memento Inks in Pear Tart and Elderberry. I love memento inks for brayer work, the colours are lovely (they are on offer at the minute too, you can find them here). I wanted to create a distressed look to the scene so I splashed on some water and blotted it off with kitchen roll and then set to with a Crafters Workshop Harlequin stencil and Memento Tuxedo Black ink. Next I stamped the images, again with Memento Tuxedo Black and added some colour with Graph'It Markers. For a little sparkle, I stamped the images again on acetate and embossed with black EP and glittered the back. Once the wings were dry I added them with a little silicone glue for dimension.

The sentiment was stamped on white card using Memento Elderberry ink. I then brushed Matte medium over the image, sprinkled with glitter and popped the acrylic tag on the medium while it was still wet. Once it was dry I trimmed the excess card and added a little green ribbon.


To finish off I've matted on white, lilac and then black card and added some green silk ribbon and a lilac paper rose.

Thanks for visiting today
Claire xx

Thursday, 13 March 2014

Magical Landscape (by Shirley)

Hello everyone, I hope your week is going well.

I have a castle design to show today from the beautiful new Magical Landscape set.


I created the background with watercolour paints wet on wet.   I have a tutorial using this technique at my blog here.   I sprinkled a little salt over the paint while it was wet which created small watermarks.

I stamped the images with Cobalt Archival ink.   The fairy from May Fairy was stamped on separate paper and decoupaged.   I coloured the castle with Prisma pencils as well as the fairy's dress and wings.  I added lots of glitter on the moon and water, but it's hard to see in the photo. The sentiment is from Fairyland Words.

Thanks for your visit and have a great day,
Shirley

Tuesday, 11 March 2014

Have a Fairy Happy Birthday! (posted by Judith)

Hi Folks, here's a project for you using stamps from the new Spring Fairy Collection stamp set combined with some older favourites. I wanted to create a gift set that comprised of a card, gift tag and matching wrapping paper, using soft pastel tones. I picked five shades of Memento Ink, and created a background on my tag, and a large piece of white card. I stamped the fairies and butterflies using Versafine Onyx Black Ink. The extra fairies and buterflies are from the Winter Fairy and Autumn Fairy stamp sets.

For the tag, I added a sprinkling of glitter on the butterfly wings and the trail of stars. The sentiment comes from the Fairyland Words clear stamp set. For the card, I added some clouds from the Magical Landscapes/Fantasy Castles Multibuy stamp set and a flower from the Decadent Brocade stamp set, which has been decoupaged. I have added some die cut leaves, and a sentiment as before.The wrapping paper was created using the same stamps as the tag, stamped with each of the ink colours, graduating across the paper.


Thanks for stopping by, Judith xx

Saturday, 8 March 2014

Magical Spring Fairy (by Shirley)

Hello Everyone, I hope you are doing well.    I'm dreaming of Spring......but we still have 2 to 4  feet of snow on the ground and it hasn't been mild enough to melt much of it.    

I have two cards to show today using stamps from the beautiful new Spring Fairy Collection.   This first one features the beautiful March Fairy.


The background was created with London Blue, Cut Grass and White Linen Dylusions inks.   To create the water marks, I sprinkled sea salt while it was still wet and when dry, brushed it off.    I stamped the fairy from March Fairy & beautiful sentiment from Fairyland Words with Deep Purple Archival ink (it looks blue in the photo).   I stamped the Winter Aconites from Spring is in the Air with Mowed Lawn Distress Ink.   I coloured the images with my Prisma pencils.    I added glitter to the fairy wings and some tiny pearl flowers that I found in my stash.

I also have a CAS design, that was quick to create.  


I cut a circle in card stock and used the negative for a mask.  I blended Squeezed Lemonade and Peacock Feathers Distress Ink inside the circle.  I stamped 'Spring' from March Fairy and the pretty little Robin from April Fairy with Cobalt Archival Ink and coloured it with my Prisma pencils.  I also added some glitter to the foliage and bird. 


Thanks for your visit and have a great weekend,
Shirley

Thursday, 6 March 2014

Make a Wish (posted by Judith)

Hi Folks, I hope that you are enjoying some Spring sunshine wherever you are. My card today uses some of the stamps from the Magical Landscapes/Fantasy Castles Multibuy stamp set. I stamped the castle and masked this off by stamping a second image onto masking paper and covering the image. I then added some trees from this set, Country Views and English Cottages before colouring the background with Pan Pastels. I added some rain clouds and extra colour with the Pan Pastels, and then completed the background with a rainbow, using the Pan Pastels, blending the colours into each other for a softened effect.

I coloured the stamped images with Distress Markers and a waterbrush, and added a sentiment from the Fairyland Words clear stamp set.


Thanks for stopping by, Judith xx

Sunday, 24 November 2013

Winter Fairies & Abstract Fragments CAS Style (by Shirley)

Hello everyone,  I hope your weekend is going well.   It's been colder than normal this week in Ontario, Canada and we've had a little snow!  I'm not ready for Winter! 

I have several 'quick make' cards today using the new stamps.


For the above card, I used TCW Starfall Stencil and Distress Inks to create the background.  I stamped the sentiment, "Magic Happens" and the fairy from December Fairy with black ink.  I used Stardust Stickles on her wings.

I used the same Fairy and stencil for the card below but added holly from the Winter Fairy Collection.


The next two cards I used fragments from Abstract Fragments.


For the above card I used TCW Mod Spirals stencil in the background using Shaded Lilac Distress Ink.  Next I inked over top with TCW Butterflies stencil and while the stencil was in place I stamped with a fragment from Abstract Fragments using Seedless Preserves.  Glenda called it 'stampencilling':)    'Best Wishes' is from Loving Sentiments.


For the above card I used the same stencil and another fragment from Abstract Fragments and the same Distress Inks.   The sentiment is from Birthday Words.

Thanks for visiting and enjoy your day!
Shirley

Sunday, 20 October 2013

Fairy Flourishes (posted by Judith)

Hi Folks, I have a sample to show you today using the new Fancy Flourishes clear stamp set. I created a background by colouring a piece of white card with Mustard Seed Distress Ink, and then stamped the large flourish stamp across the card with black ink. I used the feisty angel from the Gothic Angels stamp set, masking off the areas that I did not want to appear before I inked the stamp, and then peeled the masking tape away before I stamped the image. I was then just left with the head part of the image. I coloured the image with pencils, and added Glossy Accents to the ivy leaves. I added a sentiment from the Fairyland Words clear stamp set.

I made a flower using handmade paper which was sprayed with yellow ink, and cut from Nestability dies. I edged the shapes with black ink for definition. I scrunched each layer, and attached them together with a brad. I glued a cog into the centre, and dropped seed beads into the glue. Finally, I die cut some ivy leaves from green card.

The background reminds me of expensive wallpaper, it would look lovely in a living room or bedroom, wouldn't it? Keep popping back for more samples from my Team mates. Thanks for stopping by, Judith xx

Friday, 18 October 2013

Introducing our Flourish clear stamp set


I'm delighted to announce we have a new set of clear stamps just out - Fancy Flourishes. Read on for details of a giveaway!


I think this is one of those very versatile sets that you can use in conjunction with many other stamps - they're great for edging die cuts and adding detail to corners behind your matting and layering.

In the card below I've used 'second generation' stamping to create a background.  That simply means I've inked my stamp and stamped onto scrap paper, then stamped onto the card without re-inking.  I vary the pressure when I stamp the fully inked stamp on the scrap paper, which means the second stamping has some areas darker and some lighter, which gives it more of an antique, faded look.


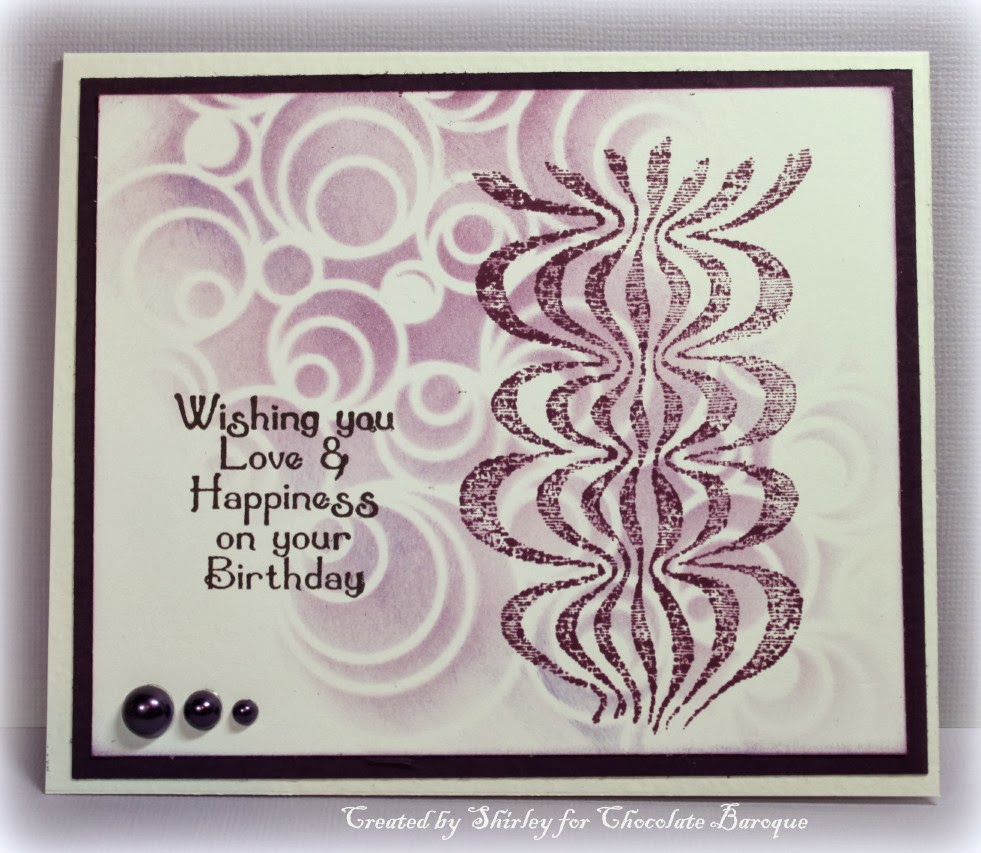
 The card below is another very simple card - I stamped the bold flourish with Versamark and rubbed PanPastel over the card to create a tone-on-tone effect.  I stamped the sentiment from Fairyland Words  in Archival (Deep Purple) over the top.


And if you thought corners were just for corners, think again.  Here I've taken the two large corners and stamped them together to make a butterfly.  I hand cut the body then overstamped that with one of the smaller flourishes too.   I stamped with Versamark and embossed with gold sparkle embossing powder then sprinkled a few purple gems around.  The wire antennae help finish off the butterfly illusion.


I have a set to give away, so if you'd like to win this set, please leave a comment below.  So that I don't forget, I've put it in the diary to pick a winner on November 1st which gives you a couple of weeks.