Pin It button on image hover
Showing posts with label New England Winter. Show all posts

Sunday, 3 July 2022

Christmas in July (by Sandra)

Hello everyone, I am sharing some of my cards from the June shows on Create and Craft.

These shows featured  stamps that were to be retired, I really hope you managed to treat yourself as they are no longer available on the website. I am using some of the Christmas stamps today.

For my first card (8x8) I used some pearl card in a deep blue-grey. I took one of the tree stamps from  Christmas Flourish and using my stamping platform I repeat stamped  to form the star shape. I used Versamark ink and embossed in white. I added a sentiment from Let's Get Festive. 


My next card uses New England Winter, one of my favourites! I have made a country scene by using a stencil to put some hills in the background and another stencil for the clouds. I used pale distress inks so that I could colour over the top without masking. I used the main house image as my focal point, added some of the trees to the foreground, the star and the pinecones - all from the stamp set.  I used alcohol markers to colour in. I then mat and layered onto a 8x8 card base.


My last card today uses the star from Christmas Fusion. I stamped and embossed in black onto Kraft card. I then used pencils in shades of blues to colour some of the parts in, leaving the Kraft to show too. I added a sentiment and a gem to the centre. I trimmed down the card and attached to a DL card base.


 I hope I have given you some inspiration and thank you for looking 

Sandra xx

Wednesday, 9 December 2020

Christmas is coming (by Anne)


Hi everyone. I am delighted to be a guest designer for you this month. My first offerings are some Christmas makes. It's been a tough year for us all and this Christmas is not really going to be usual. However, lets hope that time goes by quickly and that we can look forward to better times ahead with our friends and family in 2021. Lots of hugs, Anne.

CHRISTMAS LANTERN

My first project is a pretty Christmas lantern. I mixed & matched lots of stamps on this one but just had to include my absolute fave reindeer stamp.

Woohoo – all lit up.

This one is to be gifted to my 96 year old friend who I help care for. We are having Christmas together as I am in her support bubble. I think that she will love it.

Materials List

Pretty 3D scene with house and trees.

A close up – oh that reindeer!

Adding the acetate baubles helps to blur and disguise the side edges of the card cut outs creating the scene.

How it was made:

  1.  The bare MDF lantern was coated with white Gesso (primer).
  2.   When dry it was painted with acrylics. Gilding wax was added around the ledges.
  3.  Versamark was applied through the stencil onto heat resistant acetate to create the Winter sentiment. It was heat embossed with sparkly white powder, cut out and attached to the lantern with strong tape.
  4. The snowflakes border was stamped and embossed with white glitter powder 4 times, cut out and taped to the top portion of the lantern arches. Two large baubles were also stamped, embossed and cut out.
  5. Extra snowflakes were stamped and embossed with white or blue glitter powders, along with a few twiggy branches, and cut out ready to use as embellishments.
  6. The main images; 2 large background trees, the building scene, smaller foreground tree and reindeer were stamped with Versafine and cut out. In addition pine cones were cut out from the stamped pine branch stamp.
  7.  Images were coloured with watercolour, glitter and gel pens.
  8.  Now for the messy bit – ha ha. The glitter gel was used to coat the base and spread on top of the ledges. Some was also applied behind the acetate to help glue it in place securely. I had this heavy bodied thick glitter gel in my stash for years. It really needed using up as it had started to set in the pot. Some of the half set chunks were stuck down into the wet gel for added dimension. For added sparkle I also dropped in some of the chunky mica flakes. You could substitute heavy bodied acrylic medium and add glitter for similar results.
  9. The stamped images were anchored into the wet gel to create the scene. I just had to add a little bit more sparkle over the images with clear glitter glue too.
  10. Once the glitter gel medium had dried I did a bit of dry brushing with white Gesso in some areas to add more snowy effects.
  11. The light string was then arranged to light up the background house and trees, and to light up the foreground tree. The wires were anchored with strong tape at the back of the images to help hold them in place. The switch was hidden behind the large background scene images.
  12. The acetate bauble images were added to the sides with red tape. This helped blur the view through the sides of the lantern where just side on edges of the card elements were visible. It may have been better to stamp the sides as one complete panel but I found that I needed easy access to the inside in order to arrange the stamps and lights.
The ribbon bow was added to the top. The acetate snowy sprigs and pine cones were added to embellish the bow. The glitter glue gel was used to anchor everything in place. Extra snowflakes used to embellish too.

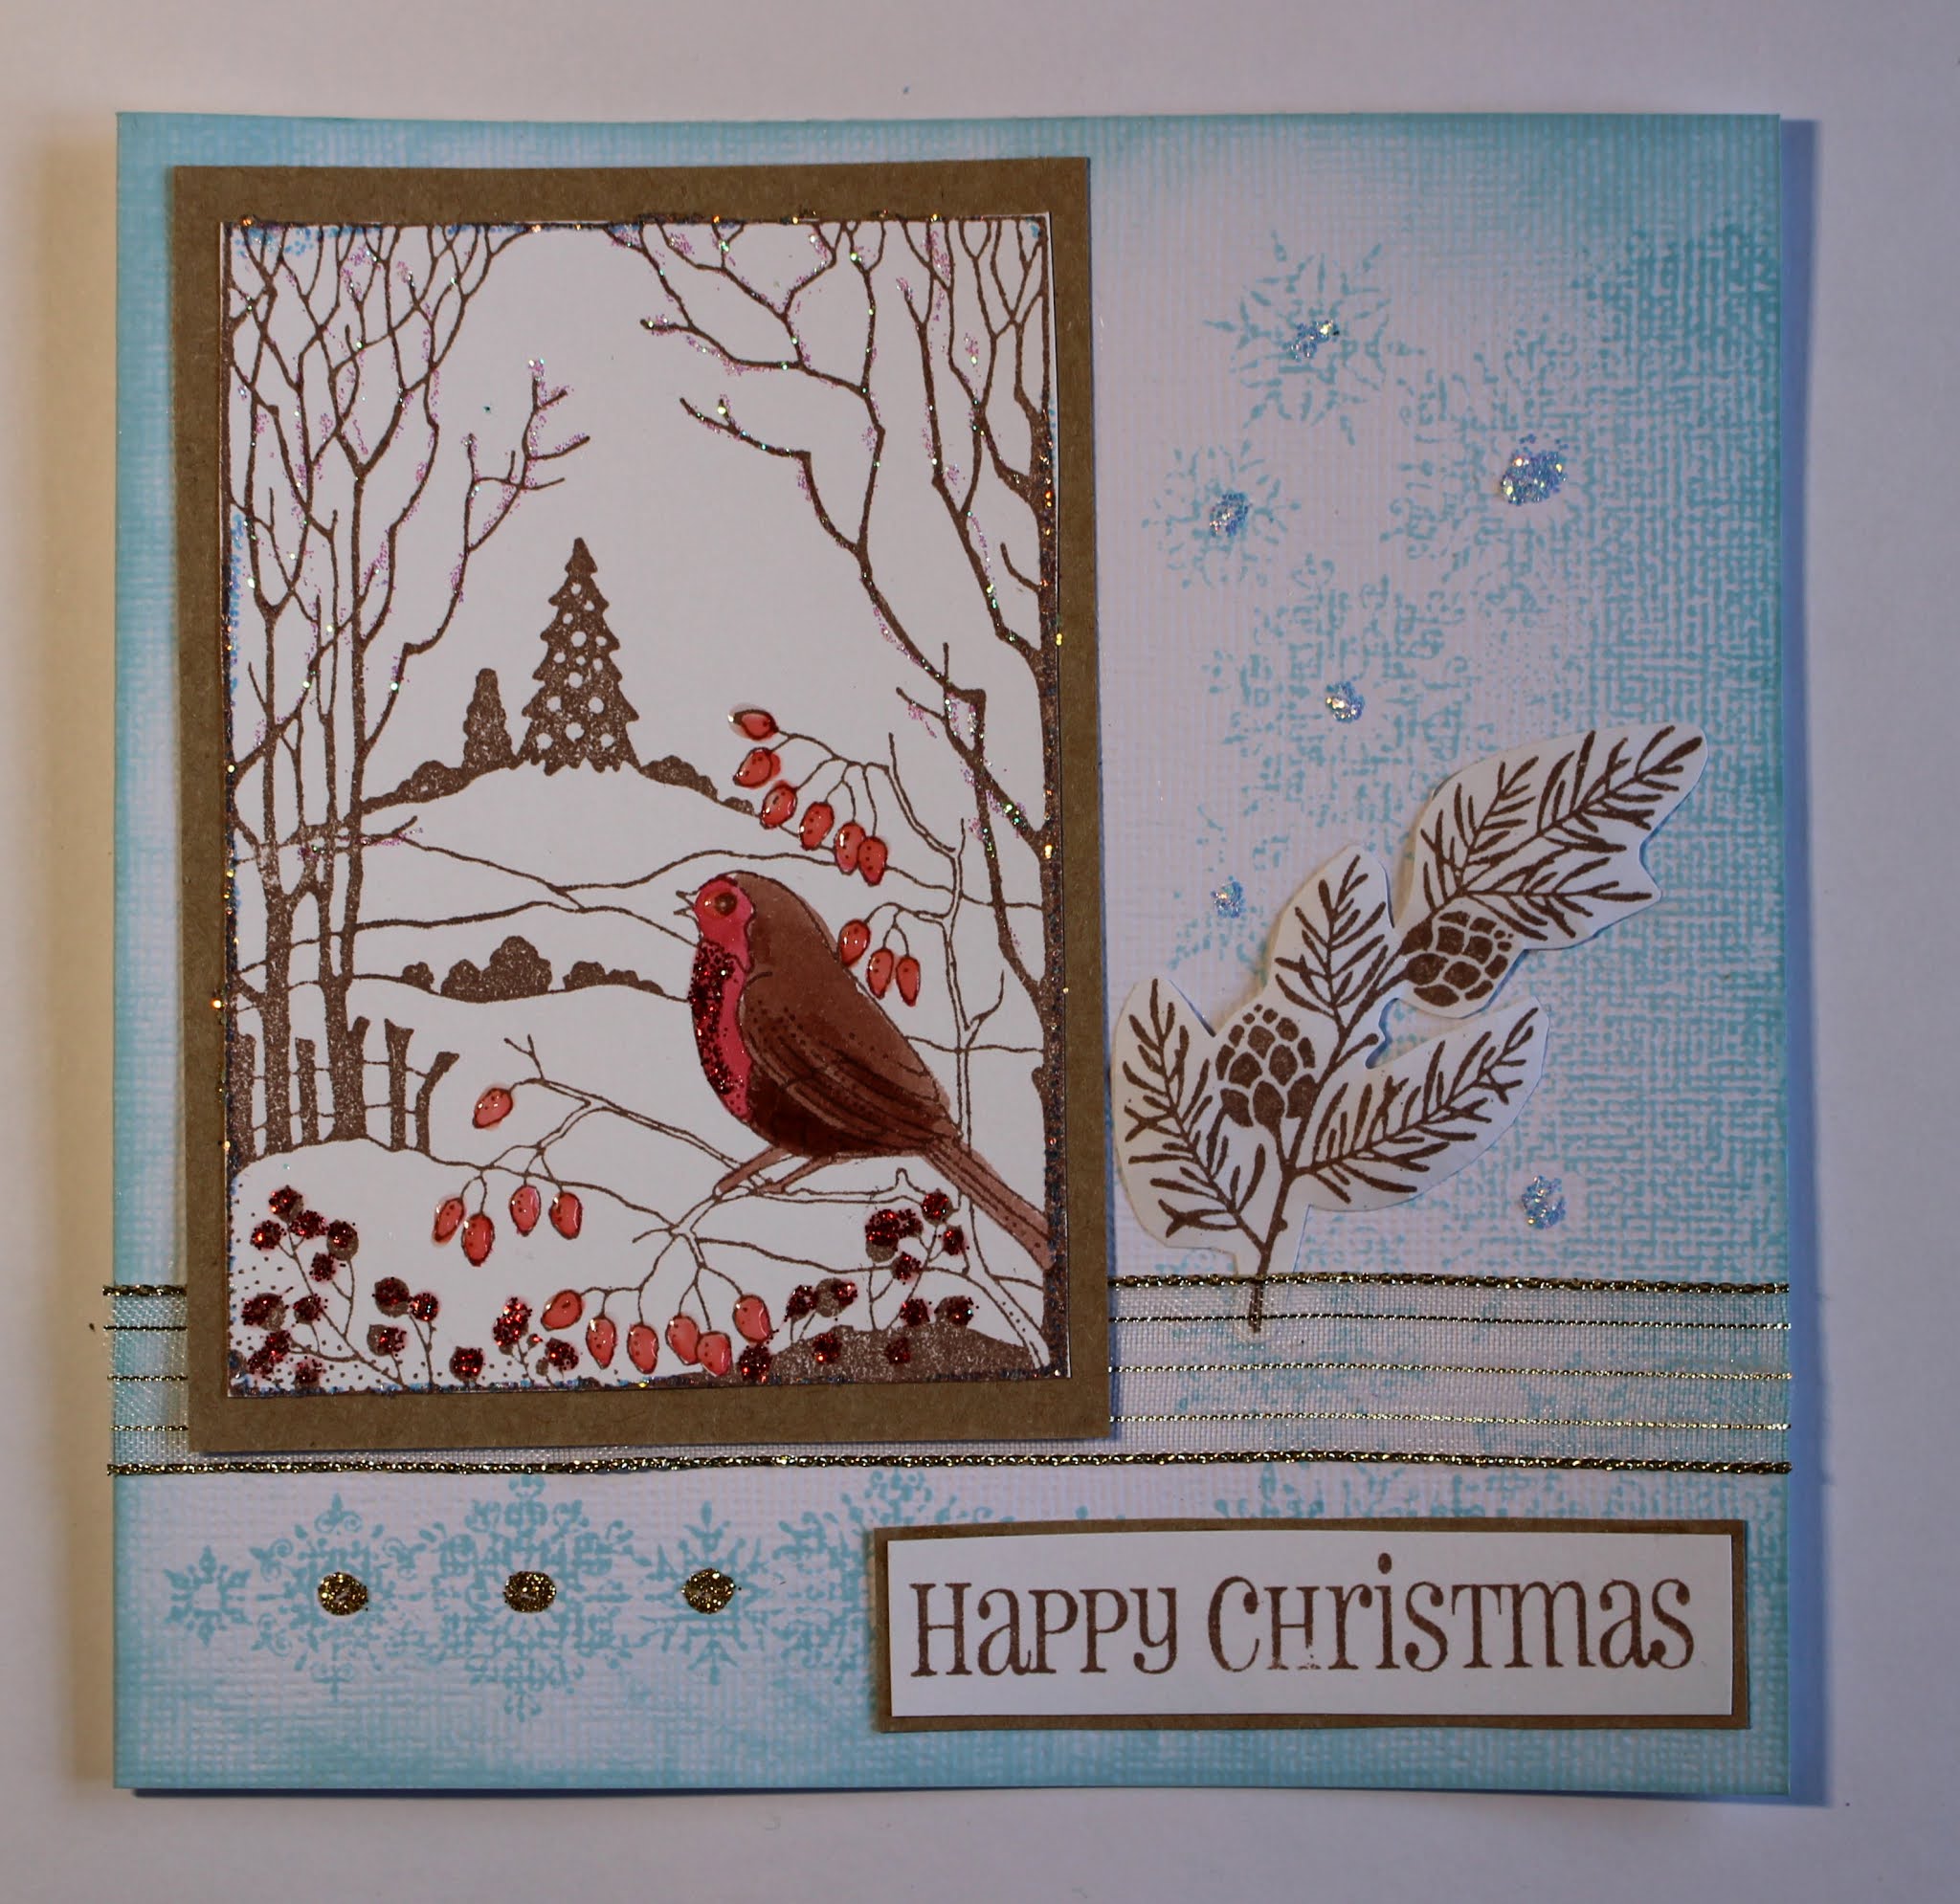
ROBIN SCENE CARD

Every year I end up leaving my Christmas cards until the last minute so I decided to do a couple of projects that would be fairly quick and easy for batch making. I always use my stamping press for batch making – it makes it so much easier to line everything up and repeat stamp multiple times.

I hope that you like this robin scene card.


I added extra inking around the outer edges of this one but decided that it really didn’t need it so didn’t do it on the rest. I just had to get on with that batch making! Ha ha.

Materials list

How it was done

  1.        Images were stamped with Versafine and cut out.
  2.      The main image was coloured with watercolour pens and mounted onto Kraft card. Glossy Accents was used to add shine to the Rosehips, and glitter glues added for sparkle.
  3.         The snowflake borders were stamped directly onto the card blank with  Distress Ink.
  4.      The ribbon was glued down and the main topper added. The sentiment was also mounted onto Kraft card and glued in place. The branch was lightly shaped before gluing.
  5.           Finished with more dots of glitter glue. Hey – you can never have too much bling – tee hee.

Note: I kept these fairly flat for ease of posting. 3D foam could be used for more depth if desired.

CHRISTMAS TREE SHAKER CARDS

Who doesn’t like a shaker card? Scenic panel stamps make them really quick and easy for batch making. These were quite tricky to photo due to shiny acetate and all that bling. Hopefully you can see enough detail of the lovely glittery snow behind the acetate windows.

Materials list:

  • Frosty Trees stamp set (Chocolate Baroque)
  • 15 X 9cm white linen textured card blanks
  • Heavy weight textured white card (for frames)
  • Heat resistant acetate
  • Versamark Inkpad
  • Embossing powders: Detail white, white with silver glitter, metallic silver
  • Glitter for inside shaker (I used Pinflair Ice Diamond – non static glass glitter)
  • Stickles glitter glue (Icicle)
  • Foam tape and red liner tape (strong double sided tape)
  • Optional: Die to cut decorative aperture approx. 12 X 6cm (or cut a plain frame by hand). I used a die from Tonic (Kaleidoscope Box Panel set)

How it was done:

  1.         Cut a frame to fit the card front and surround the stamped scene.
  2.       Stamped the image onto acetate and heat embossed with choice of powder. Trimmed and attach behind the frame with strong tape.
  3.           Next attached foam tape ensuring that no gaps were left (to contain the glitter).
  4.         Laid card flat and placed glitter in the middle before placing the framed acetate scene.
  5.         Finished with dots of glitter glue.

MORE CHRISTMAS TREE CARDS

Finally I made another batch of quick and easy cards using the reverse scene image and blue ink. I do love monochrome blue & white cards.

Materials list:

How it was done:

  1. Images were stamped with Versafine. Note: images on the textured card blanks will not be sharp. This is fine for the backgrounds.
  2. Scene panels were cut out and stuck down with foam tape for added dimension.
  3.    Finished with glitter glue sparkles. Sorry but had to do it.


Sunday, 1 October 2017

Merry Christmas (by Julie)

Hello, today I have a couple of Christmas cards to show you.


My first card is made with the New England Winter  stamp set. I started by stamping the bottom pine cone image first. This needs to be embossed so that the house can be stamped over the topped and the excess ink wiped off from the pine cone image, thus making it look like the house is behind the pine cones. To do this I first inked my pine cone stamp with Versamark ink and then coloured over the top with green and brown water colour pens. Press the stamp down and then quickly cover with clear embossing ink and then use a heat gun to set. I didn't bother embossing the other two pine cone images but of course you can if you want to. I used coloured pencils to colour the house, white gesso sprinkled with glitter for the snow effect and finished the design off with a sentiment from Lets Get Festive.


My second card is made with the same stamp sets as before so again you can see the sets are very versatile. I started by inking up the tree and stamping it towards the centre and then just repeat stamped to form the garland. No special measuring was needed, just cut your stamp quite close to the image so that it is easy to line up. The decorative corner was stamped in each corner before gilding wax was applied over the top and the design was finished off with the sentiment that I stamped onto a die cut circle.

Thanks for stopping by and please be sure to pop back again soon for some more Design Team inspiration.

Julie xx

Friday, 29 September 2017

Two projects (by Magda)

There is still time for Christmas, but these beautiful stamps from Chocolate Baroque have tempted me to try two very different projects.

Long Card :

1. Blend Distress Ink Pad Antique Linen on 3 white ATC cards
2. Stamp with Versafine Olympia Green  on each ATC a different subject, from Frosty Trees
    and New England Winter set
3. Decorate with red gems and Stickles - Crystal
4. For the background of the card blend Distress Ink Pad Antique Linen, Old Paper, Mustard Seeds
    and Rusty Hinge.
5. Stamp with Versafine Olympia Green  a sentiment from the Frosty Trees set


Journaling Page:

1. Colour your journaling page with green, red  and yellow acrylic paint
2. Cover all the page with Dina Wakley Media white gesso 
3. Stencil spots randomly with Distress Ink Pad Pine Needle 
4. Stamp with Distress Ink Pad Pine Needle and Walnut Stain the tree from the Frosty Trees set  in order to create a scene
5. Use Dina Wakley Media white gesso  on the snowflakes of Seasonal Elements stencil 
6. Stamp with Versafine Vintage Sepia the sentiment Let's get Festive
7. Decorate with some red gems and Stickles - Crystal


Thank you for passing by
Magda


Sunday, 24 September 2017

winter (by Veronica)


 I used the lovely house stamp from New England winter, stamped using distress markers to colour the stamp. Thanks to my friend Janet for introducing me to the combination of dusty concord and iced spruce, which i really liked and makes a nice change from the usual Christmas colours
I used the same colours to ink up the pine cones from the same plate to create the background, with some second generation stamping to add interest.
The sentiment from lets get festive was also coloured with the marker pens, and the die cut edged with the same markers. i also coloured the mats with the marker pens to get matching colours


The next two cards use the large stamp from the reindeer landscape plate.
For the first card I stamped with versamrk onto black card and clear embossed it, before adding colour with distress oxide ink pads. I dragged colours across the sky to try to give a northern lights effect. The snow was a white pigment ink sponged on, with a little of the oxide colours added for a reflection of the sky. Some white glitter in the foreground to finish before trimming right down and adding white and pink mounts. The greeting from the same plate was stmaped in a silver grey ink.
I wanted to see if i could make a shaker card using this stamp - I stamped the edges of the stamp onto the base card using hickory smoke distress ink to extend the scene.  I stamped the image onto spare card , colouring the stamp with distress markers, and trimmed this down to a 62 square. I die cut a circle from another piece  of card the same size, backed it with acetate and fixed it over the image using foam pads having first added some sparkly silver snowflakes I found lurking in a drawer.                                   The whole thing was then added to the base card after sponging more grey ink round the edges. The sentiment from lets get festive was stamped and silver embossed  , edged with grey and mounted on top.                     

Saturday, 23 September 2017

Christmas selection (posted by Claire)

Good morning, Claire here with a selection of Christmas cards made for Lesley's shows on Hochanda.  

To make this acetate card I cut the front off an 8x8card blank leaving a little border (about 2cm) along the top and used red line tape to attach an acetate panel. I stamped the gorgeous little house from New England Winter on watercolour card and added some colour with watercolour paints, highlighted with glitter and glossy accents. I cut this out and then tore several strips of card, adding glitter to the torn edges. The important thing with this style of card is to add some weight to the front of the card otherwise it doesn't stand up properly so the strips of snowy card give the front some strength. Layer the strips of card, popping the house in between. I added some 'snow' with a white Posca Pen and some icicles with glue and glitter. I stencilled the moon using Seasonal Elements stencil and white gesso with a sprinkle of glitter. The sentiment is from Let's Get Festive. I made the background using watercolour paint, creating a very dilute wash of colour. 


My second card was made using Frosty Trees. I began by stamping the slender trees with a rainbow ink pad, it doesn't show too well in the pic but the trees are actually shades of blue/green and purple. Next, I stamped the ornate tree with gilding glue and applied some silver holographic glitter. I used the same stamp to create a border around the white card. I stamped the sentiment (from the same set) with gilding glue and again applied glitter. 


I love these pretty birds and made two colour variations for the show using the Winter Birds set. This one in shades of pink and brown was fairly quick to make. I watercoloured the image and die cut with a spellbinders die before dusting with distress ink (Picked Raspberry and Tea Dye) and added some frantage embossing powder. The sentiment is from Let's Get Festive, I stamped with versamark and carefully embossed with gold embossing powder, carefully missing the word Hearts which I coloured with pink EP. Again this was die cut and distressed before layering up on a shaped easel card made using the same die. 

My last card for today features the same stamp but in more traditional Christmas shades of Red and Green.


I watercoloured the image, adding some glitter for a snowy sparkle and splattering some paint here and there for the background. I stamped the holly border using the little silhouette stamps from the Winter Birds set. I stamped them in green and added red berries using a fineliner pen. I added some dots of white glue and dusted with some glitter. 

I hope we're giving you lots of inspiration for your Christmas cards, this year is whizzing by and it will be here before we know it. Thanks for visiting today
Claire xx


Friday, 22 September 2017

Christmas Old and New (by Judith)

Hello everyone, I am sharing some Christmas projects with you today that were featured on last month's TV shows on Hochanda. Some of these were old projects that I made a few years ago, but I hope that you do not mind seeing them again.

I will start with a new project, where I created a background, using soft blues and pinks to represent a Winter sky. I added some deeper blue hills using torn paper masks, and stamped the tree from the Frosty Trees stamp set and the sentiment from the Let's Get Festive stamp set, using dark blue ink. Ensuring that the background was completely dry, I added some snowflakes using white embossing powder, and then used some flat-backed gems for added sparkle.

Using another tree from the same stamp set, I created an icy background using metallic paints, and on a smaller scrap of card, I stamped and embossed the tree panel using Versafine Onyx Black Ink and clear embossing powder, for a crisp image. I matted the layers onto black card, and added some small black gems. The sentiment comes from the Let's Get Festive stamp set once again.

 I wanted to create a piece of home decor especially for Christmas using my favourite sentiment from the new stamp set. I painted a chipboard heart in soft blue, adding some crackle medium here and there, and then added a vintage white paint over the top. I then stamped the sentiment in a bold red before adding the fabulous pine cones from the New England Winter stamp set around the edges. I used water based markers to colour the stamps, allowing me to add colour exactly where I wanted. A red ribbon completes the project.

This next card is an adaptation of an old card that I first made several years ago, using the Winter Birds stamp set, but I have made it in a different size. These days, I like to make 8" x 8" cards, and so the card does look slightly different from the original. I have added one of the new sentiments this time around as well.


Finally two golden oldies for you, I remade the first one, which was originally given as a Birthday card to someone. It just goes to show that these beautiful stamps can be used at other times of the year, not just at Christmas, with a change of colour. I have used the large image from the Reindeer Landscape stamp set, embossed with copper embossing powder, and coloured with Distress Inks and a water brush. The background was also created with Distress Inks, and I have then stamped leaves from the Sunny Sunflowers stamp set, and coloured them with pencils. The sentiment comes from the Nature's Peace stamp set.


Finally a luminary, also using the large image from the Reindeer Landscape stamp set. I die cut an aperture from four large printed tags. The images were stamped and embossed onto parchment using white embossing powder, and coloured from behind. I used metal tape to join the tags, which I embossed, and aged with a little bit of black paint.

I hope that my projects have given you some ideas using these fabulous stamps. Thanks for stopping by, Judith xx

Monday, 18 September 2017

Christmas Cards (By Marga)

Hello all, yes it's time again to slowly make some Christmas cards and today I would like to show you some.


Here I stamped the image on kraft paper and coloured it with pencils. I cut it out and put it on brown paper.


Here I used Distress Ink to stamp the image and with a water brush I coloured the image.


Here I also stamped the image with Distress Ink. I used different colours and with a water brush I went over the colours to create a watercolour scene.

Stamps I used are: Reindeer Landscape, Winter Birds, New England Winter and Lets get Festive

Hugs 

Marga


Tuesday, 12 September 2017

Summer Birdies Card (by Anne)


Good morning. Today I am sharing some of my samples made for the recent Christmas shows on Hochanda from Chocolate Baroque. I decided to forego Christmas with this one and make a pretty shaped summer card with the birdies.

Materials:
How to make it:
  1. Create the card blank by cutting a folded square card, through both layers, overhanging one of the die points over the card fold on the left side. Cut another whole flower from stamping card. If you don’t have a suitable die draw a flower shape onto your card blank and cut out with scissors. Consider how it will sit when standing – I arranged 2 petal points so that they sit level at the base. Use the card blank as a template to cut the stamping panel.
  2. Stamp the scene onto the front panel. No clever masking is needed, simply stamp the ‘solid silhouette’ fir tree onto the sides to partially cover and disguise the Christmas trees.
  3. Stamp the bird house onto another piece of stamping card. Extend the pole by drawing with a pen. Cut out omitting the holly leaves (just chop them off). Snip the base of the pole to fit the card front when overlaid.
  4. Colour the images with Distress Inks. Apply ink to your craft mat or a palette and pick up colour with a damp brush. Use a blending sponge for some of the larger areas (sky and trees).
  5. Attach the bird house to the card front with foam pads or 3D glue gel. Finish with a little glitter glue for added sparkle.

Saturday, 9 September 2017

A few Christmas makes ... (posted by Claire)

Good morning, I really love making Christmas projects so I had lots of fun making samples for Lesley's recent shows on Hochanda. This morning I'm sharing 3 Christmas cards. The first features New England Winter, this is one of my all time favourite sets!


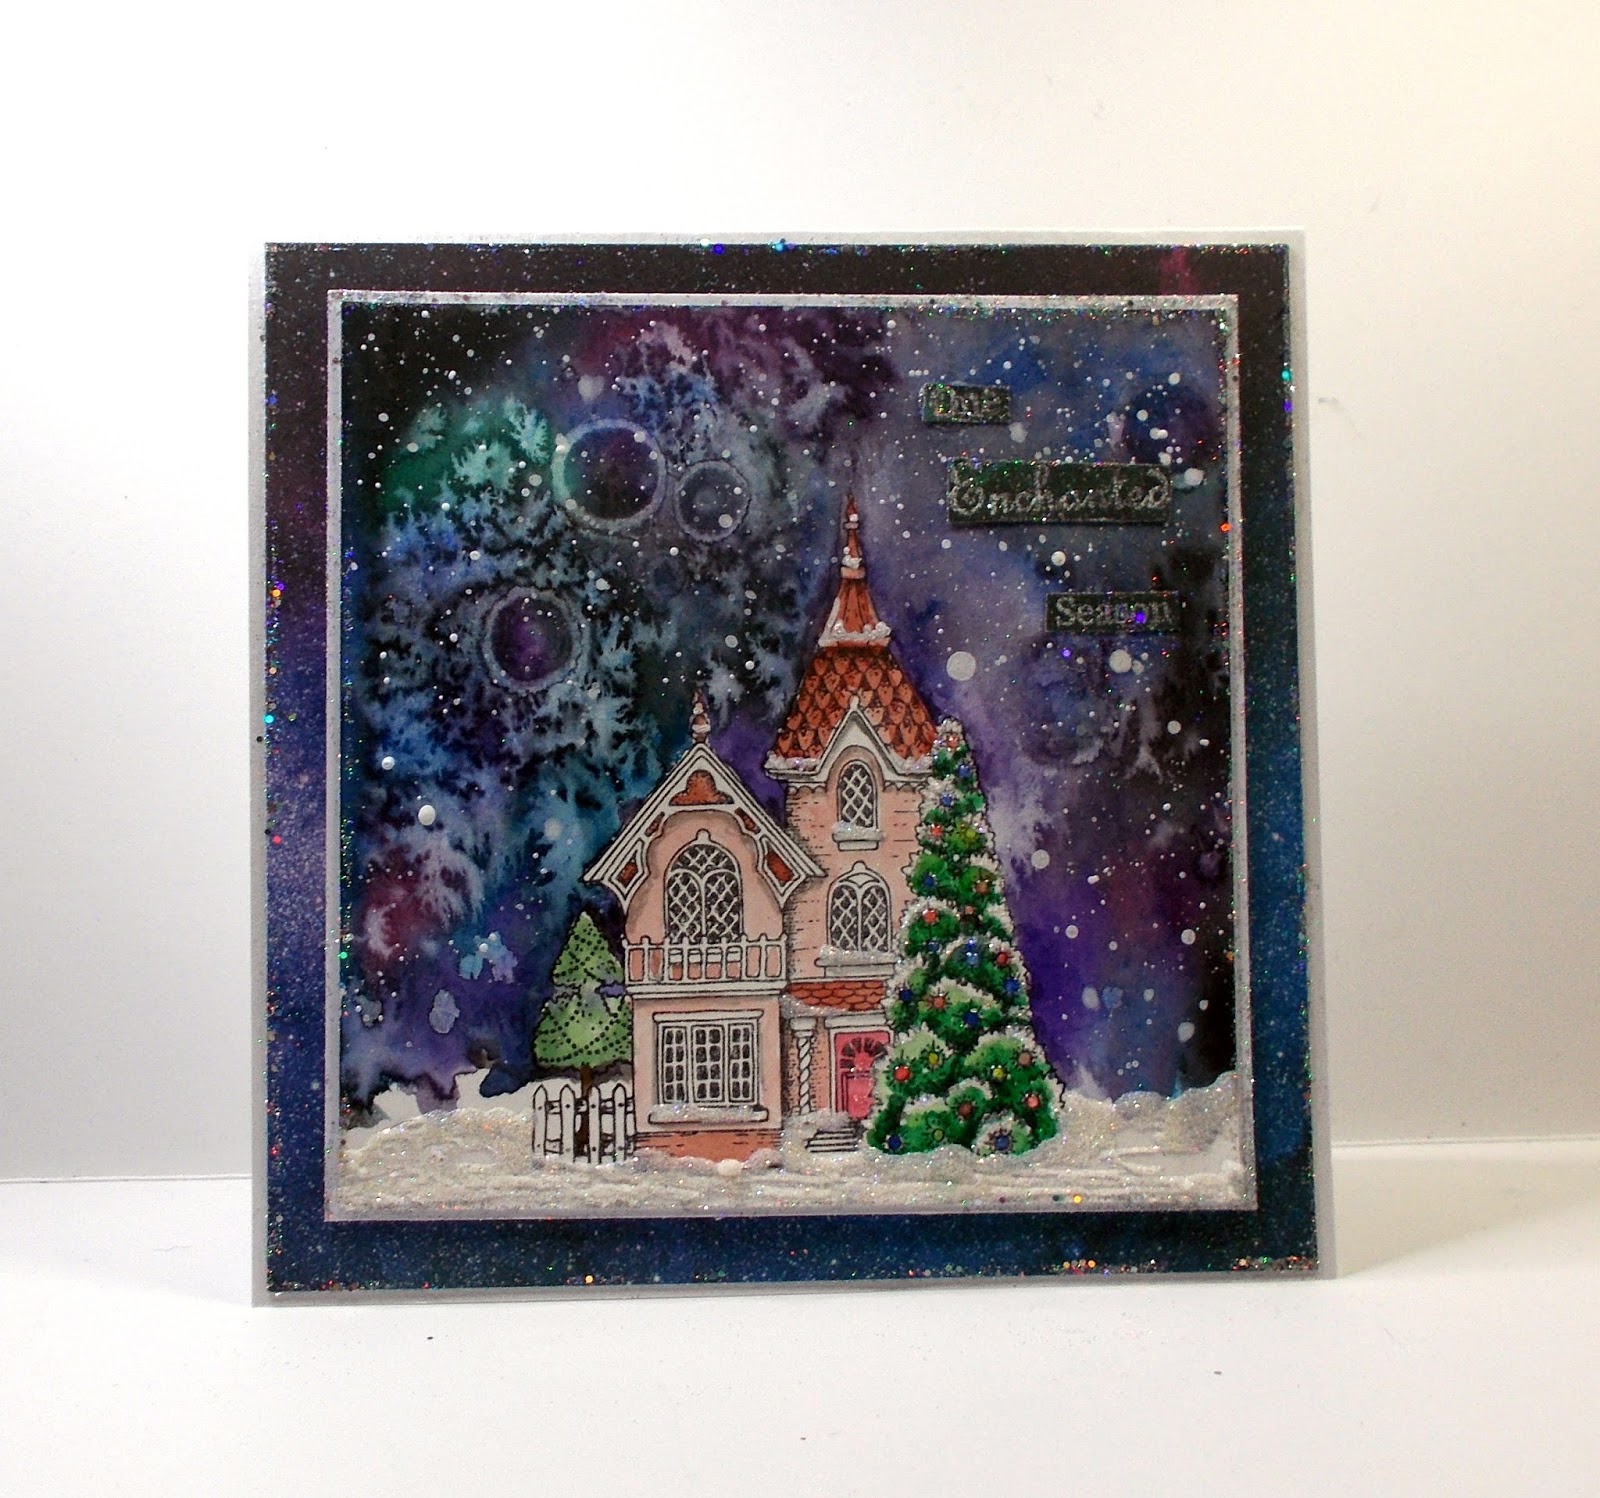
I began by stamping the image onto watercolour paper and painting with masking fluid. I gave it a good coat of the fluid as I was planning on a very messy background lol. Once the masking fluid was dry spritzed the card with plenty of water and set to with my watercolour paints to create a 'galaxy sky' effect. I used shades of blue, green, purple and pink - mixed with plenty of water and added black around the edges. While the paint was wet I sprinkled over some rock salt and then added some drops of rubbing alcohol. I wasn't sure how the alcohol would react with the water but it was on my desk so i had a go. The salt created the feathery effect in the background (I think I added a bit too much lol) and the alcohol created the circles. I left the background to dry and and then splattered everything with watered down white gesso and again left it to dry before adding some even white stars with a white posca pen. Once the background was completely dry I removed the masking fluid and watercoloured the image. I added glossy accents to the tree lights and white pva glue generously sprinkled with glitter to create the snow in the foreground. The sentiment is from Let's Get Festive.

Card number two was made using the beautiful Reindeer Landscape, another favourite (but aren't they all lol) I stamped the focal image with Black Versafine ink and used a black pitt pen to extend the landscape to each side.


I added shadows to the hills with very dilute watercolour paint in shades of blue, purple and pink. I used slightly more intense shades of the same colours to create the sky, masking a little moon. I added some snow with splatters of white gesso and a white posca pen before stamping the sentiment which comes from the lovely new set Let's Get Festive,

For card number 3 I used one of the lovely stamps from New England Winter. This was a bit of an experiment but I'm pleased with the finished card and it was very quick to make.


I stamped the pine bough with white gesso, heat set it and then roughly masked the area with a post it note before stamping the image again a little lower. Once the gesso was thoroughly dry I added some colour with watercolour paints and enhanced the details with coloured pencils. I added a wash of very dilute white gesso around the image, dried it and again splattered with more gesso. The sentiment is another from Let's Get Festive, this time embossed with white EP.

I hope you're feeling festive and are enjoying all the beautiful makes from my teamies
Thanks for visiting today
Claire xx

Wednesday, 6 September 2017

Flora Musica (by Brenda)


Good morning all you crafty Peeps, I hope you week is going well.

Today I have some creations to share using the stamps that Lesley showcases on Hochanda in August, the first show featured a wonderful collection of Vintage inspired floral stamps and the second show was all about Winter and Christmas. I will share a few of my samples for both shows with you next week.

Starting with the card at the top which features Flora Musica which I stamped onto a Distress Oxide background and the used DI's to colour the image. Using Decorative Edges I stamped some random harlequins using the same Oxide inks, a little Butterfly from Just Butterflies and sentiment from Words of Inspiration which I think is my all time favourite Chocolate Baroque sentiment set.


For this card I again created an Oxide ink background and the overstamped with the holly from Winter Birds using Versafine blue ink. The central panel has a sentiment from the new Christmas Word Plate and again the same holly around the edges.


This one was a bit of an experiment !! Yet another Oxide ink background............yes I am a bit obsessed with them and over stamped with Harlequin Bouquet which I stamped with Versafine black and coloured in with the same DI's. I then covered the whole piece with three layers of  Versamark and heat embossed each layer with detail clear poweder and then the madness set in..........I cut the piece into seven piece and rearranged onto a piece of coordinating cardstock, but do quite like the finished effect.


For my final card I used Kraft card, a mask and a white inkpad to create the Christmas bauble shape and with the mask still in place stamped the house from New England Winter using Gathered Twigs DI and finally the little sentiment set from Frosty Trees and a white bow to finish.

As always my thanks for popping in today and I hope I have inspired you to go check out the lovely stamps from the shows.


Monday, 12 October 2015

Owl Edges - Cards By Florence

Hi everyone

Today I would like to share with you two cards made with the fabulous Owl Edges. 

The Owl Edges are a new addition to the Chocolate Baroque Edges Range which can be seen here.


To make this card
Stamp, emboss and color in the floral edge.
Take a mask and Distress Inks and create the pattern on the background.
Stamp the corner flourishes and "Tranquility".


To make this card

Stamp and emboss the Owl Edge.
Take a mask and Distress Ink and create the pattern on the background leaving a clear space for the small Owl.
Stamp the small Owl and the Sentiment.
Make up the card as seen.


Thank you for looking
Florence x
Sunday, 4 May 2014

Fabulous Flappers - By Florence

Hi everyone

Thank you to everyone for calling in and for your lovely comments on the previous posts.  They are truly appreciated.   It is always great to hear from our CB family.

I am so excited!!!!  The Fabulous Flappers are amazing.  All credit to Sue who designed these stamps.  They are a stampers dream and absolute delight to use.

You don't need to take my word for it, you can tell how wonderful and versatile they are by looking at the incredible projects from the DT. 
I have always loved Art Deco styles and the artwork by people such as Erte and George Barbier so I didn't think twice about taking my inspiration from those artists to make my cards.

I have mixed and matched some other Chocolate Baroque stamps with the Fabulous Flappers.

I hope you like them.


I started off by making masks of all my ladies using some masking tape.
I used white coated card stock and Black Staz-On ink.

I stamped my (yellow) lady and covered her with a mask.

I then stamped the (blue and red) lady so that she appears behind the (yellow) lady.

Leaving the masks on both of the ladies, I stamped the pillar bases (The pillar bases are from the retired Antiquities set) at the top and bottom.

I then drew two lines using a micron pen to create a column connecting the bases.

I masked off the edges of the column and added some distress marks using one of the Abstract Fragments background stamps.

I stamped the decorative corner (from the New England Winter set) and then just added some straight lines, again using the micron pen, to tie everything in and to ground the ladies.

Whilst everything was masked off I added some blue distressing ink to the background.

I removed my masks and colored my images in.

To finish off I just added some bling and a flower flourish which I made using a die.


For my second card I used exactly the same technique as above using lots of masks.

I started by stamping and masking the lady.

I then stamped the pillar and masked it.

With all of the masks in place, I colored my card with Wild Honey distressing ink and stenciled on some patterns using Rusty Hinge distressing ink.

I then stamped my peacock.  Do check out the Peacock Stamps available from Chocolate Baroque. They are one of my hot picks to go with the Flapper Ladies.

I removed all of the masks and colored my images with my jumbo felt pens.

I used some of the little flowers from the flower vase to create a climbing flower around the pillar.
Again I added some bling and a florish.


My third card was the result of some incorrect stamping on my part.

I stamped and masked my ladies as above but then went and smudged the Chinese Lanterns.
So, being a great believer in waste not want not, I cut around my images and used them separately.

I attached a piece of pretty paper to my base card and then added all of the little stamped pieces to create a scene.
It was a case of adding a bit here and there to see what evolved.
The lanterns are from The Chinese Lantern set.
The bush in the Urn is the small tree from the Patchwork Landscape set.
The pattern on the pillar is a stamp from the Abstract Fragments.

That is all from me today. 
Take care and happy stamping.

Florence x


Tuesday, 13 August 2013

Gothic Angel (by Shirley)

Hello everyone, I hope you are doing well.

I have another Christmas design today using the beautiful new Gothic Angels set.   I think this one could also be used for a non-Christmas card.   I added images from Gothic Fragments, they compliment the new set so well.   The corners are from New England Winter, they matched the foliage on her head piece.   I love how so many of Chocolate Baroque stamp sets compliment each other and give endless possibilities for designs.


I stamped the beautiful 'feisty' angel from the Gothic Angel set with black Stazon Ink.   Both Glenda and Judith have nicknamed her 'feisty angel' which I think is a good description.    She looks like a strong woman.  I coloured her with Prisma Pencils and used Spellbinder dies to accent her.
 
I created the background with Evergreen Bough Distress Ink on my craft mat spritzed with water and then sprayed a little Teal Dylusions Ink over top (of the cardstock).  I used two fragments from the Gothic Fragments set and the Gothic letters fragment from Gothic Angels with Evergreen Bough & Salty Ocean Distress Inks that were lightly spritzed with water.  The corner flourishes from New England Winter are stamped with black ink.      .

Thanks for stopping by and I hope you can come back often as my teammates have lots of beautiful designs to show you.

Have a great day,
Shirley