Pin It button on image hover
Showing posts with label Lupin Blueprint. Show all posts

Monday, 25 October 2021

A Lightbulb Moment (Tracy Thompson)

 Hello again, I'm here with my final post of the month with creations I made for September;s show on The Craft Store.
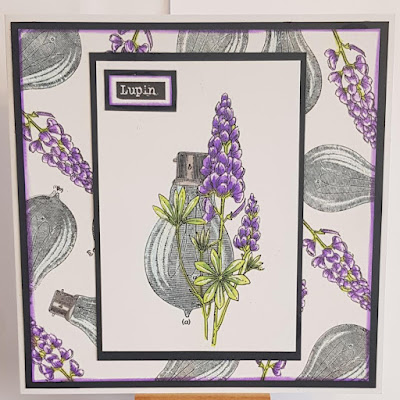

For this creation I created a background piece by randomly stamping the bulb and the lupin, I coloured the Lupins with inks and glittered the highlights in the bulb.  I then took the main image from the stamp set Lupin Blueprint and coloured it with inks, I took the sentiment from the set and layered it up and placed it on the main image in the corner.
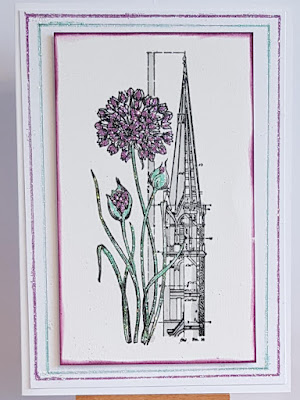


Now for this next card I tried something a little bit different, instead of colouring with markers or inks I coloured with glitters.  So To start I took a piece of card so use as a base to adhere to the card blank, using a glue pen I drew a line around the edge then glittered in purple.  I did the same again and glittered in green.  I stamped my main image from the Allium Blueprint set, and on the blueprint drawing part I shaded it in grey.  I then using a glue pen again coloured in the Allium, stems and leaves and in the same glitters as used around the edge coloured the image.  I'm just sorry all the sparkle doesn't show on the picture.

Thank you for taking the time to look at my post
Happy crafting
Tracy x


Sunday, 24 October 2021

floral blueprints (by Veronica)

For my last post this month I have a set of  very simple DL cards using the main images from each of the blueprint sets featured in last month's tv show. All the base cards are of  a dark silver card, and the images stamped on white card with black versafine ink.

The flowers were coloured with  koh-i-noor  pencils and blending solution, and the sentiments were stamped onto spare white card. The sentiment on the echinacea card is from life is so much better.


Saturday, 23 October 2021

Floral Blueprints

Hello, I am sharing  some more of my Blueprint cards from the September show on The Craft Store.
The stamps that I am using are from Echinacea Blueprint and Lupin Blueprint.

On my first card I made a background using Distress Inks which I then sprinkled with water and blotted to lift the ink. I then stamped around the edges with some of the smaller stamps to create a border. I stamped the main image onto some card, again I used Distress Inks to make a background and I coloured the flowers with water colour pens.  I used oval shaped dies to cut out the Echinacea image and layered onto black.


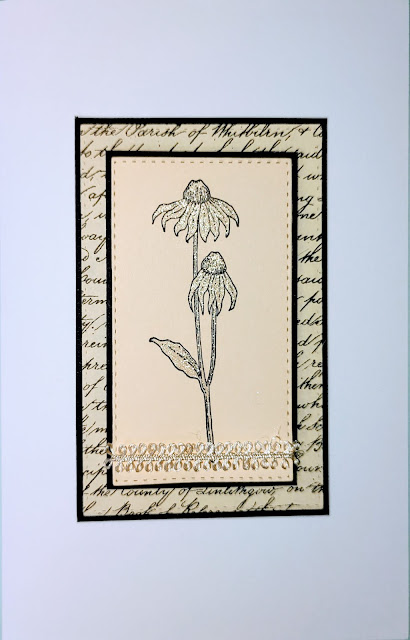
My next card is very simple. I had a small piece of script paper which I layered onto some black card.
I stamped the smaller echinacea flower onto some cream card and coloured with a silver sparkly pen. I added a piece of ribbon around the lower part of the card and mat and layered this onto some black card and then onto the script layer.


My last card uses the Lupin Blueprint set. I made a background by using Versafine Clair on the Inky Plate. I then used one of the stamps to frame the edge of the card. I used my stamping platform to stamp the main image of the lupin and lightbulb, coloured with water colour pens and then stamped the image again to make it look nice and clear.


Thanks for looking
Sandra x


Sunday, 17 October 2021

A lightbulb moment by Brenda


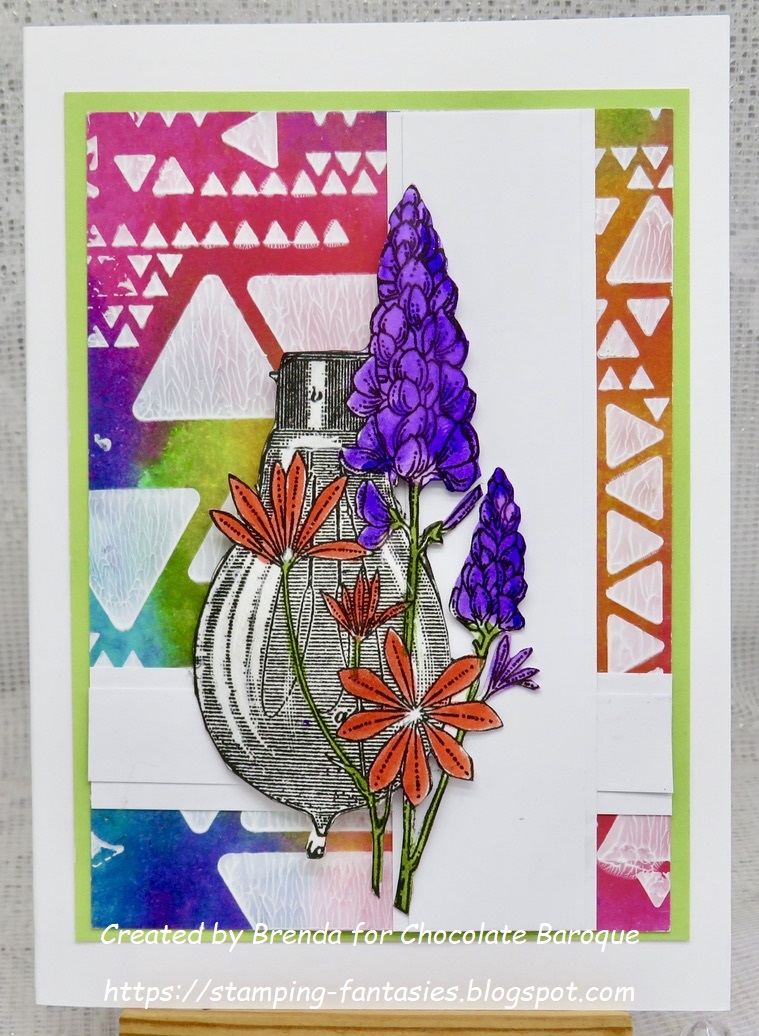
Happy Sunday everyone, a couple more of my sample from the September TV shows. Above an Oxide Spray background and added texture using a stencil and paste. The focal Lupin Blueprint stamped onto the base and then a second time cutting out the whole image and arranged over a die cut circle. The work bulb in the set was then stamped several times with first and second generation stamped and the hanging cords drawn in with a black fine line pen. The image is stamped onto black card, embossed with details white EP and the edges roughly torn, fixed in place along with some washi tape and two index clips. A matching envelope to compliment the card.


A tag using Chrysanthemum Blueprint. I covered CB black and white DP’s to cover a chipboard tag sanding and inking the edges. The stairway and bloom were stamped onto this using Versafine Clair  and white paint used to fill in the stairway element. I then stamped he blooms and leaves a second time onto white card, cut out and paper pieced, finishing with an organdie bow.

have a good week.

Friday, 15 October 2021

Lupins And Chrysanthemums (Tracy Thompson)

 Hello Blogging friends, I'm back today with my second post for this month with two more creations I created for September's show on The Craft Store.


For my first creation I masked of the centre of the card, then using ink sprayed with water I dabbed my card into the ink creating this marbled effect.  When dry I created a line down each side of the ink in glitter.  I stamped the main image, Lupin Blueprint and fussy cut it out, I coloured it in using inks as watercolours, I placed it in the centre panel using foam pads.   I stamped my sentiment in two parts which is from the Sentiment set called Life Is So Much Better.


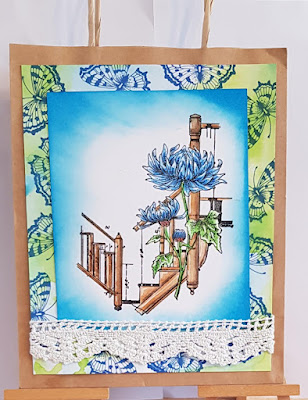
For my second creation I thought I'd show you this gift bag, I created a background piece of card as my base, this was done by inking up a piece of card with two shades of ink sprayed with water for a nice muted effect.  From the stamp set Butterfly Mind I randomly stamped a butterfly in a shade of blue to match the background.  I stamped the main image from Chrysanthemum Blueprint on a piece of card, I edged it in ink and then coloured it in pencils, highlighting in white gel pen.  I adhered my image to the background piece, then added a piece of cotton lace across the whole piece before placing it onto the gift bag.

I will see you again towards the end of the month with my final post for October.
Thanks for looking
Happy crafting
Tracy x


Thursday, 14 October 2021

greyscale (by Veronica)


 two more samples to show today using the lupin and chrysanthemum blueprint stamps from the September show.

I had a couple of pieces of grey card left over from previous cards, and decided to see how they worked with the koh-i-noor pencils and the blending solution.

For both versions I stamped the main image in black and clear embossed it before randomly stamping smaller images in grey ink round it to make a background.

For the lupin card just used the white and yellow pencils to colour the image, then added a touch of green to the flower centres and used the blending solution to spread the yellow over the light bulb. The sentiment was stamped onto spare white card.

The chrysanthemum flower was coloured with red, orange and yellow pencils blended together, and the leaves with 2 shades of green and a yellow, also blended with a little white added to the banister railing.

Both were matted onto white and black card before adding to a card blank.
 

Monday, 11 October 2021

Blueprint Notelets (by Judith)

Hello everyone, I hope that you are keeping well. I have a quick and easy project to share with you today in the form of a set of notelet cards that I created for last month's TV show on The Craft Store, using the Blueprint stamp sets. 

I made four different cards, but the principle was the same for each card. I used a piece of textured card cut to size, slightly larger than a square acrylic block. I coloured the acrylic block with Distress Ink, and lightly spritzed it with water, before stamping the block onto the piece of textured card. I lifted the block away from the card, and left the background to dry. If it was very wet, I tipped the card to let some of the water droplets run, creating more texture on the background.

Once the background was dry, I used the same colour of Distress Ink as the background, to stamp words from one of the the Blueprint stamp plates over the background, and chose one of the little worker floral stamps to stamp in the bottom left hand corner, using Versafine Onyx Black Ink. I added the number on the stamp plate as well. Here we have the image from Allium Blueprint against a pretty Teal coloured background.


I chose Chrysanthemum Blueprint for my second card and a zingy green Distress Ink. I coloured the floral images with pencils, choosing colours on the opposite side of the colour wheel to the backgrounds for a pop of colour.

Lupin Blueprint was the choice for card number three with a soft orange background. The flowers are so pretty on this stamp set.

My last card was created using Echinacea Blueprint and a pale green background. To complete the cards, I drew around the edges using a fineliner pen, creating a border. Each one was slightly different, but you could draw them all the same, it is not important.

These cards were really fun to make, and would be useful for so many purposes. I hope you will try something similar. They would make a lovely gift, or be handy when you need a card in a hurry.

Thanks for stopping by, Take care,


Judith xx

Friday, 8 October 2021

Lupins and Lightbulbs by Rachel

 Hello there! Rachel here today with a couple of makes from Chocolate Baroque's September shows - these makes mostly use the Lupin Blueprint stamp set but there is a little stamp from the Echinacea Blueprint set also used.

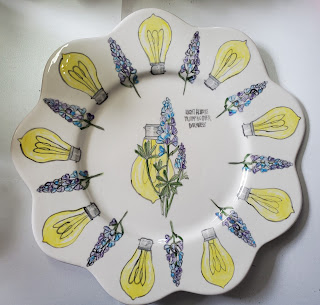
My first piece is my ceramic piece - I do love this one and think it worked very nicely! As usual I stamped the images in ink and then over painted all the line work as well as the colours in glaze. My friend Deb from PottyRoos then took over and did the over glazing and the firing. 

This second piece used the worker stamps from the Lupin and echinacea sets - I stamped them on a rectangular piece of card then coloured in using watercolour brush pens. Finally I added a little more greenery by hand and then used a distress tool to add ink for the sky. 


Hope you have a lovely day!
Rachel x


Thursday, 7 October 2021

Vibrant Echinacea by Brenda


Morning all, my first post of the month with some shares from the September Craft Store shows where some of the lovely Blueprint stamps were revisited.


The above card and matching envelope uses the lovely Echinacea Blueprint, we have an abundance of these in one of our perennial beds and the vibrant colours are a joy. The background is a simple watercolour rainbow wash onto which I stamped the image and coloured with Distress Markers and placed the piece into a die cut frame. Stamping the individual Echinacea's several times, I coloured, cut our and placed around the frame so the blooms popped outside. A sentiment from my Life is so much Better.


From light and bright to a bit of grunge with Lupin Blueprint. I had fun creating the background for this one using Distress paste, some of the new colour Halloween Mica Distress Stains along with Oxide sprays.  The main image was stamped and also one of the worker light fixings and the main image coloured with pencils. A sentiment from the same set placing into a Kraft pocket.

As always, thanks so much for your kind words and visits.

Tuesday, 5 October 2021

Blueprint in yellow {by Tracy Thompson}

Good morning, I'm here now as a member of the Design Team and not a Guest, I was really chuffed to be promoted to the team and join all the other lovely members, this is my first official post.


Here is two of my creations I made for the Septembers show, the one above is created using Chrysanthemum Blueprint , I decoupaged the image after colouring it with pencils and highlighting with a white gel pen.  I did some yellow ink splatters on the white of the card.  I then layered that on to another background I made by splodging ink on to acetate and then dipping my card into it.  It took a fair bit of time to do the fussy cutting but so worth it.


For this tag I firstly made a faux wood effect background and then made a pocket, which to me was like adding a window box or planter.  I again did some fussy cutting, I cut the Lupins from the Lupin Blueprint stamps out then coloured them, always cut first as they cut better then when they have been coloured.  I coloured with pencils and highlighted again.  I added a butterfly which is from Butterfly Mind set, and a sentiment from the Butterfly Perfumery set.


Thank you for stopping by

Happy crafting

Tracy x

Monday, 4 October 2021

rhythm of life (by Veronica)

Good morning everyone, hope you all had a pleasant weekend and everyone who needed fuel got some.....

Today I have two wreath cards to share, using some of the smaller blueprint stamps from the September shows. 

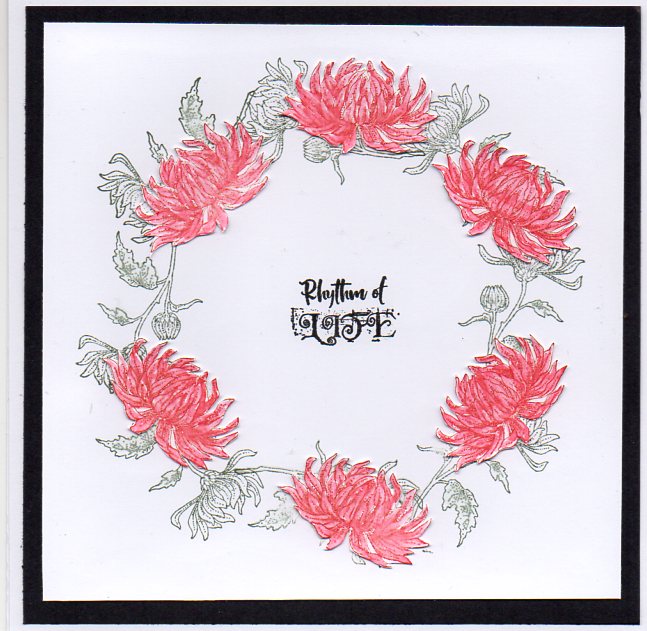
These may look complicated, but if you have a stamping platform they are very easy. The first one uses two  flower stamps from the blueprint chrysanthemum set. The smaller stamps was inked in green ink and stamped 8 times to form the base of the wreath onto a square piece of white card. The larger stamp was stamped several times onto white card using a terracotta dye ink pad, and the colour dragged out with a waterbrush. I fussy cut these out, and decided to use 6 of them to add to the wreath shape - while we are always told to use odd numbers in flower arranging, I fwelt that 5 wasn't enough and 7 was too much, so 6 it was.  The sentiment is from the echinacea blueprint set.

This was even simpler. I used a very ancient multicolour ink pad to stamp the lupin image 8 times onto a piece of square white card. The centre image is part of the main image on the set, cut out with a punch and glued in the centre. I inked a mat of white card with a matching alcohol marker .


Sunday, 28 March 2021

Mixing it Up

 Hello

I am sharing the last of my samples from the February show on Hochanda.

As we all know, Chocolate Baroque make the best stamps for card making, but they can also be used for many other things. Here are a few items I have made from Harebell Butterfly, Thistle Butterfly, Honeysuckle Butterfly and Briar Rose Butterfly stamp sets. 

My first is a mini album using the Butterflies and foliage from the sets. I used acrylic paints on the covers and Distress inks and stencils inside. I used lots of quotes, mainly from Words of Inspiration


Next, I have a grey board die cut which I covered with wood effect paper. I stamped and fussy cut two of the butterflies and added "No3" from Lupin Blueprint


This is a MDF piece which I have covered in Black and White Papers and sponged some acrylic paint around the edges in blue, green and copper. I then fussy cut some of the butterflies and coloured in more muted shades to resemble moths. I stamped the word "moth" using Distressed Alphabet Lower Case. I then added a die cut lamp post for the moths to flutter around!
 

My last piece is a round MDF coaster to which I have added self adhesive cork. Even though this was quite thick, I was still able to use my stamping platform to stamp the leafy sprig from Thistle Butterfly  into a wreath. I stamped the butterfly in the centre, but it didn't show up too well, so I stamped it onto one of the blank sheets in the Black and White paper pack and used a gel medium to stick it over the stamped image. I finished by using a white paint pen to highlight the berries and the butterfly. I used a matt varnish to seal it.


Thanks for looking.

Sandra x

Saturday, 19 December 2020

You light up my World by Brenda


Hello all, today's first card uses the lovely Floral Perfumery and Butterfly Perfumery stamped onto an Oxide background and lightly coloured in with the same colour Distress Markers. I added some random stamping in the background using worker stamps from various sets, a sentiment from Lupin Blueprint and the word Love built up with several die cut layers.


Here is another one, this time using Floral Grung and there's a YouTube video of how I made it, a really quick one with a Gelli Plate background.


And a very simple shaker card, a die cut base, one of the circles from Shaded Baubles stamped with Versafine Clair and the Tomte Gnomes stamped in the same colours on the inside, sequins and glass beads for the shaker element.


This is my last post before Christmas so I would like to wish everyone a peaceful and joyous festive season, stay safe and well and let's hope 2021 is a better year for us all.

Tuesday, 27 October 2020

Pretty Notelets

Hello, I'm sharing a few more of my samples from the September show on Hochanda using the second set of blueprints stamps - Lupin Blueprint, Chrysanthemum Blueprint, Echinacea Blueprint and Allium Blueprint.

I made a set of little set of notelets using the small individual stamps that are in each stamp set.

To make my notelets I first cut some circles from cardstock to fit on my cards and blended some Distress Inks onto the background. I then used the same colour with a stencil before stamping the flower and sentiment.  I finished by doodling around the edges


Thanks for looking
Sandra x

Monday, 26 October 2020

all together in the floral dance (by Rachel)

 Hello there! Rachel here. Did I get you singing? Hope so - then you'll be smiling as you look over some more samples I made for the September shows.

This first one is using the main image from the Echinacea Blueprint stamp set - stamped onto a gel press background and coloured with watercolour pencils. This panel has been mounted onto a card stamped using more industrial aspects of the stamp sets. 


This was my upcycling project - I used a cardboard box that something had been packaged in and covered it in the postcards that Lesley sells. Onto these I decoupaged images from the allium and the lupin sets - it made a very bright and cheerful gift box.


And finally - my sign  from the craft along shows - I used this to create this sign. The back back of the plaque is dry brushed in paint and has stamped images from the industrial parts of the stamp sets all over it. Next the letters were given a coat of acrylic paint and then stamped over and finally I added the allium to the centre of the O.


Hope you have picked up a few more ideas of ways you could use your stamps.

Big hugs

Rachel xx


Friday, 23 October 2020

Having a Lightbulb Moment (by Judith)

Hello everyone, for my final post this month, I am sharing two projects using the beautiful Lupin Blueprint stamp set. This fabulous stamp set is full of beautiful images, and some lovely sentiments. I really enjoyed working with this stamp set and will definitely be using it a lot!

For my first card, I created a background using a technique that Lesley shared with us on a Butterfly Tree get together. I painted a piece of scrapbook paper with white paint, then rolled Distress Ink over the top. I added stamping and stencilling with the same colours to create a collage effect. The whole effect looks very vintage, and makes a great background for the main image. I coloured the image with pencils, coordinating with the background colours. I also added some shading around the edge with Distress Ink.

To create my second card, I used a piece of scrap background from my stash box. This brightly coloured piece of card was crying out for some of the lightbulbs, and I stamped them across the yellow area in the middle of the page. I drew some lines at the top to hang the bulbs from, so that they were not floating in mid air. I created a matching background using the same colours of Distress Ink, and stamped the large lightbulb randomly over the top, using turquoise Archival Ink.

I hope that you have enjoyed our cards this month, thanks so much for stopping by. Take care, and stay safe.


Judith xx

Tuesday, 20 October 2020

Circle canvas by Brenda


Morning everyone, I have some more inspiration to share from my samples from last months Hochanda shows using the lovely Blueprint stamp sets.

At the top a circle canvas which I treated to an abundance of Gesso, Distress Inks, Acrylic Paint and stencilling before stamping Chrysanthemum Blueprint  and  Lupin Blueprint which I coloured in with Distress Markers. Two of the silhouette name tags, some clock hands and a few gems.


More colour, this time one of the Postcards covered with some texture paste stencilling and strips of white card to tone it down a bit. I stamped and cut out the Lupin Blueprint which I coloured with Distress Markers.