Pin It button on image hover
Showing posts with label Winter Fairies. Show all posts

Tuesday, 11 March 2014

Have a Fairy Happy Birthday! (posted by Judith)

Hi Folks, here's a project for you using stamps from the new Spring Fairy Collection stamp set combined with some older favourites. I wanted to create a gift set that comprised of a card, gift tag and matching wrapping paper, using soft pastel tones. I picked five shades of Memento Ink, and created a background on my tag, and a large piece of white card. I stamped the fairies and butterflies using Versafine Onyx Black Ink. The extra fairies and buterflies are from the Winter Fairy and Autumn Fairy stamp sets.

For the tag, I added a sprinkling of glitter on the butterfly wings and the trail of stars. The sentiment comes from the Fairyland Words clear stamp set. For the card, I added some clouds from the Magical Landscapes/Fantasy Castles Multibuy stamp set and a flower from the Decadent Brocade stamp set, which has been decoupaged. I have added some die cut leaves, and a sentiment as before.The wrapping paper was created using the same stamps as the tag, stamped with each of the ink colours, graduating across the paper.


Thanks for stopping by, Judith xx

Saturday, 30 November 2013

Green feathered Fairy by Miranda


Hi there,

Today one of the December fairies I've played with........I've stamped her on a piece of watercolour paper which was worked on with Dylusion inks. I did use a crafters template(peacock feathers) on the background. The fairy was stamped on the same paper and coloured with Derwent Soft Colour pencils. In the background you can see a fragment of the Nature Fragments sheet. These fragments are such fun to work with and so versatile to use.
Only added some gemstones for a subtle sparkle..........and the quote is from the 'Reindeer landscape', one I am going to use a lot! Believe.......


Thanks for visiting and have a sparkling day!

Miranda

Wednesday, 27 November 2013

Winter Fairy and Snow (by Shirley)

Hello everyone

I have a design today featuring a fairy from the new Winter Fairy Collection and it's starting to snow on her.   I guess fairies don't need warm clothing :)  


The beautiful fairy is from January Fairy and the tree is from February Fairy.   I also used the snowflake edge from Winter Edges.  I love how Chocolate Baroque's beautiful stamp sets work so well together.   The designer is very talented. 

I used blue design paper from my stash that actually has a wood grain pattern, but I liked the colour for the sky.   I did all the stamping with Rich Cocoa Memento Dye Ink and colouring with Prisma Pencils.  I masked the fairy before stamping the trees and 'ground'.    I stamped the bottom part of the snowflake edge on the ground and coloured it in.   I used puff paint for the snow.

Thanks for visiting and have a great day
Shirley

Tuesday, 26 November 2013

Fairy Dust (posted by Claire)

Good morning, Claire here with another sample created using the beautiful Winter Fairy Collection. As soon as I saw these stamps I pictured the fairies flying around in a circle scattering fairy dust as they went.


I began by blending distress inks on some white card (I used Peeled Paint, Tumbled Glass, Broken Chine, Shaded Lilac) and then stamped  the swirls from the January stamp set around the edges. Once the background was dry I stamped the fairies (also from the January set) and the fairy dust (from February) with versamark and then embossed with a sparkly white embossing powder.

The sentiment is from Damask Reindeer, again embossed with the same embossing powder and die cut with Spellbinders, dusting a little more embossing powder around the edges. To finish off I added a bow and some little pearls in the corners.

Thanks for visiting today
Claire xx

Monday, 25 November 2013

A Festive Fairy (by Debbie)

Hello from a chaotic craft room DT member. I have been without a PC and craft room for five days. I'll tell the short version. My hubby and I discussed that in the New Year we would revamp my craft space. He told me last weekend that he needed to drill a hole in the wall from the garage into my room but one of the units was in the way. I got in from work on Tuesday and everything had been stripped out and stored in the garage. Wednesday and Thursday were spent painting and shopping for new storage units, a chair and new flooring. Friday he laid the new floor and we built the new furniture. Saturday I spent carefully retrieving my precious Chocolate Baroque stamps from under the piles of magazines and papers. BUT I'm not going to moan as I now have an amazing space to create in, just a little earlier than planned. I'll post a few photo's on my blog this week when I've sorted a little more.
My Festive fairy is from the February set of stamps and she is a joy to work with. I stamped her onto white smooth card and coloured her with alcohol pens. I added Wink of Stella clear to her wings but unfortunately the photograph hasn't picked it up. Using Peacock Feathers Distress Ink I blended around the edges to add more colour. With the same colour inkpad I stamped the holly flourish to create a background and with black ink stamped the greeting at the bottom. I mounted onto black card and trimmed with a fine bored as I didn't want it to domineer the card. Thank you for visiting. Debbie

Sunday, 24 November 2013

Winter Fairies & Abstract Fragments CAS Style (by Shirley)

Hello everyone,  I hope your weekend is going well.   It's been colder than normal this week in Ontario, Canada and we've had a little snow!  I'm not ready for Winter! 

I have several 'quick make' cards today using the new stamps.


For the above card, I used TCW Starfall Stencil and Distress Inks to create the background.  I stamped the sentiment, "Magic Happens" and the fairy from December Fairy with black ink.  I used Stardust Stickles on her wings.

I used the same Fairy and stencil for the card below but added holly from the Winter Fairy Collection.


The next two cards I used fragments from Abstract Fragments.


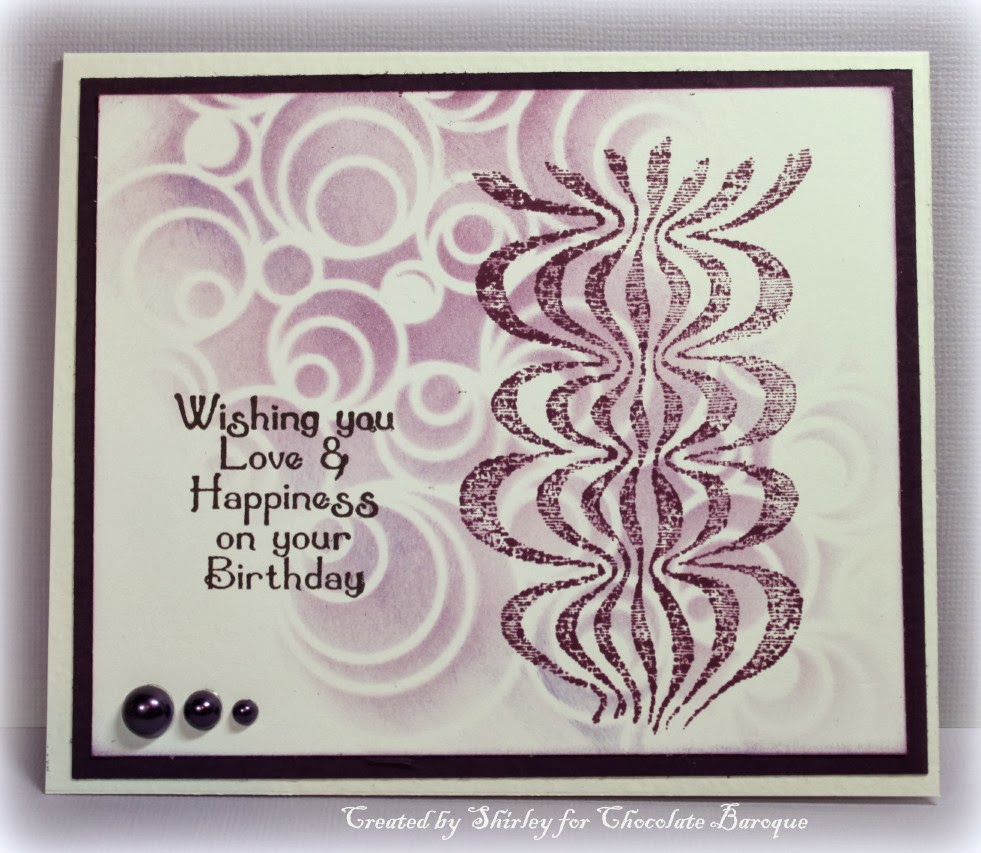
For the above card I used TCW Mod Spirals stencil in the background using Shaded Lilac Distress Ink.  Next I inked over top with TCW Butterflies stencil and while the stencil was in place I stamped with a fragment from Abstract Fragments using Seedless Preserves.  Glenda called it 'stampencilling':)    'Best Wishes' is from Loving Sentiments.


For the above card I used the same stencil and another fragment from Abstract Fragments and the same Distress Inks.   The sentiment is from Birthday Words.

Thanks for visiting and enjoy your day!
Shirley

Wednesday, 20 November 2013

Frosty Fairy (posted by Judith)

Hi Folks, here is a Wintery sample for you using the Winter Fairy stamp collection. I stamped the main fairy onto a piece of white card, and then created a mask which I placed over the image. I stamped some mushrooms from the Autumn Fairy collection and then created masks for those as well. I made some paper masks for the hills, by tearing some scrap paper, and sponged various shades of green across the background. Fnally, I used some blue ink to create a sky, adding a circle mask to create a sun.

I added some yellow in the circle area for the sun, and embossed some trees using white embossing powder. I then removed the masks and coloured the stamped images using Graph it markers. To finish, I added some glitter glue along the edges of the hills and to highlight the mushrooms.

To create the background, I embossed some snowflakes from the Reindeer Landscape stamp set using white embossing powder, and then covered the background with blue ink. I used a sentiment from the Winter Fairies stamp set, and added some blue organza ribbon and some gems to finish.

Thanks for stopping by, Judith xx

Tuesday, 19 November 2013

Believe in the magic ..... (posted by Claire)

Good morning, Claire here with my first sample using the beautiful Winter Fairies . I've used this pretty fairy from the February set, isn't she a beauty???


I've coloured her with Graph'It markers and added some glamour dust to her wings.


 The background was made with PanPastels and a snowflake stamp from Damask Reindeer which I embossed with white embossing powder. The sentiment is also from Damask Reindeer. I've used red card to mat and layer and added a little red bow and a snowflake charm to finish off.

Thanks so much for visiting, 
Claire xx


Sunday, 17 November 2013

Winter Fairies for Christmas (by Shirley)

Hello everyone, I hope you are having a great weekend.

I have a couple of designs today featuring stamps from the new beautiful Winter Fairy Collection.  I used images from December Fairy for the card below.


The background was created with Calypso Teal, After Midnight and White Linen Dylusions spray inks and I sprinkled a little salt while wet.   I stencilled a little over the background using Circle Explosion by TCW.   I stamped the angel with Seedless Preserves Distress Ink, embossed with clear, cut it out, matted and coloured with Dylusions inks. 

Next is a beautiful fairy from February Fairy.


I created the background with Festive Berries Distress Ink using an Acrylic Block.   I stamped the trees from Reindeer Landscape with Festive Berries Distress Ink.    I embossed the holly edge from Christmas Edges and Believe from Reindeer Landscape with gold.  The fairy is also embossed with gold, coloured with Tombow markers, cut out and attached.  I added Diamond Stickles to her wings and dress.


I hope you can come back often to see what my talented teammates are creating.

Thanks for visiting and have a great day!
Shirley

Friday, 15 November 2013

Thank you Fairies (posted by Judith)

Hi Folks, I have a project to show you using the gorgeous new Winter Fairy Collection stamp set. Around this time of year, we have lots of thank yous to send, and so I decided to make a gift wallet containing some thank you cards, using lots of the fairy images from both this stamp set and the Autumn Fairy stamp set.

I started my project by cutting some paper masks from scrap paper and inking through the masks with a variety of inks onto plain white card cut to size.


I blended the colours as I graduated down the area that I was shading to get a soft blend. I removed the mask and stamped one of the fairies from the stamp plate over the shaded area. On each card, I added a sentiment taken from Words of Gratitude or Pretty Poppies stamp sheets. I added black matting to the cards to tie in with the stamping.


I cut two pieces of black card 21cms x 19.5cms.  I then scored 1.5cms at one end of each piece, and overlapped them, sticking them together at this point. I scored 2.5cms at each outer edge, and 2.5cms along the bottom, cutting out a gap where the overlap occurred along the bottom. I trimmed the bottom edges slightly at each of the four ends. I folded the sides and the bottoms inwards, and secured the outer corners with glue or double sided tape.


 I placed a piece of ribbon across the middle of the front of the folder before sticking on the front design. I actually used two pieces of ribbon, a shorter piece on the right, and a longer piece on the left to wrap right around the back.


Thanks for stopping by, Judith xx

Thursday, 14 November 2013

Welcoming our Winter Fairies (by Glenda)


I'm delighted to announce the latest in our collection of Fairy stamps - meet the Winter Fairies

https://www.chocolatebaroque.com/Winter-Fairy-Collection-Unmounted-Rubber-Stamps-Multi-buy--DL-_p_5549.html
This time we are releasing December, January and February Fairy sets with a multi-buy available on all three.  There's also a new Winter Fairy Inspirations leaflet with some beautiful artwork from our talented DT girls.
https://www.chocolatebaroque.com/Winter-Fairy-Inspirations-Leaflet_p_5729.html
The leaflet is free for a limited time when you purchase the three set multi-buy.

I made this little set of four ATCs with a mixture of stamps from all three sets and I will be jazzing them up a touch and offering them for trade on Facebook over the weekend, so why not 'like' our page so you can see what we're up to over there.  (Click here to visit the Chocolate Baroque facebook page.)


We also have a super clear set called Amazing Birthday featuring a collection of sentiments which I have been finding incredibly useful lately.  

http://www.chocolatebaroque.com/Amazing-Birthday-Unmounted-Clear-stamp-sheet--A5-_p_5734.html

They really have motivated me to get many of my stamped bits and pieces turned into finished cards as you can see over on my own blog here.  I'm not a natural finisher, I have a huge box of unfinished 'bits', so it was very satisfying to get that sense of accomplishment from finishing a batch of cards.  (It's also very motivational - I haven't stopped crafting all week!)

As always, the girls have some great cards and projects lined up for you and you really don't want to miss the lovely inspiration leaflet - it will definitely get your crafting juices flowing!


PS - we really appreciate you taking the time to leave a comment on all of our DT blog posts, so at the end of this month each DT member (me included) will choose one commenter whose name will go into a hat and one of those names will be drawn randomly to win a Chocolate Baroque gift voucher.