Pin It button on image hover
Showing posts with label Amazing Birthday. Show all posts

Sunday, 13 March 2016

Russian Dolls (by Julie)

Hello! Hope your weekend is going well. Today I have two cards made with the fabulous new Babushka Dolls. I have to confess that after being a little apprehensive about working with this very different set, I am pleased to report that they are loads of fun and more importantly, very versatile so I hope you like them as much as I do.


My first card shows a parade of dolls emerging from the temple. As they are different sizes you can play around with perspective to see what suits you best. A swirly corner stencil was used to create a garden and another texture stencil was used the other side of the pathway. The design has been coloured with a mixture of Brush-markers and Distress inks and finished off with a birthday sentiment from the Amazing Birthday clear sentiment set.


My second card is a very simple card and it is made even easier if you keep the three, smallest Russian dolls together when you cut your stamps out.
I have inked up the trio with Onyx Black Versafine and stamped onto a piece of spare card before water-colouring with brush markers.
I cut the card into a square to fit the centre of my base card and brushed the edges with Tea Dye Distress ink. The crackled edges on the base card were stamped with the crackled egg from the Natural Eggs clear set and finished off with the Tea Dye Distress ink as before.

Many thanks for stopping by and please call back for another Design Team member's inspiration.

Julie xx

Tuesday, 8 March 2016

Pink and Blue (posted by Judith)

Hello everyone, I hope that you are enjoying the fabulous artwork created by my Design Team mates using this month's Babushka stamp set. I absoloutely love the versatility of this quirky stamp set, and the many possibilities that the stamps offer. I have two cards to share with you today, in very different colour options.

For my first card, I created a wrinkle free Distress background, and stamped the three dolls onto some white card using white embossing powder. I also stamped the face areas again onto some spare card using black ink. I coloured the images using water based markers and a water brush.

I die cut some hexagons, and stamped the flower head from the Breath of Spring stamp set on to the hexagons, again using white embossing powder. I coloured the hexagons using tones of blue Distress Ink, to match the Babushka dolls.  I ironed off the white embossing from the hexagons so that I could add faux stitching to the edges. I also added faux stitching around the edge of the background. Finally, I added a sentiment from the Amazing Birthday clear stamp set.

My second card became a Mother's Day card for my Mum. She loves Russian dolls, and always wanted to collect them. When we were growing up, I always remember her hankering after them, but never being able to afford them. So, I thought that it would be lovely to incorporate some of the images into a card for her.

I stamped a window fragment from the Texture Fragments stamp set onto my background, and added gold embossing powder. Before using the heat gun, I stamped the large fragment from the Dusky Damask stamp set using a deep purple ink into two of the corners of the background, and added clear embossing powder. I then heat set the images.

I covered the background with a blend of pink and purple inks, before adding a stencil, and repeated the process, to deepen the colours. I stamped the Babushka images onto a spare piece of card, using gold embossing powder, and coloured them using toning colours. Finally, I added a sentiment from the For Mum clear stamp set.

I will be back later in the month with some more ideas using these lovely stamps, but do keep checking back to see what my Team mates have been up to. Thanks for stopping by, Judith xx
Friday, 26 February 2016

Sending Smiles (by Judith)

Hello everyone, I'm back again with another project created using one of this month's featured stamps. I hope that you are enjoying the Design Team inspiration using these lovely stamps, we have been really enjoying creating our artwork for you.

I decided to create a piece of collage in the style of an old postcard as the focal point for my card, and so I cut a piece of scrapbook paper to the correct size, and gathered a selection of stamps that I could use to create my postcard. I chose a couple of butterflies, and two stamps from a great little mini set found within this collection.

I stamped the butterflies first, and covered them with a mask, before adding the large flower stamp. I then added the little postage mark, and the postcard sentiment last. I coloured the images with pencils, and edged the piece with Distress Ink.

I created a little tag from a piece of scrap card to fit a small paper wallet, and stamped a fitting sentiment, taken from the Amazing Birthday stamp set. I added some stamps from the Mail Art mini stamp set as before to complete the tag, along with some dark brown ribbon.
If you would like to know more details about my card, then hop along to my blog. Thanks for stopping by, Judith xx


Wednesday, 10 February 2016

Guest Post - Take one Flower by Lesley Ebdon


Hello Again Chocolate Baroque friends and a belated Happy New Year to you all!

It's time for my second stint as a guest designer on the blog and today I have a pretty, fairly simple card to share with you.


The stamps used for the flower and leaves are from the Tangled Garden set with the sentiment coming from my much loved and used Amazing Birthday clear stamp set.  I've used pencils to colour the flower and leaves and a stencil with inks and a spritz of Glimmer Mist for a touch of sparkle for the background.

Full details can be found over on my blog...

I'll be back to share with you again next week and until then have a good week and enjoy the wonderful inspiration from the DT proper.

Hugs
Lesley

Monday, 2 November 2015

Smiling Flower (posted by Judith)

Hello everyone, I have a project to share using one of the new individual cling mounted flowers currently on offer on the website. These beautiful large flowers are perfect as centrepieces for your cards, and are sure to brighten anyone's day. I have chosen to use the Swirl Centre Flowerhead to create my card, as I love the overall design of this particular flower.

I created a wrinkle free distress background on a piece of watercolour card, and stamped the flowerhead twice onto a spare piece of watercolour card. I also stamped a large leaf from the Tangled Garden stamp set twice onto the watercolour card. I coloured the images with alcohol pens and added shading with pencils.

I cut the images out, and stuck them to the card, creating two layers on the flower. I then added some zentangle details using a fine permanent pen. I added a sentiment from the Amazing Birthday clear stamp set, and matted the background onto some black card to finish.


If you would like to know more details about this card, you can stop by my blog. Be sure to keep checking the Design Team blog every day this month for lots of inspiration from my Team mates using these beautiful stamps, Judith xx

Saturday, 3 October 2015

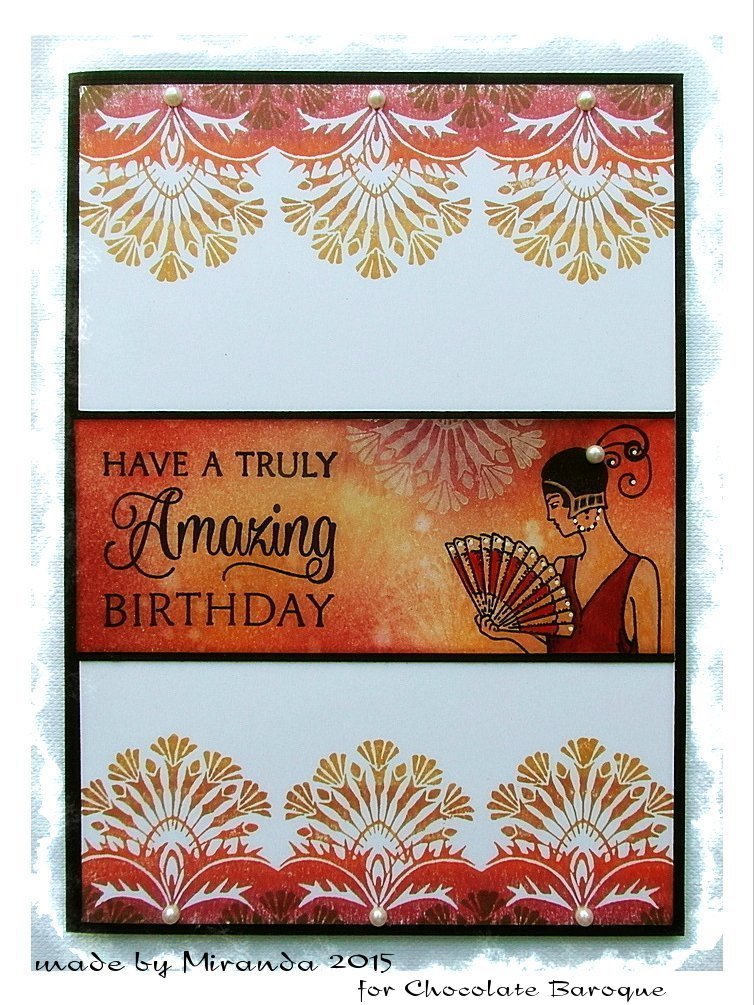
Have a truly amazing Birthday......(by Miranda)


Hi there lovely people,

Today I will show you my first take on the new stamps. I have played with the new beautiful Exquisite edges. They combine so beautiful with all the Art Deco/Nouveau style stamps which Chocolate Baroque has in their collection.
I have combined them with the Fabulous Flappers and a sentiment from the Amazing Birthday wishes.

Well now onto my card.........
I have stamped the edges with several Memento colors; Peanut Brittle,Morocco, Potters Clay, Rhubarb stalk and Rich Cacao. The center piece was blended with matching Distress inks. I stamped a part of the edge with white ink. I stamped a part of one of the ladies of the fabulous flappers and coloured her with color pencil and some white acrylic marker accents.


I really love this style of stamps and I will be happy to play more with them, so next time more art deco style from me. 

Thanks for watching and always enjoy to read your comments! 


Sunday, 26 July 2015

Two for one (by Lesley)

I love turning office stationery products into craft items and today I am using good old fashioned blotting paper to create this card. Bit of a long post but I hope you enjoy the technique.


Take a piece of blotting paper approximately 30 x 9cm, mist thoroughly with plain water and then spritz with spray inks of your choice. I used Dylusions Ink Sprays in Squeezed Orange, Lemon Zest, Bubblegum Pink and Cherry Pie. Pick up the paper and allow that colours to run into each other. Soak up the excess moisture with kitchen roll and then dry gently with a heat gun. Keep turn the blotting paper over as it will curl as it dries.
Once dry you will have the bright side on which the inks were sprayed and the reverse will be a paler version. Fold a piece of white card measuring 14.5 x 21 cm in half to make a tall thin card. Draw a curve across the top of the card and then cut out. (You can use a cup, mug or other circular object you have as a template). Using wet adhesive attach the blotting paper, pale side uppermost, to the card. Allow to dry.

Ink up the bird image from A Little Bird Told Me using Versafine Onyx Black and stamp on to the front of the card. Ink up the leaves only on the large bird image from As Free as a Bird (use a baby wipe to remove any ink that may have strayed on to other parts of the image) and stamp across the top of the card. Set aside to dry.

Take the remaining piece of blotting paper and ink the bird again, but this time just the body and stamp on to the bright side. Cut out and set aside. Ink up the leaves again and stamp onto the bright side of the blotting paper, repeat. Cut out the leaves plus the berries and leaf.  Attach the body of the bird over the stamped image on the card. Add the leaves and berries to the branch as shown and finish with a sentiment from the Amazing Birthday clear set.

By using the front and reverse of the same piece of blotting paper you can be sure that all the colours tone in together. And there is nothing to say you couldn't use the bright version for the background and stamp the bird and leaves onto the paler side.

Hope this inspires you to try using blotting paper as part of your crafty creations. Experiment with it and see what else you can do; it makes great paper flowers by the way!

Thank you for for stopping by and please call in again to see more ideas from the Design team.


Tuesday, 30 June 2015

Tag Fragments (By Judith & Lesley)

Hi there, today is a joint contribution between Judith and myself.  A couple of weeks ago we were lucky enough to have a play day together and in between the catching up chat you have with a friend you haven't seen for a little while we managed to get a little inky! Strangely enough we both started to use the same colours on a tag and so decided that we would do a tag swap. And here are the results.

So first we have Judith's tag. I coloured the background with Distress inks in Shabby Shutters, Squeezed Lemonade and Dried Marigold, splashed water over the top and patted dry with kitchen towel to give a partially faded look. Then Judith took over.

  • To make the tag stamp the raindrops from Seasonal Fragments with Potting Shed Archival ink. 
  • Next stamp the Snake's Head Fritillary and Honey Bees on to a self adhesive label with Versafine Black Onyx. Colour with pencils of your choice (Judith used Polychromos) and fussy cut. 
  • To finish add die cut corners, tinted with the same Distress inks as the background or stencil a similar image with the inks. Remove the backing from the images and stick into place. 
  • Finally stamp the phrase from the See Beauty clear stamp set with Black Onyx. 
For my tag Judith dabbed some Acrylic Wax randomly over the tag and then sponged the same Distress inks over the top. She then used kitchen roll to polish the tag, thereby removing the ink from the wax to leave her faded background. Here is what I did next.

  • To make the tag stamp one of the floral style images from Seasonal Fragments three times on to 160gsm cardstock with Dried Marigold.  
  • Use a water brush to paint over the images with Squeezed Lemonade.and when dry cut around all three images, cutting one of them slightly smaller than the others. 
  • For the flower centres die cut three circles, two x 30mm and one x 15mm, stamp them with the image from Rustic Fragments using Versafine Olympia Green and colour with watercolour pencils in several shades of yellow and orange (I used Aquarelles). 
  • To give the effect of meadow grass stamp the image from Rustic Fragments along the bottom edge of the tag using Olympic Green. 
  • Stamp the images again on smooth white paper and choose three parts of the image to make stems for the flowers. Colour with Shabby Shutters and when dry cut out and stick to the tag with wet glue. 
  • To complete, attach the centres to the flowers with glue gel and then the flowers to the stems with wet glue. Stamp the phrase from Amazing Birthday with Olympia Green.
It is so interesting to see that, although Judith and I completed our tags over 200 miles apart, we have both focused on a flower theme. I hope you like our joint designs, it is really good fun to start a project and then had it over to a crafty friend to finish.

Thank you for joining us today and I hope you come back soon to see some gorgeous projects created by the Design Team using the new Birds of Paradise stamps.


Wednesday, 13 May 2015

All Wrapped Up (by Lesley)

For today's card I wanted to show you how to create embellishments using stamps from The Sewing Room and Floral Mannequins. There is a full step by step for this, so please pull up a chair and take a break for a few minutes.

  • Stamp the ruffled ribbon from Floral Mannequins three times on to some 160gsm smooth white cardstock using Vintage Photo distress ink.
  • Use a water brush to 'pull' the colour from the ink over each image. Leave to dry thoroughly.
  • Stamp the ribbon again with the same ink, turn the cardstock over and stamp on the reverse in the same position. You want to achieve a 'double sided' ribbon for the faux bow. Easiest way it to measure up from the bottom of the cardstock on both sides, mark a line and then position the stamp on this line.  Repeat the water brush technique and set aside to dry.
  • Stamp the button from The Sewing Room three times using Vintage Photo and then water brush as detailed above.
  • Add shade to the ruffled edge on the ribbons and around the buttons with a watercolour pencil and water brush this shading.
  • When everything is dry cut out and then use a darker colouring pencil along the edges of the ruffles and round the buttons.
  • To make the faux bow use the double sided ribbon you have stamped and bring both edges into the middle to form a bow shape. Glue together with wet adhesive. When dry cut a curved 'V' shape across the top and bottom edge to create a bow shape. Use a pencil, or similar, in the ends of the bow to help form the 'ears'.
  • Glue two of the ribbon pieces together with wet adhesive. When dry attach the full strip horizontally on a folded 5" white square card, placing the join slight left of centre, with wet adhesive. Trim off the excess.
  • To create the vertical ribbon cut the remaining ribbon in two so that when attached it looks like a full strip. Fix with wet adhesive, slipping the edges under the ruffled edge of the horizontal one and trim off any excess.
  • Attach the faux bow over the join and the three buttons as shown.
  • Finally add a wooden button, paper flower or similar in the centre of the bow and stamp the sentiment from the Amazing Birthday clear stamp set using a Versafine inkpad in Vintage Sepia.

I really enjoyed using these stamps to turn paper images into realistic looking embellishments. Hope that you will give this one a try and thank you for visiting. Don't forget there is still more fabulous artwork to come from the Design Team girls.


Tuesday, 7 April 2015

When you need to be quick (by Lesley)

There are times when we want to give a hand made card but time is of the essence and when you are up against the clock is usually when your mojo has gone into hiding! Know that feeling? Me too, I knew that I was scheduled for today's blog post however we were spending a wonderful Easter break with Glenda and Adrian; time was running out.


  • Stamp the Ladys Slipper Orchid with Vintage Photo Distress ink onto smooth white cardstock.
  • Using a fine detail waterbush start brushing the colour from the inked outline of the orchid head. 
  • Work through the whole flower and, if necessary use a heat gun to ensure the image is dry. 
  • Cut around the lace edge and mount onto contrasting card with 3d foam.
  • Stamp the sentiment from the Amazing Birthday clear set with Versafine Vintage Sepia ink.
  • Fold an A4 piece of cream cardstock in half and trim to size. Add the ribbon and attach the topper with double sided adhesive tape.
TIP:  Use a very light touch and a semi dry water brush with this technique (keep a piece of kitchen towel to hand so that you can take off excess water from the brush). By not flooding the image with water you can be more precise in the colouring and shading. Also, start with the head of the flower and work your way down to avoid smudging the leaves.

So the next time you're in a hurry why not give it a try.

Thank you for dropping by today and don't forget you can see new artwork every day created by the wonderful design team.


Monday, 2 March 2015

Spring Birds (posted by Judith)

Hello everyone, I would like to show you some cards made using the Spring Birds multibuy stamp set. These stamps are perfect for this time of year, as our thoughts are turning towards the Spring time, and the warmer weather.

I started my first card by making a wrinkle free distress background; placing some Distress Stains onto a craft mat, and spritzing them with water. I also spritzed a piece of watercolour paper with water and then placed it onto the craft mat, ensuring that the paper was covered with colour. I dried the paper with a heat gun, and then patted it randomly onto the droplets of colour left on my craft mat, creating a second layer of colour on the background. I also dried this with the heat gun.

 I stamped some dog roses and a bird from the Pretty Birdcage stamp set along with a bird taken from the Spring birds stamp set onto the background. I masked the main dog roses before adding the birds and extra roses. I coloured the images with pencils. I added a sentiment from the Mackintosh Sentiments stamp set to finish.


I decided to create an easel card for my second project, and if you would like the full instructions for the assembly, you can check out the details on My Blog. I stamped the Leafy Trails Big Bold Background stamp twice onto plain card, and coloured this with waterbased markers. I edged the card with Distress Ink.

I die cut two circles, and whilst the dies were still in place, I added some colour with Distress Ink. Once I had removed the dies, I then stamped the bird image onto the larger circle, and a sentiment from the Amazing Birthday stamp set onto the smaller circle. I hand cut the mounts for the circles, by drawing around the dies onto some card left over from the easel card. Some toning ribbon completed the card.
   
My Design Team mates have been very busy this month making some beautiful projects with these stamps, so be sure to keep checking back to see what they have made. Thanks for stopping by, Judith xx

Wednesday, 11 February 2015

Chalk and Cheese (posted by Judith)

Hello everyone, I have really been enjoying working with the current stamps of the month, Sketchy Doodle Landscape/Flowers Multibuy, and my samples today are no exception. I wanted to show you the versatility of these stamps, and hopefully I have shown that with the following projects.

I chose to make a set of pastel cards for my first project, and began by masking the top and bottom of the cards, leaving a large strip of the card exposed across the centre. I poured a bit of Acrylic Wax onto a craft mat, and using a piece of cut 'n' dry, I applied the wax onto my stamp. I stamped the image randomly across the card, reapplying the wax to the stamp each time. I cleaned the stamp immediately I had finished stamping the images. Once the wax was dry, I covered the area with Memento ink, choosing soft pastel shades on each card. The wax acted as resist, so that the images were visible through the ink. I removed the masks, and stamped a sentiment onto each card from the Amazing Birthday stamp set using black ink. I stamped some of the butterfly and dragonfly images using Versamark and white embossing powder onto vellum and cut these out, before attaching them to the cards.


My next project was created using a piece of MDF as a base, which I painted with gesso. I added a honeycomb diecut and some lace, which I also painted with gesso.

I embossed several of the sketchy flowers using Versamark and white embossing powder onto a textured card, and cut them out. I added some dark brown die cut pieces, the flowers, and some gessoed metal flowers and butterflies to the board. I layered several of the sketchy flowers up, and added jewellery findings to them, which had been gessoed as well. I sprayed the whole piece with a mixture of blue and lime Dylusion sprays, which I had decanted into mini misters. I wanted a finer spray, without the big droplets that you sometimes get from the normal spray bottles. Finally, I added a bit of gilding wax here and there for a bit of metallic sheen.


I had lots of spray left on my craft mat after this project, so I decided to create a 'mop up' project using some of the left over flowers that I had. So, I dipped a tag through the inks, and also some of the white flowers. I stamped a sentiment from the Rose stem script stamp set over the background using Memento ink. I die cut some leaves from the scrap white card, and added some sari material to the top of the tag.
 I hope that I have given you lots of ideas with these stamps, and that you will have as much fun as I have had. Thanks for stopping by, Judith xx

Tuesday, 20 January 2015

True Love, Be Mine and a Quick Make (by Shirley)

Hello everyone I hope you are doing well.

I have several designs to show today featuring the new gorgeous Punky Hearts and Fluttering Hearts.


The background above was created with Salty Ocean, Shaded Lilac Distress Inks using an acrylic block and water.   I also used a heart stencil with Distress Ink.     I stamped the bubbles from Decorative Edges with Seedless Preserves Distress ink and the large heart from Fluttering Hearts with Shaded Lilac Distress Ink.

The images were stamped with black Archival ink and bleached with a little bleach & water and then coloured with Dylusions inks mixed with water on my craft mat.

I dry embossed the heart on the balloon and centres of the flower hearts on the back with a stylus and foam mat.  I also highlighted with a white pen and added stickles.    'With Love' is from Mackintosh Sentiments.

I used the lovely balloon again for this design below but stamped a different sentiment in the centre:


I blended Distress Inks using ripped card stock as a mask to create the background above.  I also stamped two fragments from Texture Fragments and flowers from Patchwork Landscape.  The balloon from Punky Hearts was painted with water colour markers.

And below is a quick make:


The above card with the pretty heart from Fluttering Hearts can be made in 10 minutes or less.  I drew a pencil line where I wanted to stamp which was easy to erase.  Thank you is from the Amazing Birthday set.    I hand drew a squiggly line around the edge.  Easy!

Thanks for your visit and have a great day,
Shirleyx

Saturday, 10 January 2015

A good heart (by Lesley)

When time is short and you need a card in a hurry then a clean and simple look is all you need. So today I want to show you a quick card using the Punky Hearts stamp set.


  • Trim approximately 2" off the short edge of an A4 piece of white card and fold in half. 
  • Mask off a strip down the front of the card, setting it slightly off centre.
  • Ink up the crackle stamp from the Echoes of Italy stamp set using Peacock Feathers Distress ink and stamp randomly over the masked strip.
  • On a piece of 160gsm card colour an area large enough for the image you wish to use with a bright red alcohol marker. 
  • When dry stamp the heart from Punky Hearts with Versamark. Emboss with a turquoise embossing powder. Cut out and set aside.
  • Using the offcut from the card stamp the sentiment from Amazing Birthday with Peacock Feathers. Trim to suit and run the inkpad around the edges.
  • Add 3d foam to both the heart and the sentiment strip and assemble as illustrated.
We don't always have the right coloured card or paper for our projects and I find that using alcohol markers on a decent weight stamping card is a quick and easy substitute. Whilst creating a patterned strip behind your focal image keeps the weight down for postage and is a neat alternative to using ribbon.

As usual there are more stunning samples to come from our talented Design Team, so please keep popping back to keep up with all their fab ideas.


Sunday, 2 November 2014

Changing Colours of Autumn (posted by Judith)

Hello everyone, I have a couple of projects to share using the new stamp sheets of the month for November.

My first card uses the lovely artichoke stamp from the Mellow Fruitfulness stamp set. I stamped the image onto smooth watercolour paper and then masked the image before adding a thistle image from the Wild Meadow stamp set. I added some texture in two corners of the background using a stencil and some texture paste. I coloured the background using dye based inks, and then stamped an image from the Harlequin Fragments stamp set over the top. I added some metallic wax to the stencilled area for a bit of interest. I coloured the stamped image using pencils. I stamped a sentiment from the Mackintosh Sentiments clear stamp set in one corner, and then added some plum shading around the edges of the background, before matting the whole thing onto purple card.


My second project was made using an oval cut from smooth watercolour paper, onto which I stamped and embossed the row of trees from the Autumn Edges stamp set. I used black ink and a clear embossing powder for a nice crisp image. I then used various tones of Distress Ink, and washed the colour loosely over the background with a large brush and some water. Once this was dry, I added deeper tones for shading, and blended it with a water brush. I added lots of little dots in Autumn tones to the grassy area to resemble leaves. I stuck the oval to a large kraft card blank.

I stamped the row of open leaves several times onto scraps of paper that I had left over from other projects. Some papers I had coloured myself, and some papers were ready made scrapbook papers, but I chose colours that were suitably Autumnal. I cut the leaves out and arranged them in a pleasing fashion around the edge of the image, before sticking them down. Finally, I added a sentiment from the Amazing Birthday clear stamp set. 


Thanks for stopping by, Judith xx


Tuesday, 30 September 2014

Autumn Tones (posted by Judith)

Hello Folks, I have some cards to share today, using some of the lovely new stamps that have been recently launched on the website. I love this time of year, as we are moving into Autumn, and enjoy working with the rich warm colours that are so evocative of the foliage that you see around on the trees and in the hedgerows.

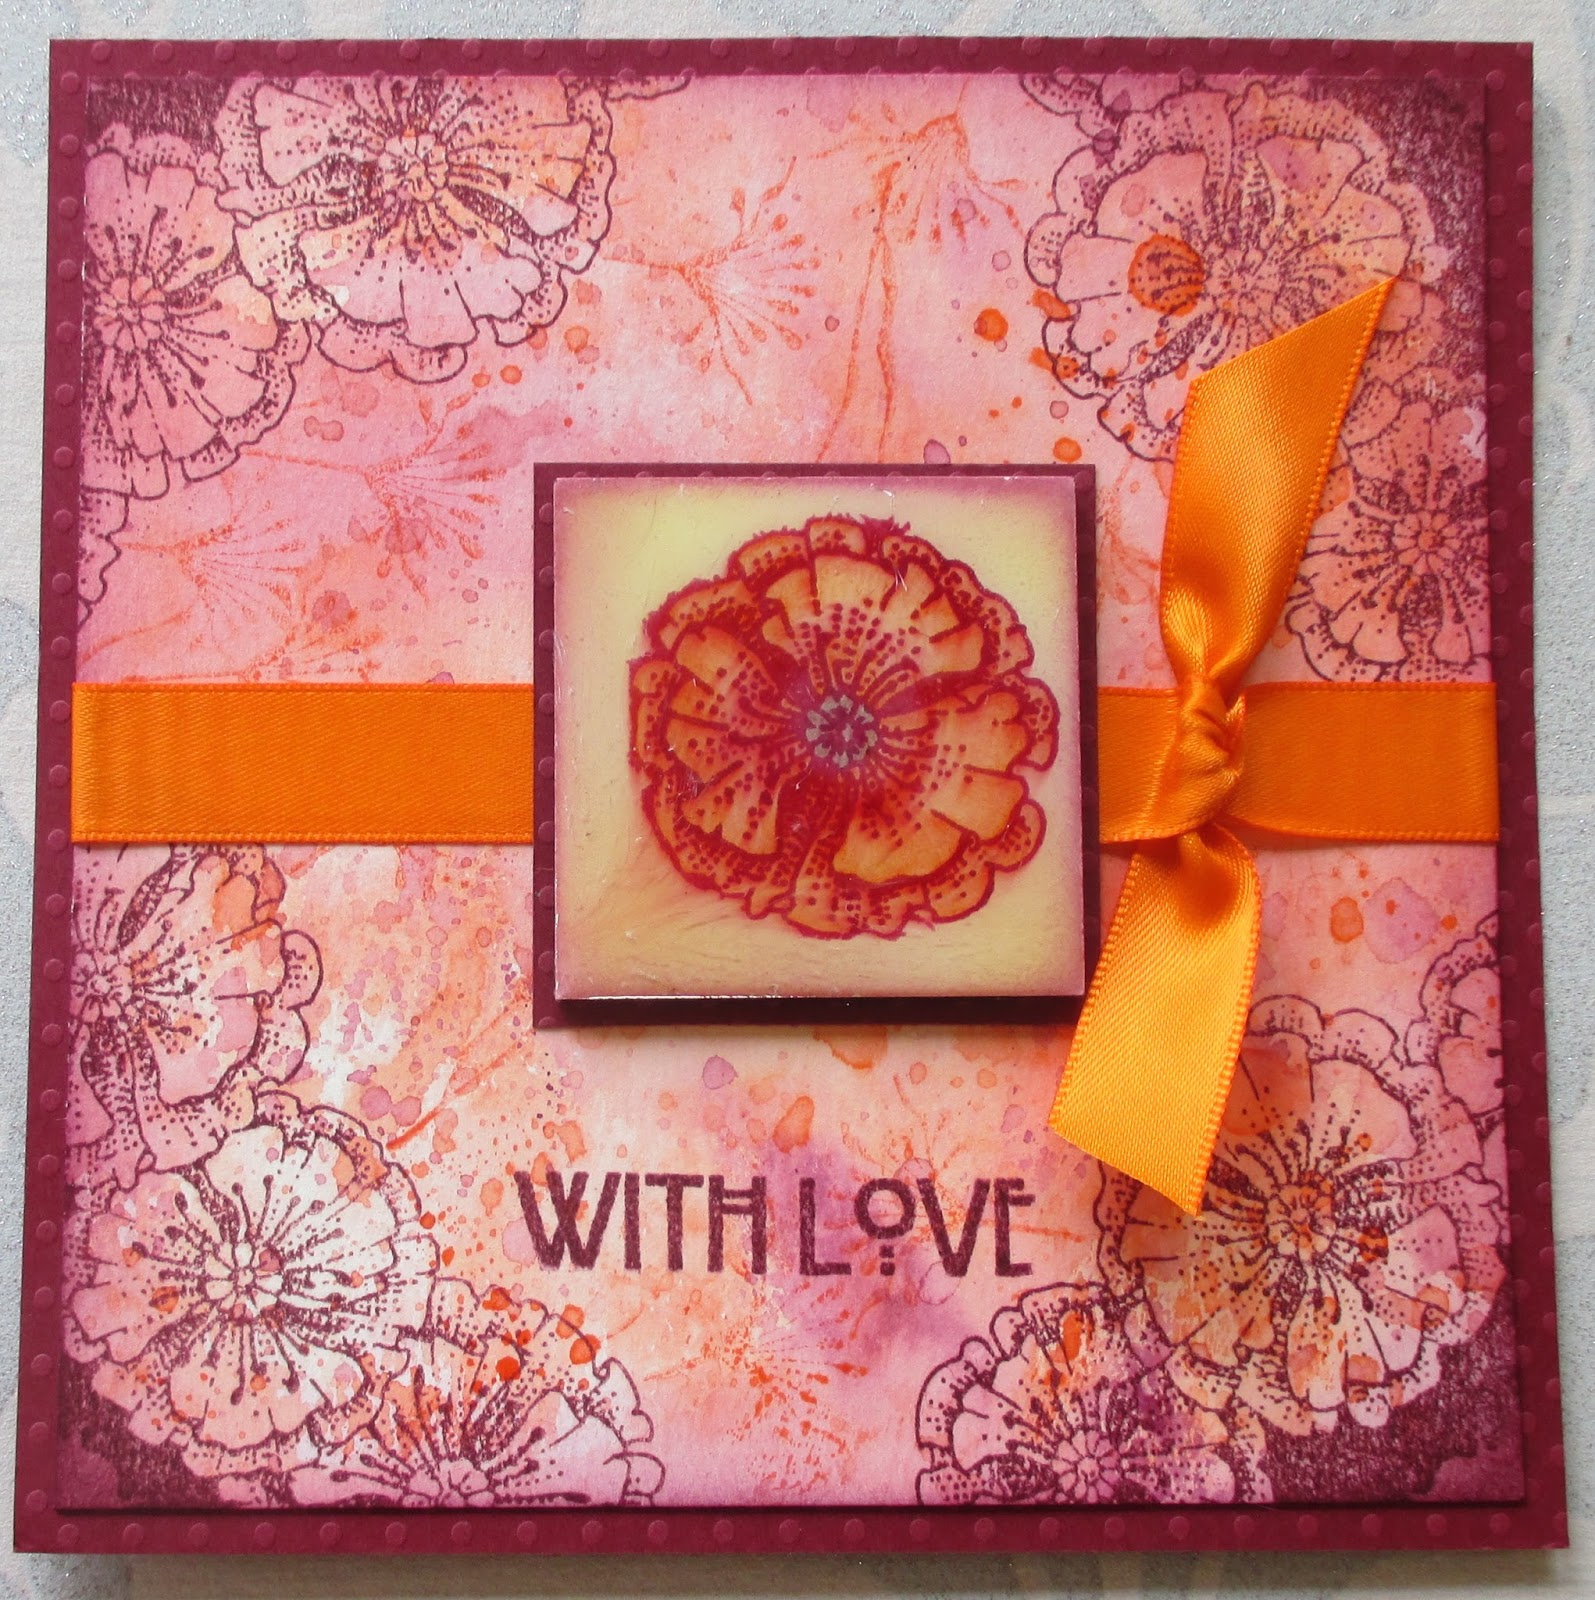
For my first two cards, I made a wrinkle free Distress background, using orange and plum coloured Distress Inks. I have used a stamp taken from the Poppy Edges stamp set, and stamped around the corners of a piece of the background, using a darker plum ink. I masked the corners, and then stamped an image from the Poppy Meadow stamp set over the background using the orange ink that I used to make my background. However, I stamped the image onto scrap paper first, before I stamped onto the background, as I did not want the image to be too vibrant. I masked off part of the poppy edge stamp with masking tape, before I inked up one of the flowers, and then peeled off the masking tape. I then stamped the single flower onto a piece of stampbord. I coloured the image with pencils, and then covered the surface with three layers of ultra thick embossing powder, to create a tile effect. I added a sentiment from the Mackintosh Sentiments clear stamp set.


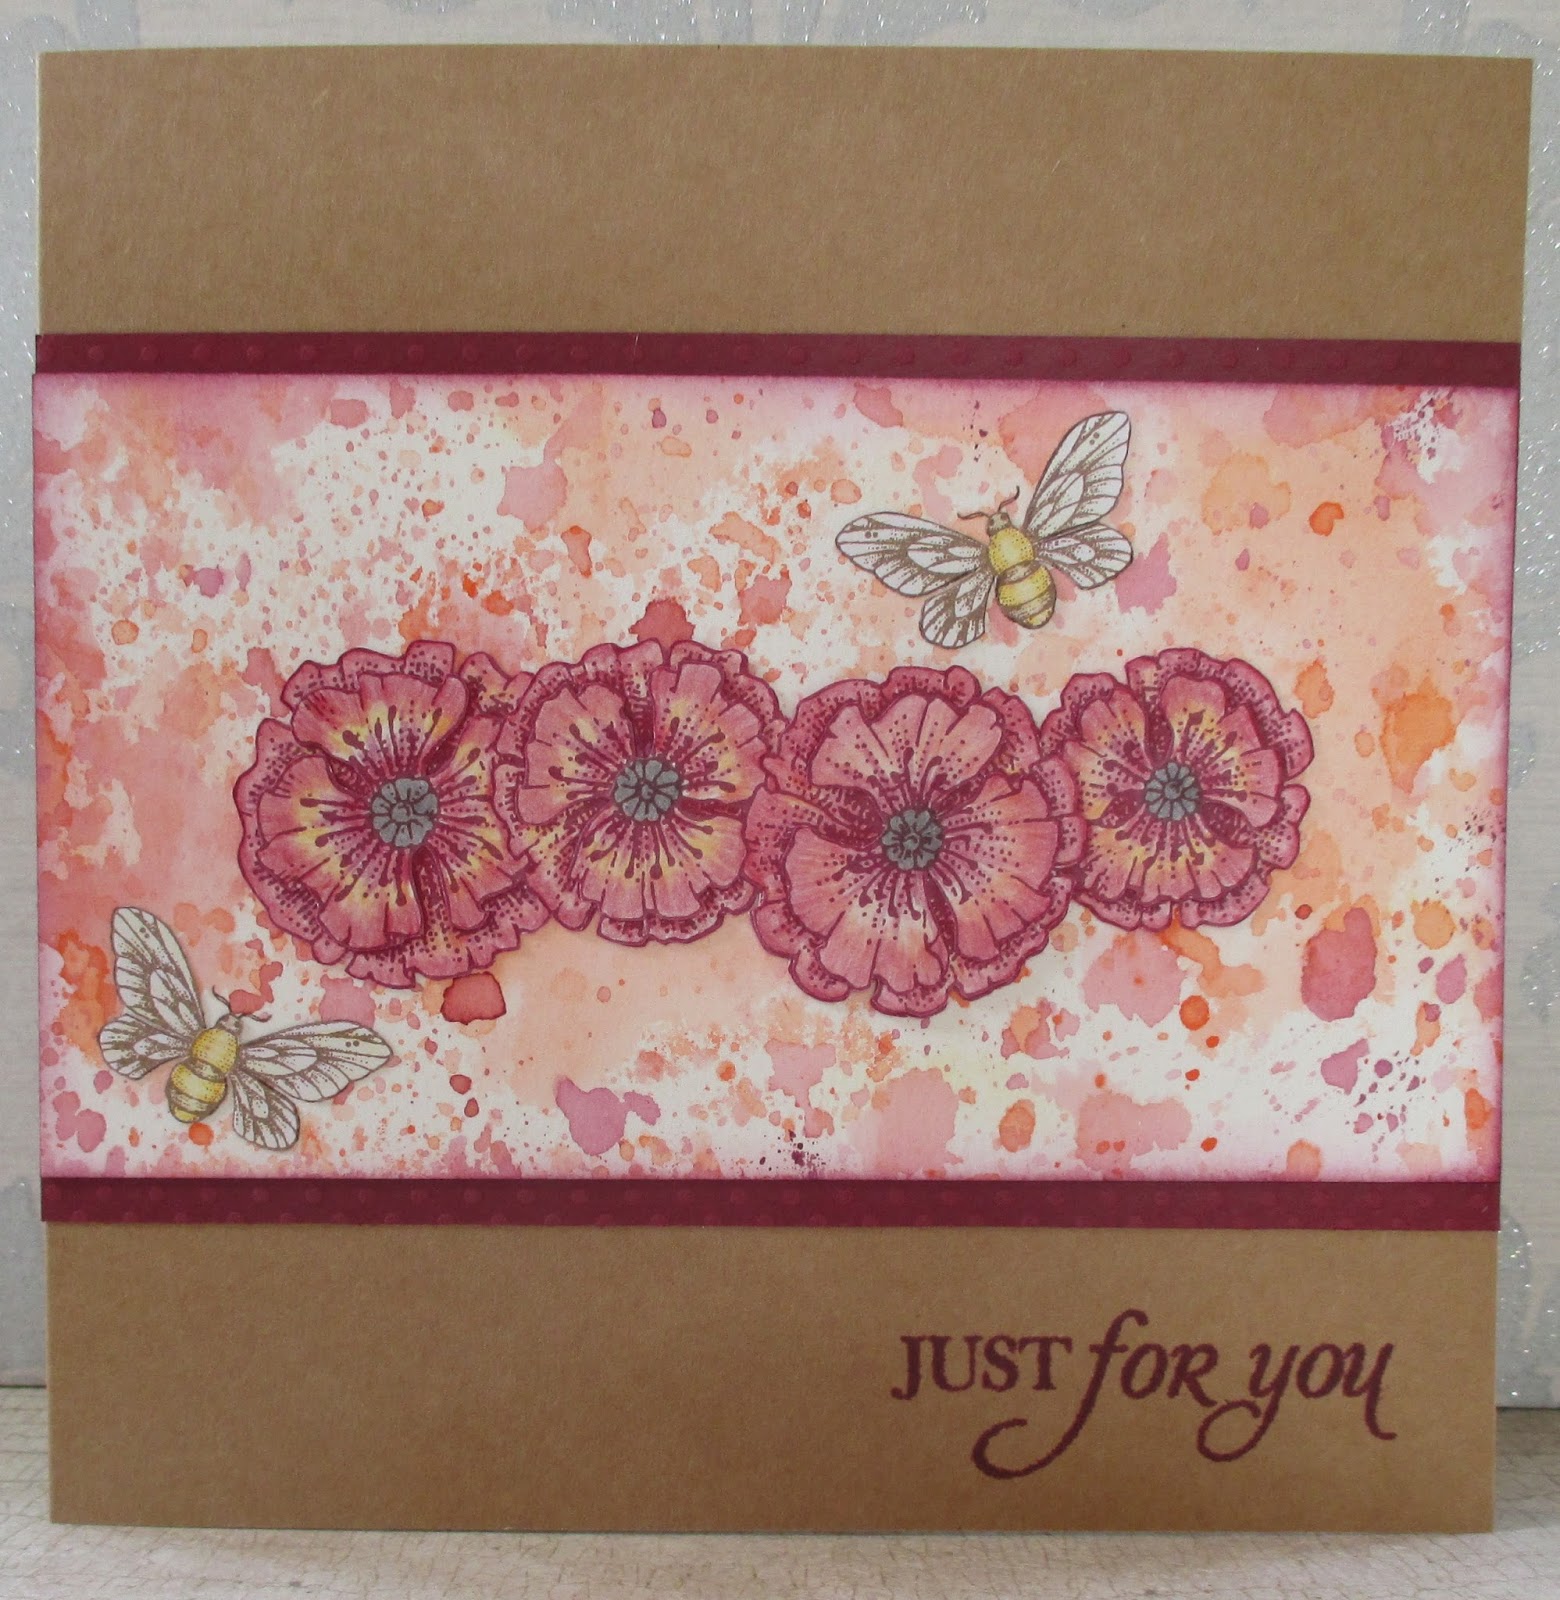
On my second card, I used a strip of the same wrinkle free distress background, matted onto burgundy card, and placed it onto a kraft card base. I stamped the poppy edge four times onto card, and coloured sections of the image with pencils, before cutting them out, and layering them onto the background. I added two of the little bees, which were also coloured with pencil. The sentiment was taken from the Amazing Birthday clear stamp set.


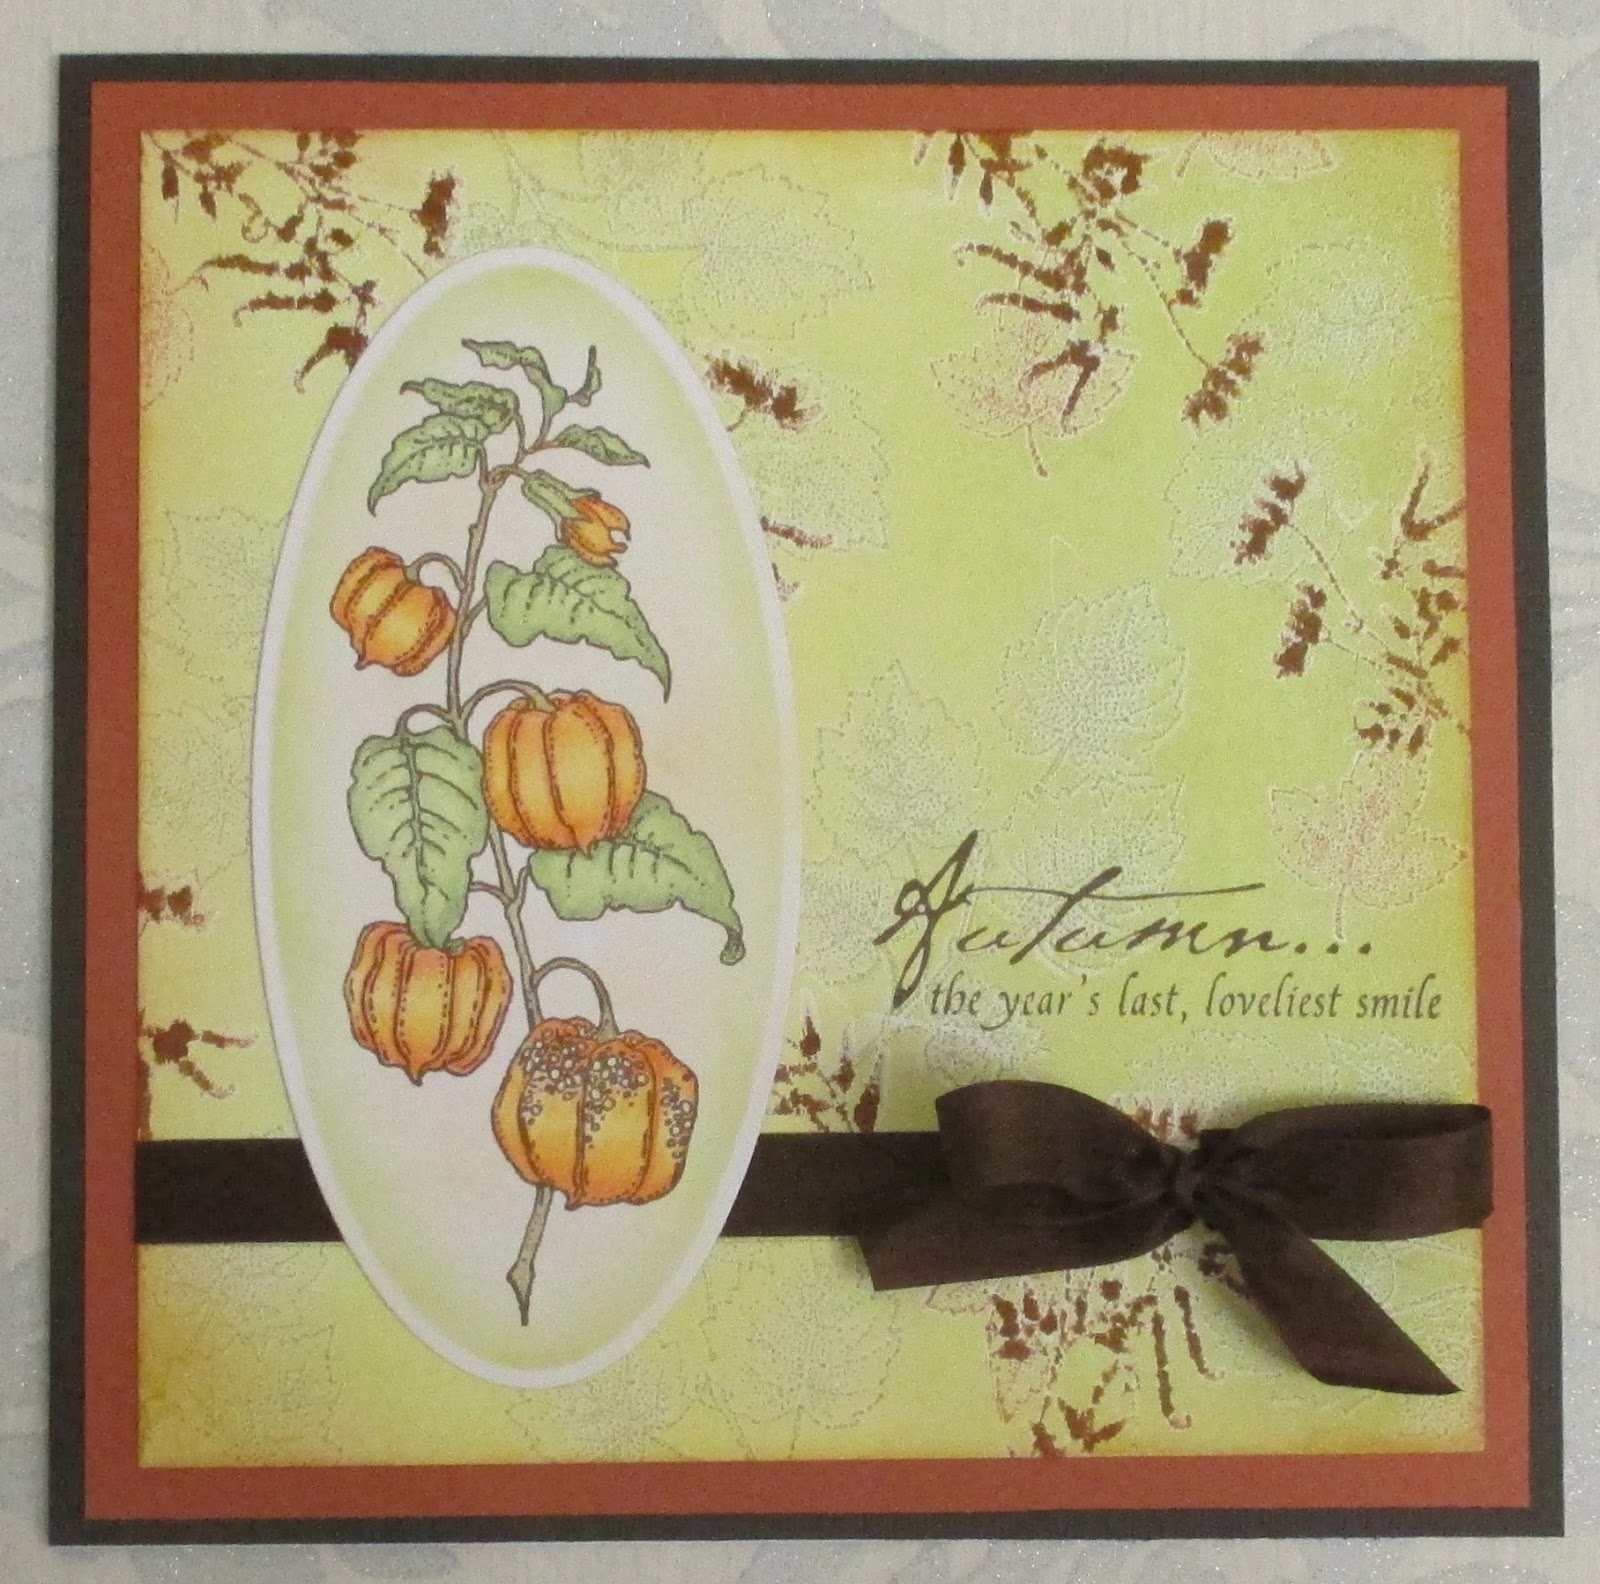
For my final card, I made a gelli plate background, using a selection of green inks, and stamped the single leaf and foliage stamp taken from the Autumn Poppy stamp set randomly over the plate. I took a print from the plate and trimmed it to size, before edging the background with a rusty coloured ink. I stamped the main image onto a large oval die cut, adding some colour to the background with green and orange inks. I coloured the image with pencils. The sentiment comes from the Nature's Peace stamp set, and is one of my favourites.


You are in for a real treat over the coming month with the samples created by my Team mates, so keep checking back to see their beautiful projects. Thanks for stopping by, Judith xx

Friday, 22 August 2014

Fun with Florals (posted by Judith)

Hi Folks, I have some more projects for you today showcasing the Thistle Butterfly/Honeysuckle Butterfly multi-buy stamp sets. I have really enjoyed working with these pretty stamps, and I hope that you have enjoyed the inspiration that my Design Team mates have been providing for you this month.

My first sample was created by using Pan Pastels for my background over a mask. I then stamped the image and coloured it with pencils. I used the floral spray stamp from the Honeysuckle stamp set to stamp around the edges using a soft lilac coloured ink. The sentiment is taken from the Amazing Birthday clear stamp set.


My second project was created using a water coloured background, onto which I stamped the large honeysuckle image. I stamped the image again onto a scrap piece of card. I coloured the image with water based markers and a water brush, and then coloured the butterflies from the second image. I decoupaged these onto the main image. I stamped the small honeysuckle stamp from the Elegant Edges stamp set around the edge of the background.


Full details of how I made these cards can be found on my blog. Thanks for stopping by, Judith xx

Friday, 11 July 2014

A Bit of Diversity (posted by Judith)

Hi Folks, my post today shows just how versatile the Harlequin Fragments/Tangled Fragments multibuy set can be. I have created some very different looking cards using these great new stamps.

My first card was created using the watery background stamp, which I stamped onto a strip of white card, using black ink several times. I then created three pieces of decorated stampbord, using three layers of embossing powder and stamping into them while the last layer was still molten. I brushed a little bit of gold pearl powder into the crevices to pick up the detail of the stamp.

I matted the background onto a piece of toning card, and stuck this onto a larger piece of black card. I added a sentiment taken from the Artistic Affirmations stamp set.

My second card was created using a piece of smooth watercolour paper, which I sprayed with diluted Distress Ink. I then stamped the dotty stamp and the stone effect stamp, using the same colour Distress Ink over the background. I embossed the single stone spine in the centre using a silver embossing powder. I added some ferns around the edges, taken from the Wild Meadow stamp set using green and purple inks.

I stamped and embossed a flower from the Tangled Garden stamp set, plus the leaf fragment using silver embossing powder, which I then painted with water based acrylic inks. I decoupaged the flower, added the larger leaves to the stem, and used the smaller leaves for a grass effect. Finally, I added a sentiment from the Amazing Birthday clear stamp set to the background.


My final card was again created using a piece of smooth watercolour paper for the background. This time, I sprayed it with Dylusions spray to create a base for the rest of the background, rolling off some of the intense colour with a paper towel.  I stamped the large bubble background, and the dotty harlequin stamp using a turquoise archival ink.

I embossed the butterfly from the Steampunk Buterfly stamp set and some flowers from the Punky Flowers stamp set, using copper embossing powder. I coloured them with water based acrylic inks. I added a stamped swirl from the Artistic Expressions stamp plate to resemble leafy tendrils behind the flowers. The sentiment was taken from the Amazing Birthday clear stamp set.


I hope that I have given you a couple more ideas for these stamps, and that you will try them out for yourselves. Keep checking back for more inspiration from my team mates every day this month. Thanks for stopping by, Judith xx

Thursday, 26 June 2014

Introducing the July stamps of the month (posted by Judith)

In Glenda's absence, while she is going through her house move, I would like to introduce the July stamps of the month to you. There are two A4 stamp sets called Harlequin Fragments and Tangled Fragments. These two new sets are a wonderful addition to the Fragment series; they are extremely versatile and, as you will see over the next month, they  work very well both alone and with many other Chocolate Baroque stamps.

First is Harlequin Fragments

and then we have Tangled Fragments, both are available at an introductory price. But if you want to save even more money then we have our usual multi-buy offer too.

All offers are available on the website until the end of July.

My sample uses a stamp from the Harlequin Fragments stamp set, which I have repeat stamped over a wrinkle free Distress background to create a watery feel. I have then stamped a bauble from the Artists Baubles unmounted stamp set onto a piece of scrap card, and coloured it in using Inktense pencils. I have added a sentiment from the Amazing Birthday stamp set.


Look out for some inspirational artwork from the Design Team coming very soon and don't forget to leave a comment to be in with a chance of winning our monthly prize. At the end of each month one lucky commentor will be randomly chosen to receive a gift certificate to spend on Chocolate Baroque stamps.

Judith

Saturday, 21 June 2014

Favourite Colours (posted by Judith)

Hi Folks, my sample today uses lots of my favourite colours, namely purple and teal. I often try to work outside my comfort zone when I am making samples and do not turn to these colours when making a project. It has been a real pleasure to make a card using this colour palette.

I started my card by creating a wrinkle free background using smooth watercolour paper, using blue and lilac tones. I then created an oval mask, which I placed in the centre of the page. I used a dark blue ink and sponged around the edge of the mask, creating a shadow. This helps create a faux layer. I also added the same colour to the edge of the background. Using a flower stamp from the Harebell Butterfly stamp set, I stamped around the edge of the background, and over the edges of the mask. I used a mixture of teal, navy and purple inks. I removed the mask and stamped the main image using navy ink. I stamped the butterfly from the main image again onto a scrap piece of watercolour paper and also onto sparkly acetate.

I bleached the image, and coloured it with pencils. I coloured the second butterfly, and stuck the acetate butterfly over the top. I added these to the main picture. The sentiment comes from the Amazing Birthday stamp set.


Keep checking back for more amazing samples from my team mates. Thanks for stopping by, Judith xx