Pin It button on image hover
Showing posts with label Natural Eggs. Show all posts

Sunday, 13 March 2016

Russian Dolls (by Julie)

Hello! Hope your weekend is going well. Today I have two cards made with the fabulous new Babushka Dolls. I have to confess that after being a little apprehensive about working with this very different set, I am pleased to report that they are loads of fun and more importantly, very versatile so I hope you like them as much as I do.


My first card shows a parade of dolls emerging from the temple. As they are different sizes you can play around with perspective to see what suits you best. A swirly corner stencil was used to create a garden and another texture stencil was used the other side of the pathway. The design has been coloured with a mixture of Brush-markers and Distress inks and finished off with a birthday sentiment from the Amazing Birthday clear sentiment set.


My second card is a very simple card and it is made even easier if you keep the three, smallest Russian dolls together when you cut your stamps out.
I have inked up the trio with Onyx Black Versafine and stamped onto a piece of spare card before water-colouring with brush markers.
I cut the card into a square to fit the centre of my base card and brushed the edges with Tea Dye Distress ink. The crackled edges on the base card were stamped with the crackled egg from the Natural Eggs clear set and finished off with the Tea Dye Distress ink as before.

Many thanks for stopping by and please call back for another Design Team member's inspiration.

Julie xx

Saturday, 20 February 2016

Crackling Rose in full bloom (by Debbie)

Good morning, a quick make from me today.
 
The background for this card was a play day make that had been sat on my desk waiting to be used. I had been playing with my Blueprint Sketch inkpad from Ranger and a gold mica spray.


The ink was applied with a sponge and sprayed with the gold mica. I wasn't happy at the outcome so covered with the blue ink again. Next, I stamped the crackle egg shape from Natural Eggs Clear stamp set with the same blue. I wiped the edges of the stamp with a baby wipe so the oval shape was not visible. The Crackling Rose was stamped directly to the card and embossed with black powder. For the rose head it was stamped onto white card and coloured with water soluble crayons then cut out. To finish it was mounted onto black card and a birthday greeting was added.

Many thanks for visiting
Debbie

Friday, 27 March 2015

Natural Eggs (posted by Claire)

Good morning, Claire here with a selection of cards for Spring and Easter.

For this first card, i've stamped the solid stamp from Natural Eggs using distress inks (Scattered Straw, Broken China and Bundled Sage) and then used the detail stamps with versamark and ivory embossing powder to create my background.


The bird is from Spring Bird Tulip and i've used my current favourite technique of colouring directly on to the stamp with distress markers, spritzing with water and stamping on to water colour card.

My second sample using 'Natural Eggs' was a bit of an experiment. I began by stamping the sold eggs with distress inks (Scattered Straw, Bundled Sage) and then stamping the detail over the top. 


Next I used the solid stamp again and added a layer of versamark ink over each egg before applying 3 layers of clear embossing powder. I found I got the best result by heating from underneath. Once this was cool I used it as a resist to create some shadow behind and underneath the eggs using distress inks and a blending tool. The sentiment is from Baroque Eggs, die cut with a tag die. I've added distress ink around the edges and created some faux stitching with a distress marker

Thanks for visiting today
Claire xx

Thursday, 26 March 2015

Stunning new stamps launched today (by Lesley)

It is almost the end of another month so today is the launch of our April stamp sets and are you in for a treat.

When we launched our first individual cling mounted stamps back in December the response was terrific and now we are adding four more to the collection.

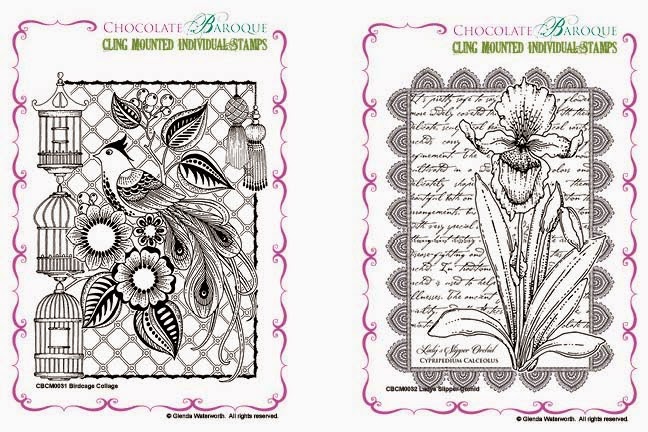
First we have Birdcage Collage and Ladys Slipper Orchid


All four stamps are available individually or as a money saving multi-buy.

Here is a stunning card made by Glenda using the Birdcage Collage


Stamped and then painted you can see this design is ideal for colouring and many of the elements are crying out to be decoupaged. And coming soon on the Shop Blog will be a post from Glenda on how she made this beautiful card, so watch out for that.

Our other stamp launch for April is an A5 clear set entitled Awesome Orchids.

This clever set features two orchid flower images and a sentiment plus a single stem and four individual orchid heads. Now you can design your own flower, how cool is that?
Here I have created three mini cards using the single stem and a selection of the orchid heads, which have then been coloured with watercolour pencils. The backgrounds have been stamped with the crackle and speckled patterns from the Natural Eggs set and the ART letters are from our Newsprint Alphabet clear set.

I just know you are going to have fun with these new stamps and keeping checking back on a daily basis for some truly inspiring projects created especially for you by the Design Team. 

Told you you were in for a treat.


Saturday, 21 March 2015

Pan Pastel Eggs (by Judith)

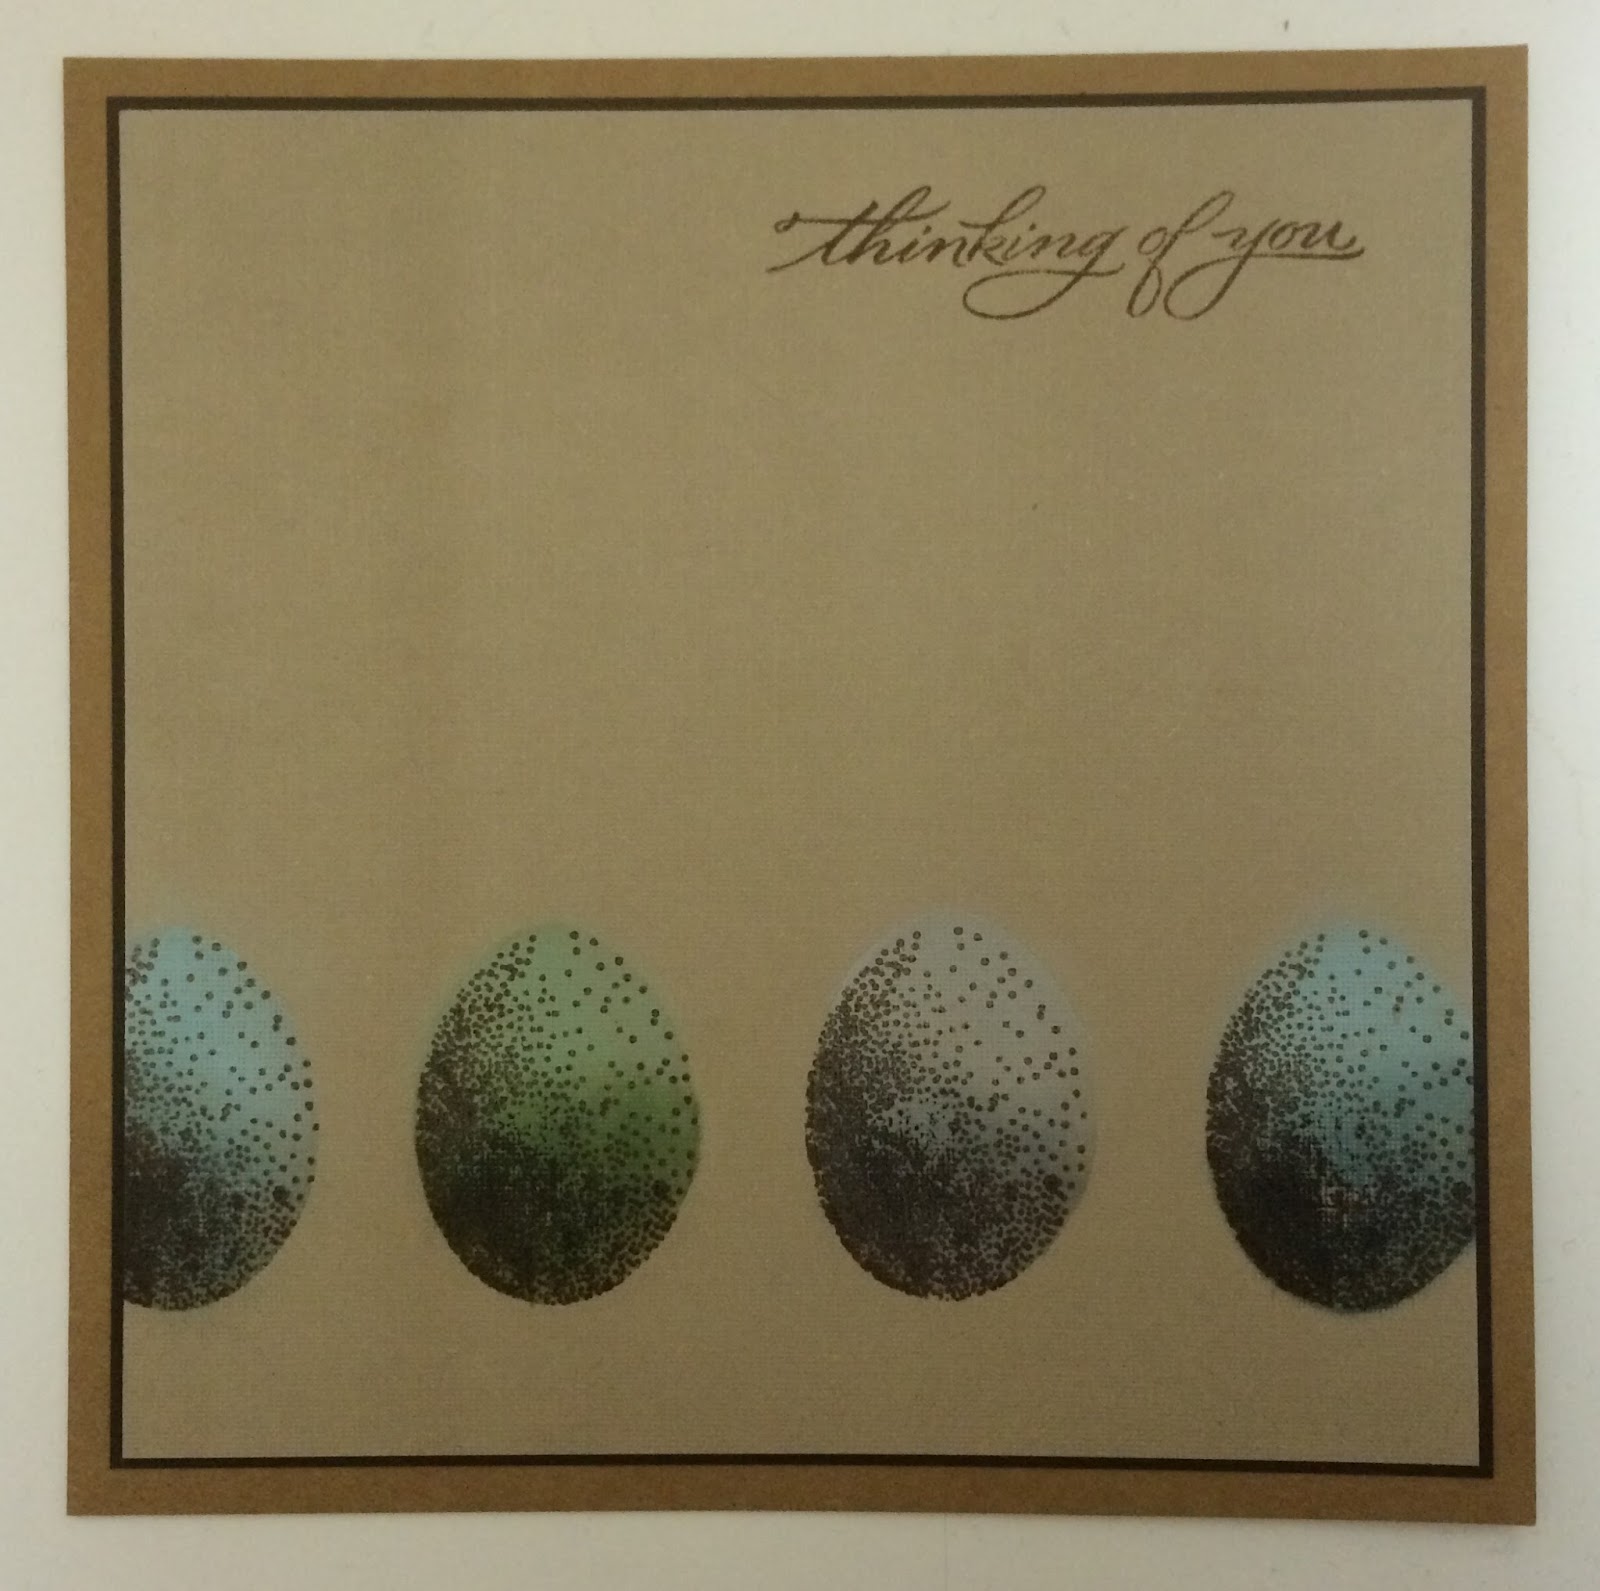
Hello everyone, I have been working with the incredibly useful Natural Eggs stamp set to make a clean and simple masculine card to show you today. Cards for men are so difficult to make, and these eggs lend themselves to a Nature themed card suitable for any time of year.

I took the solid stamp, inked it with Versamark, and stamped it across the bottom of a piece of beige linen card four times, overlapping the edges. I coloured the eggs with Pan Pastels, using a lighter colour at the top of each egg, graduating to a darker colour at the bottom. I then used the speckled stamp over the top of each egg, using a brown ink.

I added a sentiment from the Thinking of You Sentiments stamp set, and matted the background onto dark brown card before placing it onto a kraft card blank.


A quick bonus project for you, is a tag made using stamps from the Dawn Chorus stamp set. Details of how I made this tag can be found on My Blog.


Thanks for stopping by, Judith xx

Thursday, 19 March 2015

Three Little Eggs (by Lesley and Glenda)

I am starting with a confession. The beautiful card you see here was not designed by me, I received it in the post a few days ago. So today is the first combined blog post from Glenda and myself and we want to show you how easily you can achieve the layered look with our clear stamps.


  • On an A6 card, and using the solid image from the Natural Egg clear set, stamp each colour in turn with new Archival ink colours Tea Rose, Sky Blue and Buttercup. Allow to dry thoroughly.
    • Next use the same ink colour and the small multi speckled image to stamp over the solid coloured eggs. Again allow to dry
    • On the middle egg ink up the crackle pattern with Buttercup and stamp over the solid image. Repeat with the right hand egg using the second generation stamping technique and Jet Black Archival ink (second generation stamping means you ink up the stamp with your chosen ink, stamp lightly onto a piece of copy paper and then stamp your image again where you want it. This allows for a more subtle version of the image).
    • Now add the same last layer to each egg with Jet Black ink using the larger speckle pattern.
    • Stamp the sentiment from the Thinking of You Sentiments clear set with Buttercup.
    • Finally, send it in the post to a friend!
    I hope you have enjoyed our first joint DT post. Please come back again tomorrow for another inspiring project from one of our talented team.