Pin It button on image hover
Showing posts with label Rose and Thistle. Show all posts

Wednesday, 13 April 2022

Black and White with Added Colour (by Christine)

Hello everyone, today sees the first of three posts from our Guest Design Team member Christine Patch. Christine has created a couple of pretty floral projects for your inspiration. 


Christine writes:


Hello everyone,

I am very pleased to be back from a bout of ill health to contribute to the Blog and am sharing two projects. 

The first is a set of note cards which I have been planning for a while. I used a die to give me a decorative background for all six, three using black and three white card. For the white version I used a lovely stamp from the Rose and Thistle set, fussy cut it out three times and then used shimmer watercolour paints as my colouring medium.

For the next three, I chose one of the stamps from the Sunny Sunflowers set and then used coloured pencils as my colouring option. I chose a light and dark orange, a light and dark blue, and a light and dark red.


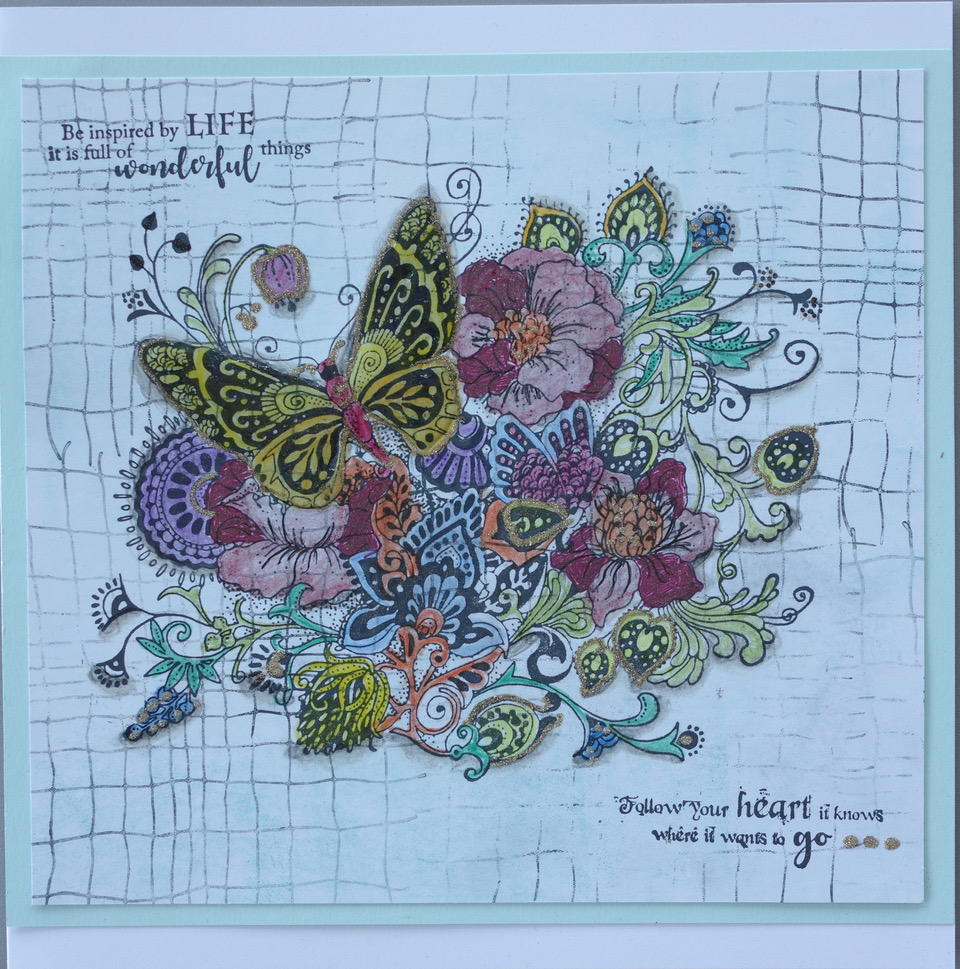
My second project is for my art journal. It is watercolour card, A4 in size, and started life out as a clean-up from a piece started last year! (They do say crafters never throw anything out?)

It was a mix of shades of blue so I added some Worn Lipstick and Spiced Marmalade Distress Inks through two of the Chocolate Baroque Strip Stencils to add a little more colour. The stamps I chose for this project are some of the latest that were shown on Create and Craft recently, the Floral Paraphernalia Slim Strip and the Phenomenal Butterfly Slim Strip.


I stamped them directly on to the page, then twice on to plain card, cut out each stamp in its entirety and placed it over the relevant image, then fussy cut out selected areas from the second card. These I coloured using the shimmer watercolour paints again as a contrast to the rest of the stamped image. Finally, I edged the entire page in Black Soot Distress Ink and then used a black watercolour pencil around the edge of both stamps, followed by a water brush to bring out the black. This acts as a shadow that makes the images stand out a little more from the background. I thought the main areas of the stamps needed a little more colour so added some coloured pencil here and there.

I hope you like the projects and that they inspire you to do some of your own.

Happy Crafting!


Sunday, 13 February 2022

red roses

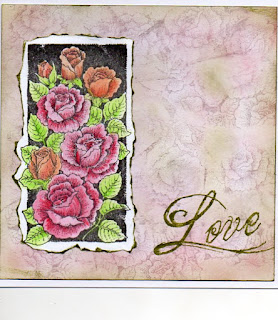
Carrying on the Valentine theme, some more samples this time using the main image from the Rose and thistle stamp set as well as the sentiment from words of love

The main image was stamped in black versafine ink and coloured with watercolour pencils, then torn out and edged with versafine ink. The background was sponged wiith distress inks in worn lipstick and peeled paint and parts of the stamp were randomly stamped in worn lipstick.. Sentiment stamped in versamark and gold embossed.

Same stamp stamped in grey versafine and part coloured with watercolour pencils. To make the coloured roses stand out more i added some elderly stickles with a brush and then covered the coloured areas with glossy accents. Once it was really dry i fussycut it out and added on to a distress oxide background. The diecut sentiment is from  rose stem script stamp set


My last card uses the main image from the rose stem script set stamped in versafine again and coloured with watercolour pencils, torn out aned added to torn mat of green card.  
The background was made with the rose stamp coloured with Koh-i-nor brush pens , randomly stamped then spritzed with water to make the colours run.
Sentiment from harlequin rose set stamped in black versafine ink


Wednesday, 20 January 2021

Concertina Journal (by Christine)

It's my turn again on the blog and this time I am sharing the first three pages in a watercolour paper concertina journal. The Chocolate Baroque items used are listed at the end.

On the opening page, I stamped a number of images and then coloured them with watercolour paints. I then used gold metallic paint to fill the negative space, a technique I really like.

Mackintosh Windows stamp set

Rose and Thistle stamp set

Rose Set stamp set

On the second page, I chose a few Distress Oxide inks and blended them together. I then stamped the images using toning metallic paints (I seem to be in to metallic paints at the moment!?!)

Woodland, Orchard, Glade & Spinney Design A Tree Multibuy

On the final page, I used Distress Oxide Sprays through a stencil and then stamped the images using Versafine Clair in black. I coloured the images using glitter paints and then added some of my own doodles with a black fine liner pen.

Steampunk Birds


I am planning my final blog for January as I write this and it will involve a black tag and possibly some embossing powder- still to be decided.


Happy crafting!


Christine

Wednesday, 14 October 2020

Floral Grid (by Christine)

Hello everyone, today sees the first of three posts this month by our Guest Design Team member Christine Patch. She has created a delightful card for your inspiration, and kindly provided a step by step tutorial for you. 

Christine writes: 

Hello everyone

It's my turn again on the blog to share some crafting ideas using lovely Chocolate Baroque stamps. So much has happened in the world since I was first on this blog but crafting with beautiful products remains a joy.

I thought I would share a 'how to' on this occasion. It started very simply with a die cut circle in white card. 


My idea was to create an image using several flower and leaf stamps, with a bit of added extra (in this case butterflies). I decided against adding any background to the white card since I wanted the images to stand proud.

Next step - add a grid. Out comes a black fine liner pen and ruler. I added temporary adhesive on the back of the card so that I can use the lines on my black glass mat to ensure the lines were straight. My ruler has a one centimetre line so I used that as a spacer.

On to colouring using Polychromos pencils and some shading to give additional depth. I also added some small circles with the fine liner pen where all the lines intersected.

Finally, I added two of the butterflies from my original stamping, colouring again with the pencils, but adding some clear sparkle gel for a little impact. A sentiment stamped in black and mounted on white then red card finished the card.

It's not a quick card to make but I think it's worth the effort.

I hope you like this design and might consider trying it yourself but adding your own spin. The stamp sets I used were:

Celebration Bouquet

Rose and Thistle

Rose Duo

Autumn Hedgerow

Butterfly Mind

Happy crafting!

Christine

xx


Wednesday, 25 March 2020

Quick Cards (by Christine)

Hello everyone, today sees the final blog post this month from our Guest Design Team member, Christine. She has made some speedy cards for your inspiration.

Christine writes:

Hello everyone.

My final blog post for March!

The first project comprises four examples of quick cards to have available in your stash! I used four mini gelli plates of different shapes, Distress Inks and stamps from Rustic Fragments set to give detail. I then chose some beautiful floral stamps, colouring in two of them with sparkle pens, but leaving two of them simply stamped, (I thought the colour from the gelli plates was enough). Floral stamps used are:

Rose Set
Rose and Thistle set
Medici Flower
Rose Stem Script


The second card was also quite a fast one to achieve. I had a circles stencil on my desk so chose blue, pink and yellow Distress Oxides and mixed them across the stencil. I cut the resulting image into different widths of strips and glued them across a piece of white card on the diagonal. Once complete, I cut out a 5" square then stamped one of the Geometric Trading Hearts with Versafine Clair Onyx Black in the centre. On a remaining piece of the striped background card, I stamped one of the sentiments from the same set.
Mounting on black card was the final step before adding to the card blank.


My final card showcases the stunning stamp sheet called The Folk Art Garden.
The first step was to create the background using the Open Weave stamp and Distress Ink. I then stamped the image with Versafine Clair Onyx Black ink and coloured it with pencils. When I was finished I added Glossy Accents to the butterfly and then glitter around some of the elements. The sentiments are from The Folk Art Garden stamp set.

I hope you have enjoyed my blog posts and look forward to catching up with you later.
Happy crafting!

Christine
xx

Wednesday, 11 March 2020

Pattern Building (by Christine)

Hello everyone, today sees the first of three posts written this month by our Guest Design Team member Christine. You will have seen some of her samples on the TV shows for the past few months, and she is now joining the Guest Design Team to write for the Design Team blog as well. Christine has created a fabulous selection of projects for your inspiration today.

Christine writes:

I am delighted to write my very first blog post for the wonderful Chocolate Baroque range of stamps and crafting goodness. I have long been a fan: creating samples for the Hochanda shows and now writing posts to share other ideas - well icing on the cake as the saying goes!

I have a bit of a theme for this post; pattern building. All three are 8" x 8" cards.

For my first example, I used one of the stamps from the Rose and Thistle sheet. I made three masks and then stamped on pink card, using the masks to create a full backgrpound as I moved around the card. I chose Versafine Clair Onyx Black ink since I thought that would stand out well against the pink.

I stamped again on white card, cut the image out using an oval die and then chose a larger patterned oval die from my stash as a black layer. I decided against adding a sentiment so that I could add one when the appropriate occasion arose.


Example two uses the large stamp from the Baroque Corners stamp set. I used a stamp platform to ensure that I placed the stamp accurately in the four corners. Once placed on the platform, I simply had to turn the card 90 degrees four times, and voila. That left four areas for another stamp and this time I chose one of the smaller stamps from The Folk Art Garden set.

For the central area, I turned to the Mackintosh Windows set. I used alcohol markers to ensure strong colours then added black glitter to the flower veins, leaves and stalks for added emphasis.


Card three also uses the same stamp set and a sheet from the Chic Script Designer Papers. I stamped the square window four times using Versafine Clair Smokey Grey ink. I used the same ink to stamp the little flower around the edges. I used Distress Oxides to colour the flowers.

I used the same Oxide colours blended on a whiteboard trading heart and then stamped one of the small flowers. I used a glue pen around the flower and then gold glitter for a bit of sparkle.

I stamped the 'face' image in black and then used clear embossing powder. I painted the image using the same Distress Oxide colours.

Finally I added two glass cabochons from my stash that had toning colours.

Happy crafting!

Christine.

xx

Tuesday, 30 July 2019

The sweet scent of a Rose by Brenda


Hello Peeps, it's Brenda here today and when you read this post all going to plan I will be away taking in some Italian and French sunshine.

It's more Roses and these beautiful new sets launched by Lesley on Hochanda last month were a delight to work with. I stamped the above from the Rose and Thistle set with Versafine Clair and heat embossed with detail clear EP then coloured in with Koh-i-noor paints and added a sentiment from Words to Dazzle and Sparkle.


Those of you who saw my post earlier this month will know I am a big fan of using Distress Markers and a water direct to stamp and this was another using that technique after adding masking tape to the edges of the piece of card. After stamping the focal from the Rose Set I used DI's to add shading and some stencilling.


A fairly simple one here, the image had been stamped onto white cardstock using Versafine Clair and then heat embossed with detail clear EP, cut out and matted onto white and then an embossed back panel using a Rose folder onto which I added black DI before running through the e.bosser.


Using another of the small worker stamps I repeat stamped using different colours of DI, spritzed with water which gave a nice faded vintage feel.


My final one using this beautiful focal image along with the small Rose repeat stamped on the background, all stamped with Versafine Clair which gives a lovely crisp image to these detailed stamps.

Many thanks for your visit today.

Friday, 26 July 2019

More roses....by Rachel.

Hello there! Here are my second set of samples from June's shows using some of the beautiful Rose sets.

This first one used the rose set stamp that I cut down having stamped multiple times.

This one used flake and glue and the rose and thistle stamp set and the rose set. 


This one using the rose set was done using the gelli plate...I inked up the plate then stamped directly into the gelli plate with no ink on. I then pulled this print!

Finally I made this one using the rose and thistle stamp set and the rose set. I stamped the small stamp from the rose set in the background and coloured up the image to go on top!

I hope you have enjoyed todays inspiration!
Hugs
Rachel x

Sunday, 21 July 2019

Roses in July part 2 (by Magda)

Hi and welcome back.
Are you ready for my second Post? This time I decided for a blurred background of this Love Journaling page.

Step 1:
As you can notice all the first stamping and coloring has been covered with a light coat of white gesso.

Step 2:
On the dry surface I stenciled several layers of colour using randomly different stencils

Step 3:
I stamped directly on the pages and colored the roses I have chosen

Step 4:
I cut some decoupage-roses and sentiments and glued on the journaling pages, I attached Washi-tape too.


For this page I used the following products :
Rose and Thistle
Rose Set
Harlequin Rose
Loving Sentiments
White Gesso
Distress Ink Pad
Watercolour Pencils


Heartfelt Thanks card :   the only difficulty in this card is to stamp in a reflex way the stamp you will find in Rose and Thistle using Archival Jet Black.  Both backgrounds are dabbed gently with Distress Ink Pad,  the flowers are coloured with Watercolour Pencils and the sentiment Words to Dazzle and Sparkle is stamped with Archival Jet Black


Thank you for passing by, hugs
Magda


Tuesday, 16 July 2019

A Bit of Romance (by Judith)

Hello everyone, I have a couple of projects to share with you today, both with a slightly romantic feel, showcasing stamps used from last month's shows on Hochanda.

My first project features a beautiful image from the Harlequin Rose stamp set. I love this image, and it has proved so useful for Weddings and Anniversaries. It can be used on its own, or linked with another one, as I have done on this card.

I chose a piece of patterned paper designed by Lesley, and stamped and embossed the image twice, using white embossing powder. I fussy cut the images, and cut one of the hearts where I needed to join them together. I simply slipped the 'broken' heart through the gap in the other heart. I used a piece of the same paper as a background, and cut a slightly smaller piece of kraft card as the forground. (If you are trying to stretch your papers as far as possible, you can use what would be hidden underneath for the hearts). I embossed the sentiment using white embossing powder once more, and added faux stitching using a white gel pen.

The addition of the kraft card makes this a great Anniversary or Valentine's card for a man.

To create my second card, I coloured some Drawing Cartridge using Distress Ink on a craft mat, spritzing it with water, and patting the Drawing Cartridge into the ink. I dried the paper with a heat gun, and then blotted up some of the remaining ink before drying the background once more. I stamped the Tagtastic stamp at one end of the background and cut this out, the remainder of the background was sufficient to create a background for the card.

I used words from the Amazing Mackintosh Words stamp set to create a random background on the tag, stamping them in black ink. I stamped some horizontally and some vertically, making sure that they were straight, whichever direction I was stamping. I stamped a rose from the Rose and Thistle stamp set onto a spare piece of Drawing Cartridge, coloured it in and fussy cut it out. I attached this to the tag, and added some bright red ribbon to the tag. I attached the tag to the larger background, added a Birthday sentiment, and used some black card as a matting layer. You could add some of the tiny rosebuds from the Rose and Thistle set to the background if you feel that the background is too plain, but I did not mind it like this. I had added some red spatters to the tag as a contrast anyway.

I hope that you will try some of my ideas out for yourselves, thanks for stopping by,

Judith xx

Saturday, 13 July 2019

Smell the Roses by Brenda


Good morning, Brenda here with some of my samples using the new Rose and Thistle and Rose stamps that Lesley launched on Hochanda TV last month, such perfect images for making Summer cards........and confetti, I have been dehydrating rose petals on a daily basis to fill little boxes to hand out to guest as they arrive at Church for our eldest Granddaughters wedding.

The panel of the top card was masked before stamping the Rose from Rose Set using Distress Markers direct to stamp and spritzed with water to bleed the colours before stamping. With the masking tape still in place I used DI's to create the frame and a brick stencil to add some background interest, finally stamping a sentiment from Birthday Words.


Next a card with matching envelope, I masked the bottom of the card both front and back and repeat stamped the Rose and Thistle from the set of the same name using Distress Markers direct to stamp along with a spritz of water before stamping. Next I added some shading with DI, then 'splodged'......a very technical term......more of the same DI onto my glass craft mat, a little water and inked up a fan brush and flicked it over the stamping to give the effect of grass.  I masked the envelope with a post it note, stamped the flowers and again some shading with the same DI. The sentiment is from Words to Dazzle and Sparkle.


For this one I stamped the image with Versafine onto black card and embossed with detail gold EP. I ripped the edges, inked and added more gold EP and the same with the sentiment panel.


I love purple and teal together so those two colours of Distress Ink were the inspiration for this one. Using my stamping platform I repeat stamped this pretty bloom by inking the image with Distress Markers and water.........and yes, this is a favourite technique of mine as you might have guessed from this post. It doesn't work with all stamps but where there is a lot of detail and rubber it works brilliantly.

My final share and yes you guessed right, the stamp platform and Distress Markers again and here I have tried to show how east it is to get a totally different look from the stamp as using this method to add ink you can focus on just the focal blooms and leaves and leave out the other areas of the stamp. I then added some stencilling to the background.

My thanks as always for your visit today, myself and the Design Team always appreciate your words of encouragement.

Tuesday, 9 July 2019

Rose Wreath (by Julie)


Hello, today it is my turn to show you two of my creations from Chocolate Baroque's June   Hochanda TV show's.
My first card is stamped with the Rose and Thistle set. 
To start with I stamped the central heart design onto spare card, before colouring with Polychromus pencils and then die cutting with a circle die.
For the base card I stamped the larger rose bud stamp in an overlapping circle design to form a wreath shape that fits around the circle die cut. You can fill in any gaps with the smaller rose bud and then colour with Polychromus pencils.
The single rose stem was stamped around the background with a pale grey ink, before Distress inks were applied with a sponge over the top.
To finish off, a sentiment from Words to Dazzle and Sparkle was added.


My second card is a simple DL design that I have stamped using the Rose Set. I inked up the rose tile stamp with Onyx Black Versafine ink and stamped in a chequer board style. No measuring was needed, I just lined it all up by eye but of course you can use a stamp positioner if you wish.
In the spaces I added the rose bud stamp and then coloured with a red Polychromus pencil. The sentiment is from Words to Dazzle and Sparkle. I then cut the design to size and mounted onto red card before adhering to the front of the card blank.


Thanks for stopping by. Please call back soon for more Design Team inspiration.

Julie xx

Monday, 8 July 2019

A rose garden (by Rachel)

Hello there! Its Rachel here today sharing the first of my samples from the June shows. For these samples I used the stamp sets Rose and Thistle and Rose set. I used various techniques to create these samples. In this first card I created a background using inks and the gelli plate  and stamped the main image from the rose stamp set onto the plate itself without any ink. I pulled the print and then added further stamping to that using the single rose stamp from the rose and thistle stamp set.


Next I made a monolith - I covered it in blue paint then overstamped with the small rose image that I painted in using translucent paints. I added the main image then from the rose stamp set which I had painted and fussy cut.


This next one was made using the rose and thistle set - I stamped in grey on the background then added the same image to a piece of card developed using a gelli plate and ink again. The image was then coloured in water colour pencils.


Finally I decorated one of the paint brushes from one of the show specials..I think it was from the May show.


I used the fabric and flowers that also came with that special set and added some paint too and some fussy cut stamped images!

I hope you can find some inspiration here!
Big hugs

Rachel xx

Friday, 5 July 2019

Roses in July, part 1 (by Magda)

Hello,
the subject of this month are "Roses" and I have really a great choice among all the "Roses" stamps from Chocolate Baroque. For this post I used the same sentiment and tried to create a monochromatic atmosphere.

1. Birthday Wishes Card:
This card has a soft colourful Distress Ink Pad, layered stenciled background on which I glued a decoupage.  I stamped  on a white cardstock the rose composition from Rose and Thistle  with a mix of Distress Black Soot and Brushed Corduroy,  blended the stamp with a watercolour brushed and fussy cut the shape. The sentiment of Amazing Mackintosh Words  is stamped with Archival Jet Black on a left over piece of the background.


2. Birthday Wishes Tag:
Stamp on a craft Tag with Distress Ink Pad Walnut Stain the big Rose stamp of the Rose Set.
Use white and brown charcoal pencil to highlight and to darken roses and leaves. Stamp the sentiment of Amazing Mackintosh Words with Archival Carnation  Red the sentiment to give a contrast to the tag.


3. Birthday Wishes Bookmark :
Blend lightly a white bookmark with Distress Ink Pad Brushed Corduroy.  Stamp the 4x4 cm rose of the Rose Set in several brown Distress Ink Pad, and the sentiment of Amazing Mackintosh Words  with the same colour used for the roses. Assemble all the cuts as shown in the picture.


I will meet you soon with "Roses in July part 2 " and have a nice rest of July,
Magda