Pin It button on image hover
Showing posts with label Autumn Poppy. Show all posts

Wednesday, 17 November 2021

Fairytale (by Corine)

Hello!

Here I am again. This is my second post this month. Today I share a fairy tale with you. I had so much fun making this card with the masking technique.


I used stamps from the sheets:

Autumn Poppy

October Fairy

Gothic Fragments

Apply to a craft sheet Distress Ink Peeled Paint. Spray it wet with water and run the paper through it. You repeat this step in sequence with the following colours Carved Pumpkin and Salvaged Patina. Make sure that each step is completely dry before you start the next. 

Stamp the fairy on the mushroom with black waterproof ink using a stamping tool. Partly mask the fairy and stamp the gothic window. I stamped the branch on the right with Archival Vintage Photo.


Colour the mushrooms and the window with watercolour markers. Mask the window again and sponge with Distress Ink Prize Ribbon and Villainous Potion. Then stamp the leaves with Archival Peeled Paint.

Sponge at the bottom with Distress Ink Vintage Photo.


With a glitter gel pen you can add some accents in the image. 

To get more depth, you can create shadows with a charcoal pencil. Carefully spread the charcoal with a feather.

It's quite a lot of work, but fun to do. 

I hope I have inspired you. If you want to try this technique, I wish you a lot of fun.

Until next week!

Kind regards,

Corine van Kuilenburg

Wednesday, 15 September 2021

Autumn Poppy Variations (by Gerrina)

Hello everyone, we are welcoming our regular Guest Design Team member Gerrina back this month with some of her creations to inspire you. Today we are sharing her first two projects, and she will be back with another post next week:

Cape gooseberry and toadstools

My first post this month as a Guest Designer at Chocolate Baroque, you can see my card here and at my own blog as well. It feels so good to make posts twice a year with the beautiful stamps from Chocolate Baroque. I don't need to use the newest stamps, but can enjoy getting some older stamps out and letting them see some ink again...

I used the Cape Gooseberry and Toadstools from the beautiful Autumn Poppy stamp set this time and kept it simple by just colouring them in and making some splatters in the background with that ink, water and a brush.

Used materials:

Stamps: Autumn Poppy

Ink: Versafine Onyx Black, several Distress Inks

Other: White aquarel paper, masking paper, waterbrush, brush and water.


Coloured Squares

My second project can also be seen at my own blog. I played again with the Cape Gooseberry stamp from the Autumn Poppy stamp set and used a straight edge and fine pointed marker to draw some lines and coloured the squares with a waterbrush and ink, so the flower would pop.


Used materials:

Stamps: Autumn Poppy

Ink: Versafine Onyx Black, Several Distress Ink colours

Other: White aquarel paper, masking paper, waterbrush, brush and water, black finepointed marker and straight edge.

Creatieve groetjes,


Gerrina

Wednesday, 28 April 2021

Inspirational Heart (by Carole)

My third and final project for this session is my Inspirational Heart.

I like making these and tend to use them as decorations as well as coaters. They are larger than normal coasters and I am in less danger of missing it when I put my cup down, if I'm not concentrating.


Products used:- 15cm heart. Mine is wood but you could use other mediums.

Black acrylic paint

Versamark inkpad

Anti static bag

Pearl powder - silver

Pearl paints

Silver embossing powder

Stamps:- Artistic Affirmations- lots of inspirational sayings on this set, lovely and bold 

Pretty Poppies - flowers

Autumn Poppy - leaves

The heart was painted and left to dry thoroughly.

I then wiped it over with the anti static bag. This is important, I think, with the metallic embossing powders in particular.

Stamp the saying first with Versamark and silver emboss so you can position it where you would like on the heart.

Position the flowers and heat emboss with silver.

The leaves were done differently, to give a softer look, although they could be silver embossed like the rest.

I stamped with Versamark and then used pigment, silver powder, to brush lightly over.

The inkpad was wiped around the edge and embossed to finish off.

The flowers were coloured with pearl paints.

If I have used the pearl powder I would normally give it a light spray with a matt sealer as the powders will lift or smudge if touched.

When making it into a coaster I would normally seal with a matt varnish.

Well that's my contribution to the GDT slot for a while.

Hope you have enjoyed my projects and I look forward to seeing other lovely samples from the DT.

 On my blog cchotchpotch.blogspot.com I have posted a few other hearts I have made. Some as coasters and others as gifts.

They became a bit of an obsession with me especially as there are some lovely inspirational sayings in the Chocolate Baroque collection.

Hope you have a good day.

Happy crafting.

Carole.


Saturday, 24 April 2021

Florals in Reds and Golds (by Judith)

Hello everyone, I have a few more projects to share with you, featuring stamps from last month's TV shows. 

My first card was created using a Brusho background, I have lots of these in my stash, waiting to be used when I need them. I make a batch in lots of different colours, which I can pull out when I need them in a hurry. Very handy when I am making DT samples!

I stamped a leafy sprig from the Autumn Poppy stamp set randomly over the background. It is not an exact match to the main image, but is close enough. I coloured the image with pencils, choosing a lovely olive green and soft red.

I die cut an oval and stamped the Flora Musica image, adding a bit of Distress Ink around the edges to soften the whiteness of the card. I coloured the image with pencils once more, coordinating with the colours of the background. I chose some toning ribbons to pull the project together. 

To create my second project I made a wrinkle free distress background, using Distress Inks on a craft mat, which I mopped up with a piece of drawing cartridge. I stamped around the edges with the Large Crackle Background, and added the splatter stamp from the Timeless stamp set. 

I die cut a rectangle and stamped the Crackling Rose which I coloured with pencils. The sentiment comes from the Life is so much Better stamp set.


The stamp from my final card was not actually featured on the show Song Thrush, its silhouette companion made an appearance. I made this card and so will share it as you could create something very similar. I used a tea stained background, and stamped a leafy image from Brocade Backgrounds over the top.

I stamped the main image twice, and coloured the images with pencils. I decoupaged some of the flowers before matting the layers onto brown card. The sentiment once more is taken from Life is so much Better. 

I had so much fun this month working with a lot of these older stamps. For some of you they will be brand new. It was great to revisit the images and get to use them again, mixing them with newer stamps that were not around when the stamps first came out. I hope that you have seen lots of inspiration from the rest of the Design Team as well. 

Thanks for stopping by, stay safe and take care,


Judith xx

Wednesday, 27 May 2020

Autumn Notice Board (by Carole)

Hello everyone, today sees the last project this month from our Guest Design Team member Carole Cann, she has made a brilliant project to inspire you and will be back later in the year.

Carole writes:

Hello everyone.

This is my last project for this GDT session. Hope you like the idea.

I have found this item very useful in my household, for leaving quick messages for my husband and vice versa.
Sttamps used: Mellow Fruitfulness and Autumn Poppy
Distress Inks, Versafine, laminator, Whiteboard pen.


I coloured my backgrounds with different yellows, oranges and red, then spritzed it so the colours bled and left a speckled pattern.

The top section was stamped with black and clear embossed to give it more depth.
Some areas were then coloured with water colour pencils and highlighted with white pen.
I then cut it to the required size and trimmed the other two sheets similarly.

These were then overstamped with various designs on the sheet with Smokey Grey Versafine. If you want it bolder then use black.

Once completed they were laminated too. I used my old Cropodile to put the rings on and joined them all together with wire loops.
You could tie them together with fine ribbon, which would look pretty too.
I didn't have any jump rings big enough, so I wrapped my wire around the handle of a paint brush to make oval jump rings.
The back of the sheets were decorated too.

You can write on this with the whiteboard pen and then rub it off easily when finished with the message.

Hope you have enjoyed my projects as much as I enjoy looking at what you are all making, and happy crafting.

Stay safe,

Carole.

Wednesday, 16 October 2019

Upcycled Box (by Gerrina)

Hello everyone, today sees the return of our Guest Design Team member Gerrina for her second post this month. She has upcycled a box that has been unused for some time, using some of our beautiful Autumn themed stamps.

Gerrina writes:

Feels so good...it is my turn again to show some things I made for the Guest Design Team at Chocolate Baroque! Three weeks in a row you will find not only here, but also at my blog, makes from me with the beautiful stamps from Chocolate Baroque....
This week is the second one already, and today I choose to go again with the Autumn season with this box that has been standing so plain and dull in my craft room for years:


Used materials:

Stamps:
Autumn Edges, Autumn Poppy, Nature Table, Nature's Peace, Lace Fragments
Ink: Versafine Onyx Black, Distress Ink: Tea Dye, Rusty Hinge, Walnut Stain, Fired Brick, Peeled Paint. Forest Moss. Memento: Cottage Ivy, Bamboo Leaves, Potter's Clay, Tangelo, London Fog.
Other: Box, Aquarel and masking paper, water brush, black fineliner, washi tape, brown cardstock.

Creatieve groetjes,


Gerrina.


Wednesday, 9 October 2019

Autumn Mushrooms (by Gerrina)

Hello everyone, our regular Guest Team Design member Gerrina is her with us this month. She will be creating three projects for your inspiration, and here is the first one, a lovely Autumnal scene:

Feels so good: it is my turn again for my posts as a member of the Guest Design Team! Three weeks in a row you will find not only here, but also on my blog, makes from me with the beautiful stamps from Chocolate Baroque.
This week the first one of this month, I made an Art Journal page for my long Art Journal. Because it is Autumn, I used the gorgeous mushrooms from two Chocolate Baroque stamp sets:


Used Materials:

Stamps: Autumn Edges, Autumn Poppy
Ink: Versafine Onyx Black, several colours of Distress Ink


Other: Art journal, watercolour paper, masking tissue, brush, water.


Creatieve groetjes


                              Gerrina


Wednesday, 21 August 2019

'Mir'acle Toadstool garden (by Miranda)


Hello there,

I am happy to be here again and having fun playing with these wonderful stamps!
I did use the beautiful' Toadstool Garden' stamp. What a beautiful design and so many things to see......I also will play with the other huge stamp called 'Folk Art' but that will be another post.

I did use it as a background stamp. First I did make an inky background using Distress inks and a bit of salt. Always like the texture of that.......
I embossed 2 fragments of the stamp using clear matt dull embossingpoeders in each corner. 
With some darker blending it really pops out and comes alive........then some stamping using some matching Memento colors.

There is a light spot in the center of the card and I thought it would be great to use a matching stamp....of course some toadstools too from another great sheet' Autumn Poppy'
I did color the toadstools with color pencils and some accents with an acrylic marker.
The sentiment is also from  the Toadstool garden stamp.

Here it is.......


a close-up of the resist embossing......


Well, this was my first take on this stamp, next week there will be more!
Thanks for your visit, hope you did enjoyed it and till next time,


Saturday, 29 June 2019

A Trio of Mushrooms (by Julie)

Hello, today I have three cards with a mushroom theme.


My first card is from a new set called the Toadstool Garden. It is such a beautiful design and takes any hard work out of designing a card as it's all done for you. I simply stamped the image with Warm Breeze, Versafine Clair ink and coloured with pencils. I sponged Distress ink in the background with a few dabs of Crystal Stickles for added interest and the card was done.


My second card is made with Autumn Poppy and Autumn Edges
To start with I inked up the mushroom design from Autumn Poppy using Sepia Versafine ink and stamped in the centre of my card blank, followed by colouring in with pencils. The leaf border was inked up with the same ink and stamped around the edge. By more luck than judgement  I chose a card size that fitted the border and did not need masking, making this quite a quick card. To finish off I applied Mustard Seed Distress ink around the edges


My third card is stamped with another new design called Mushroom House and can be used very simply by just stamping and colouring with pencils. I have just layered the design onto a DL card and added some glitter glue to the tops of the mushrooms.

Thanks for stopping by. Please call back soon for more Design Team inspiration.

Julie xx

Friday, 21 June 2019

A Mixture of Mushrooms (by Judith)

Hello everyone, I have a few projects to share with you today showcasing the fabulous mushroom stamps that we brought to you on last month's TV shows on Hochanda.

For my first projects, I stamped some Mushrooms from the Autumn Poppy stamp set onto large sticker sheets before cutting them out. This is an alternative to stamping and masking images, and allows you to add your images to patterned backgrounds very quickly. I found a lovely speckled background in my stash box which was a great colour for some mushrooms, which I had created using the wrinkle free distress method.

I stamped the sentiment onto spare card, splitting it in two, and colouring the edges with coordinating Distress Ink.

The next two cards show how backgrounds which are not altogether successful can be used when adding something over the top. The first, a remake of an old project that I made a long time ago, I actually spilled my cup of tea on the background! However, I liked the colours, so carried on anyway.

The next is the TV demo itself, and although I do not like this background so much, perhaps with a bit of pencil shading around the mushrooms, it will grow on me.

I used The Toadstool Garden next, embossed in white on a piece of kraft card, then added some paper piecing for a change. I simply rummaged through my stash box again for scraps of backgrounds left over from other projects, and stamped parts of the image using white embossing powder as before. I cut out the flowers and mushrooms before adding them to the main image.

So there you have it, a few more ideas for you using these fabulous images. I hope that you will try some of them out yourselves. Thanks for stopping by,

Judith xx

Monday, 17 June 2019

A Fenland walk by Brenda


Good morning to you all, Brenda here with some more samples using the Autumnal stamps showcased on Hochanda last month.

My top creation is my take on an Autumnal wander in the Fenland fields where I live, the trees are losing their leaves and there is an abundance of fungi to be found underfoot. 

I stamped a piece of card with the trees from Autumn Edges and added some background using Koh-I-Noor paints, a mask for the sun and some hand drawn birds. Next I stamped the Toadstools from the same stamp set, stamping a few more at both ends to extending the line, then I cut around the tops of the central ones and used a die to create a frame (when doing this tuck the bottom of the die behind those you have cut out so that section is not cut by the die). I coloured in with pencils and used foam tape to raise the frame over the trees.


The Artichoke from Autumn Edges was stamped with Versafine Clair and I then used Distress Inks and a stencil to create some background interest, matted and layered onto a die cut hexagonal shaped card.


I have used the trees from Autumn Edges to create a concertina card through the seasons, using various colours of Distress Inks for the background, a mask for the sun and various colours of Versafine Clair for the trees.


I stamped The Toadstool Garden using Versafine black onto an Oxide background, bleached out the colour from some elements of the image and them painted in some of the flowers with coordinating colour.


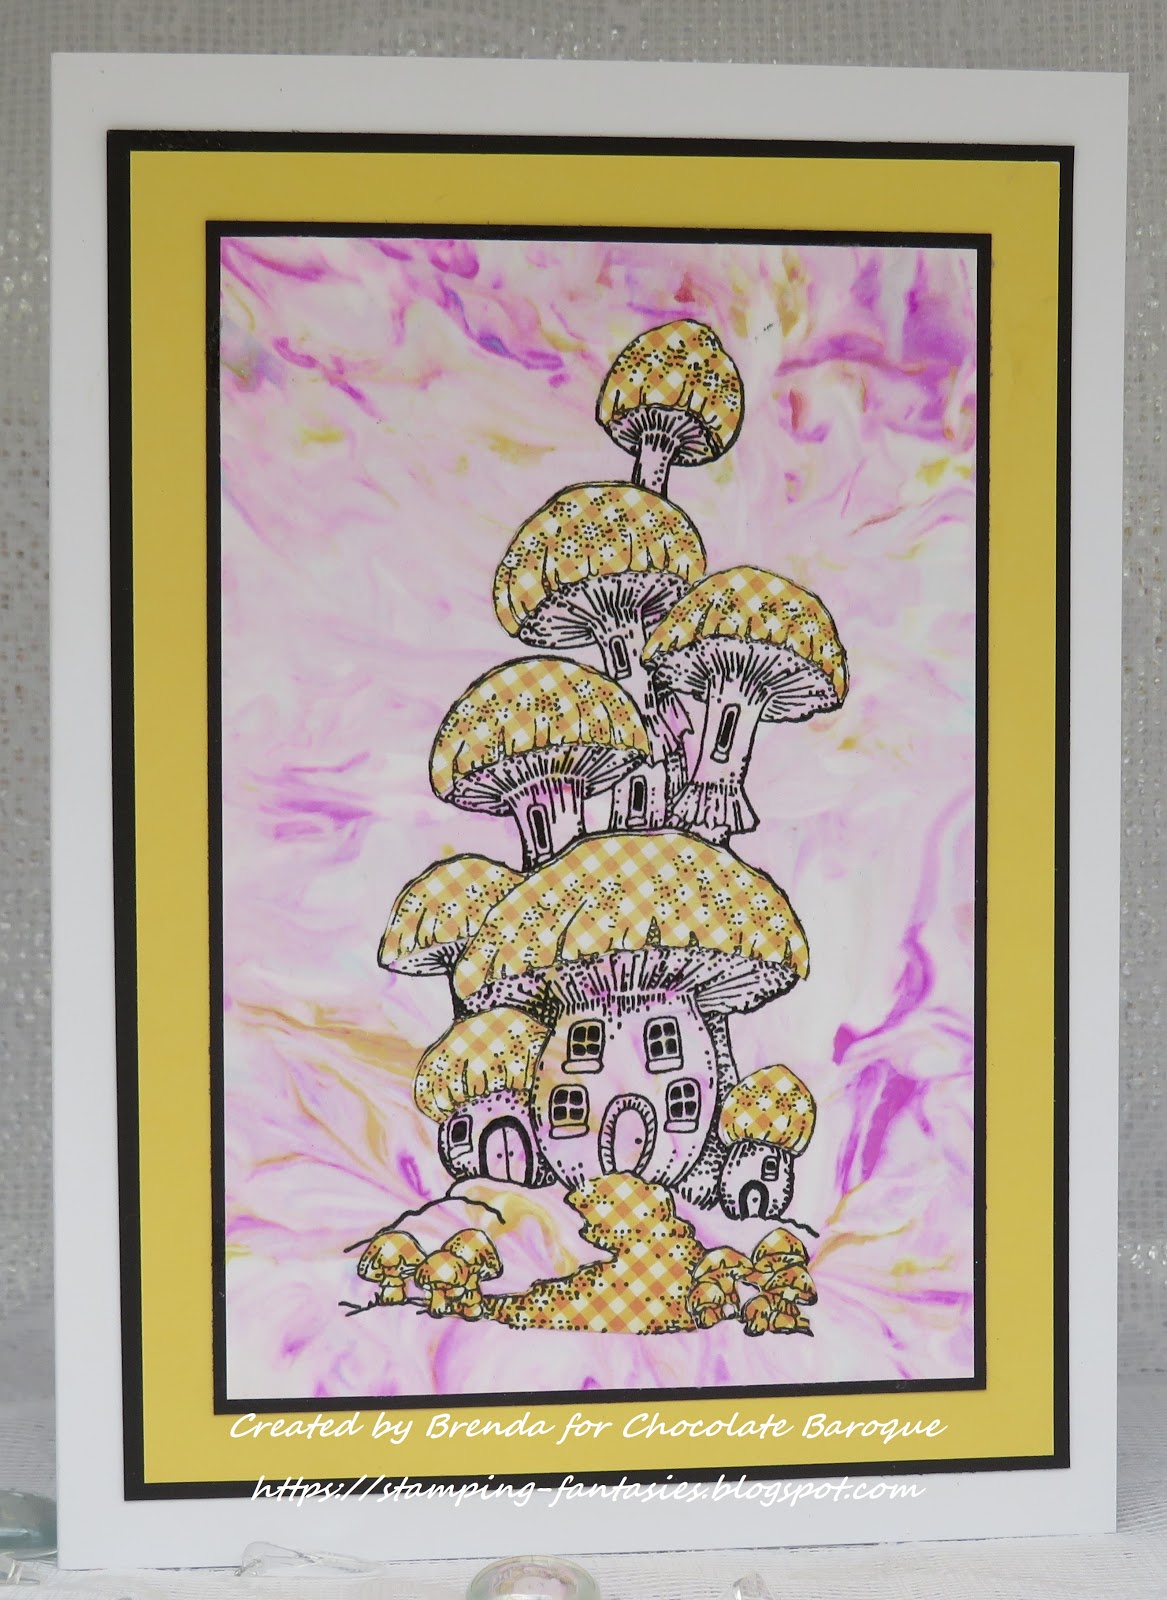
Mushroom House has been stamped onto a shaving foam background using Versafine Clair, then stamped again onto some yellow DP, but our and paper pieced.


And I couldn't finish this post without including at least one Poppy which is the one from Autumn Poppy stamped with Versafne black onto an Oxide background , bleached out and then coloured in with paint and stencilling added around the image.

Many thanks as always for your visits and encouragement.

Thursday, 13 June 2019

Woodland Delights (by Julie)


Hello, today it is my turn to share three cards that I made for Chocolate Baroque's recent  Hochanda TV shows.

 I used the Autumn Poppy set to create my first card which has a bit of a woodland theme. I stamped the mushrooms twice to the bottom right hand side of the card, followed by the leaves spreading from the top of the card. Don't worry if you over lap any leaves as you can hide any "mistakes" by stamping some leaves on spare card, cutting out and layering over the top with 3D foam pads.
I hand drew the tree trunk, before colouring the whole design with Distress inks and Polychromus pencils.


These two cards have been stamped with Mellow Fruit. They make a reasonably quick cards and as you can see are very similar in design.


The cherries and apple designs were stamped with grey Versafine Clair, before being coloured with polychromus pencils. The background is also coloured with the same pencils and white paint pen highlights were added to finish the designs off.

Thanks for stopping by and please call back for more Design Team inspiration.

Julie xx