Pin It button on image hover
Showing posts with label Let's Get Festive. Show all posts

Saturday, 11 December 2021

Festive Trees (by Judith)

Hello everyone, I hope that you are keeping well. I have a couple of Christmas projects to share with you today. These projects feature stamps that aired on our November TV shows on The Craft Store.

My first project was created on kraft card.  I stamped the large heart from Artist Trading Heart, and masked the outside. I added trees from Trees a Crowd, and some scenery lines with a fineliner pen, using torn paper. Keeping the paper in place, I added some shading with white ink and a stencil brush. I used a white gel pen to add some highlights to the trees and dots in the sky for snowflakes.

I added a sentiment from Let's Get Festive to finish.

My second project consists of two little CAS cards stamped straight on 4" x 4" cards. I used two colours of ink and stamped straight onto the card blanks. These were really quick cards to make. I chose images from Frosty Trees for both the sentiments and main images. The teal and purple colour scheme is not traditional, but would suit someone with a modern home decor. You could choose any colour palette; black and gold, red and green, blue and silver, whatever combination you like, and use black card if you opt for metallic colours for even more drama. I added a little bit of glitter glue on the tree, you can click on the photo for a close up look.

I will be back later in the month with some more projects to share with you, thanks for stopping by, Judith xx


Sunday, 1 September 2019

My House (by Judith)

Hello everyone, I have a few projects to share with you today featuring a very special stamp showcased on last month's TV shows on Hochanda, but first of all I would like to talk to you a little bit about the background of the stamp.

You are all probably very familiar with the very talented Kim Moody whose stamps are manufactured by Chocolate Baroque. His quirky stamps feature architectural images, and seaside scenes which are such a delight to work with. Kim also does commission drawings of houses and other buildings, adding his particular eye for detail. I decided to ask Kim some time ago to draw a picture of my own house Poppy Cottage, and we discussed adding lots of features that I love about my house; the dragonfly door knocker, the wrought iron butterflies on the balcony, the dovecote in the garden, and of course, he needed to include Poppy and Bella, my two cats. Poppy is a bit plump, and Bella is rather skinny, so you can tell them apart! I sent a few photographs, and Kim came up trumps with a delightful drawing, beautifully framed for me.


A few months on, and I asked Lesley if it would be possible to have the stamp made, as I would really love to create Christmas cards using 'Poppy Cottage' as a personal touch. We hoped that you would love the image as much as we did, and decided to try it out as a small batch on one of the TV shows. I was so touched that you really liked it!

I created a couple of samples for the show, the first one was created by stamping an image from the Poppy Edges stamp set a couple of times, then masking these images before stamping Poppy Cottage itself. I masked the house also, then added a Pan Pastel background.

I added foliage from the Silhouette Grasses stamp set before removing all of the masks. I coloured the images with pencils and added one of the sentiments which I stamped onto sections of card, and edged with a plum coloured ink. I chose the same coloured card to mat the project onto before adhering it to a large card blank.

My second project was a Christmas card, to show the versatility of this lovey stamp. You could use it at any time of the year really, by adding extra foliage, and varying the colours. I have chosen to stick to the true colours of my house for these samples, but you can let your imagination run riot.

I stamped the house once again, and masked the image. I used a snowflake from The Christmas Garden and white embossing over the top two thirds of the background. I covered the background with Distress Ink, and the embossing acted as a resist.I coloured the image with Koh-I-Noor paints, and added a bit of Stickles for some Christmas bling. The sentiment comes from the Let's Get Festive stamp set.

My final project was a heart stopping TV demo, and it could have gone horribly wrong on live TV, but fortunately, it all worked out well. I decided to create a little key ring or handbag charm using shrink plastic. I die cut a large tag, and stamped the image using Archival Ink. I coloured the image using alcohol markers and cut a hole at one end. I shrunk the plastic using a heat gun, turning it over regularly to ensure even heating, and flattened it with an acrylic block before it had time to cool.

I drew around the shape onto a piece of greyboard, and covered this with some scrapbook paper using Matte Medium. For the keyring, I stuck the shrink plastic to the greyboard shape with Matte Medium, but for the handbag charm, I let the shrink plastic swing freely.

Even shrunk down you can still see the details so clearly, and these little charms make a fabulous little gift. You could try this idea using the Tagtastic stamp and any of the tall houses that either Kim Moody or Sue Page have designed recently.

I will back later in the month with more ideas to share with you. I hope that you will watch Lesley on this month's TV shows on 3rd September, she has some amazing new stamps to share with you. Sadly I will not be there this month, but I will be back again in October.

Thanks for stopping by,

Judith xx

Monday, 25 February 2019

The Magic of Nature (by Carole)

Hello everyone, Carole is back with her final post of the month, a beautiful Spring themed card. 

Carole writes:

Hello again, another project for February, it is a little busier than my previous projects.
As Spring is in the air, or so they say, (it's got to come some time), I have used the pretty Spring Awakening stamp. She is one of the Four Seasons stamps, all of which I like.

Products used:

Spring Awakening stamp
Distress inkpads: Squeezed Lemonade, Dusty Concord
Versafine Smokey Gray, black permanent inkpad
Clear embossing powder, parchment paper
The words are made up from a section of one of the sayings from Let's Get Festive and Essence of Nature.

It is useful to be able to use parts of sayings from different sets. It makes them go further. Like the Autumn card I made for a previous Guest Design Team post, the hair can be inked separately to make a good background. This I did with Versafine, onto a background made with Squeezed Lemonade and Dusty Concord Distress inkpads. The Lady is stamped and embossed, then coloured with the same colours as the background. I stamped the primrose clump three times and cut around them to make an added feature.
I wanted to pick up a little of the violet colour so have mounted the background onto a violet coloured card and then the white card base.
The words are stamped with a permanent inkpad onto the parchment and when this had dried thoroughly, I tore around the relevant words.

Thank you for visiting and I look forward to my next session later in the year.
Bye for now and happy crafting,

Carole.


Saturday, 22 December 2018

Wildflowers Through the Seasons (by Judith)

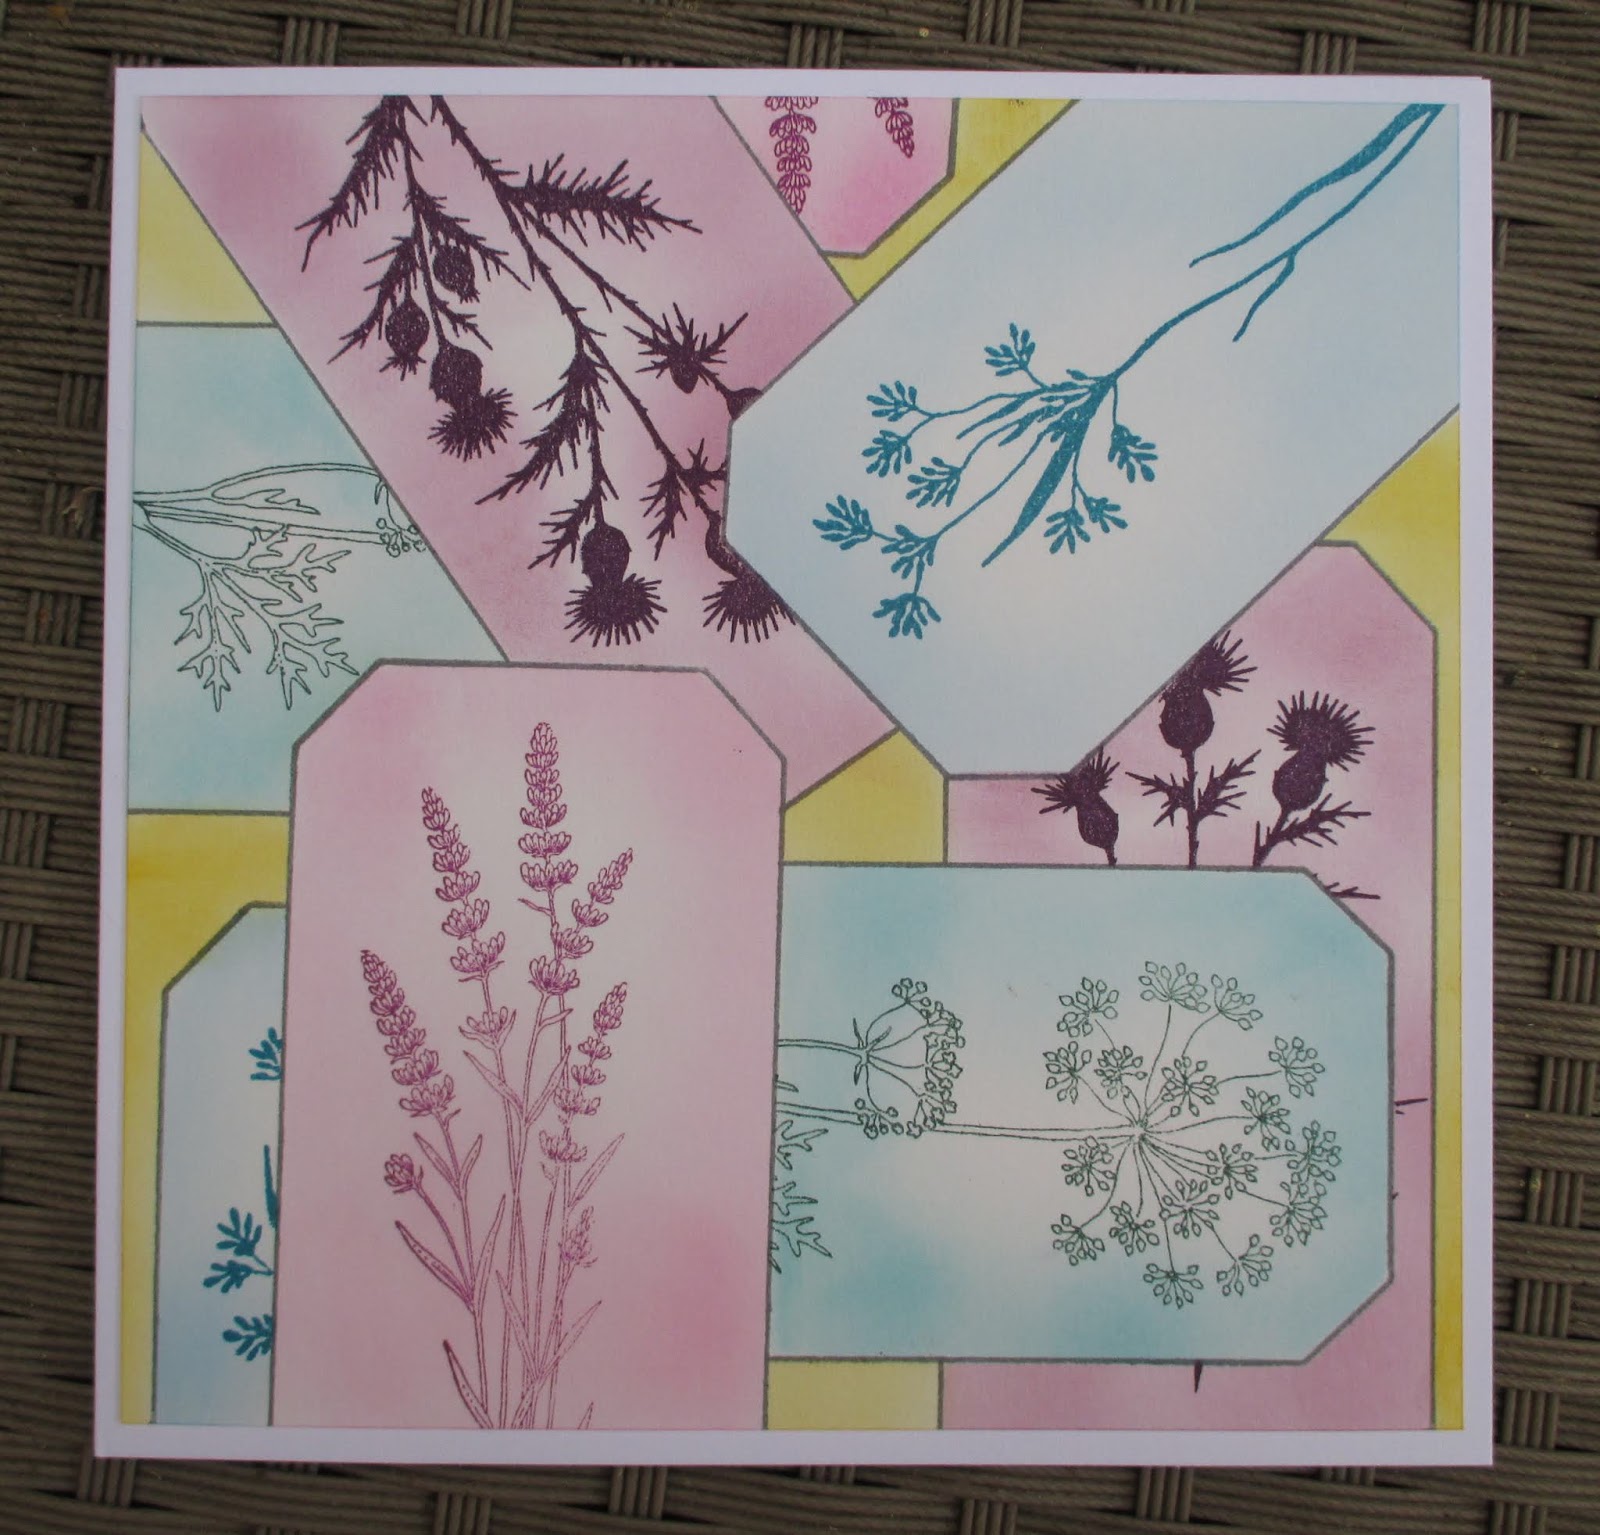
Hello everyone, I have a project to share with you today ustilising the fabulous Tagtastic stamp featured on last month's TV shows on Hochanda. I wanted to show another use for this stamp, and paired it up with the Wild Meadow stamp set for my project.

I started by stamping the image on masking tissue several times, and cutting the image out. I then stamped the image onto my background a couple of times, and then masked the images. I stamped the image again, masking those images, and continued, building up layers of the tag, until I had filled the page. I then added a background colour to fill in the 'blank' areas. I added different colours to the tags, using reverse masking, and then stamped foliage into each tag, while the reverse masks were in place. This meant that the foliage stalks did not overlap the edge of the tags.

I had great fun creating this card, and you could use the idea in a much smaller way for a tag or mixed media project.

I have a bonus project which I created more recently, as I needed to make a Christmas card for my lovely Hubby. I used one of Lesley's beautiful papers, one of the plain designs. I drew a circle in pencil, and added a few snowflakes, which I embossed using white embossing powder. I added a sentiment from the Let's Get Festive stamp set, and built the wreath using foliage from the Wild Meadow stamp set. I added a touch of shading to make the snowflakes really pop.


I will be back later in the month with more ideas to share with you, but would like to take this opportunity to wish you all a very Happy Christmas. I hope that you can enjoy the day, whatever you are doing. Thanks for stopping by,

Judith xx

Tuesday, 20 November 2018

Pocket Money cards (by Magda)

Hello, my second post for this month wants to inspire you to do some Pocket Money Cards.

I realized two projects that you can use for any opportunity changing the stamps. Chocolate Baroque has a lots of suitable stamps for you. and here below you will find what I used for my cards.

The sentiments of the plates  Let's get Festive and Words to Dazzle & Sparkle
Stamp  Fat Robin
The stencil   Seasonal Elements
White Cardstock    4 pieces:   17,5x14,5 - 15,5 x 10,5 - 11,0 x 6,5 - 7,0 x4,5 cm
Distress Ink Pad to blend and stenciled the background and mat
Versamark and Embossing Powder gold
Stickles glue
Peel off
White Embossing Paste


Thank you for passing by and don't miss the appointments of the Design Team
Magda

Tuesday, 6 November 2018

Christmas Inspirations (by Magda)

It is time to think about Christmas cards and on the Chocolate Baroque site you have a big choice of stamps.  Here below I show you three projects that could inspire you.

From Our House to Yours
1. Score a white cardstock and colour it with Distress Ink Pad
2. Stencil with embossing paste the snowflakes from Seasonal Elements
4. Stamp the birds from Fat Robin and colour with Distress Ink Pad using a brush and cut the shape
5. Stamp the sentiments from Let's get Festive, use Stickles on the snowflakes, and assemble all of the pieces as shown


Joy
1. On a white cardstock use several layers of stencil in blue Distress Ink Pad and the snowflakes from
    Seasonal Elements
2. Stamp Winter Edges in Archival Library Green and apply embossing paste on the trees and on the
    bottom
3. Colour the ground in brown/green shades of Distress Ink Pad
4. Stamp the sentiments from  Let's get Festive, use Stickles here and there  and assemble all of the
    pieces as shown


Frosty Trees
1. On a white cardstock blend  Distress Ink Pad  Barn Door and Festive Berries
2. Stamp with Versamark Onyx Black one tree from Frosty Trees plate
3. Stamp the sentiments from  Let's get Festive at the bottom of the card and cover it with embossing
    paste through a stencil
4. Wipe on the same  stencil a wet cloth in a corner on the top of the background
5. Stamp with water  the same tree of Frosty Trees plate  to create a shadowed wood
6. Apply Stickles gold on the stars of the trees and add a gold wire.


See you soon for my second post in November, happy Christmas crafting 
Magda


Tuesday, 28 August 2018

Lets Get Festive

Hello there! I have a few more samples from July's shows using the Serena stamp, Hark the Christmas Rose stamp, Robin the spruce  and Let's get festive stamp sets.


In this first one I created a background using inks and stamped the serena image onto a cut out round piece of card. I used inks to colour this too. 


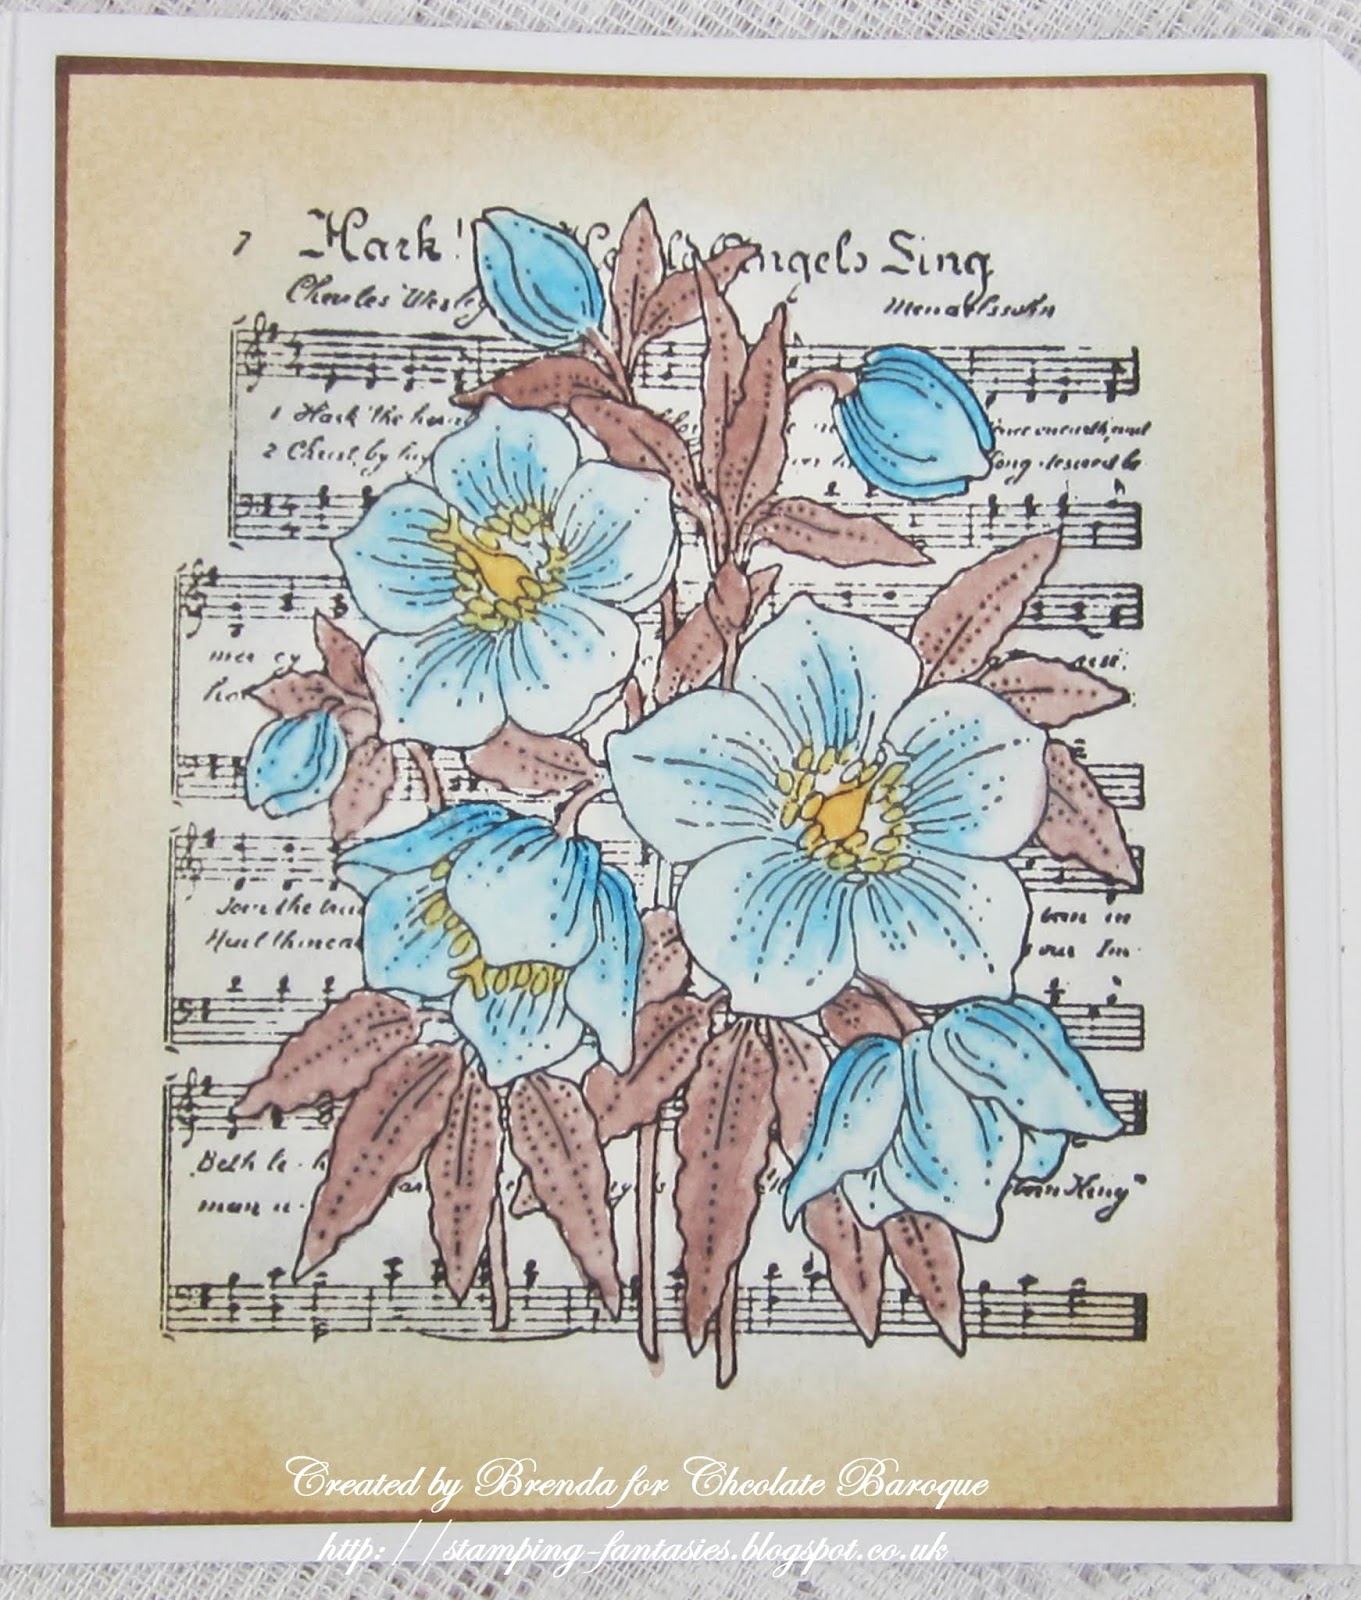
I stamped the hark the Christmas Rose stamp in archival ink and coloured it in water soluble inks. I then added this to a background created using a sentiment from the Lets get festive stamp set.


For my tag I used paints to create the background and coloured the stamped image (from robin the spruce stamp set) in distress inks.

I hope this has given you some ideas of projects you can make using these stamps!

Have a great day!

Hugs

rachel x


Saturday, 25 August 2018

Christmas Candle Box and Card (by Anne)


Good morning. Today I am sharing a couple of Christmas project ideas with you.
The first is a festive card with a bit of a grunge feel. I was experimenting a bit with this one – just had to add a bit of glitter bling though (no stopping me – ha ha). Stamp sets used: Winter Edges, Pears and Baubles plus Let’s Get Festive.
How it was done:
The card blank was stamped with the snowflake border and black dye based ink (12cm square texture Kraft card).
A die cut tag was spritzed with green and gold ink sprays. When dry the background was stamped with snowflakes and the sentiment using black ink and opaque metallic gold acrylic paint. A little black ink was blended around the edges. Black and white Bakers Twine was tied onto the tag and around the card front.
The tree was stamped with gold paint onto black card. A little opaque red gouache paint was added to the branches. This was cut out and mounted onto white card to create a border around the tree. It was lightly shaped before gluing to the card.
Next for the bling: I added Stickles (Gold and Sprinkled Sugar). Glossy Accents was also added over some of the elements to add shine and depth.
My second project is a festive candle box using the lovely Robin The Spruce stamp set – lots of bling on this one! The decorative background stamp from the Pears and Baubles set was also used to decorate the inner box panels, plus the Seasonal Elements Stencil  to add sparkly snowflakes to the inner acetate box lid.
How it was done:

I first created a little plain box with acetate lid to go inside and hold 4 small T-light candles (approx. 8cm square and 2cm deep). Viva Décor glitter paste was applied through the stencil to decorate the acetate lid.
An A4 sheet of silver decorative metallic card was used to create the outer box. This was a little deeper than 2cm (to accommodate the inner box) and approx. 9.5cm X 13cm (large enough to fit the stamped panel and sentiment on the front). The candle box was glued inside and Pinflair Snow Dust used to create a snowy effect.
Instead of a fitted lid I created fold over flaps for the top (approx. 13 X 8cm each). Inner panels were stamped in green ink onto smooth white card and coloured with watercolour and sparkle pens. Red glaze pen was added to the berries. The panels were glued to the inside flaps. Thin magnets were added between the card layers to give a magnetic closure, plus a little ribbon tab added for opening. A little obligatory bling was also added with silver glitter glue.
The sentiment was stamped with black ink onto a die cut panel. Foliage was stamped in green around the edges, and yes …. more silver glitter glue.
The front panel was stamped onto acetate with black StazOn ink. The back was coloured with alcohol ink pens. A piece of plain white card was trimmed and glued to the back creating an opaque background layer.
Glaze pen was used to colour the berries and rosehips, and glitter glue added to the snowy hills.

Thursday, 23 August 2018

Christmas roses (by Veronica)

 My last samples for this month share a theme of Christmas roses, and both stamps are great for colouring in.
The first stamp is called 'hark the Christmas rose'  and has a background of music for the carol 'hark the herald angels', which i thought was a lovely combination.
 The first one was stamped with versamark onto black card and gold embossed before painting with some very ancient mica paints - I think this one used H2Os. Trimmed down, mounted onto gold card, then onto a white card blank that had been randonly stamped with the roses using a gold inkpad.
 The second version is very similar, but embossed in silver and the paints were from an anonymous palette of mica paints - it is so old that the clear lid has disintegrated, but the paints still work fine!
This time i stamped and white  embossed the snowflakes from winter edges to make the background, then sponged a light grey ink round the edges before adding matting layers of black and silver


The serena stamp does count for this theme as it has a small bunch of Christmas roses!
My first card was the simplest, stamped with versamark onto cream card and gold embossed.
Painted again with the mica paints, a thin gold mat and mounted onto a white base card randomly stamped using the Christmas roses which were gold embossed. The sentiment is from 'lets get festive'.


The final version I stamped serena three times,  once onto white card and twice onto black and silver embossed all the images.
One of the black cards was trimmed to size, and a versamark pad dragged roughly round the edges which were then silver embossed.
Serena was painted with the mica paints on the white card and fussy cut out, then glued onto the image on the black card.
The roses and candles were painted on the third image, then fussy cut out and glued on.

I hope that you enjoyed Christmas in July, there are loads of lovely samples coming up from the girls, so keep looking!


Tuesday, 21 August 2018

Christmas Baubles (by Judith)

Hello everyone, I have some more Christmas projects to share with you today, featuring some of the stamps that we used on last month's TV shows on Hochanda.

For my first project, I have created a piece of home decor in soft vintage colours. I wanted to use very non-traditional Christmas colours, and this soft pink and green was exactly what I had in mind for my project. I used a canvas from my stash, which I painted with acrylic paint, and added some ivy die cuts all around the edge. I painted a piece of dictionary paper with the same acrylic paint, but thinning the paint, so that it allowed the words to remain visible.

I used Pearl Soft Form Relief Paste, coloured with Brushos to create my focal images, and these were left to dry overnight. I dry brushed some of the same colour of Soft Form Relief Paste over the ivy leaves, which acted as a kind of gilding paste, and it gives a lovely shimmer to the leaves.

Once the two pears were set, I peeled them from the stamps, trimmed the rough edges, and added a tough of gold gilding paste to the surface, before adhering them inside the canvas.

My second project is much more colourful! I created a background using Distress Inks , and added the large textured background image from the Pears and Baubles stamp set. I stamped three baubles onto a spare piece of card and cut them out. I attached them to the background, along with some bold purple ribbon.

A sentiment from the Let's Get Festive stamp set completes the card.

Thanks for stopping by,

Judith xx

Saturday, 18 August 2018

Shabby Chic Roses by Brenda


Hello all, Brenda here with some more inspiration using the beautiful new stamps that featured in Lesley's recent TV shows on Hochada.

The beautiful Hark the Christmas Rose was a big hit with all the Design Team and the above card was the first I made when I inked it up, it just said Shabby Chic to me so I went down the Kraft card and soft pinks route. The image was stamped with Versafine black, a little colouring added with pencils and the edges 'ruffed' up after adding tea dye DI before matting and layering on to coordinating card stock.


The backgound of this one has been repeat stamped using Distress Markers and images from the new Robin the Spruce set. The lovely Robin is from the same set, again stamped with Versafine black, a mask and Pan Pastels for the sky then coloured in and mounted on foam pads over the background.


This is Serena and her name really does befit the beautiful image whic after stamping with Versafine black I coloured in with sparkle pens, lightly inked the background, framed her and uased some organga ribbon and a snowflake brad.


My final share today has a Distress Ink background which brayered on randomly to give varying textures, then overstamped with stamps from Robin the Spruce and Pears and Baubles alsong with Large Crackle Backgrund around the edges stamped with Versamark and embossed with Detail Gold. The pears are also from Pears and Baubles stamped on to a background created in the same way as the main piece, heat embossed with detail gold again and cut out. Finally a sentiment from Lets Get Festive.

Many thanks as always for your visits and kind comments.

Thursday, 16 August 2018

Happy Christmas ( By Marga )

Hello everyone. 

This time another Christmas card.


I first stamped the background with Versamark and embossed it with white embossing powder. Then I made the background with Distress Ink. I took an iron and a piece of print paper and I ironed off the embossing powder. The Christmas balls stamped with Versmark and white embossing powder. Cut them out and pasted them on the card.

Hugs Marga
                                                                          

Sunday, 12 August 2018

Beautiful Baubles

Hello there! Rachel here today with more inspiration from the shows in July. These cards were both made using stamps from the Pears and Baubles set.

For this first card I used brushos to create a background and then stamped the lacy stamp in versamark before adding white embossing powder. I stamped the baubles separately and fussy cut them then added them raised on sticky squares. I stamped the sentiment from the Lets Get Festive rubber stamp sheet.


For this one I used soft form relief paste in silver over the bauble stamp having first inked up the stamp in red archival ink. After 36 hours I removed the hardened paste from the stamp edges and trimmed it into shape. I used frantage on black card to create the background and then added the bauble. Finally I added the sentiment stamp from the Lets Get Festive stamp set.


I hope you have enjoyed these techniques and their results!

Have a fabulous day!

Hugs

Rachel x

Saturday, 11 August 2018

"A Chocolate Baroque Christmas" on 3rd July (by Magda)

The July shows on Hochanda were a beautiful presentation of Christmas stamps and interesting preview samples made with

Pears and Baubles
Let's Get Festive
Winter Edges
Serena
Bearing Gifts
Robin the Spruce
Hark the Christmas Rose

Here below I share with you the projects I realized with "Serena " the sentiments are from
"Let's Get Festive"

A monochromatic card


A piece of home decor


A white and gold wrapped card


Thank you for passing by and see you soon again with other projects
Magda 

Thursday, 9 August 2018

Christmas Card and Treat Bag


Good morning. Today I am sharing a couple of Christmas projects – a simple card in non-traditional colours using the Pears and Baubles stamp set, and a pretty fabric pouch stamped and coloured using the Hark the Christmas Rose stamp.
A 6 X 6 inch white card blank was stamped with the lovely background stamp from the Pears and Baubles stamp set using pale pink dye based ink.
The sentiments were stamped with pink and Silver Ink from the Let’s Get Festive stamp set.
An octagonal piece of pink card was embossed with a textured folder from my stash. A little Distress Ink (Tattered Rose) was applied across the surface with a sponge to enhance the texture. Versamark Ink was applied around the edges and embossed with white powder. This was glued to the card with foam pads for added depth.
The bauble was stamped with Silver Ink onto plain white card and cut out. The bauble was sprayed with glittery varnish for added sparkle and Glossy Accents applied to the central star. The bauble was glued to the card with foam pads.
Finished with sequins, an organza bow, silver glitter glue and silver PVA pearls – just couldn’t resist a bit more bling.

A scrap of cotton was trimmed into a rectangle approx. 13 X 34cm. This gave enough room for seam allowances and a fold over top to thread with a ribbon drawstring. Before sewing together the Hark the Christmas Rose was stamped onto one end using Black Ink (suitable for fabric). The ink was left overnight to dry and ironed to fix (essential if you want to colour with water based media).
Rather than water based media I decided to colour the image with permanent alcohol markers (green, yellow, pink and blue). Colour was encouraged to bleed and give a soft blended effect using a clear alcohol blender pen.
When dry a little clear acrylic sparkly glaze was applied to the flowers, and gold glitter glue (suitable for fabric) was applied to the stamens. Yes – just had to be more bling. The fabric was again left overnight before ironing with a hot iron to set everything.
A small channel for ribbon threading was stitched on each end, then the fabric folded in half and the side seams stitched (omitting the channel). Two pieces of ribbon were thread through the channels to create a simple pull drawstring.
I hope that you have enjoyed my Christmas makes xxx.

Saturday, 4 August 2018

Hark the Christmas Rose by Brenda


Good morning Peeps, Brenda here with some Chrismtas creations from Lesley's recent Hochands shows which featured some rather beautiful seasonal stamps. And a heads up that she has two shows today at 8am and 2pm which you won't want to miss, it's all rather Eastern!

My first piece of artwork features the lovely Hark the Christmas Rose which really is the most beautiful image. I am sure the shape of this card has a name although I'm afraid I don't know it. I used a sheet of A3 card which gives you two base cards, I score twice at 6" intervals then cut vertically to create the two cards, then cut the two end panels diagonally so that they fold in on onanother.


This is the central panel stamped and coloured with sparkle pens, I then stamped the flowers several more times and cut out to decouapge on the frot panel and layered over the background with I stamped with Large Crackle Background.


A nice inky background using Distress Oxides, then the Pears from Pears and Baubles, the first stamped with Versamark and heat embossed with detail silver, masked to stamp the second pear stamped and embossed with purple embossing powder, then repeated again to add the thrid pear. Finally three sentiments from Let's Get Festive.


Another appearance for Robin the Spruce, he seems a very popular fellow with the DT and viewers, stamped with Versafine Black, twice onto the back panel and a third time onto a small piece of card, cut our and coloured and raised centrally over the background.


A final share using the beautiful Serena. I brayers white acrylic pain onto a piece of Kraft card purposely leaving uneven edges. I then added a wash of Twisted Citron and Peacock Feathers Oxide Inks, to get the ink where I wanted it I put the ink onto a pice of acetate, water down and then dabbed the piece of painted Karft into it.........messy but works a treat as you can see the ink and are in more control of where it goes.

I then stamped Serena with Versafine black, added some seam binding and coloured and cut out a couple of flowers from Hark the Christmas Rose.

Thank you so much for your visit today.

Saturday, 23 December 2017

Bold Poinsettia (by Judith)

Hello everyone, as Christmas Day draws near, I hope that you are all nearly ready with your plans and preparations, whatever you are doing. I have a festive card to share with you today, using stamps featured on last month's TV shows on Hochanda.

I created an inky background using Distress Inks, which I spritzed with water, and stamped a leafy spray from the Steampunk Christmas stamp set on the background, and added a sentiment from the Let's Get Festive stamp set.

I stamped and embossed some leaves and a flower centre from the Bold Blooms stamp set onto cartridge paper, using gold embossing paper. I coloured the images with ink and a water brush, before fussy cutting them out, and attaching them to the background, to create a poinsettia style flower.

Have a lovely Christmas everyone, and if you get a chance, do try and watch Lesley on Hochanda today. Her shows are on at 12.00 and 3.00. Thanks for stopping by, Judith xx