Pin It button on image hover
Showing posts with label Distress Ink. Show all posts

Thursday, 16 December 2021

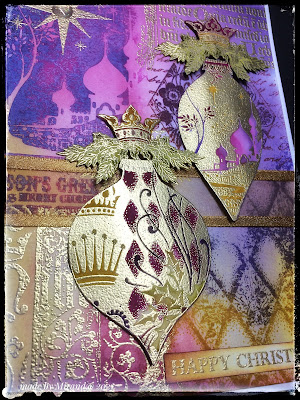
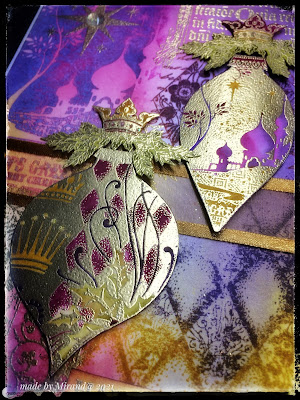
Royal Christmas (by Miranda)


Hi peeps, Miranda here with a festive blogpost. 

I have browsed through my CB collection and came up with these sets.........Harlequin Christmas A4 set

and this one too 'Gothic Angels A4 set'. Two of my favorite Christmas themed stamp sets.

I have used Distress inks and some Oxydes. Lots of gold embossing powder for a rich shine. A bit of decoupaging and coloring. 


Hope to have inspired you a bit...however....I think you all will have finished your Christmas cards.......but maybe for the next year?

Thanks for your visit and like to read your comments as always,

stay safe and have a lovely peaceful Christmas time,


Thursday, 21 January 2016

The view from the garden wall (by Lesley)

Hi everyone, today I am actually posting one of my own pieces of artwork. Seems ages since I was let loose on here! Anyway, this one was designed for the TV show when the stamp launched last month and I made it to demonstrate a couple of new techniques. Bit of a long one, so maybe you need to pull up the chair.

  • To create the sky take a piece of 300gsm white cardstock, cut to 5" square. Tap three colours of distress inkpad on to an acrylic block, I used Barn Door, Fossilized Amber and Spiced Marmalade. Spritz with water and then drag the block along the top half of the card.
  • For the grass clean the block and repeat the same exercise using Crushed Olive, Bundled Sage and Mustard Seed.  If you want a less 'yellow green' grass then leave out the Mustard Seed. Again spritz with water and drag along the bottom half of the card, allowing the colours to slight overlap the sky.  Set aside to dry thoughly.
  • Stamp the Walled Garden on to a self adhesive label with Jet Black Archival ink and colour with Distress inks and a water brush. When dry, cut out. TIP: Don't worry about the trailing rose stems on the top of the wall, you can draw these back in later.
  • Peel the backing off the label and position on the background, then trim around the edges.
  • To create the walled effect take another piece of 300gsm white card, approx 5" square, an old credit card and Vintage Sepia Versafine ink. Run the long edge of the card through the inkpad and then 'stamp' random lines horizontally across the white card. Keeping reinking the credit card and continue until you have covered in one direction (side to side).
  • Now repeat, this time stamping vertically between the horizontal lines. You want this criss-cross stamping to resemble bricks. It doesn't matter if it is uneven. Sponge Old Paper Distress ink around the edges of the card to give an aged appearance.
  • To distress around the edge of the card use either a distress tool or run a pair of scissor blades backwards and forwards over each edge to rough up the cardstock.
  • To assemble, glue the background to the faux wall and then attach to a 5.5" square blank Kraft card.
  • Finally draw back in the trailing rose branches using a black fineliner pen.
I love 'painting' with an acrylic block and of course if you change the colour combinations you can have a winter or a pale summer sky, brilliant green fields or something a little more subdued. Best of all you will always 'paint' a unique background since the inks on the block will spread out on the card differently each time you do it. I hope you will try these techniques and create your own view from the garden wall.

Thanks for dropping by and please call again soon for more beautiful creations from our fabulous team.


Friday, 8 January 2016

An Old Postcard (by Asha)

Good morning, fellow Chocoholics. My turn today to share a project and I'm playing with one of the new cling singles called Walled Garden. Here's a simple project that you could easily make without getting too inky. I was inspired by my grandmother's very old holiday snaps. 


To recreate this old postcard look, start by stamping the image on cream cardstock. I coloured it with alcohol markers, but pencils will work well too. Lastly, ink the edges with Distress Ink. To soften the wall I added stamped the falling ivy from the June Fairy DL sheet.

I've made a simple card but with this stamp you can do so much more. Come back soon and be prepared to be wowed by the rest of the team. As always you'll find more detail about this card on my blog.

Thanks for stopping by and have a beautiful day!

Beijinhos,
Asha

Monday, 26 October 2015

Exquisite Edges - Card by Florence

Hi everyone

Today I would like to share a card made using the new Exquisite Edges.  
All of the stamps in the Edges Range can be seen here.


To make this card

Take a mask and Distress Ink and create a pattern on a piece of white coated card stock.
Stamp the Floral Edge and the Sentiment.
Make up the card as seen.

If you have missed any of the recent posts, do scroll down and check out the fabulous projects made by the team.

Thank you for looking.
Florence x

Monday, 12 October 2015

Owl Edges - Cards By Florence

Hi everyone

Today I would like to share with you two cards made with the fabulous Owl Edges. 

The Owl Edges are a new addition to the Chocolate Baroque Edges Range which can be seen here.


To make this card
Stamp, emboss and color in the floral edge.
Take a mask and Distress Inks and create the pattern on the background.
Stamp the corner flourishes and "Tranquility".


To make this card

Stamp and emboss the Owl Edge.
Take a mask and Distress Ink and create the pattern on the background leaving a clear space for the small Owl.
Stamp the small Owl and the Sentiment.
Make up the card as seen.


Thank you for looking
Florence x

Tuesday, 29 September 2015

Hocus Pocus Card by Florence

Morning everyone


Today I am using the new Hocus Pocus stamp set. 

Although these are Halloween stamps they can easily be used for other occasions.

I would like to share with you an idea for a little persons birthday card.

This would also work as child's party invitation just by changing the sentiment.


 Please click on the image enlarge.

To make this card

Stamp the creature onto a piece of white card, color the image and cut it out.
Stamp just the tail onto a piece of white card and cut it out but include an extra piece at the one end of the tail for attaching purposes.
Die cut or cut out by hand the number.
Stamp a pattern onto the number and add a little Distress Ink to the edges
Glue the tail onto the back of the number so that just the front of tail shows.
Stamp and emboss the sentiment onto a piece of pretty paper or card.
Mat and layer the card.
Attach the number (with the tail attached) using foam pads.
Attach the creature also using foam pads.

Do check out all of the amazing creations from the team.

Thank you for looking

Happy Stamping
Florence x

Sunday, 20 September 2015

Spooky Flip Flop Card by Anne

Good morning. I have another spooky project to share with you using the new Hocus Pocus and Put a Spell On You stamp sets. This time I have made a Flip Flop card where the topper panel flips to reveal the sentiment as you pull the card open. I hope that you like it.


Materials used:
How to make it:
  1. Spray a piece of stamping card approx. A5 in size with inks, drop on dishwasher salt and leave to dry. I used stained salt so it gave more random flecks of colour.
  2. Score and cut the card to create the flip flop opening panel. I used a die set but you could hand score and cut. The flip flop panel is approx. 7cm square. The score lines are approx. 6.5 and 9cm in from the right hand side. You can see where to cut and score in the opened card picture.
  3. Stamp the tree and bats with StazOn and complete the landscape using a fine black marker.
  4. Cut a topper approx. 7cm square. Stamp the cat scene, colour with pencil and brown marker, edge with Distress Ink and draw faux stitching with black marker.
  5. Cut another topper approx. 6cm square. Stamp the sentiment, bats and twigs. Edge with black marker.
  6. Cut a strip approx. 1cm wide and randomly stamp with the spider. Also stamp a mini topper approx. 3.5cm square with the bird. Ink the edges with Distress Ink and black marker.
  7. Mount the toppers (I used foam pads for the cat image), add Glossy Accents to the bird and cat, and finish with some PVA pearls.
I am having so much fun creating these spooky projects. I hope that you are enjoying all the lovely projects from the Design team as much as I am.

Anne x.

Tuesday, 15 September 2015

Put A Spell On You - Halloween Card - By Florence

Morning everyone

Today I would like to share with you an easy card made using the new fabulous Halloween Stamps.

For this card I have used
"Put A Spell On You" A5 Set and you can see the mult-buy option HERE.

They are both great sets with lots of images that can be mixed and matched to enable you to let your spookylicious imagination create wonderful projects.

The stamps are a great size which are ideal for stamping onto any surface.  They are perfect for card making, tags, ATC's or decorating gift boxes for trick and treating or for making Halloween decorations.  Lots of scope for these stamps.


Here is my card for today.

Please click on the image to enlarge.


To make this card

Cut a piece of white card stock to size.
Colour the card using Distress Inks and a piece of Cut-n-Dry foam.
For this card I used Wild Honey and Seedless Preserves.
Place a mask/stencil onto the card and apply more Distress Ink, using the same color Distress Inks that are under the mask/stencil.
Stamp the images and text.
Take a damp paint brush and some kitchen paper and remove some of the ink to high light parts of the images.
Optional - Add white highlights to the circles and to the bodies of the bats.
Using a piece of torn copier paper as a mask and some black Distress Ink create a frame.
Stamp the spell book and the sentiment onto white card stock, cut them out and attach them to the card using foam pads.
Make up the card as seen.

Thank you for looking.
Do pop back and see the wonderful projects made by the DT.  
There is a new post every day with lots of inspiring ideas.

Take care
Florence x

Tuesday, 1 September 2015

Hocus Pocus - Halloween Tags By Florence

Hi everyone

I hope your week is going well.

Today I would like to share with you some easy tags made with the fabulous new Hocus Pocus Rubber Stamp Set.

I had so much fun making these. 
The more I use the stamps the more I love them.

Please click on the photos to enlarge and to see the detail.


This is such a fun creature.
 I did think it would also work for a little boys birthday card....I'm thinking dragons and castles.


This stamp set is so versatile. 
The cat, the spider and the trees in this set would work for other stamping projects other than Halloween.


The spider stamp I used to create the little spiders on the tag above are from the
 "Put A Spell On You" Set.


I made all of the tags in the same way.

To make the tags

Stamp the main images:  The creature, the cat and the Witch.
Make a circle mask and place it on the tag where you wish the moon to appear.
Mask off any parts of the image that you wish to colour.
Colour the tag with a light brown Distress Ink using a piece of Cut-n-Dry foam.
Take a stencil and place it over the tag and using a piece of foam apply a darker colour Distress Ink to create the pattern on the background.
Apply some more darker Distress Ink around the edges if necessary.
Stamp all of the remaining images ie., the bats, cobwebs, spiders, script and branches.
Remove any masks and colour the images.
Optional: Spray the tag with a fixative to fix the ink.

Just to share.  
On the second tag, and using a paint brush, I added some lemon juice around the edges of the tag and then heated it to create an old charred look.

Grab yourself and cuppa and check out all of the wonderful projects made by the team.


Thank you for looking.
Happy Stamping.
Florence x

Tuesday, 18 August 2015

Christmas Candlelight and Sparkling Trees - Cards by Florence

Morning everyone

Today I would like to share with you two cards made using the beautiful Christmas Candlelight and Sparkling Trees stamp sets.  The multi buy offer on these stamp sets can be seen here.

These are great sets of Christmas stamps.  They have been very cleverly designed so that you have very classic images but they are so versatile you can easily give them a modern twist depending on your style of card making.  Brilliant!

For this card I wanted an aged effect but also a contemporary feel about it.


Please click on the photo to enlarge.

 On thing I would like to share with you about the the candle image is that the image has the most beautiful fine lines and stamps perfectly every time.  A really, really lovely stamp to use.

To make this card

Stamp the candle image using a brown Distress Ink say, Frayed Burlap or Walnut Stain.
Color the image with either diluted Distress Inks or diluted felt pen ink and a small paint brush to create a soft watercolor effect.
Flick some lemon juice onto the card and heat it with a heat gun to create the scorched droplets and background.  This is a very old idea that some of you will remember from back in the day.
Take a mask/stencil and Distress Inks and create the circle pattern.
Stamp the sentiment using Archival Ink.
Make up the card as seen.

My next card is a very quick and easy CAS card.


 To make this card

Stamp the tree image onto coated card stock using Archival Ink and leave to dry.
Again, using Archival Ink, stamp the tree decorations and the sentiment
Make up the card as seen.

Thank you for looking
Happy Stamping

Florence x


Tuesday, 4 August 2015

Christmas Candlelight and Sparkling Trees By Florence

Morning everyone

I hope your week is going well.

Although it seems quite strange thinking about Christmas in August, the silly season will be upon us in a blink of an eye.  I am determined this year to get ahead and make one or two cards each week.

Who is organised and making Christmas cards now or who leaves them until the last minute?
Mmm....  I wonder!
I would love to hear from you.

Today I would like to share with you two cards made using
Christmas Candlelight and Sparkling Trees.


please click on the image to enlarge

To make this card

Using a piece of Cut-n-Dry and Distress Ink color a piece of white card stock.
Stamp the candle images using black ink.
Stamp the lace boarder using blue ink.
Using a paint brush and water remove some of the ink from parts of the candle images ie the glow of the light and the candles.
Color the images.
Take a mask or stencil and using a sponge and Distress Ink create patterns just on areas of the background.
Stamp the Yuletide sentiment.
Attach the stamped piece to a white blank card.


My second card today is a simple CAS card.

The deer stamp is fabulous.
There are so many possibilities with it and it mixes and matches so well with the other stamps.


Please click on the image to enlarge.


To make this card

Trim to size a piece of coated card stock.
Using pieces of paper or post-it notes mask off the top and bottom of the card stock leaving a 4 cm strip across the top part of the card.
Using a piece of Cut-n-Dry apply some light blue Distress Ink to the whole unmasked area.
Using Distress Ink and a mask/stencil, create the pattern on the boarder.
Move the stencil/mask slightly and apply more ink.
Repeat until you are happy with the pattern.
Remove the paper masks from the card stock.
Stamp the snow flakes and the deers using Archival Ink.
Add some gems to the centers of the snowflakes.
On a separate piece of white card stock, stamp the sentiment, trim the piece to size and edge it with a gold pen.
Make up the card as seen.

That's all from me today.
Thank you for looking

Florence x

Saturday, 20 June 2015

Rustic Fragments - Simple cards by Florence

Hi everyone

I hope you are enjoying the weekend.

Today I would like to share with you two simple cards made using the new Rustic Fragments Set.  

For my first card I have made a masculine card and I would like to dedicate this to all crafting Fathers and Grandfathers out there.  I hope you have a wonderful Fathers Day.


For the background stamping I stamped the image using brown Archival Ink but then added a little bit of embossing to give it a little bit more depth and to give it an abstract feel.  
I used an embossing pen for this and just applied the ink to the card in a brush stroke fashion.
I stamped the Eccentric Edwardian onto a separate piece of card stock, cut him out and attached him using foam pads.  I used a 350 gm board for this because I wanted him to be a chunky embellishment.

For my second card I have used the same stamp as above to make a basket of flowers. 


I embossed the image on card stock and cut out the basket shape.
For the flowers in the basket, I have used the Sunny Sunflower set of stamps. The flowers are stamped and then fussy cut out. To color them, I used a sponge and some Distress Ink.

Little baskets would look beautiful stamped in pastel colors for Easter projects.  Maybe with some chicks from the Steampunk Birds or maybe a basket of Daffodils from the Spring Bird Daffodil Set.  Or, what about a basket of Poinsettias for Christmas cards!   This is a really versatile stamp set to have in your stash. 

These are only a few suggestions for the basket idea.  Maybe you have some of your own that you would like to share with us using the comments box below?? 
Don't forget that if you do leave a comment, on any of the posts, during the current month, your name goes into the monthly comments draw.
Thank you for looking.

Happy Stamping
Florence x

Saturday, 30 May 2015

Making a Frame of it (by Lesley)

I love the versatility of our stamps and today I want to show you how you can turn the Dressmaker's Window into a picture frame.


  • Stamp the Dressmaker's Window onto white cardstock using Versafine Black Onyx. Cut out and then cut out the 'window panes', leaving just the frame.
  • Paint the frame using Vintage Photo Distress ink and when dry use a coloured pencil to add shade and dimension.
  • Adhere frame to a background paper taken from a dictionary, old book etc and trim off the excess paper around the edge of the frame.
  • Stamp the mannequin from the Floral Mannequin set onto white cardstock and colour using a combination of Barn Door, Spice Marmalade, Mustard Seed, Mowed Lawn and Tea Dye Distress inks. Cut out.
  • Cover a 5" square card with patterned paper, run a charcoal pencil around the edges and rub over with your finger to give a smudged effect.
  • Attach the frame to the card and then the mannequin using 3d foam pads and finish by stamping the word 'Delight' from Artistic Expressions.
I hope this inspires you to explore the possibilities in your stamps, you may be surprised by the results.

Please drop in again to see more wonderful creations from the Design Team.


Tuesday, 26 May 2015

The Sewing Room and Floral Mannequins - By Florence

Morning everyone

Today I would like to share with you a card made using The Sewing Room and Floral Mannequins rubber stamps sets.

These stamps have been a joy to work with this month.  
The possibilities for cards and craft projects, using these stamps, is endless.  You don't have to take my word for it.  Grab yourself a cup of coffee and see all of the wonderful projects made by the team.  There has been a new post every day this month with inspiring projects and lots of ideas on how to use the stamps.


To make this card

 Color a piece of white card with Distress Inks using the spritzing with water technique.
Stamp the images onto the backing card.
Stamp the ruffled ribbon twice onto white card, color and cut out.
Stamp the sentiment onto a piece of card, trim to size and color with Distress Inks.
Stamp the mannequin twice.  Once onto white card and once onto pretty papers and cut out.
Color the mannequin that has been stamped onto white card.
Glue the two cut out mannequins together.
Make up the card as seen and add the embellishments.
The fabric tape used on this card can be seen here.

Thank you for looking

Take care,
Florence x

Wednesday, 1 April 2015

Pretty Awesome Orchids! (by Asha)

Good morning, all. Hope you're having fun with the brand new stamps. These orchids are pretty awesome, wouldn't you agree?

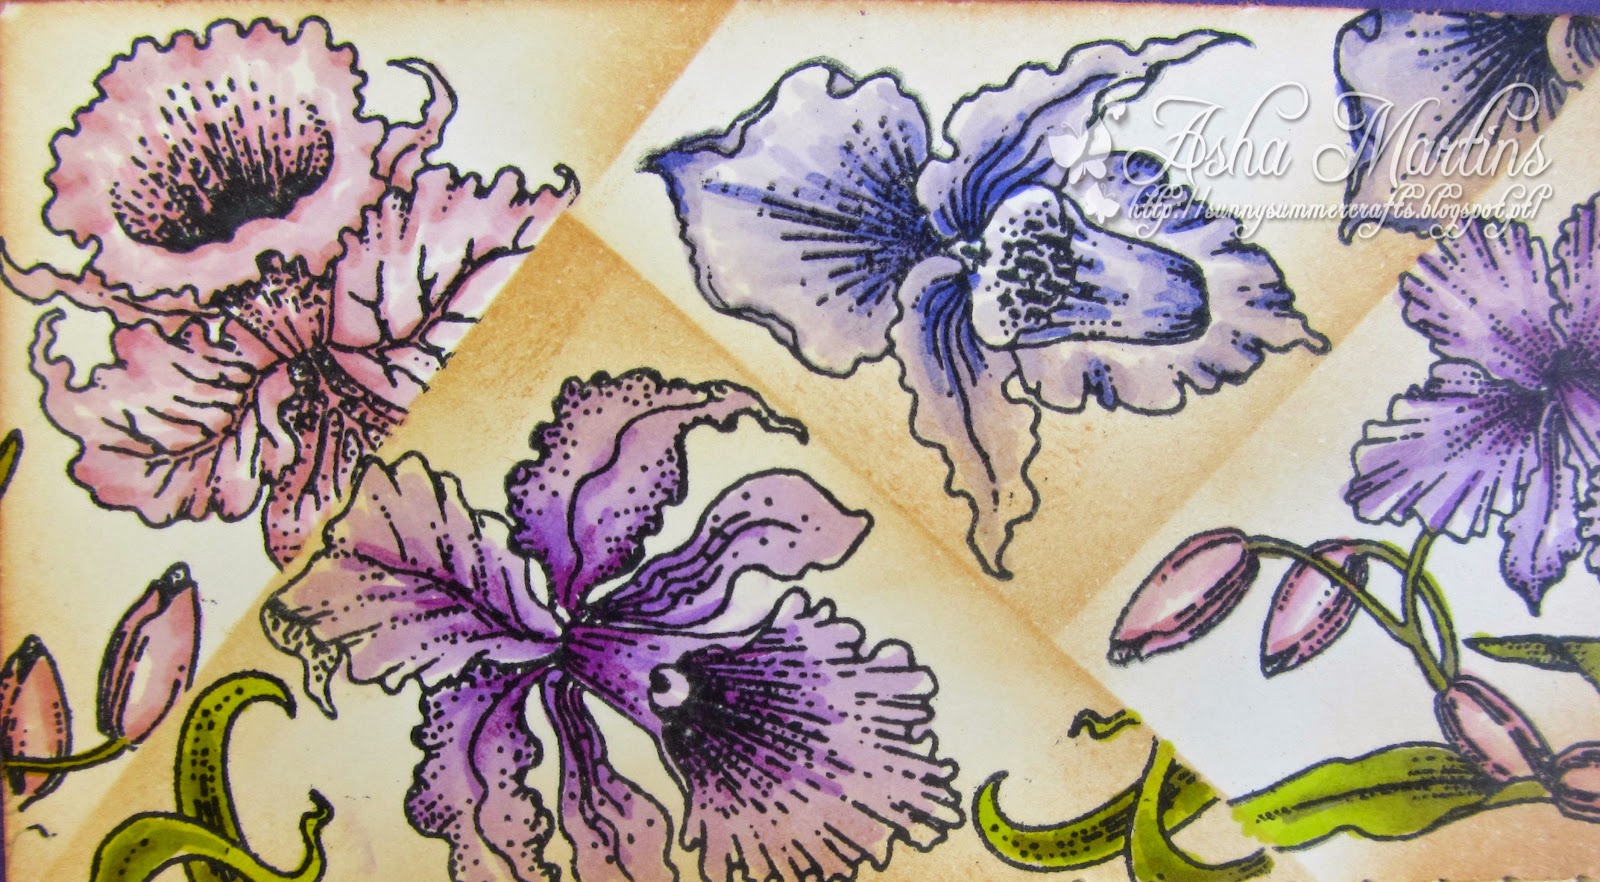
I have 2 cards to show you today, both featuring the Awesome Orchids clear stamps and the same vintage inspired colour combos, but with different results.

On the first card, I'm using the orchids to create a background that really stands out. With the partial retiform technique in mind, I masked off segment on a piece of alcohol marker friendly paper with post-its and inked the edges of each segment separately. Then I stamped the orchids in each segment, but making sure there are no overlapping into the neighbouring segments. You will need more post-its to mask the areas. Then I coloured the images with alcohol markers. It looks like bits of patterned paper, cut into random pieces and put together - but it's all done on one piece of card stock.

The greeting is from Birthday Words and I finished the card with a couple of sequins.  


Here's a closer look at the inked segments:


For my second card, I started by dry embossing and inking the background. Then I stamped, coloured and fussy cut several of the flower heads and leaves. I wanted to fill the card base with random clusters of the orchids and that meant some snipping, pruning and training to get the orchids to grow as shown below! :)

The greeting from Loving Sentiments, heat embossed in black on vellum, is a great way to obscure the "modifications" while still allowing the artwork of the stamps to come through.


Thank you for stopping by today. As always details of supplies used for these projects are available on my blog. Happy stamping!

Beijinhos,
Asha


Wednesday, 25 March 2015

Spring Bird - Tulips - By Florence

Hi everyone

I hope you are all having a good week.  

Only a couple more days until the weekend...yey!

Today I would like to share some projects made using the new Spring Bird Tulip rubber stamp set.  

All three of the new stamps sets have been a delight to work with this month. Although this is my last post for this month I am certainly not putting these stamps away just yet!


I have used a die for the alarm clock but it is an easy shape to cut out.

The main stamping piece has been created by stamping the bird and nest image, masking it off and coloring the background with *diluted Distress Ink.
The masks where removed and the image colored using water color crayons.
The clock embellishment has been made up as seen with the addition of the flower sprays which have been created using the flower stamp from the Tranquility rubber stamp set.


I have used a die for the base card.  
The main focal piece and the small lady bug embellishments have been made in the same way.
I stamped the tulips and the lady birds, masked them off and colored the background using *diluted Distress Ink.
I then removed the masks and colored the images with water crayons.
The card has been made up as seen.

My final project today is a very simple design.  

Lots of inky fun.


I wanted to share this card with you today because I think it illustrates how the focal pieces on the cards above have been made.

 The only difference is, when I removed the masks, I didn't color the images.

*To dilute Distress Ink, pat the ink pad onto an acrylic block and spritz with water.  Take your stamped piece (with the masks on) and place it into the ink and move it around slightly so that the card picks up the ink.  Repeat this if necessary for more coverage.


Thank you for stopping by 


Happy Stamping 
Florence x

Tuesday, 24 February 2015

Sketchy Doodle Flowers - Cards By Florence

Hi everyone
If, this is your first visit to the Chocolate Baroque blog, a big warm welcome. 

Today I would like to share two simple card designs using the new Sketchy Doodle Flower Stamps.
I hope you like them.

If you are new to rubber stamping sometimes it can be a little daunting stamping straight onto a large card.  A simple solution to this, is to use a smaller base canvas to stamp onto and then add it to your card as a topper.


I cut a circle out of white card stock and stamped the flower just off the edge of the circle and added a small butterfly.
I colored the flower and butterfly with water color crayons.
I then colored the edge of the stamped card circle using a sponge and Distress Inks.
For the base I stamped the Harlequin pattern and the sentiment onto a piece of white card and trimmed it to size.
I made the card up as seen using foam pads to attach the focal piece.
Ink used : Archival Ink - Black and Cornflower Blue.

Please note that the butterfly stamp I have used on both of these cards is not included in the Sketchy Doodle Flower Set but is from the Butterfly Doodle Set.


For the card above, I stamped the image using a multi colored dye ink pad onto coated card stock.
I added the small butterfly using Black Archival Ink.
For the heads of the flowers I stamped just the top of the flowers onto coated card stock using Vermillion Archival Ink, cut them out and then decoupaged them onto the main image.
I made the card up as seen.

It has been a real joy working with the new Sketchy Doodle Flower Stamps this month.  I have made a few more projects using these stamps which can be seen on my card blog here.

Thank you for looking
Happy Stamping

Florence x


Friday, 16 January 2015

Ophelia by Doreen

Hello to you all, I am sharing sample made from the new stamps that have just been released.

I have made this using Stampbord....I started by inking the stampbord with distress ink then using Black Archival ink, stamped the image "Ophelia"over the top. When dry I then got a Scratch Knife and started to scratchaway where I thought the highlights should be. This was then matted onto some black card.
I really enjoyed doing this it was my first time but have done many more since.


Tuesday, 25 November 2014

Mellow Fruitfulness - Stampbord By Florence

Hi everyone


Today I would like to share with you two project I have made using the fabulous Mellow Fruitfulness Stamp Set.

For my first project I have used a piece of Stampbord to make a fridge magnet.


Stampbord is such a wonderful medium to stamp onto.  There are different sizes available on the Chocolate Baroque Web Site.

I colored my Stampbord with Distress Inks using a piece of Cut-n-Dry foam and left it to dry.  

I stamped my image using Archival Ink.

I then scratched off some of the ink to reveal the white chalky surface of the Stampbord to create some high lights.

I attached a small magnet to the reverse of the board.

For my second project I have used the same artichoke stamp from the set to make a card.


I used one of my own backing papers for this card and just stamped the image directly onto the printed paper using Archival Ink.  

There are lots of pretty papers available on the Web Site in this section here.

I colored the image using water color crayons and blended the colors with a damp paint brush.

I used a die to cut out the ornate edges (fancy edged scissors will create the same effect) and stamped the wording onto them using Archival Ink. 

I then made up the card as seen. 


If you haven't already, do check out all of the amazing projects made by the DT.  You are in for a real treat.

Take care everyone
Happy Stamping.

Florence x


Sunday, 26 October 2014

Book of Spells - By Florence

Hi everyone
 
I hope you are all enjoying the weekend.

I am back again today to share two more cards made with the fabulous Book of Spells Rubber Stamp Set.  The new stamps have been an absolute delight to work with and I have had a lot of fun with them as I am sure you are all going to.

Both of these cards are really quick and easy to make. 


I took a piece of orange card, embossed it and then rubbed over it with some Black Distress Ink using a piece of Cut'n'Dry to give it a bit of a gothic touch.

I used one of my own backing cards for this project because it reminded me of damp mold, slime and things lurking in the night and thought it would go great with the Cob Webs and Spider images.

Using Black Archival Ink, I stamped the Cob Webs around the outside edge of the card and then stamped the Spiders.  To get the longer threads, I turned the stamp upside down and repeat stamped the image, placing a piece of scrap paper as a mask so that the body didn't stamp onto my backing paper.

I made up the card as seen just adding a little Book of Spells tag embellishment.

 
I made my second card in exactly the same way as the one above.


For this card I was thinking blood stains, dragon fang soup and green fluffy monsters!!

I stamped the Cob Webs and the Witches Pot onto my background paper to make the main focal piece.

I then stamped the pot again onto white copier paper, cut out just the bubbles and the steam/smoke and attached it to the main piece with glue.

I made up the card as seen using some green fluffy mulberry paper.

Hubble Bubble!

Thank you for looking.

Florence x