Today sees the final project from our Guest Design Team member, Penny Butler, for this month. She has created a fabulous Venetian style mask in a bold peacock theme.
Penny writes:
Hi everyone, I hope this finds you all well. I have a fun project today for you as my third Guest Designer post here this month.
I have used stamps from the Tangled Peacock and Peacock Parade stamp sets, gold gilding paint, Versafine Ink, gold embossing powder, black artist's pen, Distress Ink, gold acrylic paint, and gems from my stash.
On some white card, I stamped two tails and the body of a peacock, and embossed them in gold. I then cut the images out and painted them. I painted the mask with gold gilding paint, and when dry, I used a couple of worker stamps to decorate it. I then used the black marker pen to accentuate the eye holes. I added some gems from my stash to accent the tails, and added some more to the mask. I attached the tails to either side of the mask, and the peacock body to the centre above the nose. I also added a couple of tiny gems to the corners of the eyes, and finished the project by adding some ribbon to tie the mask on with.
A beautiful fun project for parties, home decor, or a keepsake.
Thank you Penny for such an inspirational way to use these stamps. Penny will be back to share more projects on the blog with us in a few months' time. You can see her work featured regularly in some of our compilation posts each month here on the blog, and she also contributes to the TV shows on Hochanda. Penny's blog can be found here.
Thanks for stopping by,
Showing posts with label Tangled Peacock. Show all posts
Wednesday, 26 July 2017
Friday, 22 May 2015
A Trio of Tags (posted by Judith)
Hello everyone, I hope that you are enjoying the wealth of Haberdashery inspiration this month. I have created three tags for you combining the Sewing Stamps multi-buy and the Peacock Parade/Tangled Peacock multi-buy. I wanted to create some designer haute couture style dresses, and decided to use the peacock tails as skirts combined with the bodices of two of the mannequins from the sewing sets. I stuck to a peacock themed colour palette throughout the three tags.
I started the three tags by stamping and embossing the lace strip along the bottom of the three tags, using black ink and clear embossing powder. I then stamped the foot of one of the mannequins on each tag. I stamped each peacock tail onto a tag, using teal ink, and coloured them in using watercolour paints. I used the same paint to colour the bodices, which I stamped and embossed onto a spare piece of card.
I inked each background using Tumbled Glass Distress Ink, and then chose a corresponding ink colour to blend around the edges. I used the same ink colour to stamp an assortment of sewing notions as a border. Finally, I added a sentiment to each tag.
Thanks for stopping by, Judith xx
I started the three tags by stamping and embossing the lace strip along the bottom of the three tags, using black ink and clear embossing powder. I then stamped the foot of one of the mannequins on each tag. I stamped each peacock tail onto a tag, using teal ink, and coloured them in using watercolour paints. I used the same paint to colour the bodices, which I stamped and embossed onto a spare piece of card.
I inked each background using Tumbled Glass Distress Ink, and then chose a corresponding ink colour to blend around the edges. I used the same ink colour to stamp an assortment of sewing notions as a border. Finally, I added a sentiment to each tag.
Thanks for stopping by, Judith xx
Saturday, 5 July 2014
Tangled Peacock card (by Debbie)
When I saw this stamp on the Harlequin Fragments sheet I immediately could see Peacock feathers although I'm sure it will bring different patterns to mind for others.
With Seedless Preserve Distress Ink, I rubbed it onto an acrylic block and lightly sprayed with water then placed the stamp onto it to pick up the ink. When on the card it slightly spreads.
I repeated with Mown Lawn and Peacock Feathers Distress Inks stamping randomly on the card.
The Peacock stamp is from Tangled Peacocks
When I had stamped and heat embossed the Peacock I placed tape around the image so that the water colouring with Distress inks didn't run and I had a white frame around it. I picked out the blue for mounting onto.
Many thanks for visiting
Debbie.
Monday, 30 June 2014
Building Backgrounds (posted by Judith)
Hi Folks, I have a couple of samples to show you today, using the Harlequin Fragments/Tangled Fragments multibuy stamp set.
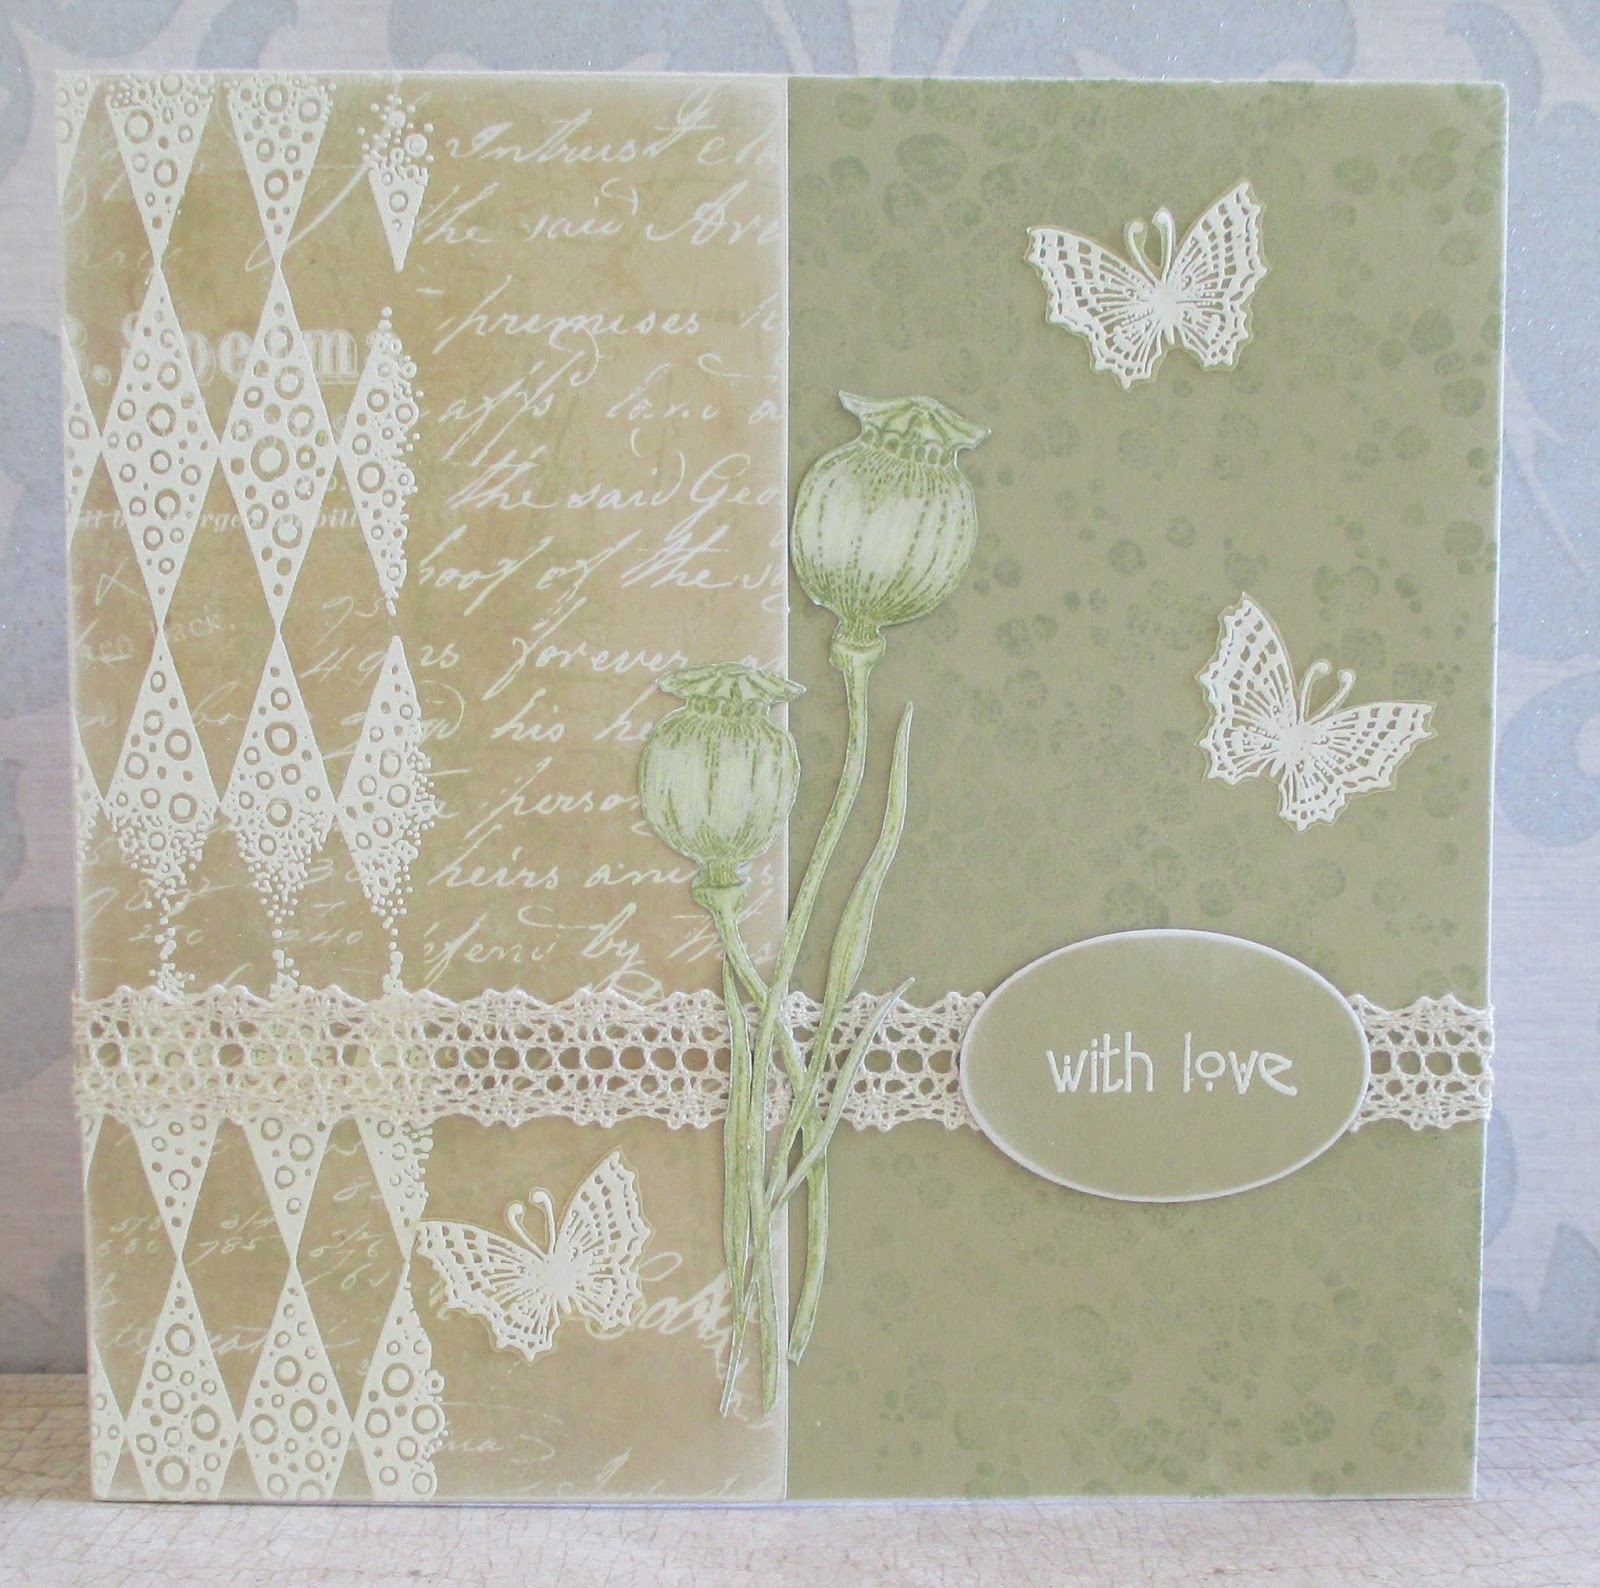
For my first card, I have chosen a soft colour scheme, using a printed tag, and embossed the dotty harlequin stamp using white embossing powder. I have used the large dotty stamp on the main background, stamping my image onto scrap paper first, then onto the card to get a fainter image. This is known as second generation stamping. I stamped three butterflies from the Briar Rose Butterfly stamp set onto beige vellum, using white embossing powder.
The poppy image is from the Flora and Fauna stamp set, which I stamped onto white card and coloured it using pencils before cutting it out. Lastly, the sentiment comes from the Mackintosh Sentiments clear stamp set, and I have again embossed this with white embossing powder. I sanded the edges of all of my pieces of card before assembling my project, and added some cream lace.
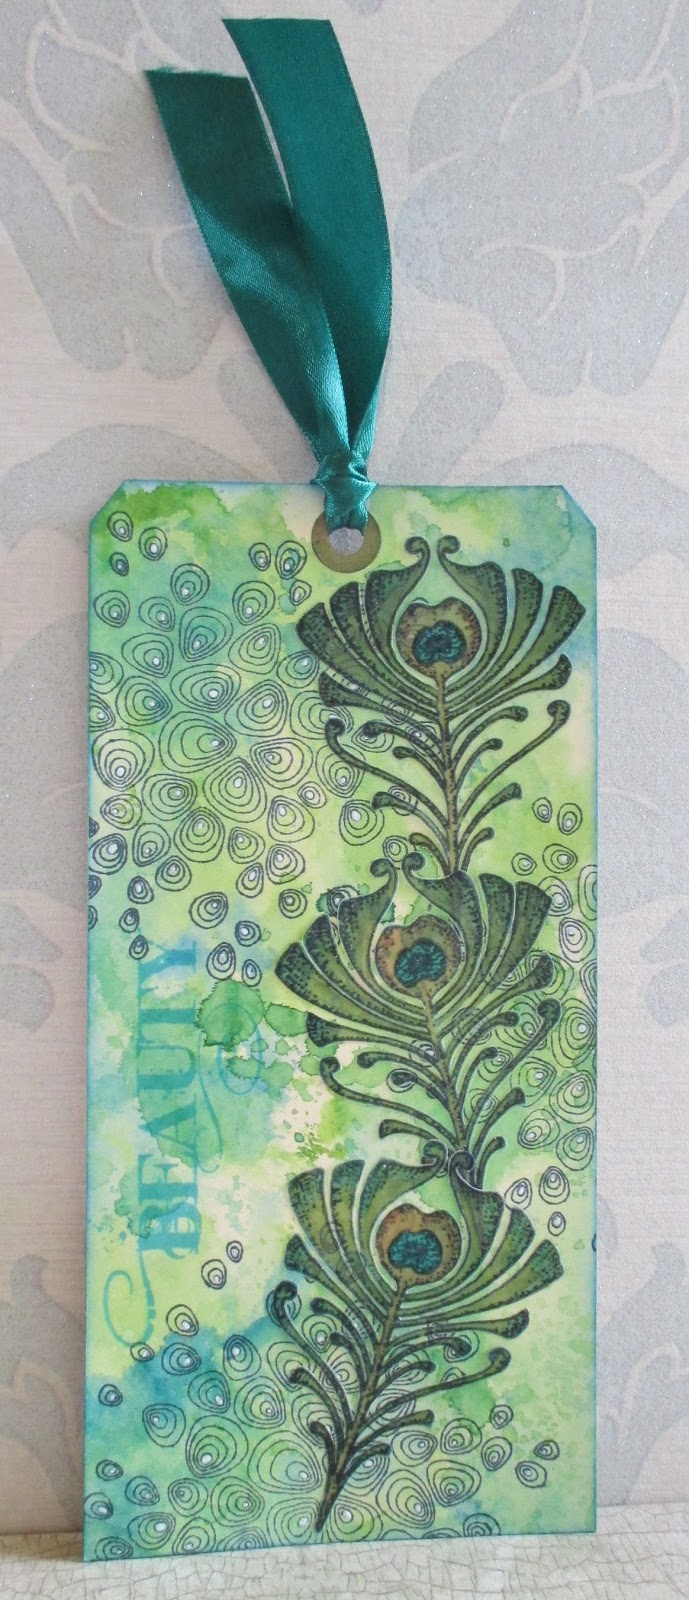
My second project was made using a tag that I coloured with leftover inks from my project here as I did not want to waste the remaining ink. I coloured two further tags, and this was one of them. I stamped the large background stamp using a dark blue ink, and added white highlights. I used a stamp from the Artistic Expressions stamp set on the background using a turquoise ink, which I also used to edge the tag.
I stamped a peacock feather from the Tangled Peacock stamp set onto pale green vellum three times using navy ink and clear embossing powder. I coloured the reverse of the images with alcohol markers before cutting them out. A piece of emerald ribbon finishes the tag.
Keep checking back for some fabulous samples from my Team Mates in July. Thanks for stopping by, Judith xx
For my first card, I have chosen a soft colour scheme, using a printed tag, and embossed the dotty harlequin stamp using white embossing powder. I have used the large dotty stamp on the main background, stamping my image onto scrap paper first, then onto the card to get a fainter image. This is known as second generation stamping. I stamped three butterflies from the Briar Rose Butterfly stamp set onto beige vellum, using white embossing powder.
The poppy image is from the Flora and Fauna stamp set, which I stamped onto white card and coloured it using pencils before cutting it out. Lastly, the sentiment comes from the Mackintosh Sentiments clear stamp set, and I have again embossed this with white embossing powder. I sanded the edges of all of my pieces of card before assembling my project, and added some cream lace.
My second project was made using a tag that I coloured with leftover inks from my project here as I did not want to waste the remaining ink. I coloured two further tags, and this was one of them. I stamped the large background stamp using a dark blue ink, and added white highlights. I used a stamp from the Artistic Expressions stamp set on the background using a turquoise ink, which I also used to edge the tag.
I stamped a peacock feather from the Tangled Peacock stamp set onto pale green vellum three times using navy ink and clear embossing powder. I coloured the reverse of the images with alcohol markers before cutting them out. A piece of emerald ribbon finishes the tag.
Keep checking back for some fabulous samples from my Team Mates in July. Thanks for stopping by, Judith xx
Wednesday, 26 June 2013
Card and a gift bag by Debbie
I noticed that today the girls hadn't posted so I thought I'd quickly sneak this card and gift bag on here made with stamps from Tangled Peacock. I thoroughly enjoyed making these as I love seeing how I can use the stamps in different ways.
The feather is a lovely size and I stamped it four times with Butterscotch Adirondack Ink and then stamped in the four spaces with Ginger for the front of the bag. This gave me an idea of size for stamping for the card so I stamped it on the edge of the card front, added a sentiment and created a border for the edge from the smaller feather.
I love the pattern that the stamp has made in the centre.
Thanks for visiting.
Debbie
Tuesday, 25 June 2013
More Peacocks (by Shirley)
Hello everyone, I hope you are doing well.
I have two more Peacock designs to show you today using the fabulous new stamps.
The background for the above card was created with Smooch Inks. I stamped the feather over the background with Moss Green Pigment ink by Colorbox. The Peacock Feather 'plant' from Peacock Parade and the bubbles at the top from the clear set -Decorative Edges were embossed with gold. I added the gold border with a gold pen. The Peacock above from Tangled Peacock was also embossed with Gold on watercolour paper and coloured with Tombow markers.
The backgrounds on the card above are designer papers from my stash. I distressed the edges of the blue paper and added a little Tea Dye Distress Ink to both. The Peacock & decorative edge are both from Peacock Parade which I stamped with Coffee Archival Ink.
I coloured over the Peacock with Prisma Pencils and added glitter and little rhinestones on his tail.
Spellbinder Dies: Labels Eight & Decorative Labels Eight.
Well that's all the Peacock designs I have for this month, I look forward to 'playing' with these gorgeous stamps again.
Thanks for stopping by and have a great day,
Shirley
I have two more Peacock designs to show you today using the fabulous new stamps.
The background for the above card was created with Smooch Inks. I stamped the feather over the background with Moss Green Pigment ink by Colorbox. The Peacock Feather 'plant' from Peacock Parade and the bubbles at the top from the clear set -Decorative Edges were embossed with gold. I added the gold border with a gold pen. The Peacock above from Tangled Peacock was also embossed with Gold on watercolour paper and coloured with Tombow markers.
The backgrounds on the card above are designer papers from my stash. I distressed the edges of the blue paper and added a little Tea Dye Distress Ink to both. The Peacock & decorative edge are both from Peacock Parade which I stamped with Coffee Archival Ink.
I coloured over the Peacock with Prisma Pencils and added glitter and little rhinestones on his tail.
Spellbinder Dies: Labels Eight & Decorative Labels Eight.
Well that's all the Peacock designs I have for this month, I look forward to 'playing' with these gorgeous stamps again.
Thanks for stopping by and have a great day,
Shirley
Sunday, 23 June 2013
Peacock sitting beneath the blossom by Debbie
Hello. The idea for my card came from the thinking that a peacock would never want to be in a cage.
For the peacock I used white glossy card and coloured it with green, blue and yellow alcohol inks on a dabber. I then stamped the peacock with black stazon and trimmed it out. For more detail I used a white and gold pen on his tail feathers. The branches above him were stamped in brown from the Chinese Lanterns clear stamps then flowers punched out and edged with pink and a pearl centre. I sat the peacock on top of the die cut cage. Thanks for visiting. Debbie
Wednesday, 19 June 2013
Peacock Flowers (posted by Claire)
Good morning everyone, Claire here with another card using the lovely new Peacock themed stamps. I hope you're enjoying all the inspiration from my teamies.
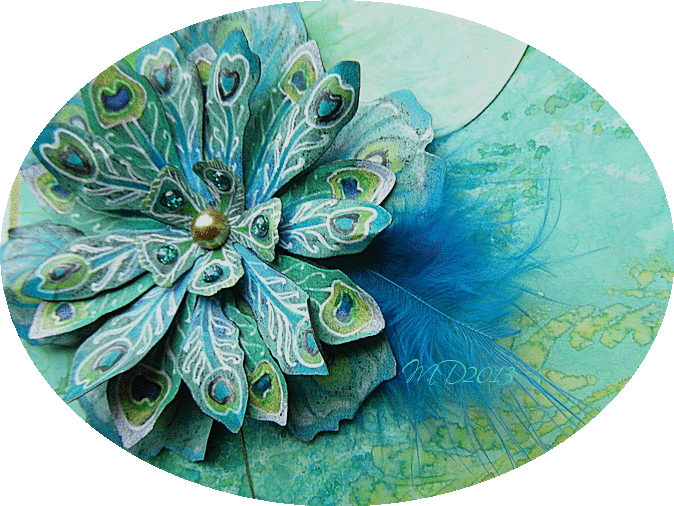
I've created a background using distress inks (Mowed Lawn, Picked Raspberry and Peacock Feathers) and stamped the large Art Nouveau feather (from Tangled Peacock) in the corners with versamark before embossing with WOW Gold embossing powder. I made the flower by stamping the stylised peacock feather stamps on some scraps of backing paper from Peacock Summer Party. I embossed them with gold embossing powder, cut them out and layered them up to create the flower. In the centre I've added bottlecap with a glass cabochon. To finish off I've added some gold die cut swirls.
Thanks for visiting today
Claire xx
Tuesday, 18 June 2013
Tangled Peacocks (by Shirley)
Hello everyone !
I have a couple of Peacock designs today using the beautiful large design from the new Tangled Peacock set.
The image on the above CAS design was stamped with black Stazon ink. I spent some time colouring the fabulous image with my Prisma Pencils. I added some outlining with a black Pigment pen and a little highlighting using a white Gelly Roll Pen. The pink mat was created with Purple Dylusions.
This second card is a different colour combination and meant to be 'fun'.
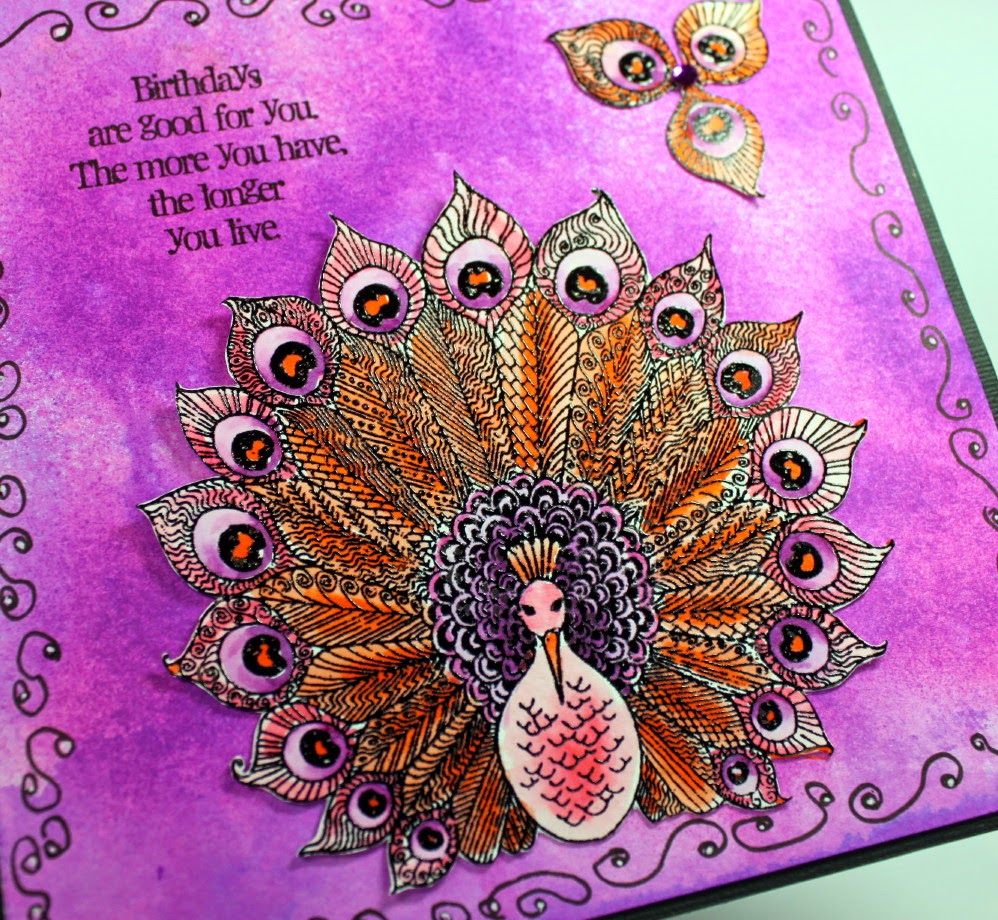
The background was created with purple Dylusions ink and the Peacock, which I embossed with black, was coloured with Tombow markers. I added a little Doodling around the border. The sentiment is from Birthday Words. The little 'flower' in the top RH corner was created with eyes cut-out from a 2nd image.
You can see the detail on the bird on the photo below. I thought this card would work well for a 'man'.
Thanks for stopping by and have a great day,
Shirley
I have a couple of Peacock designs today using the beautiful large design from the new Tangled Peacock set.
The image on the above CAS design was stamped with black Stazon ink. I spent some time colouring the fabulous image with my Prisma Pencils. I added some outlining with a black Pigment pen and a little highlighting using a white Gelly Roll Pen. The pink mat was created with Purple Dylusions.
This second card is a different colour combination and meant to be 'fun'.
The background was created with purple Dylusions ink and the Peacock, which I embossed with black, was coloured with Tombow markers. I added a little Doodling around the border. The sentiment is from Birthday Words. The little 'flower' in the top RH corner was created with eyes cut-out from a 2nd image.
You can see the detail on the bird on the photo below. I thought this card would work well for a 'man'.
Thanks for stopping by and have a great day,
Shirley
Sunday, 16 June 2013
Peacock center stepper card by Debbie
Another white peacock. Claire Chapman and I had a similar idea to create a white bird and they look very different.
I stamped the peacock onto white card and trimmed then inked around the edge with tumbled glass. For the feathers, to give them a little dimension I coloured with flesh colour Copic pens and coloured with cool grey pen. I cut and folded a centre step card and stamped the blossom branch from Chinese Lanterns clear stamps. Finally,I added a couple of strips of card down the sides.
Thanks for visiting,
Debbie
Saturday, 15 June 2013
Golden Plumage (posted by Judith)
Hi Folks, here's a sample using the Peacock Parade stamp set and the Tangled Peacock stamp set. I created a background using the wrinkle free Distress method, and coloured my peacock image using the same colour Distress Inks. I stamped the large deco feather onto some strips of navy card, using gold embossing powder, as I wanted a very regal feel to this card. I mounted the peacock image onto a Nestie frame using the same navy card, and added some flat-backed gems to the peacock tail.
Keep checking back for more fabulous samples from my team mates over the coming days. Thanks for stopping by, Judith xx
Sunday, 9 June 2013
A Pair of Peacocks by Debbie
Hello.
My card uses the Tangled Peacock stamps and they are great fun to use and have such an elegance.
The Peacocks have beautiful detail on them and the tails flow. Firstly, I coloured acetate with green and yellow alcohol inks and it gave a few shades of green. I stamped onto acetate with black Stazon and cut out. I then turned one of the peacocks and loved that they interlocked. I attached them with a few small pieces of red really sticky tape. The background paper is from Bo Bunny, the Serenity pad and the sentiment is from the Wedding Belles plate. The card could be a wedding or anniversary card
Thanks for visiting
Debbie
Saturday, 8 June 2013
Another Peacock creation by Miranda
Hello there,
Today another Peacock creation from the lovely 'Tangled Peacock'sheet from Chocolate Baroque. I've made a background on Ranger special stamping paper and used Dylusion inks. They look totally different on this paper when you compare it with working with them on aquarel paper. As you can see I've used a Crafters workshop template here called 'Peacock feathers' and it's great! I've embossed the Peacock head with 4 colours of the WOW embossingpowders; Green glitz, Blue glitz Blue blast and sparkling gold.
This time I've tangled the Tattered flowers myself with a white gel pen and colour pencils. Added some thin gold thread and a few gemstones.
Here you can see a close up from the head
Different view.......light....
Thanks for your visit and see you next time,
Labels:
Tangled Peacock
Wednesday, 5 June 2013
White peacock (posted by Claire)
Good morning, Claire here with the first of my samples featuring the gorgeous new stamps 'Peacock Parade'. This card was inspired by a memory of a beautiful white peacock sitting on a tree branch at twilight, the white of his feathers seemed to glow in the dim light so I set to with inks and stamps to capture the effect.

I began by creating the background using distress inks (pumice stone, walnut stain, picket fence and tumbled glass) and overstamped with the feather from Tangled Peacock and embossed with WOW white EP. I stamped the peacock image on white card and embossed with white EP and added colour with distress markers and lots of water. I've added some lace and ribbon from my stash and a little paper flower.
Thanks for popping by
Claire xx
Tuesday, 4 June 2013
Peacock beauty by Miranda
Hello there,
Have you already seen the new stamps that are just launched at Chocolate Baroque? They are so gorgeous and they are all about 'Peacocks'! There is a 'Tangled peacock' set and a Peacock parade' set. Just take a look at the website. Soon there will be beautiful artwork to see at this blog and on the blogs of the talented bunch ladies of the DT team! There will be lots of inspirational work to see.
Here is my first card with the 'Tangled Peacock' set. You know I love colouring on black and kraft paper so could not resist that. I've made an easl card with it and stamped and coloured the Tattered flowers from TH.
Of course added some real feathers.......
Well, hope you are inspired by these peacocks and soon there will be more artwork to see.........
Creative greet,
Labels:
Tangled Peacock
Monday, 3 June 2013
A Beautiful Day (by Shirley)
Hello everyone! I hope you are doing well and enjoying your Spring.
I'm in love with the new Peacock designs, each one is more beautiful than the next. My first design using the new stamps features a beauty from Tangled Peacock.
The background is created with Dylusions inks, TCW stencil - mini Fleur DeLis and Viva green gold modelling creme. I sprayed water over the stencil in the bottom left corner and blotted with a towel to get the 'ghost' effect. The beautiful Peacock was embossed with gold and I painted with Tombow markers. I cut out the first one and stamped it a second time to decoupage the feathers and wing. The wonderful sentiment is from Loving Sentiments . I'm giving this card to a dear friend who is turning 90 this month!
Thanks for visiting and please come back soon to see the beautiful designs by my talented teammates. You won't be disappointed !
Have a great day,
Shirley
I'm in love with the new Peacock designs, each one is more beautiful than the next. My first design using the new stamps features a beauty from Tangled Peacock.
The background is created with Dylusions inks, TCW stencil - mini Fleur DeLis and Viva green gold modelling creme. I sprayed water over the stencil in the bottom left corner and blotted with a towel to get the 'ghost' effect. The beautiful Peacock was embossed with gold and I painted with Tombow markers. I cut out the first one and stamped it a second time to decoupage the feathers and wing. The wonderful sentiment is from Loving Sentiments . I'm giving this card to a dear friend who is turning 90 this month!
Thanks for visiting and please come back soon to see the beautiful designs by my talented teammates. You won't be disappointed !
Have a great day,
Shirley
Subscribe to:
Posts (Atom)