Pin It button on image hover
Showing posts with label Hark the Christmas Rose. Show all posts

Wednesday, 16 December 2020

Gerbera Delights (by Anne)

 Hi everyone. I am delighted to be a guest designer for you this month. For my second set of projects I have had a play with the lovely new Gerbera and Friends stamps from Annabel. Love this set. Hope that these give you a few more ideas and fun playing with some of your stash.

I have also finally finished the last of my Christmas card batch making - phew. Why do I always leave them until the last minute! Ha ha.

Lots of hugs, Anne.

GERBERA AND FRIENDS

Materials List

  • Stamp sets (Chocolate Baroque): Gerbera and Friends (main images), Words to Dazzle & Sparkle (sentiments), Glorious (leaf stamp)
  • Card blanks and smooth card (sky blue, white or black)
  • Inkpads: Stazon (Jet Black), Versafine (Onyx Black), Distress Ink (Gathered Twigs), Versamark
  • Versamark embossing pen
  • Embossing powders: detail white and metallic gold
  • Mica powders: yellow gold, pink and purple
  • Water based inks: Turquoise, yellow, green, red and magenta (I used Spectrum Noir Aquatints)
  • Acrylic paint metallic pink (Starlight)
  • Acrylic mat medium (clear drying)
  • Colouring pencils (pink, green, yellow)
  • Alcohol in pens (pink, purple, yellow)
  • PVA pearls and Glossy Accents
  • Acetate and translucent shrink plastic
  • Decorative circle dies (Tonic)

Make a Wish Cards

I created a couple of cards using the lovely dandelion clocks. I remember as a child how we would blow the seeds from the flower heads whilst making a wish. Happy memories.

My card blank measured approx. 13 X 17.5cm. I trimmed my stamping card to 12 X 16.5cm and rounded off the corners.

I painted on the water based inks, blending them wet in wet (working from the top down). When dry I flicked with water and lifted out colour with tissue to add texture. I also applied a circle of water and lifted it out to create the moon.

The dandelions, sentiment and foreground texture were stamped with Versafine. I lifted out some of the colour from the seed head bases).

I also used Distress Ink to stamp more texture at the base and to blend around the card edges. Black alcohol ink pen was used to edge and frame the card before mounting.


My next card was more clean and simple. The card blank was 15cm square and the blue background mat was trimmed to 14.5cm.

I used dies to cut the decorative circle (approx. 14cm diameter) and circular centre (approx. 9cm). A white paper doily would also look good if you don’t have decorative dies.

The images were stamped with Versamark and embossed with white powder. I mounted with 3D foam for added dimension. Finally finished with PVA pearls.

Bright Gerbera Cards

I adore this huge Gerbera stamp and wanted to make something really bright and cheery.


My card blank was 15cm square. I trimmed black card to 14.5cm to create the background mount, and white stamping card to 13.5cm.

The card was painted with the yellow, red and magenta inks, blending them outward from the centre. Versafine was used to stamp the images.

Oh that Gerbera!

Again I used a 15cm square card blank and trimmed a black mat to 14.5cm. The background texture was stamped with Versamark and yellow/gold mica brushed over with a soft brush. Excess mica was removed with a microfiber cloth. Versamark was then applied around the edges which were embossed with metallic gold powder.

The sentiment and leaves were stamped and embossed onto black card. An embossing pen was used to edge the sentiment plate.

The Gerbera was stamped onto acetate and shrink plastic using Stazon which were then cut out.

The back of the shrink plastic was coloured with alcohol pens before shrinking with a heat gun. Coloured pencil was used to enhance the colour on the front before covering with Glossy Accents.

The back of the acetate image was coloured with mica powders mixed with mat medium. When dry the back was then painted with the metallic acrylic.

The photo really doesn’t do justice to the shine and mica sparkle on the Gerbera. Love this one.


LAST OF MY CHRISTMAS MAKES

Materials List

How it was done (including my boo boo)

I love these collage panel style stamps for creating quick and easy batch makes – one stamp does all the work for you. I have stamped and coloured these but they would look equally good without colouring or perhaps stamped and embossed with a pretty metallic powder. I like to use a stamping platform for batch making as it makes it easy to line up and repeat stamp in a production line.

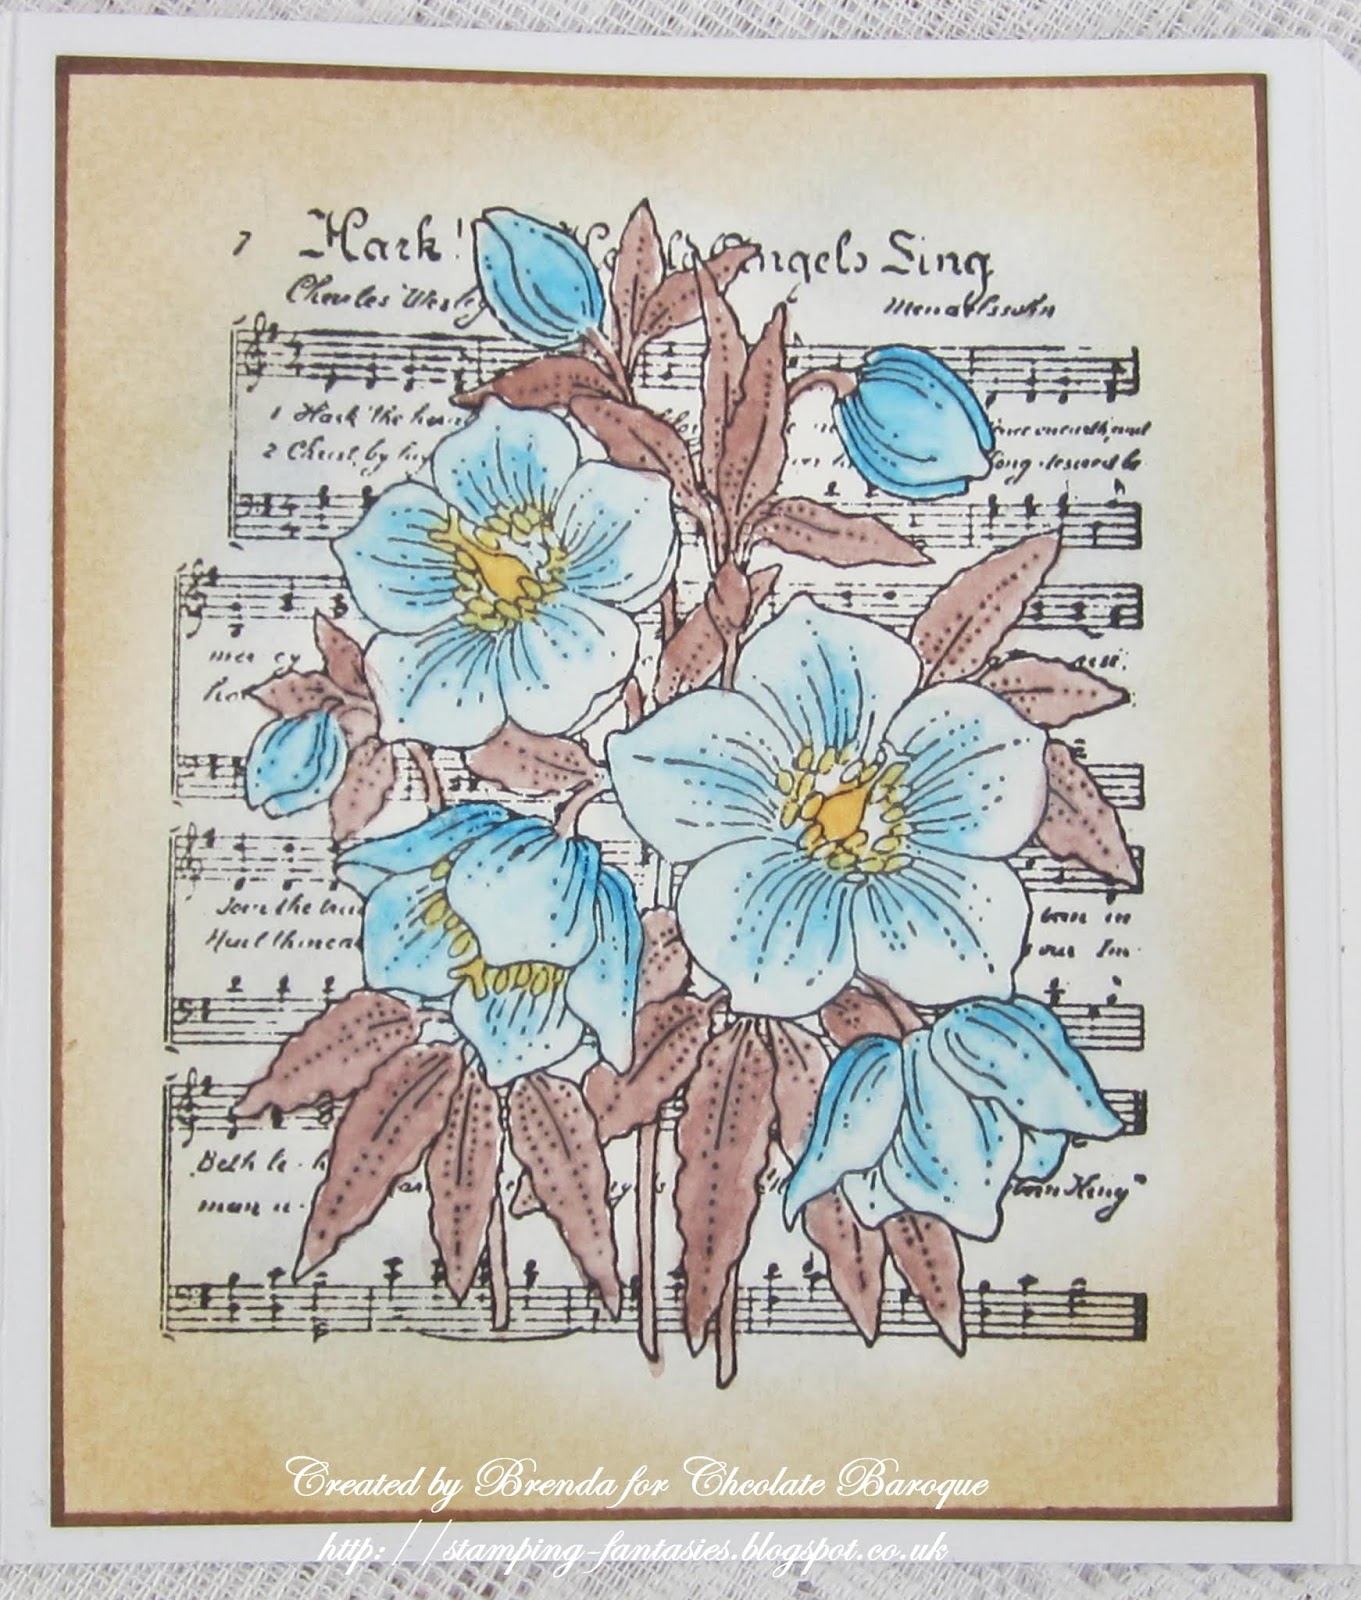
Stamped with Majestic Blue Versafine and coloured with Distress Ink (Chipped Sapphire).

I just had to make a blue and white set. Those of you that know me will know that I love making these. However, I have been a little out of practice with my stamping and colouring this year and my first attempt was a flop – ha ha.  I have shown my blooper as I thought it may be helpful if you have struggled with colouring.

This was my first attempt – eeek! Initially I tried to colour with watercolour pen and attempted blending out with a damp brush. It wouldn’t work very well and my watercolour just sucked straight into the card. This really shows the importance of choosing the correct type of card for the techniques that you wish to use. For watercolouring you need a card that will hold the pigment without it bleeding out too much, but then release it again when water is applied to allow blending and shading. This brand of card used to work well but recent batches really have not worked as well so I suspect they have changed the ‘formulation’.

As my watercolour pens were not behaving well with my card I tried switching to Distress Ink. Applying to my mat, diluting out and picking up with a damp brush. Distress Inks are specifically formulated to stay wet longer and to blend more easily. It worked out much better on this card. The two flowers on the left were my quick trial with Chipped Sapphire Distress Ink.

Another mistake I made was to go in far too heavily with the colour. I was aiming for a softer colouring more suitable for the delicate flower petals. This is achieved by using a more diluted colour and gradually building up the layers and shading.

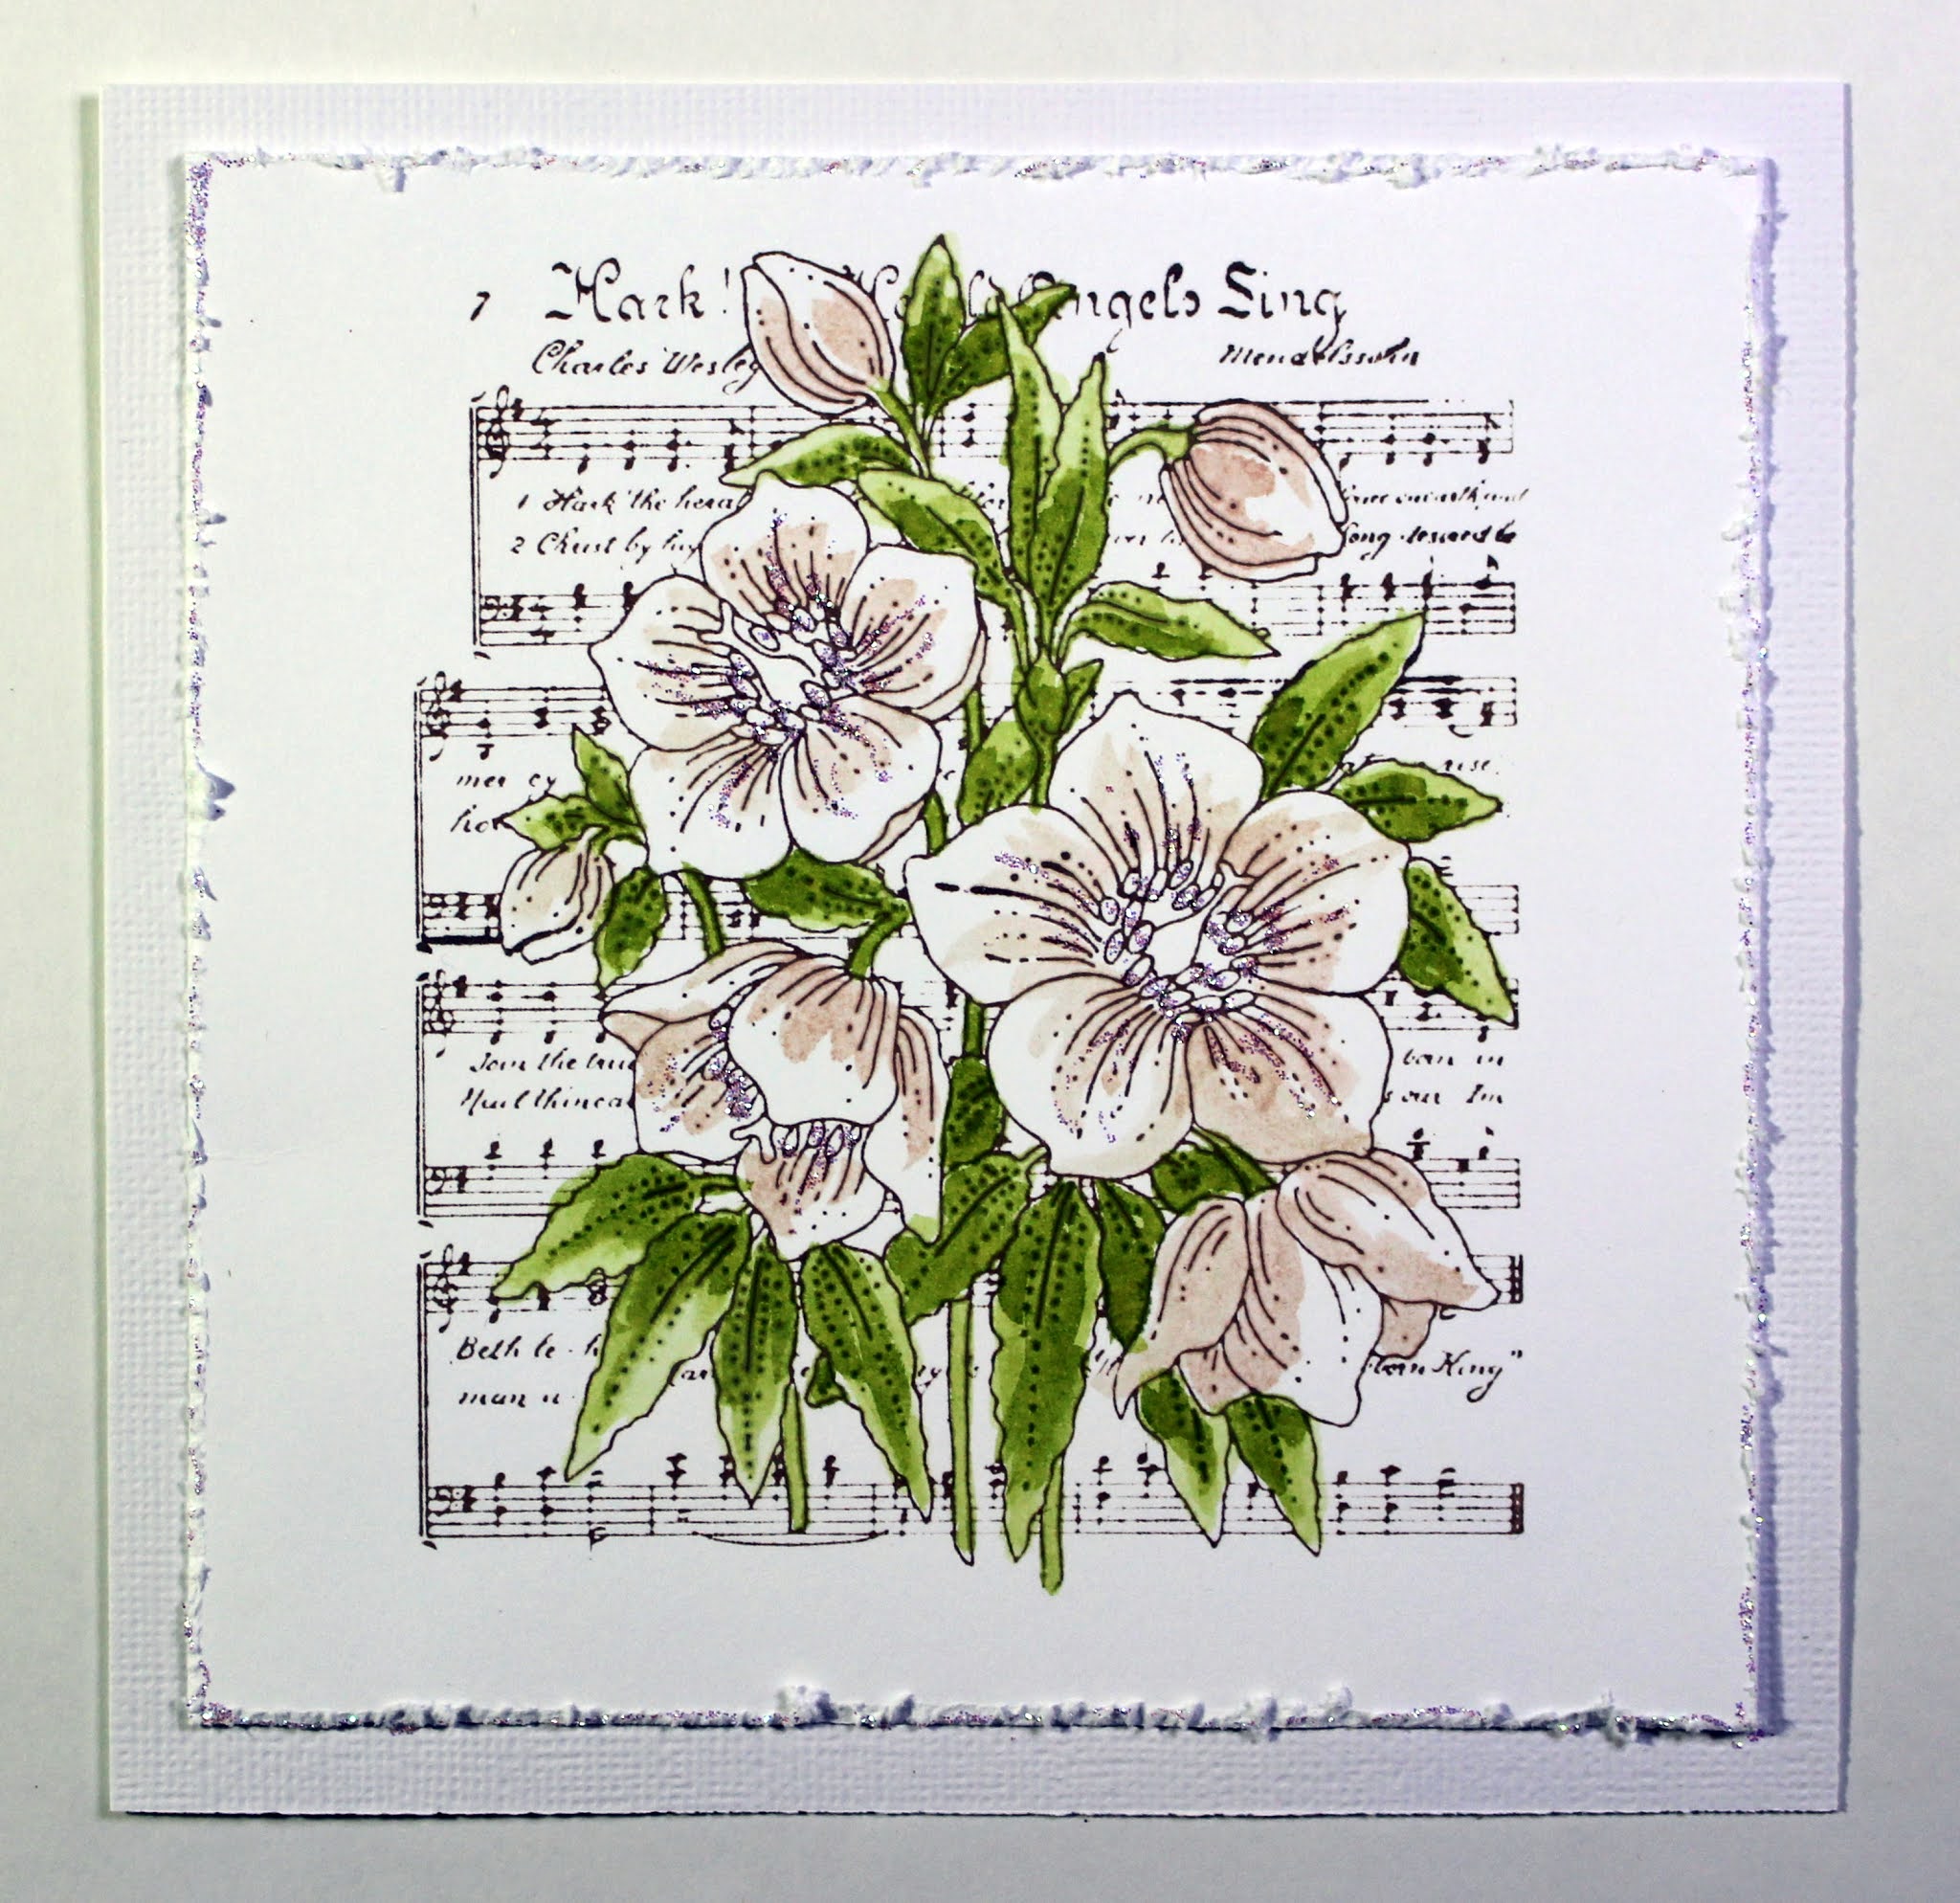
This shows the first stage of Distress Ink colouring using very dilute ink.

Deeper colour was then added to give shading. Working more heavily on the leaves and stems helped the delicate flowers to stand out more.

The edges of the card were distressed (using the edge of my scissors) to give a soft textured border before mounting onto the card blank. Lastly sparkly glitter glue was added to the flower stamens and around the edges. Cannot have Christmas without at least a little bling.

My next set were also coloured with Distress Inks. I went quite dark on the leaves to enhance the delicate flowers.

I was pleased with the delicate vintage look.


Next I coloured with soft pastel coloured alcohol ink pens.


Again my first attempt at colouring this batch was not really what I wanted. I felt that the flowers were a bit too much, too Summery and had lost their delicacy. Despite this I mounted this one as good enough.


I was happier with this colouring for the wintery theme. Coloured pencil details (outlines, leaf & petal veins) were added in to enhance the soft colouring.

Glad to have finally finished my Christmas cards – now to get them all written up and posted.

I will be back again next week with some more stamping play x.


Monday, 22 July 2019

A Trio of Cards (by Debbie)

Hi everyone it's my turn on the Chocolate Baroque Design Team blog today. I love all the great background stamps from Chocolate Baroque and my first design is just concentrating on using Damask Panel.
I started out by embossing three times on white card using a black inkpad and clear embossing powder. That done I got out my Distress Inks and sponged Seedless Preserves and Salty Ocean softly over the entire area. I then cut around two pieces leaving a narrow border and then mounted onto black card. The card blank is a white DL used sideways and as you can see I've attached one piece at the bottom right of the card and then turned the other piece up the other way and mounted it slightly over the bottom piece and standing up over the top of the fold of the card. I used 3D foam tape for this piece to give some dimension. From the 3D piece I die cut the tag and layered it onto some white card. The sentiment which has been stamped onto a punched circle, comes from Words to Dazzle and Sparkle, and I've edged the circle with a black pen. To finish I've punched three smaller circles, edged them also with black, and attached to the bottom left.

For my next design I've used one of my favourites, the very useful Mosaic Flower. I'm a great fan of monochromatic designs using just one colour but this technique using a spot of colour works well too for quite a dramatic effect.
I've stamped twice and coloured one piece with simply red and grey pens. I've then punched four circles from the image and again edged them with black pen. I've then simply overlaid them onto the other image matching up the design carefully. The 5" x 7" white card blank has been randomly stamped with On The Tiles using a grey inkpad and the image mounted onto red card before attaching to the card blank. The sentiment once again comes from Words to Dazzle and Sparkle.


My third design is a December birthday greeting using Hark the Christmas Rose stamped onto White Silk Board with black ink and embossed with clear embossing powder. I've watercoloured with the gorgeous Koh-I-Noor Brilliant Water Colour Palette and mounted onto brown card before attaching to a 6" x 6" ivory card blank. To finish I've wrapped some baker's twine around the fold of the card. The cute birthday greeting comes from the newly launched Christmas stamps, Christmas Circles.


Thanks for stopping by,

Debbie.
 

Friday, 14 September 2018

Not Only for Christmas (by Carole)

Hello everyone, Carole is back to share a couple of super projects with you today. She is showcasing the versatility of one of our individual stamps, Serena, and showing you how to make two beautiful projects.

Good morning everyone.
This is my second spot as a Guest Design Team member for September.

I have used the beautiful Serena stamp, which is a great design, as it can be used for Christmas but, 'not only for Christmas'.
It is always useful to have stamps with versatility.
This is my 'not only for Christmas', as I thought it would be beautiful as a Winter Birthday or Winter Wedding card too.

Stamps used: Serena, Hark the Christmas Rose, words are part of a Let's Get Festive stamp.
Distress inkpads
Versafine Onyx Black inkpad
Clear embossing powder
Watercolour pencils

For the background, I clear embossed a swirly tree design and lightly coloured with Distress Inks.
Serena and the Christmas roses were stamped with Versafine and clear embossed.
The halo and the candles are easily cut away from Serena, and the candles can be used on another card. The Christmas roses were cut away from their background.
I have coloured the design with watercolour pencils, which is still a favourite method of mine, and the colour was blended with a water brush.
On my blog I have another sample that I showed a while back which is a 'not only for Christmas' sample.

Serena is also perfect for making a decoration for your Christmas table as shown below.
She fits perfectly onto a 12.5 cm plastic, faux candle.
Ink up the stamp with a permanent inkpad, keeping it flat on the table.
Position the candle and roll it over the stamp, putting a little pressure on as you do so. Try not to slip, or the image will look smudged.
This can be left uncoloured, as I have done, or coloured with alcohol inks.


Thank you for visiting, and I hope you enjoy these stamps as much as I have.

Happy crafting,
Carole.

Wednesday, 29 August 2018

Floral Christmas (by Julie)


Hello, today I have another couple of Christmas themed cards. My first being stamped with the rather lovely Hark The Christmas Rose

The base card has been coloured with green and red Distress inks and then over stamped with the mistletoe image from Pears and Baubles. The centre panel was created on water-colour card. First I spritzed the card with water and then dragged the wet card through red and green Distress inks that I had applied to a non stick mat. Once the card had dried I inked up Hark The Christmas Rose with Onyx Black Versafine and stamped in the centre of the coloured card-stock. I coloured the image with Polychromus pencils and applied water with a paint brush to all of the card surrounding the stamped image. Kitchen towel was then used to blot dry. The Christmas Rose now stands out much more from the paler background and once completely dry, cut to size, matt onto black card-stock and apply to the front of the card.


My second card is quite quick and would be ideal for batch making. It doesn't matter what size card you have as you can just adjust your matting and layering accordingly.
The sentiment was stamped with Onyx Black Versafine and along with the mistletoe image that was stamped in the four corners of the card, comes from Pear and Baubles.
The fir tree branches come from Robin The Spruce and have been stamped with two different shades of green dye ink.
The mistletoe was coloured with pencils and then the panel was cut to size before being matt and layered onto black card-stock and applying it to the card blank.

Tuesday, 28 August 2018

Lets Get Festive

Hello there! I have a few more samples from July's shows using the Serena stamp, Hark the Christmas Rose stamp, Robin the spruce  and Let's get festive stamp sets.


In this first one I created a background using inks and stamped the serena image onto a cut out round piece of card. I used inks to colour this too. 


I stamped the hark the Christmas Rose stamp in archival ink and coloured it in water soluble inks. I then added this to a background created using a sentiment from the Lets get festive stamp set.


For my tag I used paints to create the background and coloured the stamped image (from robin the spruce stamp set) in distress inks.

I hope this has given you some ideas of projects you can make using these stamps!

Have a great day!

Hugs

rachel x


Thursday, 23 August 2018

Christmas roses (by Veronica)

 My last samples for this month share a theme of Christmas roses, and both stamps are great for colouring in.
The first stamp is called 'hark the Christmas rose'  and has a background of music for the carol 'hark the herald angels', which i thought was a lovely combination.
 The first one was stamped with versamark onto black card and gold embossed before painting with some very ancient mica paints - I think this one used H2Os. Trimmed down, mounted onto gold card, then onto a white card blank that had been randonly stamped with the roses using a gold inkpad.
 The second version is very similar, but embossed in silver and the paints were from an anonymous palette of mica paints - it is so old that the clear lid has disintegrated, but the paints still work fine!
This time i stamped and white  embossed the snowflakes from winter edges to make the background, then sponged a light grey ink round the edges before adding matting layers of black and silver


The serena stamp does count for this theme as it has a small bunch of Christmas roses!
My first card was the simplest, stamped with versamark onto cream card and gold embossed.
Painted again with the mica paints, a thin gold mat and mounted onto a white base card randomly stamped using the Christmas roses which were gold embossed. The sentiment is from 'lets get festive'.


The final version I stamped serena three times,  once onto white card and twice onto black and silver embossed all the images.
One of the black cards was trimmed to size, and a versamark pad dragged roughly round the edges which were then silver embossed.
Serena was painted with the mica paints on the white card and fussy cut out, then glued onto the image on the black card.
The roses and candles were painted on the third image, then fussy cut out and glued on.

I hope that you enjoyed Christmas in July, there are loads of lovely samples coming up from the girls, so keep looking!


Saturday, 18 August 2018

Shabby Chic Roses by Brenda


Hello all, Brenda here with some more inspiration using the beautiful new stamps that featured in Lesley's recent TV shows on Hochada.

The beautiful Hark the Christmas Rose was a big hit with all the Design Team and the above card was the first I made when I inked it up, it just said Shabby Chic to me so I went down the Kraft card and soft pinks route. The image was stamped with Versafine black, a little colouring added with pencils and the edges 'ruffed' up after adding tea dye DI before matting and layering on to coordinating card stock.


The backgound of this one has been repeat stamped using Distress Markers and images from the new Robin the Spruce set. The lovely Robin is from the same set, again stamped with Versafine black, a mask and Pan Pastels for the sky then coloured in and mounted on foam pads over the background.


This is Serena and her name really does befit the beautiful image whic after stamping with Versafine black I coloured in with sparkle pens, lightly inked the background, framed her and uased some organga ribbon and a snowflake brad.


My final share today has a Distress Ink background which brayered on randomly to give varying textures, then overstamped with stamps from Robin the Spruce and Pears and Baubles alsong with Large Crackle Backgrund around the edges stamped with Versamark and embossed with Detail Gold. The pears are also from Pears and Baubles stamped on to a background created in the same way as the main piece, heat embossed with detail gold again and cut out. Finally a sentiment from Lets Get Festive.

Many thanks as always for your visits and kind comments.

Thursday, 9 August 2018

Christmas Card and Treat Bag


Good morning. Today I am sharing a couple of Christmas projects – a simple card in non-traditional colours using the Pears and Baubles stamp set, and a pretty fabric pouch stamped and coloured using the Hark the Christmas Rose stamp.
A 6 X 6 inch white card blank was stamped with the lovely background stamp from the Pears and Baubles stamp set using pale pink dye based ink.
The sentiments were stamped with pink and Silver Ink from the Let’s Get Festive stamp set.
An octagonal piece of pink card was embossed with a textured folder from my stash. A little Distress Ink (Tattered Rose) was applied across the surface with a sponge to enhance the texture. Versamark Ink was applied around the edges and embossed with white powder. This was glued to the card with foam pads for added depth.
The bauble was stamped with Silver Ink onto plain white card and cut out. The bauble was sprayed with glittery varnish for added sparkle and Glossy Accents applied to the central star. The bauble was glued to the card with foam pads.
Finished with sequins, an organza bow, silver glitter glue and silver PVA pearls – just couldn’t resist a bit more bling.

A scrap of cotton was trimmed into a rectangle approx. 13 X 34cm. This gave enough room for seam allowances and a fold over top to thread with a ribbon drawstring. Before sewing together the Hark the Christmas Rose was stamped onto one end using Black Ink (suitable for fabric). The ink was left overnight to dry and ironed to fix (essential if you want to colour with water based media).
Rather than water based media I decided to colour the image with permanent alcohol markers (green, yellow, pink and blue). Colour was encouraged to bleed and give a soft blended effect using a clear alcohol blender pen.
When dry a little clear acrylic sparkly glaze was applied to the flowers, and gold glitter glue (suitable for fabric) was applied to the stamens. Yes – just had to be more bling. The fabric was again left overnight before ironing with a hot iron to set everything.
A small channel for ribbon threading was stitched on each end, then the fabric folded in half and the side seams stitched (omitting the channel). Two pieces of ribbon were thread through the channels to create a simple pull drawstring.
I hope that you have enjoyed my Christmas makes xxx.

Monday, 6 August 2018

Christmas Compilation (by Judith)

Hello everyone, I have several projects to share with you today, showcasing the fabulous Christmas stamps from last month's TV shows on Hochanda.

For my first project, I decided to combine the lovely Serena, with some of the images from the Robin the Spruce stamp set to make a triptych. I used drawing cartridge for the front of all of the sections, and painted the back and sides with an olive green acrylic paint, adding a touch of quinacridone gold for a touch of opulence. I stamped Serena onto the main section, and masked the image, before colouring the background with Distress Ink and a blending tool. I coloured the other two sections at the same time.

I added some stamping with the Large Crackle Background around the edges, to age the background , and the added the sentiment to one side panel, along with the foliage stamps. On a separate piece of card, I stamped the floral part of the Serena image again three times, and coloured these, along with the main image with water based markers and a water brush. I decoupaged the images onto the side panels to complete the project.

For my second project, I used some kraft card to stamp and emboss the Hark the Christmas Rose image, using Versamark and white embossing powder. I painted the image using Koh-i-Noor paints. The white paint was most useful for the roses to create a softly coloured Christmas Rose, as the white shows up so well on darker cardstock.

I used a blend of Distress Ink colours for the larger background, and stamped a foliage stamp from the Robin the Spruce stamp set randomly over the background, using green ink and second generation stamping, for a softer effect.

My final card was created using some left over background from a previous project. I had used Tinting Medium and Brushos on Textured Art card. I stamped and embossed all of the images from the Robin the Spruce stamp set using Versamark and white embossing powder, choosing to pick out the robin himself  and the berries as the highlighted areas. A simple red bow finished off the card.

Thanks for stopping by, I will be back later in the month to share some more Christmas projects with you. Judith xx

Saturday, 4 August 2018

Hark the Christmas Rose by Brenda


Good morning Peeps, Brenda here with some Chrismtas creations from Lesley's recent Hochands shows which featured some rather beautiful seasonal stamps. And a heads up that she has two shows today at 8am and 2pm which you won't want to miss, it's all rather Eastern!

My first piece of artwork features the lovely Hark the Christmas Rose which really is the most beautiful image. I am sure the shape of this card has a name although I'm afraid I don't know it. I used a sheet of A3 card which gives you two base cards, I score twice at 6" intervals then cut vertically to create the two cards, then cut the two end panels diagonally so that they fold in on onanother.


This is the central panel stamped and coloured with sparkle pens, I then stamped the flowers several more times and cut out to decouapge on the frot panel and layered over the background with I stamped with Large Crackle Background.


A nice inky background using Distress Oxides, then the Pears from Pears and Baubles, the first stamped with Versamark and heat embossed with detail silver, masked to stamp the second pear stamped and embossed with purple embossing powder, then repeated again to add the thrid pear. Finally three sentiments from Let's Get Festive.


Another appearance for Robin the Spruce, he seems a very popular fellow with the DT and viewers, stamped with Versafine Black, twice onto the back panel and a third time onto a small piece of card, cut our and coloured and raised centrally over the background.


A final share using the beautiful Serena. I brayers white acrylic pain onto a piece of Kraft card purposely leaving uneven edges. I then added a wash of Twisted Citron and Peacock Feathers Oxide Inks, to get the ink where I wanted it I put the ink onto a pice of acetate, water down and then dabbed the piece of painted Karft into it.........messy but works a treat as you can see the ink and are in more control of where it goes.

I then stamped Serena with Versafine black, added some seam binding and coloured and cut out a couple of flowers from Hark the Christmas Rose.

Thank you so much for your visit today.

Friday, 3 August 2018

Musical wishes ( By Marga)

Hello everyone, here is Marga again with a new card. It's a hot summer in the Netherlands but it's also time to start with the Christmas cards because I'm not on time if I don't start now.


This gorgeous new stamp, Hark the Christmas Rose I coloured with aqua markers.
I really love this stamp.

Hugs Marga

Monday, 23 July 2018

Season's Greetings (by Autumn)

Hello everyone, Autumn is back with another post today, sharing a beautiful Christmas card.

Hello lovelies! Autumn Clark of http://www.sewpaperpaint.com with you again today. Today's card features the Hark the Christmas Rose individual stamp. To begin, stamp the Christmas Rose stamp in Fired Brick Dtstress Ink two times. Watercolour the images with Fired Brick, Frayed Burlap, Peeled Paint and Crushed Olive Distress Inks. Fussy cut out the large flowers from the second image and mount onto the first image with foam tape.


Apply liquid enamel dots to the centre of your flowers. Curl up the edges for extra dimension. Sponge the edges of the base panel with Antique Linen Distress Ink and layer with red cardstock and printed designer paper onto a red card. Attach a sentiment sticker along the bottom. Thanks so much for joining us today!

We look forward to seeing Autumn's final project for the month next week,