Pin It button on image hover
Showing posts with label Woodland Dreams. Show all posts

Wednesday, 9 February 2022

Woodland Dreams (by Lorraine)

Hello everyone, today sees the first of three posts by our Guest Design Team member Lorraine. She has created a card using the spotlight technique for your inspiration.

Lorraine writes:

 I decided to pull out one of my original Chocolate Baroque purchases from the Woodland Dreams set. There is so much detail in this one stamp that it ws possible to actually spotlight two areas, although it could carry one quite happily. Unfortunately, I can't recall the dimensions of the card, and it's been gifted now, so I can't check, but the design really dictates the base layer- the size of the mounts is at your discretion!

Smooth black and white card are essential to get the best results, as this technique called for lots of embossing. Liberal use of an anti-static bag also helps. Starting off with the black card, stamp the image using Versamark. I used a stamping platform to help get a good impression - it also provides you with the opportunity to reapply the ink if you miss a bit. Fortunately, the embossing ink shows up well on the black card. Once you're happy with your image, add your white embossing powder and heat set. I like the fine detail powders as they give a crisp result. Repeat the proces using black powder on white card.

When you have decided on the area you want to spotlight - in this case I chose the birds - cut the two corresponding circles from your white card. I actully used my Scan n Cut for this as I didn't have any circle dies of the right size. The circle on the left overlapped the card, so I layered up the the black and white mounts before actually affixing the spotlight circles. There are so many 'contact points' within the design that it does take a little patience to get it properly lined up, but I think the finished effect is worth it. I hope you agree!


Thursday, 9 April 2015

Birdcage Collage with Stampbord (posted by Judith)

Hello everyone, I have a project to show you using one of this month's individual stamps, Birdcage Collage.

I started my project by inking up the stamp, and then placing an ATC sized piece of Stampbord onto the stamp to take a partial print of the image. I stamped the image again onto a piece of white card. I coloured the Stampbord image with pencils, and also the areas of the image on the card that would not be covered by the Stampbord image.

I covered the piece of Stampbord with Versamark and sprinkled it with extra thick clear embossing powder, melting it with my heat gun. I added embossing powder twice more while the embossing powder on the Stampbord was still molten. You need to be very quick to do this! Once the Stampbord had cooled down completely, I attached it to the card image, lining up the two images so that they matched each other.

I created the card background using the wrinkle free Distress technique: adding Distress Ink to my craft mat, and spritzing it with water, before dragging my card through the ink. I dried this layer, and then patted the card onto the mat again to pick up some of the left over ink droplets, and dried the card again. I added a second colour and repeated the process. I used a template and Distress Ink to add a trellis effect to two of the corners of my background, and stamped a small berry stamp taken from the Woodland Dreams stamp set onto the other two corners.

I attached the background to an 8" x 8" card blank and added a sentiment from the Card Sentiments clear stamp set.

 
Thanks for stopping by, Judith xx

Tuesday, 13 January 2015

A Bird for all Seasons and Ophelia the Mermaid? (by Judith)

Hello everyone, I hope that you are enjoying the range of projects from the Design Team this month. I have chosen to use some of the new individual cling mounted stamps Song Thrush and Ophelia for my projects for you today.

For my first project, I wanted to show the diversity of this lovely stamp, and how it could be used to create cards all year round, so I have made a Christmas card. I started by embossing the image three times, using white embossing powder on some green scrapbook paper, and colouring the image with pencils. I decoupaged the flowers and bird. I layered the image onto kraft card, using some dark red card as a mat for contrast. I also added some holly die cuts, and some more stamping, using a berry stamp from the Woodland Dreams stamp set which I also coloured with pencils. I tucked some flowers from a spare image under the main frame, along with the holly die cuts. I added some shading around the edge of the kraft background, using Festive Berries Distress Ink. Finally, I added a sentiment taken from the Warm Christmas Greetings clear stamp set.


For my second sample, I stamped Ophelia onto a piece of heavy weight cartridge paper, and then masked the image. I coloured the background by blending three different colours of Distress Inks randomly all over the page. I stamped an image from the Texture Fragments stamp set onto opposite corners, using one of the same colours of Distress Ink. I then flicked water onto the other areas of the page and dried it with a heat gun, to emphasise the watermarks.

I stamped and embossed a seaweed image along the bottom of the page, from the Underwater stamp set,  using a blue/green metallic powder. I then added some flowers which I had cut out and coloured with pencils from the Song Thrush Silhouette image. It just goes to show that you can add flowers to just about anything! Finally, I coloured Ophelia using pencils, and matted the project using toning coloured card.

Thanks for stopping by, Judith xx

Friday, 9 May 2014

Birds of a Feather (posted by Judith)

Hi Folks, I have a couple of bird related samples for you today using the stamp of the month stamps from Chocolate Baroque.

For my first sample, I created a couple of backgrounds using Distress paints and water. I used some smooth watercolour paper, as I wanted to add lots of water to the paints to create a watery feel to the backgrounds. I have used Seedless Preserves, Crushed Olive and Antique Linen as my colour palette. On the larger background, I stamped a border using a tree stamp from the Woodland Dreams stamp set using gold embossing powder. On the smaller background I have used one of the lovely Lalique style birds, which I have coloured using Distress Markers. I simply matted the backgrounds with plum card, and added some ruffled ribbon.

My second project is a little altered notelet box, using Weathered Wood Crackling Medium and acrylic paint from my stash. I painted the little box using navy and and pale blue paint, applying the crackling medium in between the two layers. I used very cheap acrylic paint, so it works very effectively. I stamped the bird onto tissue paper using silver embossing powder, and coloured it with Distress Markers.


I used a sentiment from the Mackintosh Sentiments clear stamp set to stamp along a piece of ribbon to embellish the sides of the box. I added a couple of Crealie flowers to complete my project.
Thanks for stopping by, Judith xx


Monday, 11 February 2013

Enchanted Forest (posted by Judith)

Hi Folks, I have a project to show you today using the Fantasy Woodland stamp set combined with Woodland Dreams to make an enchanted forest scene. I have used Distress Inks to create the background and paper masks to create the hills that the trees are standing upon. The trees were then coloured with pencils, and I added further foliage around the edges with deeper colours to add depth.

No enchanted forest would be complete without a fairy, so I have added one of those as well, along with some little handmade flowers created from glassine paper.


The eagle eyed amongst you may see one or two stamps that you do not recognise. If you care to take a look in the What's New Department on Valentine's Day, February 14th, you will be in for a treat!

Keep popping back for more fabulous samples from my Design Team mates, thanks for stopping by, Judith xx

Wednesday, 28 November 2012

Two Roads (posted by Claire)

Good morning, my sample this morning features the new clear stamps Terrific Treescapes, this time I've created a misty Autumn scene by combining them with stamps from Woodland Dreams 


I've had this card in my head for a long while and these new stamps were just perfect to create it. The sentiment from Woodland dreams was the inspiration for the card, unfortunately its a little blurred in the photo but it reads 'Two roads diverges in a wood, and I, I took the one less travelled by'. 
It can get a bit tricky making quite complicated scenes using a brayer but its so easy with PanPastels. I  used a torn paper mask for the hills at the back of the scene and also a mask for the sun but apart from that I just used the Sofft tools to create the scene with shades of green and brown PanPastel. I stamped the trees with Memento inks. The little bird is also from  Woodland Dreams, coloured with distress markers. I've used brown card for matting and layering and one of the Guild papers in the background.

Thanks for visiting today, 
Claire xx

Wednesday, 30 November 2011

Altered Book (posted by Judith)

When Glenda sent me the new Country Views stamp set, I fell in love with the little folly stamp on the plate, and wanted to make this a focal point of a project. I have made altered books before, and decided to make one for a Design Team piece.

Now for those of you that are horrified at my alteration of a good book, I will tell you where I get my books from! I buy my books from charity shops, so the proceeds always go to a good cause, and I choose books that have seen a better life, and have therefore outlived their usefulness.

Once I had cut a circle in the front cover of my book with my trusty Tim Holtz Tonic scissors, I painted the book first with gesso, then a couple of coats of acrylic paint. I mixed the colour myself, using a couple of colours, to achieve the shade that I wanted. I then dry brushed a darker colour around the edges. I embossed one if the fabulous new Texture stamps onto the book with gold embossing powder. I tore a loose circle shape out of the first few pages, creating a niche, and then stamped the folly stamp onto a spare piece of card. I coloured the image with Polychromos pencils, and blended the colours, adding extra shading where necessary. I then inked around the image with Distress Inks, before fixing the card into the book.

I wanted to add some flowers, and was undecided as to which colour to use, so I looked at a colour wheel for inspiration. The opposite colour to the zingy green that I had chosen for my book, was a lovely plummy pink colour, so I went with that, and added some ribbon in a similar shade as the closure for the book. I stamped and cut out some leaves from the 'Woodland Dreams' stamp plate to go with the flowers, as I love the leaf on this stamp plate, it is a firm favourite of mine. I also added the sentiment from the same stamp plate.


These stamps are so much fun to work with, and I really enjoyed creating this project. Keep checking back to see what the other members of the Design Team have come up with over the next few days. Thanks for stopping by, Judith xx

Thursday, 17 November 2011

Woodland Dreams tag card

It's been a while since I posted any of my own artwork here, so here's a simple birthday card which I've made two weeks before I actually need to send it - unheard of! 

I used a kraft tag and stamped the tree from Woodland Dreams with Memento inks and coloured with Prismacolour pencils.  I added some shading around the edge of the tag then mounted onto a piece of card which I had previously used to cut out a Nestability shape.  I liked the curved edge, so centred the tag on it and trimmed it to fit.  It's matted onto a lime green layer and stuck onto an 8x8inch card with backing papers from the Essence of Nature CD.  The sentiment is from Craftwork Cards and the gold leaves are cut with a Crealies shapes die.

I love the combination of chocolate and lime, but then I love chocolate with anything really!

Friday, 28 October 2011

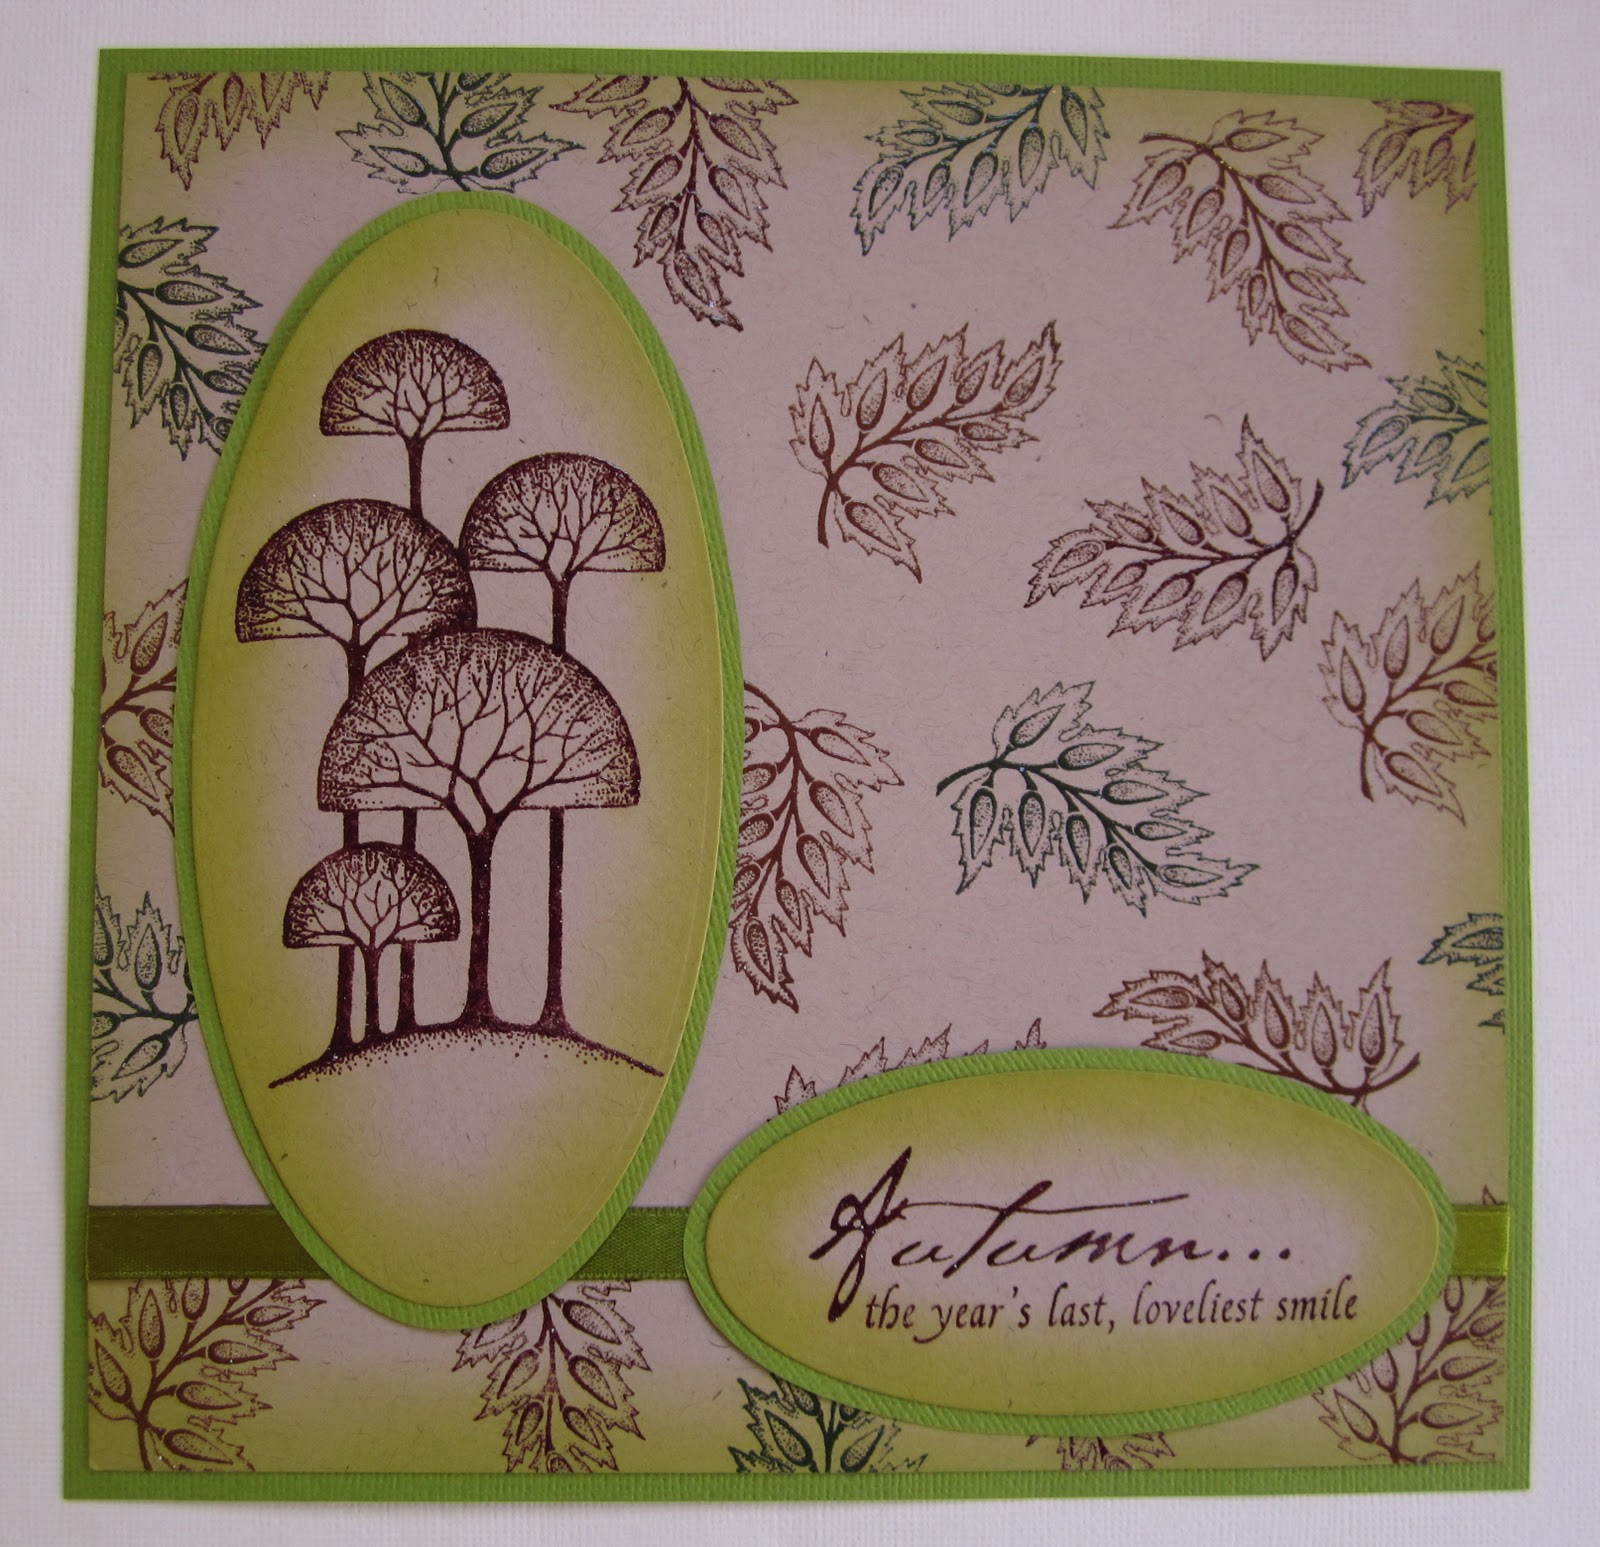
Autumn's lovely Smile

At this time of year, I love all of the different shades of brown and red around on the leaves, and I wanted to reflect that when I used these lovely new stamps from the 'Woodland Dreams' stamp plate. I chose to stamp my images onto Kraft card, to create a muted background, and used clear embossing over all of the images. I used a green ink to add shading around the edges, to correspond with the ribbon that I used. Lastly I used a sentiment that I am very fond of from the 'Nature's Peace' stamp plate, which just went with this card perfectly.


There are some fabulous images on this stamp plate, as you will have seen from Glenda's introduction. Keep checking back for more samples this week from the Design Team. Judith xx

Thursday, 27 October 2011

A leafy frame (posted by Elaine)

I am pleased to post a project using the new Woodland Dreams plate. I loved the leaf stamp, in fact this plate was made for me as I love nature themed projects.


First of all I cut an oval aperture in a piece of medium brown card and then I stamped the leaf randomly around it in russet archival ink. I added a little shading with a brown pencil. Then I overstamped with gold Brilliance ink. I wanted to create the effect of vintage fabric. I heat embossed the leaf in gold and then carefully cut out and mounted the leaves to frame the aperture. I heat embossed the tree in gold onto a large piece of dark brown card and then mounted the frame on top.

There are some delicious stamps on this new plate and you can find it on the Chocolate Baroque website here

There will be more design ideas to come this week from my fellow teamies.

Elaine

Tuesday, 25 October 2011

Echoes of Italy and Woodland Dreams

The girls are ahead of me here - I've been without a working computer at home for over a week and I had real problems with Blogger too, but the computer is back and things seem to be working fine now.

So, October's new stamps are two new A4 sets packed with beautiful images. 


Echoes of Italy has been in the pipeline a long time and I'm sure the images will seem familar to anyone who has visited Tuscany, though they could equally be from Provence or other rural mediterranean areas.

Woodland Dreams is a much more stylised and decorative interpretation of trees and woodland and makes really striking contemporary cards.  The simple shapes are easy to mask out, so lots of potential for using them with interesting background techniques.

The girls will be adding more of their artwork to the blog over the next week or two, so do keep coming back for more eye candy!