Pin It button on image hover
Showing posts with label Pears and Baubles. Show all posts

Wednesday, 9 December 2020

Christmas is coming (by Anne)


Hi everyone. I am delighted to be a guest designer for you this month. My first offerings are some Christmas makes. It's been a tough year for us all and this Christmas is not really going to be usual. However, lets hope that time goes by quickly and that we can look forward to better times ahead with our friends and family in 2021. Lots of hugs, Anne.

CHRISTMAS LANTERN

My first project is a pretty Christmas lantern. I mixed & matched lots of stamps on this one but just had to include my absolute fave reindeer stamp.

Woohoo – all lit up.

This one is to be gifted to my 96 year old friend who I help care for. We are having Christmas together as I am in her support bubble. I think that she will love it.

Materials List

Pretty 3D scene with house and trees.

A close up – oh that reindeer!

Adding the acetate baubles helps to blur and disguise the side edges of the card cut outs creating the scene.

How it was made:

  1.  The bare MDF lantern was coated with white Gesso (primer).
  2.   When dry it was painted with acrylics. Gilding wax was added around the ledges.
  3.  Versamark was applied through the stencil onto heat resistant acetate to create the Winter sentiment. It was heat embossed with sparkly white powder, cut out and attached to the lantern with strong tape.
  4. The snowflakes border was stamped and embossed with white glitter powder 4 times, cut out and taped to the top portion of the lantern arches. Two large baubles were also stamped, embossed and cut out.
  5. Extra snowflakes were stamped and embossed with white or blue glitter powders, along with a few twiggy branches, and cut out ready to use as embellishments.
  6. The main images; 2 large background trees, the building scene, smaller foreground tree and reindeer were stamped with Versafine and cut out. In addition pine cones were cut out from the stamped pine branch stamp.
  7.  Images were coloured with watercolour, glitter and gel pens.
  8.  Now for the messy bit – ha ha. The glitter gel was used to coat the base and spread on top of the ledges. Some was also applied behind the acetate to help glue it in place securely. I had this heavy bodied thick glitter gel in my stash for years. It really needed using up as it had started to set in the pot. Some of the half set chunks were stuck down into the wet gel for added dimension. For added sparkle I also dropped in some of the chunky mica flakes. You could substitute heavy bodied acrylic medium and add glitter for similar results.
  9. The stamped images were anchored into the wet gel to create the scene. I just had to add a little bit more sparkle over the images with clear glitter glue too.
  10. Once the glitter gel medium had dried I did a bit of dry brushing with white Gesso in some areas to add more snowy effects.
  11. The light string was then arranged to light up the background house and trees, and to light up the foreground tree. The wires were anchored with strong tape at the back of the images to help hold them in place. The switch was hidden behind the large background scene images.
  12. The acetate bauble images were added to the sides with red tape. This helped blur the view through the sides of the lantern where just side on edges of the card elements were visible. It may have been better to stamp the sides as one complete panel but I found that I needed easy access to the inside in order to arrange the stamps and lights.
The ribbon bow was added to the top. The acetate snowy sprigs and pine cones were added to embellish the bow. The glitter glue gel was used to anchor everything in place. Extra snowflakes used to embellish too.

ROBIN SCENE CARD

Every year I end up leaving my Christmas cards until the last minute so I decided to do a couple of projects that would be fairly quick and easy for batch making. I always use my stamping press for batch making – it makes it so much easier to line everything up and repeat stamp multiple times.

I hope that you like this robin scene card.
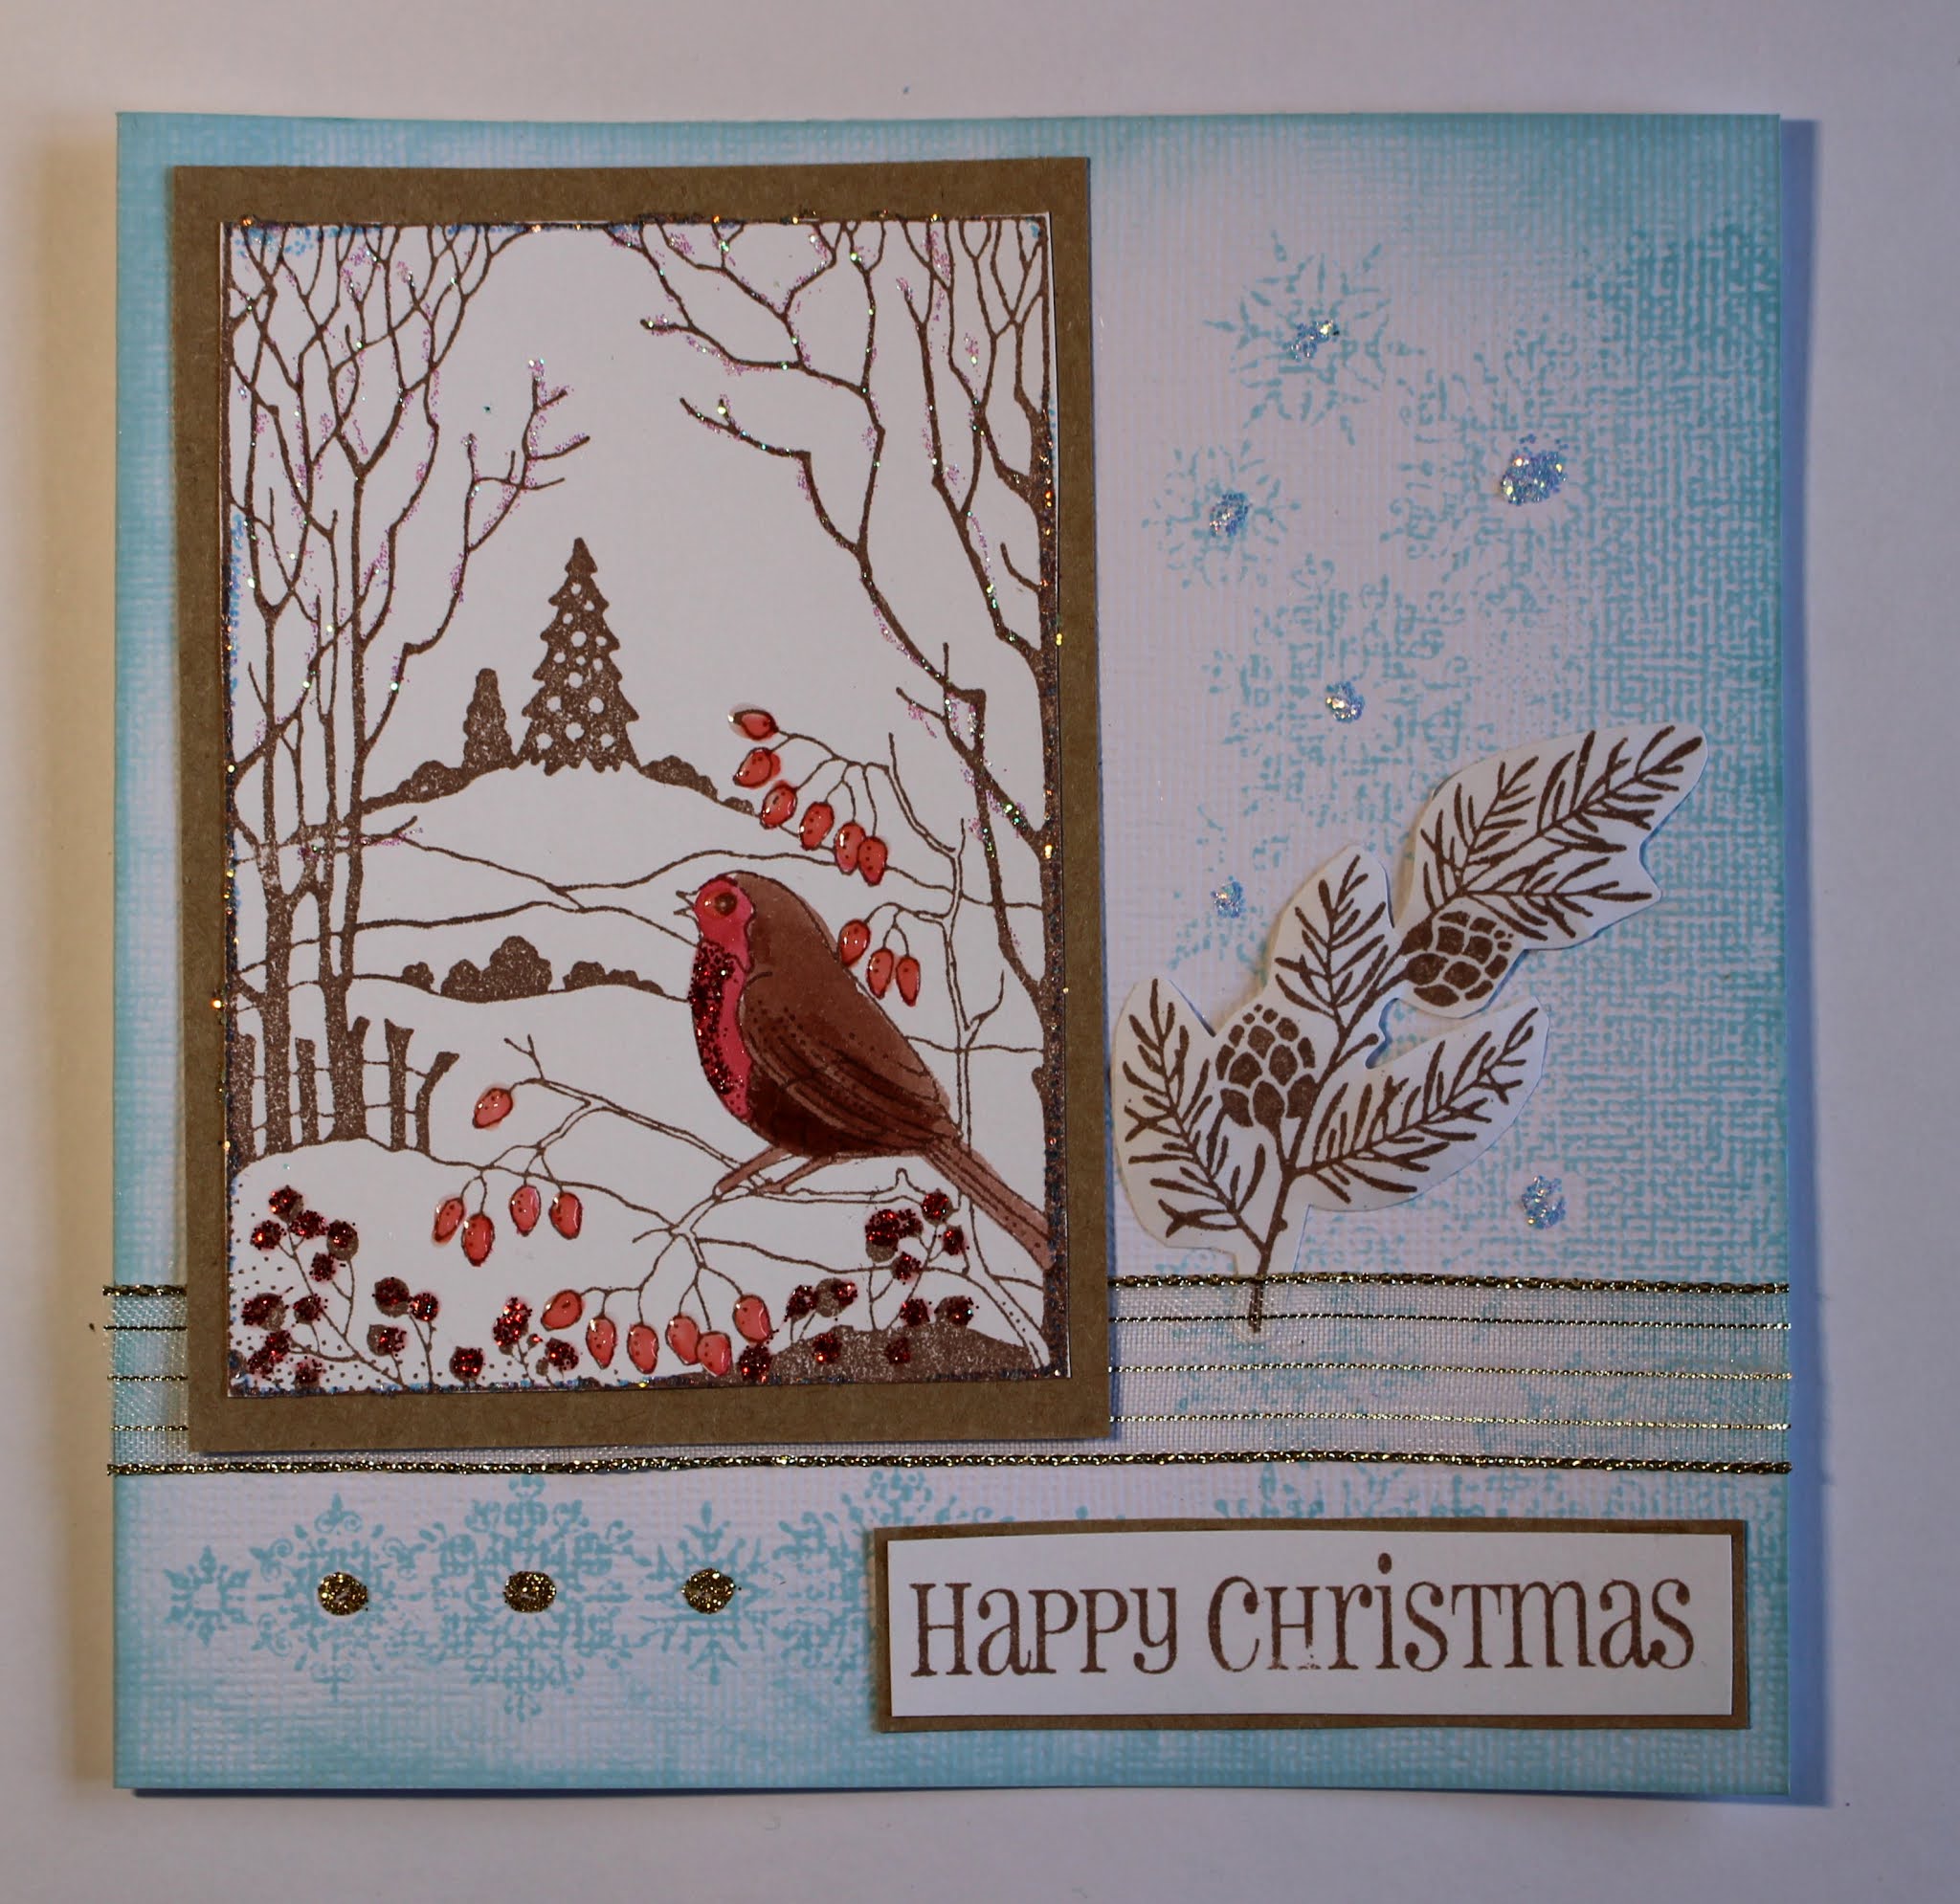

I added extra inking around the outer edges of this one but decided that it really didn’t need it so didn’t do it on the rest. I just had to get on with that batch making! Ha ha.

Materials list

How it was done

  1.        Images were stamped with Versafine and cut out.
  2.      The main image was coloured with watercolour pens and mounted onto Kraft card. Glossy Accents was used to add shine to the Rosehips, and glitter glues added for sparkle.
  3.         The snowflake borders were stamped directly onto the card blank with  Distress Ink.
  4.      The ribbon was glued down and the main topper added. The sentiment was also mounted onto Kraft card and glued in place. The branch was lightly shaped before gluing.
  5.           Finished with more dots of glitter glue. Hey – you can never have too much bling – tee hee.

Note: I kept these fairly flat for ease of posting. 3D foam could be used for more depth if desired.

CHRISTMAS TREE SHAKER CARDS

Who doesn’t like a shaker card? Scenic panel stamps make them really quick and easy for batch making. These were quite tricky to photo due to shiny acetate and all that bling. Hopefully you can see enough detail of the lovely glittery snow behind the acetate windows.

Materials list:

  • Frosty Trees stamp set (Chocolate Baroque)
  • 15 X 9cm white linen textured card blanks
  • Heavy weight textured white card (for frames)
  • Heat resistant acetate
  • Versamark Inkpad
  • Embossing powders: Detail white, white with silver glitter, metallic silver
  • Glitter for inside shaker (I used Pinflair Ice Diamond – non static glass glitter)
  • Stickles glitter glue (Icicle)
  • Foam tape and red liner tape (strong double sided tape)
  • Optional: Die to cut decorative aperture approx. 12 X 6cm (or cut a plain frame by hand). I used a die from Tonic (Kaleidoscope Box Panel set)

How it was done:

  1.         Cut a frame to fit the card front and surround the stamped scene.
  2.       Stamped the image onto acetate and heat embossed with choice of powder. Trimmed and attach behind the frame with strong tape.
  3.           Next attached foam tape ensuring that no gaps were left (to contain the glitter).
  4.         Laid card flat and placed glitter in the middle before placing the framed acetate scene.
  5.         Finished with dots of glitter glue.

MORE CHRISTMAS TREE CARDS

Finally I made another batch of quick and easy cards using the reverse scene image and blue ink. I do love monochrome blue & white cards.

Materials list:

How it was done:

  1. Images were stamped with Versafine. Note: images on the textured card blanks will not be sharp. This is fine for the backgrounds.
  2. Scene panels were cut out and stuck down with foam tape for added dimension.
  3.    Finished with glitter glue sparkles. Sorry but had to do it.


Saturday, 24 November 2018

The Magic of Cristmas ( By Marga)

Hello everyone, today it's my turn again to show you a card, this time again a Christmas card. I made a lot this year so I'm sure I have more than I need, but I like to make them.


I used my stamping tool to make this card. I first inked the image with two colours of ink and stamped it and then I sprayed water on the stamp and stamped it again. This gives a watercolour look.

Stamps I used are: Robin the Spruce , Pears and Baubles and Let's get Festive.


Hugs Marga


Saturday, 10 November 2018

Happy Christmas ( By Marga)

Hello everyone, today it's my turn to show you a card. This time a Christmas card.


For this Card I used the stamp set Pears and Baubles. I stamped the images and the sentiment with Versamark ink and used gold and silver embossing powder.
I cut the ornaments out and put a gold ribbon on it. 

Hugs Marga

Friday, 26 October 2018

Christmas Card (by Corine)

Hello everyone, Corine is here today with her final post of the month as a Guest Team Designer. She has created a beautiful Christmas card to inspire you.

Corine writes:

Hello!

Today it is my third and last time to post a card as guest designer. I hope you enjoyed my samples.

I used stamps from the sheets:
Pears and Baubles
Seasonal Fragments


Apply Distress Oxide Faded Jeans, Peacock Feathers, Cracked Pistachio on a craft sheet. Place watercolour paper on it. Repeat this and dry with a heat tool.
Stamp background with Peacock Feathers. Stamp mistletoe with Memento dewdrop Olive Grove.
Colour the mistletoe with green markers.
Stamp Christmas ball with Memento Luxe Teal Zeal on watercolour paper, emboss with clear embossing powder. Colour in with markers.
Stamp text 'Happy Christmas' with Memento Luxe Teal Zeal and emboss with clear powder.

Kind regards,
Corine van Kuilenburg

Corine will be back in the New Year with more projects to share with us all. 

Thanks for stopping by,


Friday, 31 August 2018

Believe in ...( By Marga)

Hello everyone, today another Christmas card from me. I'ts going well with the Christmas cards.


I made the backgound on photopaper, put the ink on it and blew the ink with a straw over the paper.

On another piece of the paper I embossed the pear with gold embossing powder and cut it out and pasted it on the paper. The sentiment I stamped with Archival Ink.

Hugs Marga

Sunday, 26 August 2018

Mini Book (by Magda)

Hello everybody
Here is a tiny "Mini Book" for your next Christmas memories.

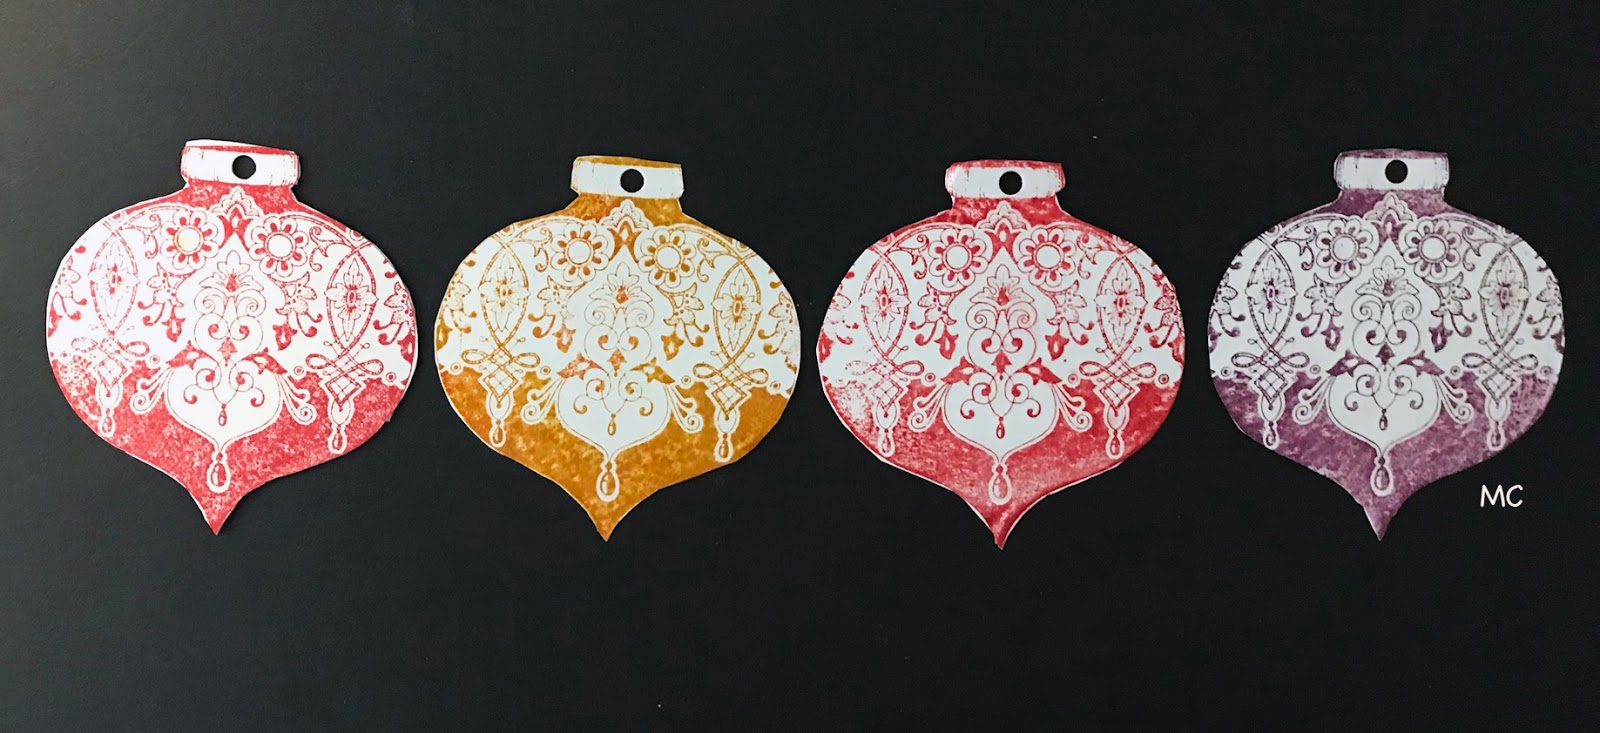
Stamp the bauble  of  Pears and Baubles stamp in different colours on a white cardstock , cut out the images and make a hole at the top of each one.


Stamp the sentiment in black with Versafine on a white cardstock and glue it on one bauble.
Blend Distress Ink Pad on the reverse side of the decoupage cut and stencil a little star as decoration


Assemble the baubles, at the end the mini-book will look like the photograph below:


For this card I used  the background stamp, the bauble and the sentiment from Pears and Baubles


From the same stamp sheet, Pears and Baubles   I stamped the Tree, while the borders are the snowflakes from Winter Edges stamp set. I stenciled stripes for giving some movement to the background.


I wish you a nice Christmas Crafting Time,  full of ideas, and fun in creating.
Magda 

Saturday, 25 August 2018

Christmas Candle Box and Card (by Anne)


Good morning. Today I am sharing a couple of Christmas project ideas with you.
The first is a festive card with a bit of a grunge feel. I was experimenting a bit with this one – just had to add a bit of glitter bling though (no stopping me – ha ha). Stamp sets used: Winter Edges, Pears and Baubles plus Let’s Get Festive.
How it was done:
The card blank was stamped with the snowflake border and black dye based ink (12cm square texture Kraft card).
A die cut tag was spritzed with green and gold ink sprays. When dry the background was stamped with snowflakes and the sentiment using black ink and opaque metallic gold acrylic paint. A little black ink was blended around the edges. Black and white Bakers Twine was tied onto the tag and around the card front.
The tree was stamped with gold paint onto black card. A little opaque red gouache paint was added to the branches. This was cut out and mounted onto white card to create a border around the tree. It was lightly shaped before gluing to the card.
Next for the bling: I added Stickles (Gold and Sprinkled Sugar). Glossy Accents was also added over some of the elements to add shine and depth.
My second project is a festive candle box using the lovely Robin The Spruce stamp set – lots of bling on this one! The decorative background stamp from the Pears and Baubles set was also used to decorate the inner box panels, plus the Seasonal Elements Stencil  to add sparkly snowflakes to the inner acetate box lid.
How it was done:

I first created a little plain box with acetate lid to go inside and hold 4 small T-light candles (approx. 8cm square and 2cm deep). Viva Décor glitter paste was applied through the stencil to decorate the acetate lid.
An A4 sheet of silver decorative metallic card was used to create the outer box. This was a little deeper than 2cm (to accommodate the inner box) and approx. 9.5cm X 13cm (large enough to fit the stamped panel and sentiment on the front). The candle box was glued inside and Pinflair Snow Dust used to create a snowy effect.
Instead of a fitted lid I created fold over flaps for the top (approx. 13 X 8cm each). Inner panels were stamped in green ink onto smooth white card and coloured with watercolour and sparkle pens. Red glaze pen was added to the berries. The panels were glued to the inside flaps. Thin magnets were added between the card layers to give a magnetic closure, plus a little ribbon tab added for opening. A little obligatory bling was also added with silver glitter glue.
The sentiment was stamped with black ink onto a die cut panel. Foliage was stamped in green around the edges, and yes …. more silver glitter glue.
The front panel was stamped onto acetate with black StazOn ink. The back was coloured with alcohol ink pens. A piece of plain white card was trimmed and glued to the back creating an opaque background layer.
Glaze pen was used to colour the berries and rosehips, and glitter glue added to the snowy hills.

Tuesday, 21 August 2018

Christmas Baubles (by Judith)

Hello everyone, I have some more Christmas projects to share with you today, featuring some of the stamps that we used on last month's TV shows on Hochanda.

For my first project, I have created a piece of home decor in soft vintage colours. I wanted to use very non-traditional Christmas colours, and this soft pink and green was exactly what I had in mind for my project. I used a canvas from my stash, which I painted with acrylic paint, and added some ivy die cuts all around the edge. I painted a piece of dictionary paper with the same acrylic paint, but thinning the paint, so that it allowed the words to remain visible.

I used Pearl Soft Form Relief Paste, coloured with Brushos to create my focal images, and these were left to dry overnight. I dry brushed some of the same colour of Soft Form Relief Paste over the ivy leaves, which acted as a kind of gilding paste, and it gives a lovely shimmer to the leaves.

Once the two pears were set, I peeled them from the stamps, trimmed the rough edges, and added a tough of gold gilding paste to the surface, before adhering them inside the canvas.

My second project is much more colourful! I created a background using Distress Inks , and added the large textured background image from the Pears and Baubles stamp set. I stamped three baubles onto a spare piece of card and cut them out. I attached them to the background, along with some bold purple ribbon.

A sentiment from the Let's Get Festive stamp set completes the card.

Thanks for stopping by,

Judith xx

Sunday, 19 August 2018

Colourful Festivities (by Zoe)


Good morning Lovelies and welcome to my final post for August, you might need your sunglasses lol!

I blended Distress Oxides around a circle mask and flicked some water and dabbed dry. I used a stencil to fill in the moon. I repeat stamped these fabulous stamps using various colours in both Oxides and Versafine inkpads. I dried them thoroughly and then heat embossed in white. I added some glitter glue dots for berries.

Very similar technique to the first card, but I used Distress inkpads for the background.

I made a tag sampler using a layering die. I used Distress Oxides on both sides of each tag, which was put onto a mat, spritzed with water, and then picked up the colour on the tag. I dried between each layer until I achieved the desired look, (wrinkle free distress technique), and added lots of layered stamping, and some heat embossing.
I have to apologise for my mucky hands in the photos.


Thank you once again for visiting and leaving your comments. Have a wonderful day xx Zoe xx

Saturday, 18 August 2018

Shabby Chic Roses by Brenda


Hello all, Brenda here with some more inspiration using the beautiful new stamps that featured in Lesley's recent TV shows on Hochada.

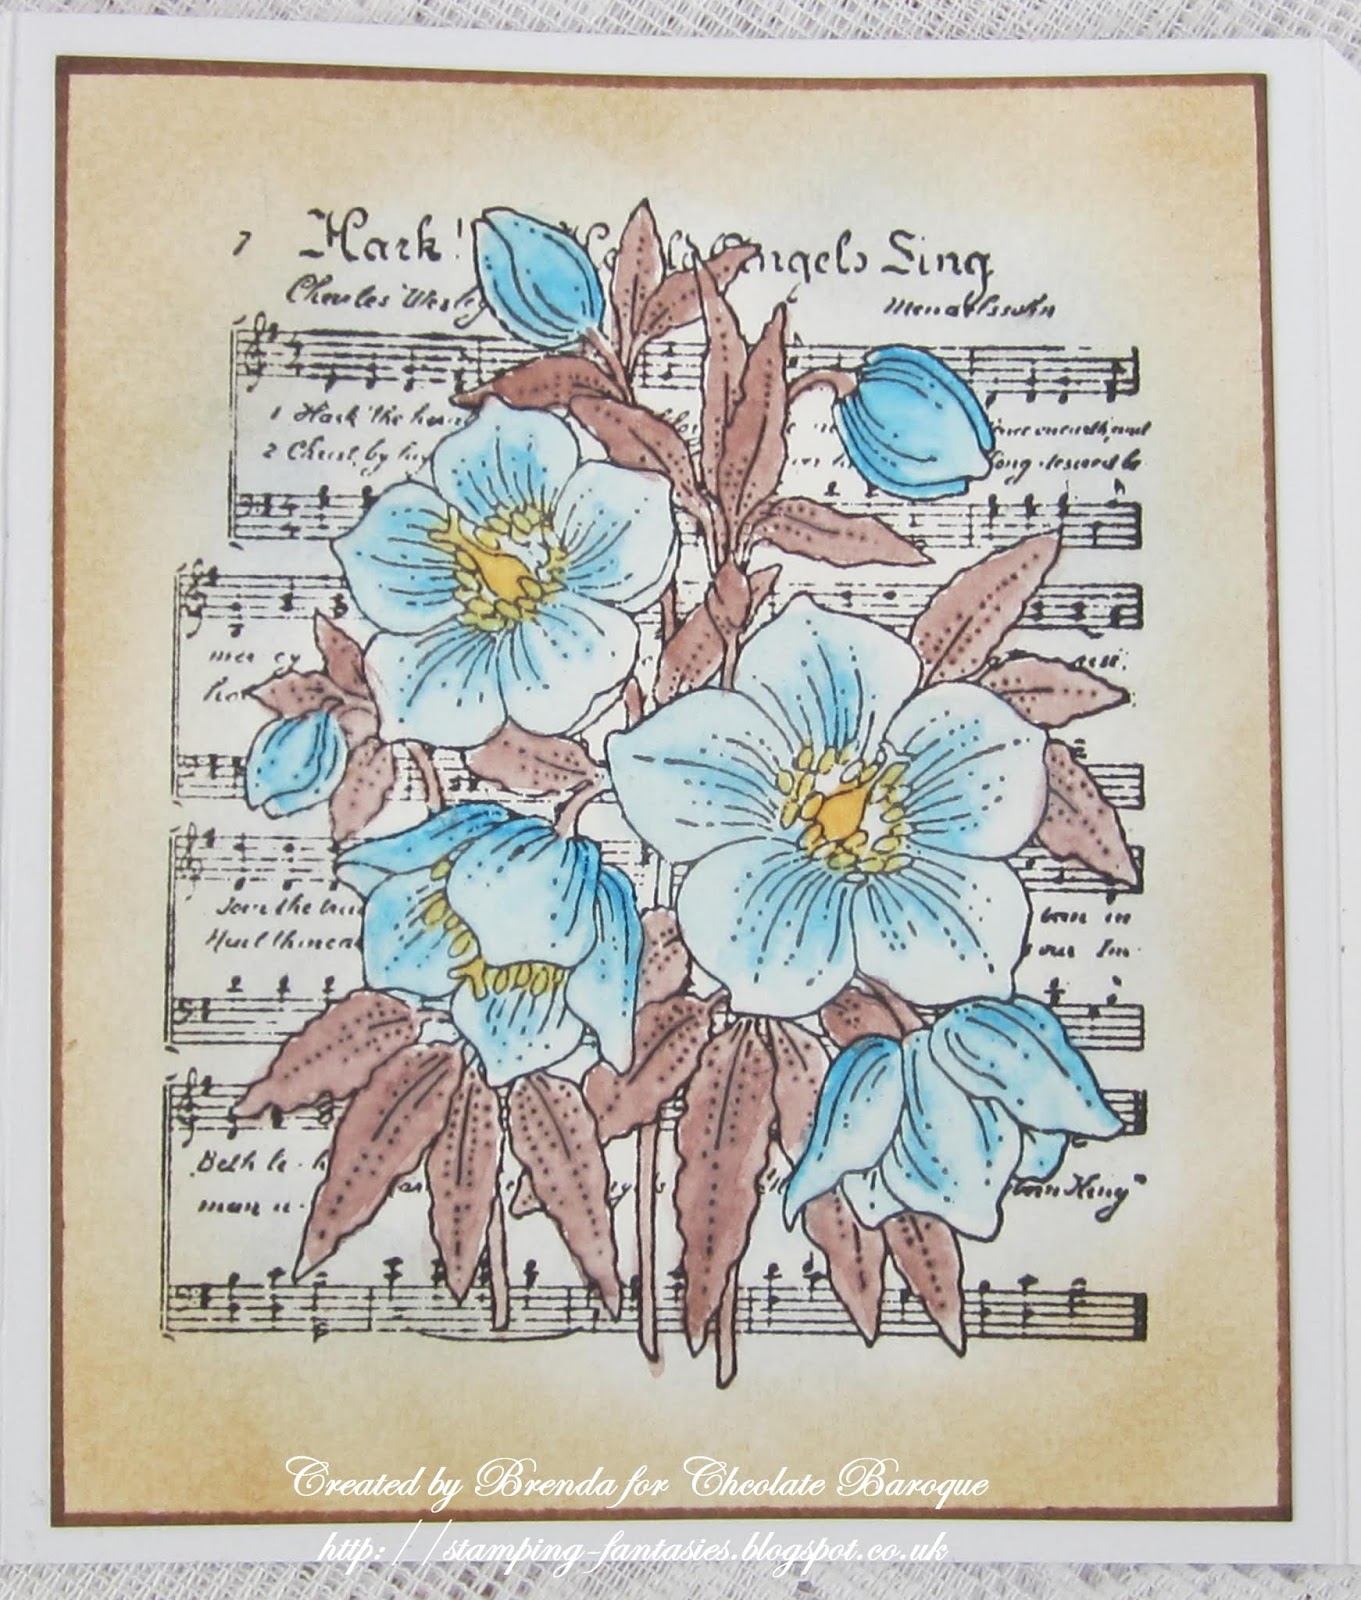
The beautiful Hark the Christmas Rose was a big hit with all the Design Team and the above card was the first I made when I inked it up, it just said Shabby Chic to me so I went down the Kraft card and soft pinks route. The image was stamped with Versafine black, a little colouring added with pencils and the edges 'ruffed' up after adding tea dye DI before matting and layering on to coordinating card stock.


The backgound of this one has been repeat stamped using Distress Markers and images from the new Robin the Spruce set. The lovely Robin is from the same set, again stamped with Versafine black, a mask and Pan Pastels for the sky then coloured in and mounted on foam pads over the background.


This is Serena and her name really does befit the beautiful image whic after stamping with Versafine black I coloured in with sparkle pens, lightly inked the background, framed her and uased some organga ribbon and a snowflake brad.


My final share today has a Distress Ink background which brayered on randomly to give varying textures, then overstamped with stamps from Robin the Spruce and Pears and Baubles alsong with Large Crackle Backgrund around the edges stamped with Versamark and embossed with Detail Gold. The pears are also from Pears and Baubles stamped on to a background created in the same way as the main piece, heat embossed with detail gold again and cut out. Finally a sentiment from Lets Get Festive.

Many thanks as always for your visits and kind comments.

Thursday, 16 August 2018

Happy Christmas ( By Marga )

Hello everyone. 

This time another Christmas card.


I first stamped the background with Versamark and embossed it with white embossing powder. Then I made the background with Distress Ink. I took an iron and a piece of print paper and I ironed off the embossing powder. The Christmas balls stamped with Versmark and white embossing powder. Cut them out and pasted them on the card.

Hugs Marga
                                                                          

Sunday, 12 August 2018

Beautiful Baubles

Hello there! Rachel here today with more inspiration from the shows in July. These cards were both made using stamps from the Pears and Baubles set.

For this first card I used brushos to create a background and then stamped the lacy stamp in versamark before adding white embossing powder. I stamped the baubles separately and fussy cut them then added them raised on sticky squares. I stamped the sentiment from the Lets Get Festive rubber stamp sheet.


For this one I used soft form relief paste in silver over the bauble stamp having first inked up the stamp in red archival ink. After 36 hours I removed the hardened paste from the stamp edges and trimmed it into shape. I used frantage on black card to create the background and then added the bauble. Finally I added the sentiment stamp from the Lets Get Festive stamp set.


I hope you have enjoyed these techniques and their results!

Have a fabulous day!

Hugs

Rachel x

Thursday, 9 August 2018

Christmas Card and Treat Bag


Good morning. Today I am sharing a couple of Christmas projects – a simple card in non-traditional colours using the Pears and Baubles stamp set, and a pretty fabric pouch stamped and coloured using the Hark the Christmas Rose stamp.
A 6 X 6 inch white card blank was stamped with the lovely background stamp from the Pears and Baubles stamp set using pale pink dye based ink.
The sentiments were stamped with pink and Silver Ink from the Let’s Get Festive stamp set.
An octagonal piece of pink card was embossed with a textured folder from my stash. A little Distress Ink (Tattered Rose) was applied across the surface with a sponge to enhance the texture. Versamark Ink was applied around the edges and embossed with white powder. This was glued to the card with foam pads for added depth.
The bauble was stamped with Silver Ink onto plain white card and cut out. The bauble was sprayed with glittery varnish for added sparkle and Glossy Accents applied to the central star. The bauble was glued to the card with foam pads.
Finished with sequins, an organza bow, silver glitter glue and silver PVA pearls – just couldn’t resist a bit more bling.

A scrap of cotton was trimmed into a rectangle approx. 13 X 34cm. This gave enough room for seam allowances and a fold over top to thread with a ribbon drawstring. Before sewing together the Hark the Christmas Rose was stamped onto one end using Black Ink (suitable for fabric). The ink was left overnight to dry and ironed to fix (essential if you want to colour with water based media).
Rather than water based media I decided to colour the image with permanent alcohol markers (green, yellow, pink and blue). Colour was encouraged to bleed and give a soft blended effect using a clear alcohol blender pen.
When dry a little clear acrylic sparkly glaze was applied to the flowers, and gold glitter glue (suitable for fabric) was applied to the stamens. Yes – just had to be more bling. The fabric was again left overnight before ironing with a hot iron to set everything.
A small channel for ribbon threading was stitched on each end, then the fabric folded in half and the side seams stitched (omitting the channel). Two pieces of ribbon were thread through the channels to create a simple pull drawstring.
I hope that you have enjoyed my Christmas makes xxx.

Saturday, 4 August 2018

Hark the Christmas Rose by Brenda


Good morning Peeps, Brenda here with some Chrismtas creations from Lesley's recent Hochands shows which featured some rather beautiful seasonal stamps. And a heads up that she has two shows today at 8am and 2pm which you won't want to miss, it's all rather Eastern!

My first piece of artwork features the lovely Hark the Christmas Rose which really is the most beautiful image. I am sure the shape of this card has a name although I'm afraid I don't know it. I used a sheet of A3 card which gives you two base cards, I score twice at 6" intervals then cut vertically to create the two cards, then cut the two end panels diagonally so that they fold in on onanother.


This is the central panel stamped and coloured with sparkle pens, I then stamped the flowers several more times and cut out to decouapge on the frot panel and layered over the background with I stamped with Large Crackle Background.


A nice inky background using Distress Oxides, then the Pears from Pears and Baubles, the first stamped with Versamark and heat embossed with detail silver, masked to stamp the second pear stamped and embossed with purple embossing powder, then repeated again to add the thrid pear. Finally three sentiments from Let's Get Festive.


Another appearance for Robin the Spruce, he seems a very popular fellow with the DT and viewers, stamped with Versafine Black, twice onto the back panel and a third time onto a small piece of card, cut our and coloured and raised centrally over the background.


A final share using the beautiful Serena. I brayers white acrylic pain onto a piece of Kraft card purposely leaving uneven edges. I then added a wash of Twisted Citron and Peacock Feathers Oxide Inks, to get the ink where I wanted it I put the ink onto a pice of acetate, water down and then dabbed the piece of painted Karft into it.........messy but works a treat as you can see the ink and are in more control of where it goes.

I then stamped Serena with Versafine black, added some seam binding and coloured and cut out a couple of flowers from Hark the Christmas Rose.

Thank you so much for your visit today.

Thursday, 2 August 2018

Christmas Baubles (by Julie)

Hello, hope you are enjoying this hot weather. However in craft world it is Christmas so here goes  a couple of Christmas cards...


My first card is stamped with Pears and Baubles and Robin the Spruce.
I stamped one of the baubles onto the base card with a teal dye ink and glued a silver bow to the neck for added detail. I then inked up the foliage stamp from Robin the Spruce using a lighter green ink to start with and then added in a few dark green branches for contrast. To finish off I stamped the second bauble onto spare card. I inked up the stamp with the teal dye ink as before but added sparkle embossing powder to the stamped design before it had chance to dry and then set it with a heat gun. Using scissors I cut out the bauble, glued on a silver bow and then attached to the front of the card with foam pads.


My second project is a DL card. I created the background by stamping the Christmas Tree from Pears and Baubles onto black card using a metallic Brilliance ink. I cut the card to DL size and then using a ruler and gold metallic pen I outlined the border, before attaching to the card blank. I stamped the sentiment onto separate black card and attached to the front with foam pads. The baubles were stamped and clear embossed onto white card-stock which I then cut out, attached bows to each bauble and then attached to the card with foam pads.

Thank you for stopping by. Please call back soon for more design team inspiration.

Julie xx