Pin It button on image hover
Showing posts with label Fantasy Woodland. Show all posts

Wednesday, 20 July 2022

Lonely Tree (by Corine)

Hello!

Here I am again. This is my second post this month. Today I share a fairytale with you. I had so much fun making this card with the masking technique.


I used stamps from the sheets:

Fantasy Woodland

Poppy Meadow

I made the base of a background with Brusho. Brusho always gives surprising effects. I first make a background and only think then how to proceed.

I do not apply too much Brusho on the watercolour paper. I started with Yellow at the bottom and the Turquoise at the top. Spray with the water and do this step by step. Not too much water in the beginning. Let the wet Brusho dry thoroughly.

Stamp the tree with Stazon Jet Black. Mask the tree with masking tape. Use a stencil to apply 'sun rays' in the top left corner. I sponged it with Distress Ink Fossilized Amber. I made the leaves in the background using a stencil and Distress Ink Peeled Paint.

Under the tree I made soil with torn paper and sponged with Distress Ink Brushed Corduroy.

I stamped the flowers with Archival Vintage Photo.


 The tree has been coloured with watercolour markers and for the shadows around the tree I used a charcoal pencil.

I hope I have inspired you. If you want to try this technique, I wish you a lot of fun.

Until next week!

Kind regards,

Corine van Kuilenberg

Monday, 30 October 2017

In the pink by Brenda


Good morning Peeps.

I am back with some more shares from Lesley's recent shows using the some of the beautiful Tree stamps which as with all Chocolate Baroque stamps were a delight to work with.

Above I have used Dylusions to create a background over which I stamped (second generation) one of the images from Indian Textiles  as I wanted to create some subtle background interest, then stamping one of the trees from Fantasy Woodland with Versafine Black and colouring in with sparkle pens and adding white highlighter. The sentiment is again from Birthday Words.


I will be the first to admit I am not a particularly frugal crafter but I do save all the smaller pieces of Fabriano which I always seem left with after cutting square pieces from the A3 sheets as they are the perfect size for creating a triptych card. I inked all three pieces with Oxide inks and using Black Versafine stamped three trees from Fantasy Woodland and Tall Trees stamp sets and a sentiment from Birthday Words.


My starting point for this card with a Dylusions background and my usual spritz of pearl mica spray to blend the colours followed by stamping around the edges with Large Crackle Background.............such a useful stamp that we all need in our stash......... using Versamark and embossing with detail gold powder. I then stamped Poppy Meadow Words of Inspiration with Versafine black and bleached out the colour, but as I added the bleach I mopped each flower with a piece of kitchen towel so it left some of the colour to give a pinkish finish. I stamped the sentiment onto an offuct sprayed with the same Dylusions and added some ribbon to finish.


I am really still not sure about this one, it's all rather dark although did look better in the flesh. I stamped the main panel onto a piece of card coloured with Oxide inks using a stamp from Butterfly Daisy Collage and Butterfly Poppy Collage multi buy. I then used Versamark and detail clear embossinng powder to glaze the panel, giving it three coats of both. I stamped the flowers from the same multi buy onto card coloured with the same inks, cut out and covered them as well with embossing powder before layering up. I placed the panel inside a die cut frame and arranged the flowers and some ribbon.

I hope you have a lovely day.

Monday, 16 October 2017

More Autumn by Brenda


Hello Peeps, I am back again with some more of my samples from Lesley's recent Autumn shows on Hochanda.

So more indulgence in inky Autumn colours and Poppies and my starting point for the top card was a background of  Mica powders spritzed with pearl mica spray to bleed the colours and add some sparkle. I then stamped the Poppy heads from the Poppy Meadow set along with some smaller ones from Natures Table and some grasses from the same set. Next I used a stencil and Distress Inks to add some sun rays, then stamped some more poppy heads across the top. The sentiment is from Natures Peace which is one one of the sets in the multi buy. I added colour to the Poppy heads using the same mica powders and highlighted with a white pen.


Scenes are something I really enjoy creating and for the card above I started with a cloudy sky using distress inks and bleaching out some clouds. I then stamped trees from the Autumn Edges and Tall Trees using Gathered Twigs DI and added leaves with DI's using just the top of one of the larger stamps in the same set. Using watered down DI I painted in some hills and stamped leaves along the top using another stamp from the same set. The fauna in the foreground is stamped with an image from Silhouette Grasses and sentiment from Birthday Words.


On this one I tried to create warmth using DI's for the background and then added some stenciling. The focal images is from Fantasy Woodland. After cleaning the larger stamp I masked off a section so I could ink and stamp just the tiny trees alongside the small tree to the right. Inking just the tip of the flower stamp in the set I added a border around the piece and finally stamped a sentiment from Birthday Words.


Another Oxide background here with some stenciling, followed by some background stamping using the scrip stamps from Butterfly Poppy Collage and then the lovely harlequin and Poppy head stamp using Versafine Black. After stamping I cleaned the stamp, masked the Poppy heads and inked just the harlequins to extend the pattern. The two Butterflies are from the same set and coloured in with the same inks used for the background.

I hope you all have a lovely day with some crafty time as well.


Monday, 9 October 2017

Spooky Dream Journey (by Anne)

This was one of my samples for the recent shows on Hochanda featuring the lovely Fantasy Woodland stamps. I couldn’t help seeing the pattern for half an eye in one of the tree tops, and so couldn’t resist making something a little dark and spooky. I had a bit of fun with this one.


Materials:
  • Fantasy Woodland and Birthday Words stamp sets
  • Seasonal Elements and Seasonal Journey stencils, plus a texture stencil for ‘scales’
  • 14cm card blank, black card, white stamping card
  • Ink sprays with mica (teal, copper)
  • Texture pastes: Viva Décor Kristall Gel (Hologram glitter and clear gel) and opaque acrylic texture paste (Pebeo Concrete)
  • Gilding wax (copper gold)
  • Acrylic paint (metallic gold and light metallic teal)
  • Alcohol marker (black)
  • Water based inks (red, yellow, teal green)
  • Inkpads: Versafine (Onyx Black), Distress Ink (Scattered Straw), Versamark
  • WOW heat embossing powder (Clear Gloss)
How it was made:
  1. I spritzed the black card with mica sprays.
  2. Background texture was created by applying clear and glitter gel, plus acrylic paint, through the stencil. When dry I applied gilding wax over the scaly texture.
  3. Lettering was created by applying opaque paste through the stencil. I made a bit of a mess as I got some paste seeping under the stencil. When dry I tidied and sharpened up the letter edging by using a black alcohol marker (mess saved).
  4. The edges were stamped and rubbed over with gold acrylic paint.
  5. The text was stamped with Versafine and trimmed away from the full stamp sentiment. Edged with Distress Ink and applied with 3D glue gel.
  6. The eye was created by stamping the tree top twice (turning the stamp 180 degrees) with Versafine. Note the centre needs to be overlapped slightly to create a circle shape. I then cut out using a circle die and used a black marker to colour around the edge and to draw the pointed pupil shape.
  7. The eye was coloured with water based inks and then heat embossed with clear gloss powder. I added several repeat layers of embossing until I got a smooth shiny glass eye effect. Glue to the card with 3D gel.

Sunday, 8 October 2017

Birthday Greeting (by Asha)

Good morning, friends! Brand new day and a brand new project. I've used the skinny trees from the Fantasy Woodland A4 sheet to create a birthday card. The greeting is from the Birthday Words A5 sheet.

I heat embossed the trees with WOW Ebony Embossing Powder and then created the background by blending various Distress Inks.


As always, I have details of the tools and products used on my blog. Thank you for stopping by and drop in soon for more designs by the team.

Beijinhos,
Asha

Friday, 6 October 2017

Autumn Woodland (posted by Claire)

Good morning, Claire here with some projects made for Lesley's shows on Hochanda. I was really happy to have a play with these gorgeous stamps.

This first card features stamps from Tall Trees. I created a little scene on linen card using a torn paper mask and distress inks before stamping the trees with brown ink. I then cleaned the stamp and inked up the top part of the trees with gilding glue and stamped again before applying glitter in shades of green, orange and brown. The sentiment is from Birthday Words.


My second project is a canvas board. I began with a brusho background and then stamped the trees (from  Fantasy Woodland) and embossed with gold embossing powder. I added some little dots of clear glue and created some foliage with beadazzles.


Next I took some brown acrylic paint and grounded the trees. Once that was dry I stencilled in some leaves using green acrylic paint and the Useful Leaves stencil. Next I added some falling leaves using the Seasonal Elements stencil and the word Autumn using the Seasonal Journey stencil and iridescent paste. Once the paste was dry I coloured the leaves and word with alcohol markers.

Last but not least I've made a little kraft card using the beautiful toadstool border from Autumn Edges. I coloured the image with pencils, added white spots with a white Posca pen and sketched in some foliage. I added a sentiment embossed in white (from Birthday Words) and added some red pompom trim.


Thanks so much for visiting today, keep checking back as my teamies have some gorgeous projects to inspire you.
Claire xx


Tuesday, 3 October 2017

Autumn Day by Brenda


Good morning Peeps, today it's my turn to share some inspiration using stamps which Lesley showcased on Hochanda recently. The shows were all about Autumn, Trees and Poppies so ticked all the right boxes for me as I love working with Autumnal colours and as those who know me can confirm Poppies are my favourite flower plus I am a self confessed 'Treeaholic'.

For the card at the top I used three panels of cardstock and stamped two with images from the Autumn Edges set colouring with DI's and on the the third panel used the same inks to add the words using the Seasonal Journey stencil.


The lovely Poppy from Pretty Poppies is the focal image on this card, stamped with Versafine Black onto a watery Burosho background, I mopped quite a lot of the colour away as I wanted a subtle finish and then coloured the flowers with sparkly pens, stamping the Butterfly a second time to decoupage. The corners are from Baroque Corners stamped in the same black and then I added a few leaves using Useful Leaves stencil and ties some red ribbon and added a Poppy button.


The same stencil as the top card has been used along with DI's to create the background for this card and the for the focal panel I created a Brusho background and stamped one of the tree from Fantasy Woodland adding a few stenciled leaves using the Seasonal Elements stencil.......I can't begin to tell you how useful these stencils are for building up interest and colour on your artwork.


This is another sample from last weeks shows on Hochanda, this time using one of the images from Butterfly Poppy Collage stamp set, it's an A4 stamp sheet and you get absolutely loads of beautiful images. The background is Distress Oxides, stamped with Versafine black and the colour added to the Poppy heads using the same Wilted Violet ink and Glossy Accents added, plus a little stamping down the left edge, again using the same ink and stamps from Nature's Peace and the same set as the main image.


I am tentatively adding this one as Lesley asked if she could use it as the basis of one of her demos, however I will be away on holiday when the shows are aired and this post goes live so it may or may not have featured. Using a circle as a mask I stamped a selection of flora and fauna from Nature's Table, Nature's Peace and Poppy Meadow, inking with Distress Markers direct to stamp and a spritz of water before each stamping. The horse chestnuts in the corners were stamped with DI and are also from Natures Table. After stamping I removed the mask and used the negative to stamp the focal sentiment, again from Poppy Meadow and added some shading around the circle.

And as I seem to have quite a number of pieces in my gallery which have not been blogged as yet I thought I would share a few of them in this and my following few posts.


A triptych design which was for the August shows featuring the beautiful Harlequin Bouquet stamped with Versamark and heat embossed with detail copper powder on to a Oxide ink background and some stenciling to carry the harlequin design.


This one features the lovely Summer Fayre stamped onto black cardstock using Versamark and detail white embossing powder, then coloured into metallic pencils, the colour is quite subtle but I rather like the soft finish.

Have a lovely day, I am hoping mine will be warm and sunny as today we sail into Rhodes in the Greek Isles.

Tuesday, 25 October 2016

Autumnal Woodland (by Julie)

Hello, lovely people. Like a lot of crafters, Autumn is my favourite season as it is full of gorgeous rich tones of reds, yellows and browns. This card created with the fantastic Fantasy Woodland set hopefully captures some of these wonderful colours....


The main design has been created onto water-colour card and die cut using a circle with a 13 cm diameter. The tree design was coloured with brush markers directly onto the rubber stamp before being stamped onto the card-stock, then a damp brush was used to go over the leaves so they have a  hand painted look. The background has also been water-coloured with brush-markers and Distress inks and the outside edge has been inked with Walnut Stain.
Next I cut another circle with a diameter of approximately 15 cm. This can be from any card-stock as I just used the waste left behind as a stencil to add a circle of Distress ink around the edge of the main design. It also acts as a guide to help place the stamped leaves/trees around the edge. The mini tree was inked up with dye ink and stamped at 12, 3, 6 and 9 o'clock. Once these four points are stamped it is easier to judge filling in each quarter so there is no special measurements or gadgets needed.
Another decorative tree was stamped in each corner and along the edges of the base card and Old Paper Distress ink was blended across the base card. 
Crystal Stickles was dabbed over the design for a finishing touch.

Thanks for taking a peek. Please call again soon, for more Design Team inspiration.

Julie xx

Thursday, 6 October 2016

Autumn Trees (by Judith)

Hello everyone, I love this time of year, when the countryside is filled with warm colours, and the leaves are turning shades of orange, brown, gold and plum. It is still warm enough to go for brisk walks and enjoy the sunshine and appreciate the vibrant colours that Mother Nature still has to offer us before we hunker down for the Winter months.

I have created a card using some left over pieces of watercolour card from a previous project. I simply added some stencilling and stamping to the top layer, and then added some shading around the edges of the layers, using Seedless Preserves Distress Ink, to add a warm plummy tone to the background.

I have used a lovely tree from the Nature's Peace stamp set, which I inked with water based markers, enabling me to incorporate the various colours that I had used in my background. I also stamped around the edge of the background using a favourite tree from the Fantasy Woodland stamp set.

This really was a quck and easy card to make, and by varying the colours, could become a very masculine card.

Do keep checking back for more Autumnal inspiration from my team mates this month. Thanks for stopping by, Judith xx

Saturday, 9 April 2016

Spring Greens (by Judith)

Hello everyone, I have a lot of Chocolate Baroque favourite stamps in my stash, which I have collected over many years, as you can well imagine! I have been taking a look through my collection, and have tried to pick out just a few to share with you today.

For my card, I have chosen a lovely tree stamp from the Fantasy Woodland stamp set. I love the versatilty of this stamp set, so many different stamps, offering many possibilities. I stuck an old book page onto some thin card, and then stamped the tree image onto the card. I coloured the image with watercolour pencils and a water brush. I also tore some jagged strips of book page, and coloured them with various colours of green Distress Ink, darker at the top, and paler at the bottom.

I added a circle mask to a white card blank, and coloured the top portion of the card pale blue, using Distress Ink. I then removed the circle mask, and added a bit of yellow ink to the circle. I stuck the book page strips to the lower end of the card, and trimmed off the rough edges.

I stamped the tree image directly onto the card, and added a bit of shading under the image using a dark green pencil. I decoupaged the image that I had stamped onto book paper over the background image. I stamped three birds from the Landscape Edges clear stamp set over the sun, and added a sentiment from the Mackintosh Sentiments clear stamp set.

Thanks for stopping by, Judith xx

Tuesday, 5 January 2016

Oranges and Lemons (by Judith)

Hello everyone, I have a cheery project to share with you today, one that will hopefully banish the Winter blues, and bring thoughts of warmer days. I have created a card using the new individual Another Brick in the Walled Garden stamp, and created a garden scene.

I drew a square frame onto a piece of kraft card, roughly the size of the walled shutter stamp, and then stamped the orange tree from the Fantasy Woodland stamp set on either side, with the leaves from each tree creeping over the edge of the frame slightly. I created a mask for each tree, and then stamped the small brick texture stamp from the Abstract Fragments stamp set over the background. I then trimmed away inside the frame, cutting around the tree leaves where necessary.

I stamped the walled shutter image onto a spare piece of kraft card, and coloured the images with pencils. I added the foliage to the tree on the main image by colouring the stamp with a water based marker. I added some shading around the edge of the frame with Vintage Photo Distress Ink. I adhered the frame to a piece of dark olive card, and trimmed inside the frame, leaving a narrow border of olive green card showing. I then stuck the main image inside the frame. Finally, I added some Glossy Accents to the lemons on the tree.


Keep popping back to see more inspiration from my Design Team mates across the month, Judith xx

Saturday, 31 May 2014

A little bit of Summer (posted by Judith)

Hi Folks, I have some samples to show you today showcasing the Summer Fairy Collection unmounted stamp set. This set is full of lovely fairy images, and some great floral images as well.

My first card uses one of the large silhouette fairies, which I have placed on an inked background, made using Distress Inks. I chose several colours which I blended across the page, and then placed a leafy stencil over the top, and used the same colours again to stipple colour through the stencil. I added some deeper colour around the edges of the background to create a frame, and then stamped the trailing ivy across the top of the page, using a navy blue ink. I added a border around the bottom half of the card, using a tree stamp taken from the Fantasy Woodland stamp set. The two trees are a stamp from the same stamp set. I added some shading underneath the trees using a paper mask, and a toning green ink. I stamped the silhouette fairy, and the little butterfly, which comes from the Autumn Fairy stamp set, using Versafine ink.

I added some glitter glue to the fairy and butterfly wings for a little bit of sparkle.


My second card uses a couple of the flower stamps from the collection to create a fairly clean and simple card. I cut a rectangle of smooth watercolour paper, and stamped the freesia stamp at the bottom of the card. I covered the image with a mask so that I could stamp the image again on either side of the original image.

I coloured the silhouette freesia stamp with Distress Markers, blending several colours, and stamped the background with the mask in place. I placed the mask on top of each freesia image in turn, so that I did not stamp over them. I then coloured the three freesia images with Distress Markers and a waterbrush.

I matted the picture onto a piece of dark green card, and then placed this onto a larger square of light green card, adding some orange and green ribbon to my main image. I added three Crealie butterflies to the large background.


My last card was created using lots of masking again, and a hand cut stencil. You can buy Stencil Blanks from the website and cut your own stencils very easily.

I used one of the large fairies from the collection, which I stamped and masked off, before stamping poppies from the Poppy Meadow stamp set. I then masked these flowers and stamped the little silhouette flower from the same set. I added the stencil and coloured the sun rays using Distress Inks, before inking the remaining sky with blue. I have added a shimmer spray over the top.

I have coloured the fairy and flowers with Distress Markers. The two tiny butterflies are half of a butterfly stamped twice, taken from the Spring Fairy stamp collection. I simply covered half of the stamp with masking tape before I inked it up, then removed the masking tape before I stamped it onto the page. I have decoupaged them, and added glitter glue to their wings. The sentiment is taken from the Fairyland Words clear stamp set.

 Thanks for stopping by, Judith xx

Monday, 31 March 2014

Country Home (posted by Shirley)

Hello everyone, I hope you are doing well.

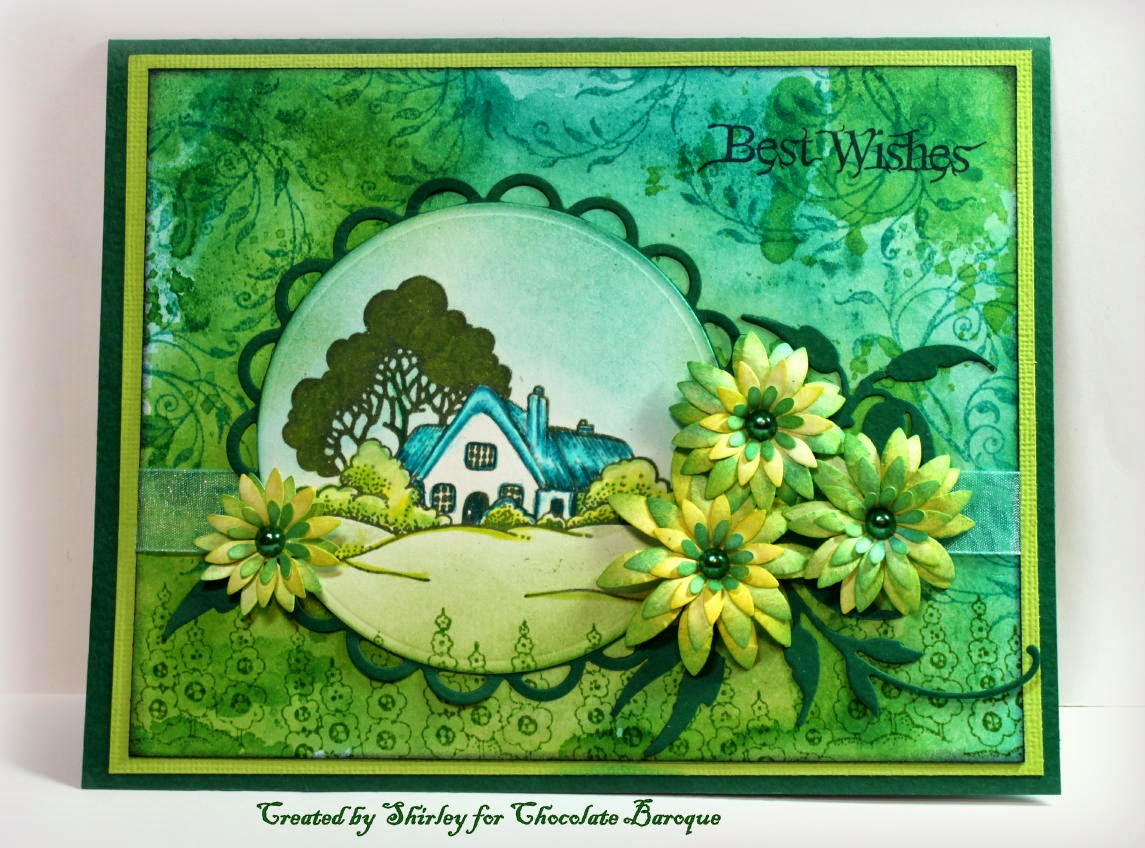
The new whimsical stamp set, Patchwork Landscape is so much fun to create designs with.  My card below features the lovely cottage from the set.


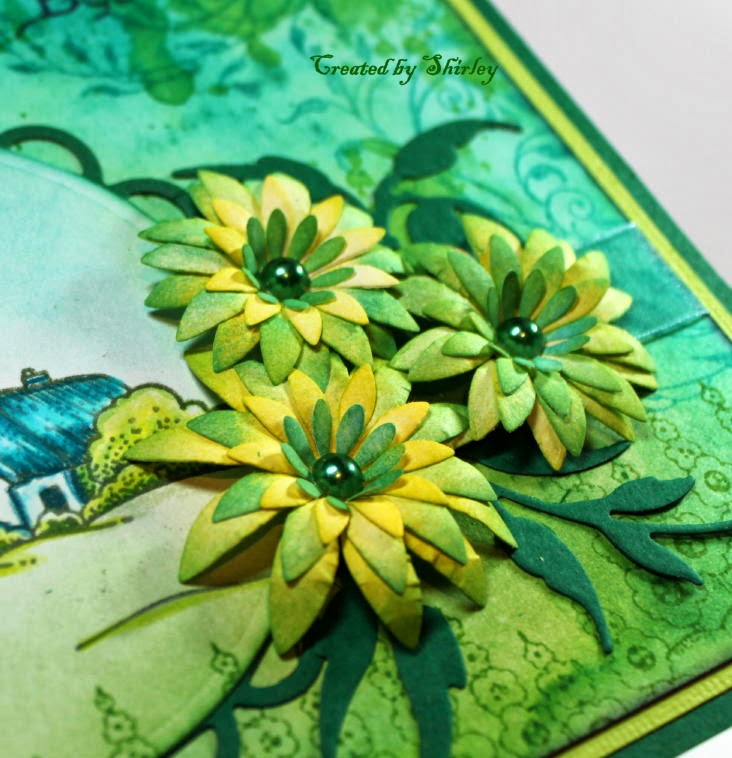
The background was created with Mowed Lawn and Peacock Feathers Distress Inks using the Acrylic Block technique.     I stamped part of the flourish tree from Fantasy Woodland at the top and the flowers from Patchwork Landscape at the bottom.  The cottage was stamped with Olive Archival Ink and coloured with Prisma pencils.    I blended a little Distress Inks around the image.  Best Wishes is from Loving Sentiments.    I coloured the Crealie die cut flowers with Mustard Seed and Mowed Lawn Distress Inks.

Dies:  Crealies Flowers CL CF 25 and Marianne Design Flourish LR0150


Thanks for your visit and please come back often as I'm sure you will enjoy seeing what my talented teammates have been creating.

Have a great day!
Shirley

Friday, 22 November 2013

Masculine Birthday Greetings (by Shirley)

Hello everyone, I hope you are doing well.  I have a card design today that I think works well for a man.


The background was created with Melted Chocolate (how appropriate) Dylusions Ink.   I stamped using two tree trunk grain fragments from the new Nature Fragments set with Gathered Twigs Distress Ink.     I embossed two trees from Fantasy Woodland and sentiment from Birthday Words with brown powder.   I blended Broken China Distress Ink over the trees and label.   

Die:  Spellbinder - Elegant Labels 4 S6-005

Thanks for your visit and have a great day,
Shirley

Sunday, 1 September 2013

Bewitched Moonlight (by Shirley)

Hello everyone and welcome to September.    Time sure flies by when we are having fun!

I love Autumn and Halloween is a fun part of it.  I love to see how some people go all out and decorate their homes to celebrate.  I like to have pumpkins out with our tall grasses to add a touch of Autumn to our front patio.

I've been working with the new Bewitched Moonlight set which is great to create spooky scenes for Halloween cards, tags and more.       


For the above card, I started with watercolour paper and sprayed Purple & Orange Dylusions Inks.  I spritzed water over top and was careful not to blend the colours as these two will turn into muddy brown together.  I blotted with a paper towel roll. 

When dry, I stamped the images from Bewitched Moonlight with black Stazon Ink.   I also stamped the Flourish Tree from Fantasy Woodland to the left of the mushroom and around the top edges.    Using a black Micron Pigment pen I drew a little on the bottom of the tree and added a few little mushrooms to blend the images together.    

Using a piece of cardstock with a circle cut out and placed over the witch, I carefully spritzed a little water, then blotted the ink off to create the moon.    Dylusions inks are water soluble, so it's easy to remove the ink.   I added holograph glitter to highlight the moon.

I have another design using the same stamp set:


I started again with a piece of watercolour paper and sprayed Midnight, Teal and White Linen Dylusions Inks.  I spritzed a little water over top, let the colours blend and blotted with a paper towel roll.   When dry, I used two stencils TCW Cell Theory (at the bottom)  and TCW Star Fall (at the top) with Distress Inks to create a little more pattern on the background.  Next I embossed the images with black powder.  I created a moon again using cardstock with a circle cut out and distress inks.

I hope you have enjoyed these 'spooky' designs.    Please come back often to see what my talented teammates are posting.     Glenda is giving away some new stamp sets !  -  all you need to do for a chance to win is leave a comment here.

Thanks for stopping by and have a great day,
Shirley

Wednesday, 27 February 2013

More Fantasy Trees (by Shirley)

Hello everyone !  I hope you are doing well.

I have a couple of cards today using designs from the Fantasy Woodland,  I've had a lot of fun 'playing' with this set.   


I used Pan Pastels to create the background on the card above.   I also added a little design with TCW's Mini Solace stencil and Distress Ink.     I stamped the delicate trees from Fantasy Woodland with Versafine Black ink along with the quote from Words of Inspiration.


The background for the card above was created using Pool, Lime & Ocean Smooch Inks.    For a description of the technique please see my blog post here.     I embossed one of the small trees from Fantasy Woodland with gold to create leaves in the background.   The main tree image was also embossed with gold & I blended Smooch inks to colour.    I embossed it a 2nd time to decoupage.   The die cut is Spellbinder S5-062 and the small piece under the Owl charm is S5-063.

The photo does not do the Owl charm justice, he has lots of bling that it hard to see. 


Thanks for stopping by,
Shirley

Saturday, 23 February 2013

Yummy New "Chocolatey" Stamp Sets! (by Clare)

Hello!  As you probably already know, Fantasy Woodland is the new stamp set of the month!  What an amazing set of stamps - so many different types of trees!  Beautiful images to work with!  Click on the name of the set above, and you will be taken directly to the stamp set on the website, where you can see all of the stamps in this set.  


Below are a couple of projects I made using this set, and I hope they'll inspire you a little!  There are so many great projects that the design team has made, so please check the other posts on this blog for more ideas!  The little house is from the set, Home Sweet Home, as well as the wheat grass.  The bottom border is from a brand new clear set, called Floral Edges, released February 14!  There are two other clear edge sets that have also been released - Decorative Edges and Landscape Edges - please check them out!  They are awesome!


My next sample has the orange tree image from the Fantasy Woodland set, and several "Thank you's" from the Words of Gratitude set.  Those oranges look good enough to eat!


My next card is framed with one of the trees from the clear Fantasy Woodland set.  I used several dies to cut out the shapes, and hand made the roses.  


This card was made with last month's new set, called The Rose Tree.  I used the new clear Floral Edges on the background.


I've enjoyed your visit, and hope you did too!  Thanks for stopping in!