Pin It button on image hover

Thursday 31 December 2015

Goodbye to 2015 (by Lesley)


As we reach the end of the year I would just like to say a couple of things.

I am thoroughly enjoying being the captain of the good ship Chocolate Baroque. I am surrounded by some very clever and inspirational people who help to keep the ship afloat and, although the seas are not always smooth and calm, I am truly grateful for the opportunity to continue to bring you beautiful stamps and interesting crafty products.

Most of all I wish to thank each and every one of you for supporting me during the past six months. Your constant encouragement and wonderful comments that you leave here and on our social media pages help me realise how lucky I am.

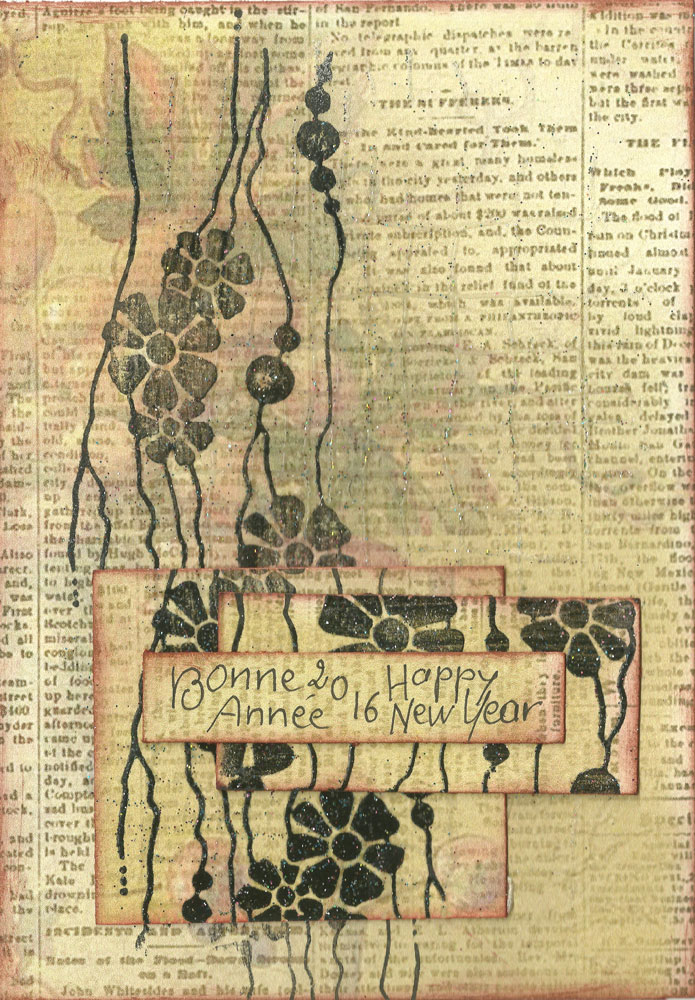
So may I raise a glass to everyone and wish you all a very, very happy and peaceful New Year. May we share lots more fun and creativity on our ship in 2016. Hope you are good at rowing!


Wednesday 30 December 2015

Rolled PaperTrees (by Debbie)

I'm finishing my 2015 of blogging with a couple of gifts I made. I have taken inspiration from a few different pinners on Pinterest. The style has popped up in the form of tags, cards and canvas's and I'm not sure where it started but I thoroughly enjoyed making them.
 
 
They are 20cm by 30cm and for the first I used my precious papers from Graphicus, I still have a few in my stash and stroke them from time to time.
The backgrounds for each of them is old book pages and mixtures of paints applied with baby wipes rather than the uniformity of a paint brush. When the paint had dried I stamped with the circles from Decorative Edges and blue ink.
 
 
The second is made in the same way using different colours and paint. The stamp I used is the
 Open Weave with brown ink. The paint background was a little bright so I also used sequin waste with more ink.
 
 
I changed the shape of the tree and added words to it, I have called them Wishing Trees. The rolls of paper were cut to different lengths and as on each tree, added the white pen faux stitching. The stamped background uses the Floral Weave stamp. This photo shows the computer generated words I have used.


Wishing you all 'Best Wishes' for 2016
Debbie

Tuesday 29 December 2015

Lattice Orchids (by Julie)

Hello, I hope you all had a lovely Christmas and as this is my last post for this year I would like to wish you a very Happy New Year! I have two projects that I hope you will like, made with two of the fantastic background stamps. My first is this plaque, made with the Baroque Orchids cling mounted stamp.


The base of this plaque is a large square of chipboard and I have stuck a piece of spare chipboard on the back to make a stand, much the same way as a standard picture frame works.
The centre is made up of letters cut with an electronic cutting machine and then over stamped with the Baroque Orchid using Onyx Black Versafine. The "O" is a piece of white polymer clay, cut with a heart cookie cutter and over stamped using the Versafine. Once baked I added a piece of cord around the edge of the heart with a hot glue gun and then stitched some seed beads around the cord edge, before adhering to the plaque with more hot glue. I have added layers of silver mirri card, black card and a stamped background using the Baroque Orchid.


This card has been made with the Studded Lattice cling mounted stamp along with Wild Meadow and Mackintosh Sentiments sets.
The base card was created with Pan Pastels. I then inked up the Studded Lattice with Versamark and randomly stamped around the background before brushing black and metallic Pan Pastel over the top. I then applied a fixative spray over the top.
For the decorative panel I stamped the Studded Lattice onto white card and coloured with Polycrhomos pencils. The wild grass is from the Wild Meadow set and was over-stamped with Onyx Black Versafine.
To finish off I inked up the With Love sentiment with Onyx Black Versafine and stamped over the Pan Pastel Background.

Many thanks for stopping by and hope to see you again very soon,

Julie x

Monday 28 December 2015

Bonne Année

Hello everyone.
I hope you all had a wonderful Christmas. It is my last post for this year and it is time to say Happy New Year
In French : Bonne Année.

So I send you all a lot of good vibrations. For this, I made two cards with the beautiful new Chocolate Baroque stamps "Baroque Orchids", "Studded Lattice" and "Floral weaves".
I used a CB digital paper printed on my computer and clear embossing powder on black ink.

Bonjour tout le monde.
J'espère que vous avez passé un joyeux Noël. C'est ma dernière publication pour cette année et il est temps de vous souhaiter une Bonne Année.
Alors je vous envoie plein de bonnes ondes. Pour cela je vous ai préparé deux cartes réalisées avec les magnifiques nouveaux tampons Chocolate Baroque.
Pour cette carte, j'ai utilisé un papier digital imprimé à partir de mon ordinateur. J'ai embossé le tampon avec la poudre transparente sur l'encre noire.


For the second one I used a red paper, stamped with Versamark and embossed with black powder. Then I stamped on a white paper and cut just around the flower.
Pour le second, j'ai tamponné l'image de fond sur du papier rouge et embossé à la poudre noire. Les fleurs ont été tamponnées sur un papier blanc et détourées finement.

I hope you will enjoy. I am very to be a part of this wonderful DT and I thank Lesley and Judith for their confidence. Kind regards.

J'espère que vous aimez. Je suis vraiment très heureuse de faire partie de cette magnifique DT et je tiens à remercier Lesley et Judith pour leur confiance. A bientôt.


Sunday 27 December 2015

Art Bag using the new background stamps (by Anne)

I created this sample for the recent TV shows from Chocolate Baroque on The Craft Channel. Lesley Wharton was fantastic and gave some wonderful demos using the new background stamps – Floral Weave, Open Weave, Studded Lattice and Baroque Orchids. They are so versatile for so many projects and styles.  

 I have used recycled curtains to create myself a large Art Carry bag. I used all four of the lovely new background stamps to decorate my fabrics. Now I have a lovely new bag to carry my unframed paintings to exhibition. You could easily adapt the design idea to make a shopping or handbag, or to decorate a ready-made bag.  Materials:
How it was made:
  1. I first made a simple strong bag to fit my board mounted artwork pieces. Simply 2 rectangles sewn together with handles to fit over my shoulder. This is a very large bag so it is easy to decorate and sew on the applique pieces while made up. For smaller bags and shoppers it would be easier to decorate the panels before completing the construction.
  2. Ironed Bondaweb onto the back of the cream lining. Leaving the paper backing in place cut out flowers and leaves with the dies. Printed the text to create a template for cutting the lettering.
  3. Stamped all the cut shapes with textile paint using a random mix of all four stamps (see tip). Left overnight to dry and cure.
  4. Stamped the front of the bag with the Floral Weave stamp. Left overnight to dry then fixed the paints with an iron (this makes the paint permanent and washable).
  5. Peeled the backing paper off all the cut out shapes and ironed onto the bag. This secures the shapes and heat fixes paints.
  6. Finally I stitched around all the shapes using a straight stitch and free machine embroidery. This is where you drop the fabric feed dogs and freely move the fabric beneath the needle (like drawing with a sewing machine and thread).

Tip for stamping with paints: I used to use a standard sponge for applying acrylics or textile paint to my stamp. I would apply paint to a palette then pick up with a sponge, dabbing to remove excess paint before applying to my stamp. After a short while the paint would start to dry on the palette. The detail of the stamping was also gradually lost as clumps of paint built up in the stamp crevices after repeat application of paint. When this occurs you need to stop and clean up the stamp before continuing. I now use Cut-N-Dry foam and the results are so much better. I apply plenty of paint directly to the pad and work it well into the foam with a palette knife. The foam can now be used to apply paint to the stamp repeatedly without reloading. Placing the foam paint side down on a craft mat while not using also keeps the paint moist for ages. I find this method gives much sharper printing, uses a lot less paint and is easier to clean up when finished.  Clean up well and do not leave paint to dry onto your stamp. I use a little soapy water and a soft tooth brush if needed.

Saturday 26 December 2015

His and Hers Steampunk (by Asha)

Happy Boxing Day, fellow chocoholics! Hope everybody had a lovely Christmas.  I've got a couple of card projects to show you.

The first card features the Open Weave cling stamp. I heat embossed it in white on a piece of vellum.  To create the underwater scene I stamped, coloured, fussy cut and adhered elements form the Funky Fish A5 sheet.

The second card is a girly glitzy number featuring the Baroque Orchid cling stamp.  This time I've heat embossed it with Verdegris embossing powder and inked the bckground with Seedless Preserves, Worn Lipstick and Picked Raspberry Distress Inks. The rose is from Steampunk Butterfly, coloured with alcohol markers. And to glam up the card I mounted the design panel on purple glitter foam.

Thanks for stopping by and don't forget to come back for more creative inspiration form the rest of the design team. Happy Holidays!

Beijinhos,
Asha

Friday 25 December 2015

It's Christmas (by Lesley)

Today there is no Design Team inspiration, after all I am sure that you will agree they deserve some time off!


Instead I would just like say to a very Merry Christmas to each and every one of you. I hope it is filled with all that you wish for and that you get some crafty down time during the holiday period.

Enjoy this special day.


Thursday 24 December 2015

Poinsettia Lattice (by Judith)

Hello everyone, my second post this month conveniently falls on Christmas Eve. I would like to wish you all a very Happy Christmas, and offer my good wishes for 2016. I hope that Santa brings you lots of crafting goodies, and that you have time to relax and enjoy the festive season, whatever you are doing.

I have chosen to create a Christmas card for my final offering of the year, and hope that you will accept it as a card from me to you. I would like to thank you all for the lovely comments that you have left over the year on my posts.

I have used the Studded Lattice cling mounted stamp to create the background, and added some poinsettias from the Joyful Christmas stamp set.


Thanks for stopping by, Judith xx

Wednesday 23 December 2015

Guest Post - Designer Penpot by Rachel Fisher

Sadly this is the last post from Rachel this time round and what a fabulous project she has lined up. So without further ado I shall hand you over to the lady herself.


Hello again!  This is my final piece for my guest design team stint here at Chocolate Baroque in December. 


I created this penpot using the Arched Landscape cling single stamp. The penpot is made from MDF and I used black gesso on it first to prime it. Then I stamped the image 4 times and coloured it with distress pens.

 
Full details can be found on my blog – Fishers Cards andCrafts.

I hope you have enjoyed what I have done with this beautiful stamp!

Big Hugs

Rachel

Thank you for giving us three wonderful projects Rachel, we look forward to welcoming you back next year.  Our very gifted Design Team girls still have loads more inspiration for you so please call back again soon.

Tuesday 22 December 2015

Studded Lattice (by Miranda)


Hello there,

Today I have another new background to show to you, the Studded Lattice. Like this very versatile background. Can you imagine the possibilities? I know I am going to use this often.....
I have used one of the Crealies Patchwork dies to create this card.

Again, as in my last blogpost I have combined this background with one of the lovely flower heads and this is the ' Daisy Centre flowerhead'. I have embossed it with silver embossing powder and coloured it with water based markers. The studded Lattice is stamped with Versafine black and after I have finished the card I've added some silver pearl pen accents.


Well, hope to have inspired you with this one......
Christmas is coming soon and I wish you all wonderful days! 

Thanks for all your encouragement en lovely comments and hope to see you soon in the New Year!


Monday 21 December 2015

pastel steampunk


A bit of a change for me, a heart shaped hanger.
I covered with hanger with white gesso, then brushed the edges  with emulsion paint, using those little tester pots
Once the paint was dry, I stamped the new studded lattice background stamp across the whole shape, using a silver grey ink pad. The butterflies are from the steampunk butterfly set, stamped in dark blue ink, so that the antenna would be there.
I then stamped the butterflies again, once onto a sticky label (thanks Lesley for that tip) and once onto card, fusy cut out and glued over the original stamping. A lilac ribbon completed it.
                                                                                   The Country Market that I bake for is based at a local ex-Servicemen's club, and they always have loads of beer mats from the brewers, so I also altered some of these to make posher coasters. Same paints and inks, but the cog stamp from the set as a background, and butterflies on sticky labels again.
I did cover the back of the beermats with felt to hide the brewer's logo.

The steampunk set wasn't on my want list when it came out, as I only really loved the one stamp, but I found that it has become quite addictive since I started playing with it...............and you can use it for pretty as opposed to grungy. So don't write off that set you were dubious about - wait until it is on offer and then have a go, you may be as surprised as I was!

Thank you for looking, there is some lovely stuff coming up - best wishes for a happy Christmas

Veronica

Sunday 20 December 2015

Baroque Orchids (posted by Claire)

Good morning, Claire here with a quick and easy card made using the beautiful stamp 'Baroque Orchids'. This is such a beautifully detailed stamp that I really wanted to give it centre stage on my card.


I began with some glossy white card and stamped Baroque Orchids with versamark and embossed with clear embossing powder. I took a deep breath, lined up my stamp again and was very pleased to see that the stamp joins up beautifully to create a larger panel. I embossed the second image with clear embossing powder and then applied distress inks in Shabby Shutters, Bundled Sage and a little Evergreen Bough randomly with some Cut'n'Dry foam.


I stamped the sentiment with Memento Tuxedo Black on some vellum and tore a strip to layer over the background as shown. I added some black lace, green ribbon and a black button to finish off.

Thanks so much for visiting today
Claire xx

Saturday 19 December 2015

Fabulous new background stamps by Zoe

Good morning, and Merry Christmas, I hope you're all ready for the big man?
I'm back with my second post of these fabulous and versatile new background stamps from Chocolate Baroque, I hope you managed to catch our fab Lesley on The Craft Channel, wasn't she so cool and professional, such great demos.
I used the gorgeous Baroque Orchid with a Versamark Inkpad and heat embossed with gold embossing powder, I then inked using a blending tool and Distress inks, once blended I put the card between some baking/greaseproof paper and ironed using a hot dry iron until the embossing became flat, I was able then to stamp onto it, I added some tulle and bit of bling, matted and layered and viola!

My second is a 5"x7" canvas, I used Dylusions paints applied with a wet wipe, I stamped using stamps from the Steampunk Butterfly set and Studded Lattice, I used gilding flakes on the cogs stamp from the set, gilding wax around the edge, white gesso using credit card and bottle tops to create some texture, the butterfly was stamped onto tissue and adhered with a gel medium.

I used the Studded Lattice again on the background using my Gelli Plate, I inked it up first using my brayer then stamped the Lattice directly onto the Gelli Plate with a darker pink ink then pulled my print, the Roses from the Steampunk Butterfly set I coloured using pencils to create a metal effect.

Thank you so much for spending your time visiting, please pop along again and see what my fantastic teamies create, have a wonderful Christmas time and Happy New Year xx Zoe xx


Friday 18 December 2015

Colourful Flowers (by Debbie)

 
Welcome to all.
My cards today are made with lots of colour, inspired by the colourful Christmas trees I have spied in peoples homes recently.
 
 The first card is made using the Open Weave and Swirl Centre stamps. The background is made from a couple of the new distress ink colours rubbed onto the card and then water flicked on helping to blend them. The open weave stamp was added around the edges, I used Wild Plum Adirondack ink for a more subtle effect. Only two flowers were used for the card, one in the centre and the second was cut for the corners. These flowers are really detailed and I'm really impressed at how the detail is picked out when embossed with powder. I coloured the flowers with colours from the pallet used on the background, pink, oranges and yellow. 
 
 
This card came from playing with inks and water. I coloured the white card with Tumbled Glass, Broken China and Stormy Sky Distress Inks, shading them down to create an ombre effect. I lightly misted the Studded Lattice stamp with water and stamped onto the card. The water on the stamp left the pattern from the stamp on the ink background. With the Magnolia single clear stamp I first stamped it with black ink onto the card and then onto book page paper and coloured with pencils. I fussy cut out the flowers and glued onto the card. The sentiment was added and to finish I matted onto black and then added to the A5 base card.

 
Many thanks for visiting
Debbie

Thursday 17 December 2015

Weave Collection (by Julie)

Hello, thanks for dropping in. I hope you managed to catch one of Lesley's shows on The Craft Channel at the beginning of December. Not to worry if you didn't as I have two projects that use two of the fantastic new background stamps from the shows.


My first card is stamped with the Open Weave cling mounted stamp. I stamped the base card using the Weave stamp on a slight angle and continued until the card was completely covered. The main image was simply stamped with Onyx Black Versafine, doodled with a fine tipped micron pen and then coloured with Polychromos pencils. I then edged with Squeezed Lemonade Distress ink before mounting onto black card. I created the flowers by die cutting 3 black flowers and 3 white. I stamped the Open Weave over the white stamps and doodled and coloured as before. The sentiment is from Mackintosh Sentiments clear stamp set.


My second project is a decorative picture frame and could be made for a last minute Christmas present. The background has been stamped with a pink dye based ink using the new Floral Weave and edged with Peacock Feathers Distress ink. I have added flat back gems and dots of Crystal Stickles for added interest. The butterflies are from the Honeysuckle Butterfly set which I have coloured with Peacock Feathers and Pickled Raspberry Distress ink. The background has been stamped four times so you may have a couple of places where you haven't been able to make a neat join to the next image.....this is the perfect place to add your stamped butterflies....!
The white frame immediately around the stamped image has been covered with Viva Crystal Gel  and the picture frame was painted with white Gesso and dry brushed with a deep pink acrylic paint.

Thanks so much for stopping by and I hope you all have a lovely Christmas. 

Julie x


Wednesday 16 December 2015

Guest Post - A touch of Tranquility by Rachel Fisher

Hi everyone, it is already the second week for our new Guest Design Team member Rachel and this week she is delighting us with a card using the Tranquility stamp set. I think we probably all need a little of that at the moment with all the frenzy of the festive season. Anyway, I hope you enjoy this delicious card and have five minutes to just sit and breathe!


Hello again!  This is my second piece for my guest design team stint here at Chocolate Baroque. 


I created this scene using stamps from the Tranquility set and also one from the Fantasy Castles set. I stamped the main image then masked before stamping the other images. Colouring has been done via a combination of distress inks and colouring pencils.

Full details can be found on my blog – Fishers Cards andCrafts.

I hope you have enjoyed what I have done with these beautiful stamps!

Big Hugs

Rachel.

Just love the subtle colouring here, a very tranquil card indeed Rachel, thank you. If you have enjoyed seeing this creation from Rachel, then please come back again soon to see more insiprational artwork from our regular Design Team girls.