Pin It button on image hover
Showing posts with label Steampunk Funk Fish. Show all posts

Wednesday, 8 January 2020

Strut your Punky Stuff by Brenda


Morning Peeps, today I have a few more shares using the Steampunk stamps Lesley showcased recently on Hochnda TV.

I adore the Punky Cockerel featured on Steampunk Birds as he rather reminds me of one of our own! An Oxide background with stenciling and a die cut corner, the Cockerel stamped with Versafine Clair and coloured and a few 'coffee stains' stamped using an image from Timeless.


More Oxides and stencilling to create an underwater scene and various images stamped from both Steampunk Sea World and Steampunk Funky Fish and a little watercolour added here and there.


This one has a background created using the Gelli Plate and acrylic paint, some rays added with Distress Ink and one of the images from Steampunk Sea World repeat stamped across the bottom and a sentiment from Punky Expressions added.

My thanks as always for popping in today and I hope I have offered a little inspiration.

Tuesday, 23 December 2014

Set Sail (posted by Judith)

Hello everyone, this is my final marine themed post for this month. I have really enjoyed working with these stamps, and have lots more ideas for them.

My project this time around uses the large ship image, which I wanted to portray sailing through a forest at the bottom of the ocean. I stamped the images and then embossed some cogs from the Punky Flowers stamp sheet. I coloured the background using Distress Inks, and then stamped a cog fragment from the Steampunk Butterfly stamp set over the top.

I coloured the images with Inktense pencils and added some fronds at the bottom of the page using the legs from the octopus taken from the stamp of the month set. Finally, I added a sentiment taken from the Steampunkery stamp set.

 Thanks for stopping by, Judith xx

Monday, 22 December 2014

In the dark deep sea......and some CAS cards....by Miranda


Hi there,

Today my last creations of this batch made with the Steampunk sheets.  And again I've used both sheets, Steampunk Funk fish and Steampunk Sea world. In the right bottom corner you can see a fragment of the Seaside dreams. The sentiment is also from that sheet.
I've used one of my many already finished backgrounds waiting to be stamped on.......This is a very dark one, made with fluid inks( like Ecoline) and some silver spatters.......you can see that in the close-up. I've stamped the images with Versafine black and coloured them with my pencils. I did take photos in the evening with artificial light because you can better see the lovely shimmer in the background but also of the metallic Pan Pastels on black and the gold embossing of the gears.


Than I've embossed some black card using an embossing folder with a gear pattern. First I pressed the embossed pieces into my Versamark pad and than I' ve added several Metallic Pan Pastels over it.   And also some hints of blue and purple Pan Pastel to reflect the colors of the background and the card. I also die cut some gears and did some triple embossing with clear and gold embossing powder. I had a tiny left over piece of the embossed paper and used it to create a small card. I've embossed the gear with several embossing powders. And the sentiment is from the Mackintosh sentiments.


Of course it's also possible to create a simple but effective card with these stamps. So onto the clean and simple style now.............I always admire cards with a lot of white space but somehow I can't often manage to left some white space LOL so that's a challenge for me.
I will show you some possibilities........

These cards are made using the colors of the 6th colourchallenge. You can see my other cards on the CB color challengeblog. These cards are very easy and quick to make, lots of white space(very difficult for me) but sometimes you need to create something different and I enjoyed it too!

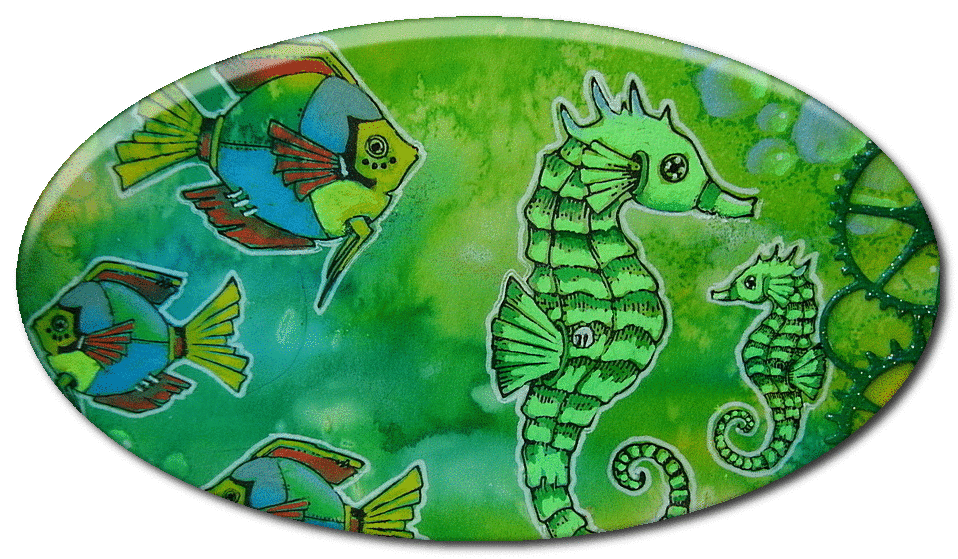
I die cut a circle template and sponged with several Distress inks, spattered some waterdrops and after drying I stamped the seahorses with Versafine black and gave some accents with the Wink of Stella brush markers. Only added a lovely swirl from the Artistic Expressions. The text is from the Artistic affirmations. I layered the white card on a black one and voila finished!


the sparkly effect of the clear Wink of Stella marker.......


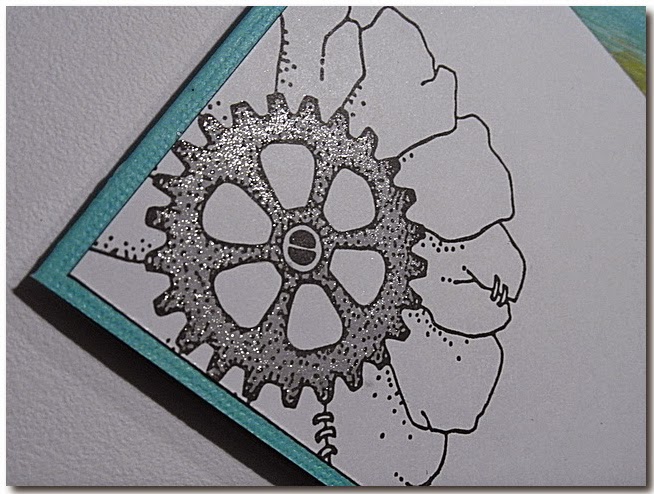
On the next card I used masking tape to create my working area. I only swiped some diagonal strokes with Distress paints and spattered with water. After drying I stamped the steampunk ship with Versafine black and again some accents with the Wink of Stella marker and a white belly pen. I've combined it with some steampunk flowers from ' Punky flowers'. The gears are coloured with the silver Wink of Stella marker.


The Wink of Stella markers have a beautiful sparkly shine which shows best in sunlight and halogen light. I use them often........ At both cards I used a black fineliner(005) to outline the coloured area.


Well hope to have inspired you with these simple and quick cards. Thanks for visiting and I always enjoy to read your comments. 
Wishing you all joyful days and till next time!


Sunday, 21 December 2014

Sea creatures on Kraft paper! (posted by Maria)


Hello stamping lovers,

Between shopping, making cards and parcels, I have managed to make some more samples with my favourite Steampunk Sea World and Steampunk Funk Fish stamp sets.


I made the card, on kraft paper, or better on the reverse of a piece of scrapbook paper, it is the same as kraft paper but I liked the colour better. I stamped my sea creatures and the lamps and bubbles from the Punky flowers stamp sheet with Versafine ink, waited till the ink was dry and then used pencils with a lot of pigments to colour these images. I took a white gelly pen for the white accents. Afterwards I took my Wink of Stella golden glitter marker and coloured all over the pencil colours to give everything a golden shine. I took a stamp from the Texture fragments stamp set, and with Versamark and white embossing powder, I created the bubbles background at the borders.
With some embossing enamel powder- shabby white I made the white accents in the background.
For my second project, I made a milk carton that I had seen on other blogs which I thought was such a beautiful package, that I looked at You-tube and found how to make it. I first coloured the card stock as before and then made this package, wouldn't it make a gorgeous present?

I really hope you enjoyed your weekend, and hope you still have the time to make some cards and boxes as Christmas presents, have a lot of fun, and a joyful, happy Christmas to all of you!

Greetings
Maria

Thursday, 18 December 2014

Rusty Steampunk Funky Fish (posted by Claire)

Good morning, Claire here with a quick card made using Steampunk Funky Fish. I'm really enjoying playing with this months new releases, they are such fun and quirky designs and a refreshing  change from Christmas crafting too. For this card I've tried to create a rusty effect using foil tape and alcohol inks.

I've used two of the stamps from Steampunk Funky Fish for this card. I began with a distress ink background (using Broken China, Tumbled Glass and Weathered Wood distress inks). I stencilled over the top with Mowed Lawn distress ink though a Crafters Workshop Cell Stencil. Next I used the same stencil and blotted with damp kitchen roll to remove some of the colour. I stamped some foliage (from Seadragon) with Mowed Lawn distress ink. I distressed the edges and matted the background on some copper mirri card.

I took some foil tape (from the plumbing supplies department of my local DIY store) that I'd attached to a scrap of white card and added some colour with alcohol inks in shades of blue and green. I stamped the fish and the seadragon with Versmark and embossed with copper embossing powder before cutting them out and popping them on my background with 3d foam pads.

Thanks for visiting today
Claire xx

Saturday, 13 December 2014

Along the Edge of the Sea Bed (posted by Judith)

Hello everyone, I have another watery sample to show you today, using the Steampunk Funk Fish and Steampunk Sea World stamp sets, currently on offer as Stamp of the Month sets.

I started my sample by stamping the seashell edge taken from the Seaside Dreams stamp set near the bottom of my background, but splitting it in half, and stamping a piece on either side of the page. I also created a mask of the image, and covered the original stamped image with the mask. I then stamped the octopus from the Steampunk Funk Fish stamp plate in between the two images, and masked that image as well. I stamped the seaweed edge slightly higher up the page in the middle, and then a piece on each side, to create a continuous run behind the first set of images, and masked these as well. I used some water based acrylic inks, which I diluted and blended to get the colours that I wanted, and then coloured the background, using a turquoise for the sea area, and an ochre colour for the sand. I added extra interest to the sea area by sponging Distress Ink through a stencil to create a bubble effect. I stamped several fish onto adhesive labels and coloured these with water colour pencils, and also stamped a few more directly onto the background. I chose to stamp the background fish with blue ink, so that they appeared to fade into the background slightly, toning the colours down on these fish as well. I removed the masks from the images on the sea bed, and coloured these with watercolour pencils, blending the colours with a waterbrush. I added a stamp from the Nature Fragments stamp set along the edges for a bit of extra funky seaweed.

Thanks for stopping by, Judith xx

Thursday, 11 December 2014

Brusho under the Sea! (posted by Maria)

Hello everybody ,

I hope you are doing well, and I hope you can enjoy your card making during these busy days!
I have made some more underwater world samples with the gorgeous Steampunk Funk Fish and Steampunk Sea World stamp sets for you , and I really hope you like them. Today have I used some Brusho, such a fun, and very easy product, these cards are really made in 10 minutes, so if you don't have a lot of time, use Brusho!


I coloured the creatures with some Brusho too, and  for the golden accents I used a Wink of Stella glitter marker in gold. The golden circles I made with some golden acrylic paint and the cover of an embossing powder box! The small golden border I made with some Versamark and golden embossing powder.
I really had a lot of fun with these stamp sets and Brusho, I hope you do too!

Hugs,
Maria

Saturday, 6 December 2014

An Under the Sea Canvas (by Debbie)

I recently received a canvas as a gift from a friend and when the Steampunk Funk Fish and Sea world stamps arrived set to work immediately.
The canvas is 10cm by 30cm in size. I've recently fallen in love with working on canvas so it was great fun to play.


I started with stamping onto scraps of card that were coloured with Brusho inks and Distress spray colours. For the background I used gesso, stencils with paste, ink sprays, paints, cogs and watch faces found at a flee market. The fishes and ship wreck were attached and a leaf sprig for dimension.
 
Many thanks for visiting
Debbie 

Wednesday, 3 December 2014

Tangled up under the Sea (posted by Judith)

Hello everyone, I have had great fun playing with the new stamps recently released from Chocolate Baroque and have a project with a difference to show you today.

I have incorporated a bit of Zentangle with the Steampunk Funk Fish and Steampunk Sea World stamp sets. I started my card by stamping the scenery section onto the bottom left hand corner of the background, and then adding the bubble machine. I joined them together with some hand drawn lines using a permanent black pen, and created a sandy floor. I drew some plants using various tangles, and then stamped some jellyfish, seahorses and more bubbles. I coloured everything with a mixture of watercolour pencils, blending with water brushes.I added detail on the metallic areas with a gold pen and a charcoal glitter pen. Finally, I added Glossy Accents to the bubbles.
 This was such a relaxing project to create, as tangling is very calming, and you can add as much or as little as you like to create a scene. For more details on my project, just hop over to My Blog. Keep checking back for lots more colourful inspiration from my Design Team mates over the coming month, Judith xx

Tuesday, 2 December 2014

Imagine the steampunk underwater world.......by Miranda


Hi there,

Today I want to take you on a underwater tour where you can spot the very special steampunk fish........they have that special vibe.......lots of gears and a different shape of card......
I've used both of the new steampunk sheets; Steampunk Sea world and Steampunk Funky fish, you can have a nice shortage when you buy them together........(multi buy)

Well, up to the card now......
and some close-ups to have a better look on details.....

I've embossed the gears with Wow neutral ultra shimmer embossing powder which creates a lovely sparkly effect......


I've coloured the fish with an acrylic based marker and some white accents on the contour...
In the background you can see the Texture fragments, still one of my favorite sheets along with all the  other texture and fragment sheets.....they are so versatile! O yep I forgot to mention that I've used one of the older steampunk stamps too at one of the left panels, they are from the Steampunk flowers. Can you imagine all the possibilities with all these steampunk sheets..........


Well, I hope you enjoyed this tour underwater as much as I did creating it, everyday you will see and enjoy the inspiring creations here of all the DT ladies....so keep watching!

Till next time and thanks for visiting,


Monday, 1 December 2014

Under the sea! (posted by Maria)


 Ahoy!

Hello everyone, as you can see these stamps were really made for me! I love them, they are really fun to play with. Your imagination can take over now, nothing to think about, just go with the flow, and create a fantastic underwater world, just enjoy!
These three samples are made with my precious dylusions. I took some white smooth paper, made it wet by spraying with some water, and took the colours of the sea (from my imagination!). I held the paper straight up, so that the colours could flow and make their own design, it was fun to do and to see how beautiful my papers became.
Then I took the beautiful new stamps sets from the Chocolate Baroque Steampunk Funk Fish and Steampunk Sea World stamp sets and started to make my own seaworld! I also took some stamps from the Punky Flower stamp set. For the bubbles and lights I used some glossy accents. The fish and creatures I stamped on a paper that was already coloured with dylusions, cut them out and with some 3D foam I placed them in place. For the gold and silver colours I've used Wink of Stella glitter marker gold and silver.
I hope you like these gorgeous stamps, they really are fun to play with. I really enjoyed making projects with these stamp sets, and I hope you do too!
Have a wonderful day, and enjoy!

Maria