Pin It button on image hover
Showing posts with label Spring Bird - Crocus. Show all posts

Wednesday, 15 January 2020

Feeling Like Spring (by Pat)

Hello everyone, this month our Guest Design Team member Pat is joining us to inspire you with some creative projects. For her first appearance, she has made a lovely Spring themed card.

Pat writes:

Hi everyone, I'm so pleased to be back with my first of three guest posts for this month. I decided to make us feel as though Spring has arrived, even though it will be a couple of months or so before we feel that Spring is in the air. I am using the Spring Bird Crocus set, Texture Fragments, a small dot stamp from Freedom Flower, the graph stamp from Small Graph Paper and the sentiment from Spring Bird Tulip set. Also Distress Inks- three greens, a lilac, purple and two yellows, clear gloss embossing powder, a waterbrush, a blending tool, and permanent purple and white pearlescent ink.

I stamped the smaller crocus image and the little flower border four times onto a 4" square piece of white card using the purple permanent ink and heat embossed with clear gloss embossing powder. I coloured the flowers using a waterbrush and the Distress Inks mentioned above, and applied the dots around the edge using the purple and some white pearlescent ink. 

I then made the background using the same Distress Inks and stamped one of the Texture Fragment stamps, then the little dots, and finally the graph paper stamp. I also blended more of the purple around the edges. I finished with a sentiment stamped with the permanent ink and heat embossed again with the clear gloss embossing powder. I used a stitched tag die and the sentiment from the Spring Bird Tulip set, and then blended more of the lilac and purple Distress Inks around the edges.


That's all from me for now but I'll be back again next week.

Best Wishes,

Pat.

Saturday, 18 March 2017

Spring Birds (by Julie)


Hello and thanks for stopping by. The two cards I have today are both using the lovely Spring Bird stamp sets. 


I started my first card by stamping the Bold Leafy Background onto my base card and coloured with brush markers. I added some stencil detail and Old Paper Distress ink to the edges. The bird design is taken from Spring Bird Tulip, which I stamped onto water colour card, coloured with brush markers and blended with a brush dipped into water. The image was cut out with a circle die and mounted onto a larger circle die cut that I had coloured with the brush markers to match with the little bird.


My second card is stamped with Spring Bird Crocus. I die cut a circle from some copier paper to act as a mask. I placed the copier paper over the base card so that the bird design could be stamped through the hole left from the die cut. Once you have coloured the bird (I used Polychromos pencils), place the circle, that was cut earlier, over the bird so that you can stamp the Bold Leafy Background over the top and blend your Distress inks. I used the tiny little stick design from Sticks and Stones to create a border and then added spodges of white paint pen for interest.

Thank you for reading, please call back soon to catch some more Design Team inspiration.

Julie xx

Friday, 10 March 2017

A couple of projects (posted by Claire)

Good morning, Claire here with a couple of mixed media projects made for Lesley's recent shows on Hochanda. The first features the beautifully detailed bird stamp from Spring Bird Crocus and the second uses one of the smaller stamps from Breath of Spring.


For this first project I began by applying texture paste through a woodgrain stencil onto a little MDF bird house blank. Once that was dry I added some colour with acrylic paint, shimmer spray and distress ink

I stamped the bird and coloured the image with pencils before cutting out and layering the image up over some scraps of hessian, lace and ribbon from my stash. I topped the birdhouse with some raffia and a little wooden button. Here's a closer pic of the image:


My second project today is this little charm made using the beautiful butterfly swirl stamp from Breath of Spring. I took a couple of microscope slides and gently rubbed a versamark ink pad over one of them before applying PanPastel in shades of Magenta ( I used Magenta, Shade and Extra Dark). I glued the other slide to the back with glossy accents and then stamped the image onto the front with versamark before embossing with Silver embossing powder. It really pays to use an antistatic bag when embossing on glass as lots of the powder sticks to the surface.


I stamped the butterfly on acetate and again embossed with silver, applying versamark and more PanPastel to the back. I cut the butterfly out and stuck it to the image with more glossy accents. I attached a glue on bail to the top of the slide and a little filigree corner to the front, bending the corners around the glass very gently. Once everything was dry I added beads from my stash and a scrap of ribbon.

Thanks for visiting today, happy crafting. 
Claire xx

Sunday, 19 February 2017

Blue and White Crocus Card (by Anne)


Good morning. Today I am sharing one of my samples with the new stamps recently featured on the shows with Lesley Wharton on Hochanda. I have got a 'thing' about blue & white scenes recently! Tee hee.


Materials:
  • Spring Bird Crocus stamp set
  • 6 inch square card blank and white stamping card
  • Distress Inkpad (Chipped Sapphire)
  • Fine tipped pen (blue) and gel pen (white)
  • Dies to cut square frames and mats
How to make it:
  1. Cut the frame and square mats for layering. Edge with Distress ink and add faux stitching with the fine tipped pen.
  2. Stamp the image and sentiment with Distress Ink. Pull out the colour using a damp brush. Add some ink to a craft mat and use as a paint to add extra colour and shading. Use the white gel pen to add back some highlights if needed.
  3. Mat and layer onto the card front using 3D foam on the topper for extra depth.

Sunday, 5 April 2015

Floral Eggs (posted by Claire)

Good morning folks and a very Happy Easter to you! I hope you have a lovely day with lots of chocolate and of course some crafting too lol. Today's card features the gorgeous new clear stamps from  called 'Floral Eggs'. I've used this beautiful image to make a topper for my card but I think it would be a stunning pendant too.


I began with a distress ink background using Bundled Sage, Tumbled Glass and Scattered Straw distress inks and stamped the corners using one of the stamps from Spring Bird Crocus with black ink, adding faux stitching around the edges. 

I stamped the image onto smooth white card using Memento Tuxedo Black ink and coloured it with my Graph'It markers. I cut the image out and triple embossed it with clear embossing powder.
I layered the image over a pretty heart shaped doily and added a little black bow.

Thanks so much for visiting today
Claire xx


Sunday, 29 March 2015

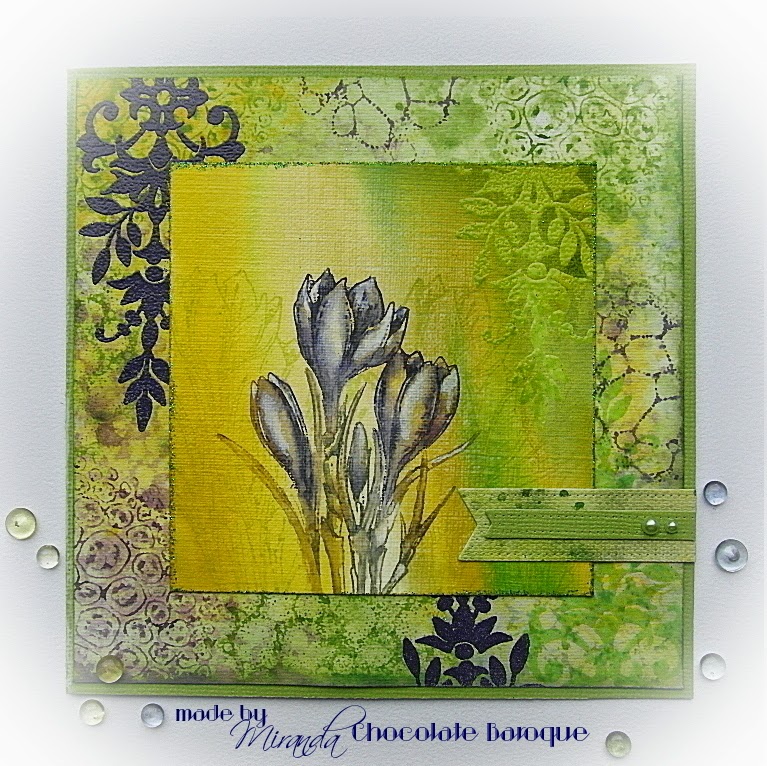
A lovely little Crocus.........by Miranda


Hi there,

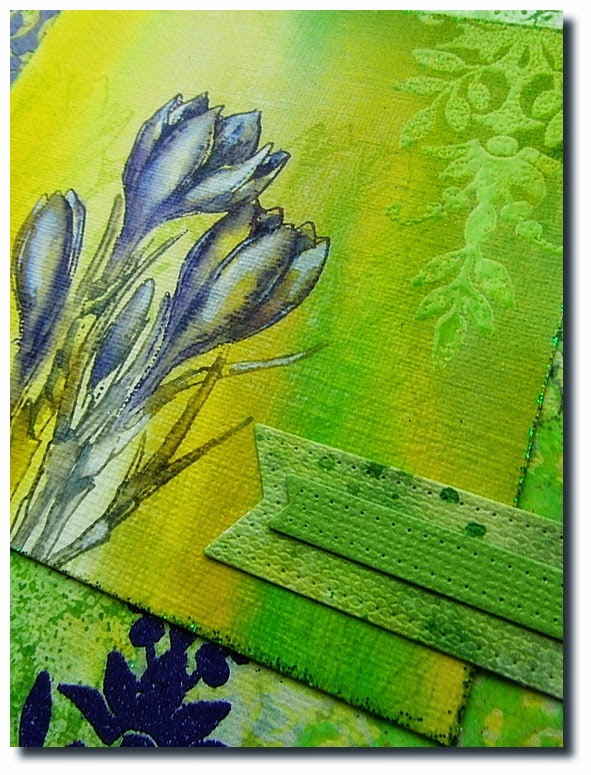
It's my turn again to show you something made with the lovely Spring bird stamps. This time I've used the Spring bird Crocus. I have worked on paper suitable for working with acrylic paints, with a canvas structure. It worked also fine for inks and water. On this paper I have used some fluid inks which are a more bright than the Distress inks.
I have inked directly on the crocus rubber stamp with water based markers, spritzed some water and after stamping I blended the colors with a water brush for a water color effect.

On the background you can see lots of layers. First I have made a background using Distress stains and water.(Mustard Seed/Mowed Lawn and Dusty Concord). Than I have stamped( also with Distress stains)several stamps of the Textured Fragments and finally embossed some ornaments from the Fancy Flourishes clear set using Wow Earthone Grape and Wow Luscious Lime.
The edge of the small card is embossed with Wow Mint Mojito, a sparkling powder.


If you have any questions, feel free to ask! Thanks for visiting and till next time,


Saturday, 28 March 2015

Springtime Bird and Flowers (by Shirley)

Hello everyone, I hope you are having a great weekend.

I have a design to show today featuring the beautiful Spring Bird -Crocus set.   I love all three of the new Spring Bird sets that include so many gorgeous little stamps. 


The background is Distress Inks, including the new Cracked Pistachio. 

I stamped the Daffodil edge from Springtime Edges at the top and bottom and coloured a little along with the main bird image with pencils.  I added die cut flowers that were coloured with Distress Inks and molded uisng a stylus and foam mat. 

Thanks for your visit and have a great day,
Shirleyx

Monday, 16 March 2015

Spring Bird Crocus - Altered Slide Mailer By Florence

Hi everyone

I hope you have all had a lovely weekend.

Today I would like to share with you a slide mailer that I decorated using the new beautiful Spring Bird Crocus Rubber Stamp Set.  The multi buy option for the 3 new sets can be seen here.  These stamps are stunning.

I had so much fun with this project.  I hope you like it.


All images have been stamped using Archival Ink and colored using water color crayons.
The panels have all been made in the same way.  The images have been stamped and masked.  The panels where then dipped and swished into some diluted Distress Ink.  Dilute the ink by patting the ink pad onto an acrylic block and then spritz it with water.


The Front Cover


Base coat the slider with one coat of Gesso and two coats of purple paint.
Stamp the images for the front cover, the inside front cover and the back cover onto white card stock, color the images and trim to size.
 Attach the stamped pieces to the front and the inside cover of the mailer using PVA glue.


Inside the Mailer


Using old book pages or pretty papers, cut out two panels and attach them to the slider with PVA glue as seen on the right hand side of the photo above.
Stamp two Crocuses (I used a stamp from the Elegant Crocus set) or stamp and cut out two Crocuses from the larger stamp image shown below.  Color the two Crocuses and keep them at the side for the moment.


Tear some thin strips from a book page or pretty papers and attach these, using glue, to all of the edges as per the photos.
Attach the stamped image to the back cover using foam pads.  Place the foam pads on the underside of the panel at the top and at the bottom leaving a space in the middle to place the ribbon.


The Back Cover


Apply some gold wax or paint to all of the edges of the slider including the painted area as shown below.


Finally, attach the two Crocuses using silicon or foam pads to raise the heads of the flowers slightly.


That's it from me today.  
Thank you for looking.
Have a great week.

Florence x

Wednesday, 11 March 2015

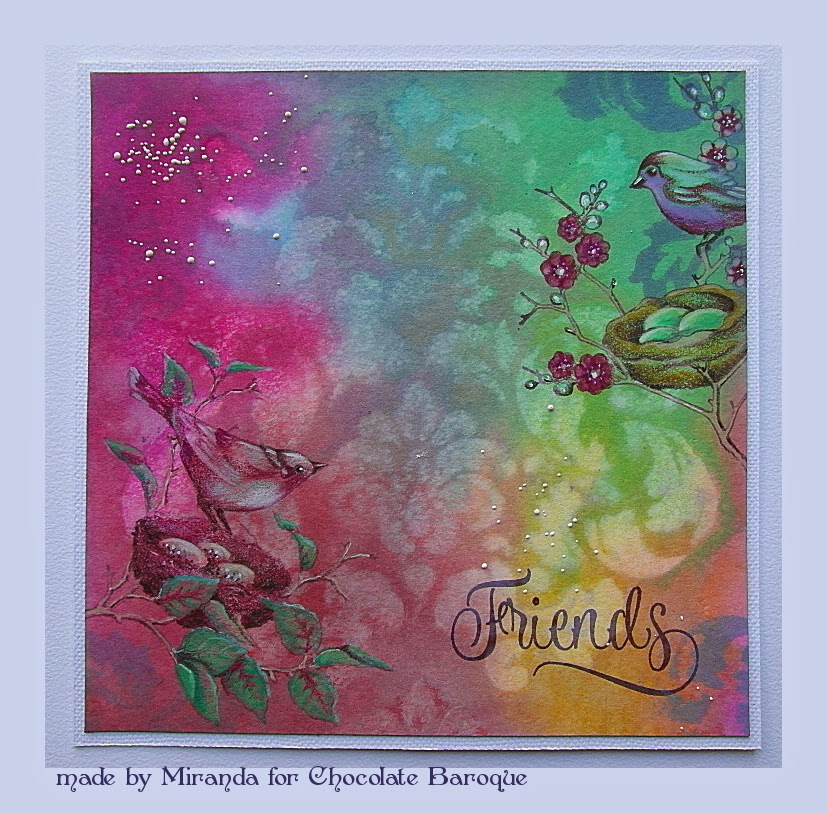
Lovely Spring birds.....by Miranda


Hi there,

Today I have the honor to show you a creation made with the new Spring birds stamps. Aren't they lovely? 
I have worked with the Spring Bird Crocus and Spring bird Tulip sheet. No crocuses or tulips this time but only those lovely birds with their nests. This background was also made by my son some while ago and I did the stenciling, stamping and colouring. 
Here is my card....

The white spatters are made using the Chunky white embossing enamel from Stampendous which give a lovely effect.
The word is from the Amazing Birthday clear stamp sheet.


Hope to have inspired you and keep your eye on this blog for more beautiful artwork made by the DT!

thanks for visiting and till next time,


Monday, 9 March 2015

Simply Black and White (by Lesley)

I have always loved black and white, not just in stamping but in photography, fashion, art etc. So my card today is just that, clean and simply black and white.

  • Using the least acute curve from the Tonic Shape Mate Rulers draw a faint pencil line along the curve across a piece of A4 160gsm paper, then cut along the line.
  • Ink up the flower from the Spring Bird Crocus set with Versafine Onyx Black and stamp three times as illustrated. 
  • Use a A4 piece of black card to make a DL card. Trim 0.5cm off both long sides of the A4 160gsm white paper. Now trim approximately 7cm off the short straight edge and fold in half. This becomes the wrap around for your card. Stamp the sentiment from the Thinking of You Sentiments clear set in position using Black Onyx.
  • Place a small strip of double sided tape on the front and back of the card next to the fold and attach the wrap. Finish with a length of black satin ribbon tied around the inside of the card and fastened in a bow at the front.


A plain black and white card can be used for a variety of occasions but you could just as easily use a pastel or strong colour as the base for your DL card and stamp in a co-ordinating ink. 

Thank you for dropping by, I hope you keep visiting to catch up with all the gorgeous designs coming your way from our talented girls.

Sunday, 8 March 2015

A Taste of Spring in Pink and Orange (by Shirley)

Hello everyone, I hope you are doing well.

I have a few designs to show today featuring stamps from the new gorgeous Spring Bird- Tulip, Daffodil and Crocus sets.  The pretty images are just we need to cheer us up as we are weary of snow and extreme cold temperatures here in Ontario, Canada.  


The background above was created with Ripe Persimmon and Picked Raspberry Distress Inks using an acrylic block, heat drying and then picking up the drops left on the block.

I stamped the decorative design, bird and flowers from Spring Bird - Daffodil and the foliage from Spring Foliage sets.  'Best Wishes' is from the Spring Bird - Tulip set.    I enjoyed colouring these images with pencils.

And below are four ATC's that I created using stamps from Spring Birds with Tulip, Daffodil and Crocus sets.   I'll use them as gift tags, but they are cut in the ATC size.


The backgrounds above were created with orange and pink Dylusions spray inks.  I added white Acylic paint using Memory Box stencil.  The images were again coloured using pencils.

I have one more design to show today which was very quick to create.


I painted the tulip stamp from Spring Bird - Tulip with water colour markers and then stamped onto water colour paper.  Using a water barrel brush I blended the paint.  I added a little green Brushos crystals with water to the bottom to create grass.

Thanks for your visit and have a great day,
Shirleyx

Tuesday, 3 March 2015

Garden Fresh Crocus and A Spring Bird (by Asha)

Good morning, fellow Chocoholics! Spring is most definitely in the air and things can only get better now that we have some new stamps to play with. I've got a couple of projects to share with you featuring stamps from the brand new Spring Bird - Crocus DL set.


My first card showcases the beautiful crocuses. I stamped a cluster of the taller ones from the set and coloured them with alcohol markers. Then I coloured and fussy cut the smaller cluster and adhered in in front. And to fill all the gaps I added some die cut grass with coincidentally match the leaves of the crocuses! The greeting is from Butterfly Easter and the butterfly is from Harebell Butterfly.


Here's my second project. This time the spotlight is on the nesting bird. I've moved away from fresh bright colours and used warm neutrals instead. As before the image is coloured with alcohol markers and fussy card before adhering to the card base. I've also used the greeting and the itty bitty accent stamp from the same Spring Bird - Crocus set.


I love how this one set of stamps gives 2 different looks - garden fresh or warm & cosy. I dare say this set will get some use in the Autumn months too.

In the coming days the rest of the Design Team will show lots more projects to inspire you. So make sure you swing by often. I'll post details of how I made this card on my blog tomorrow... it's a little hectic there today! :)

Beijinhos,
Asha

Thursday, 26 February 2015

Signs of an early Spring with our new Stamp releases (by Lesley)


The days are starting to feel a little longer, the sun is shining a little more and March is just around the corner. So today I am pleased to announce our latest stamp releases which I hope will help us all feel a little closer to Spring. Plus there are some new clear stamp sets that should really help you get your words straight.

First we have three DL sets, Spring Bird Crocus


Spring Bird Tulip
and finally Spring Bird Daffodil.

Of course these wonderful sets are available individually or as our usual money saving multi-buy.
And now for the clear stamps.  

I don't know about you but stamping words in a straight line has always been a bit of a problem for me. However, once you can see through the stamp it is much easier and there is less chance of ruining the project that you just spent hours creating.

So the clear stamps we are releasing today are all sentiment sets that you won't want to be without. First is an A5 set entitled Sweet Nothings

followed by two A6 sets, Thinking of You Sentiments
and Card Sentiments


Both A6 sets are also available as a multi-buy.


All our Spring sets are just asking to be coloured with your favourite mediums. Here I stamped the tulip stems and heads onto spare pieces of card that had already been coloured with Brushos. After cutting them out I glued them onto the folded card, which was covered with patterned paper. I added a little distress ink around the edges of the card and finally stamped one of our new sentiments. A relatively quick make because I used saved scraps of card for the flowers and I didn't need to mat and layer the sentiment. Sometimes we just need quick and simple don't we?

As you can imagine the Design Team girls have gone to town with their Spring creations, so please keep coming back every day to see a new piece of inspiring artwork.