Pin It button on image hover

Tuesday 30 November 2021

Masking Ideas by Natalie

Sketchy, textured or broken image stamps all look fantastic when combined with masking techniques. There are a number of masking products you can use to achieve this but I tend to stick to paper based products when working with inks. There are two approaches: positive and negative we shall call them.

Positive Masking


This is where most beginners start with paper masks. You can stamp your image onto masking paper, tissue or tape and then cut it out to create your mask. You should trim slightly inside the image to prevent a halo when apply another image or ink to your design. The resulting mask then masks the original image so you can ink outside of the image for background techniques, glows or shadows. It is also how we can build scenes using multiple stamps. 

Using From Nature 1, stamp and cut out the mask of your chosen leaf image. Depending on your material, you may want to allow the paper to dry before cutting out to save inky fingers.

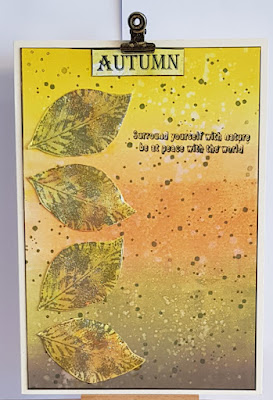
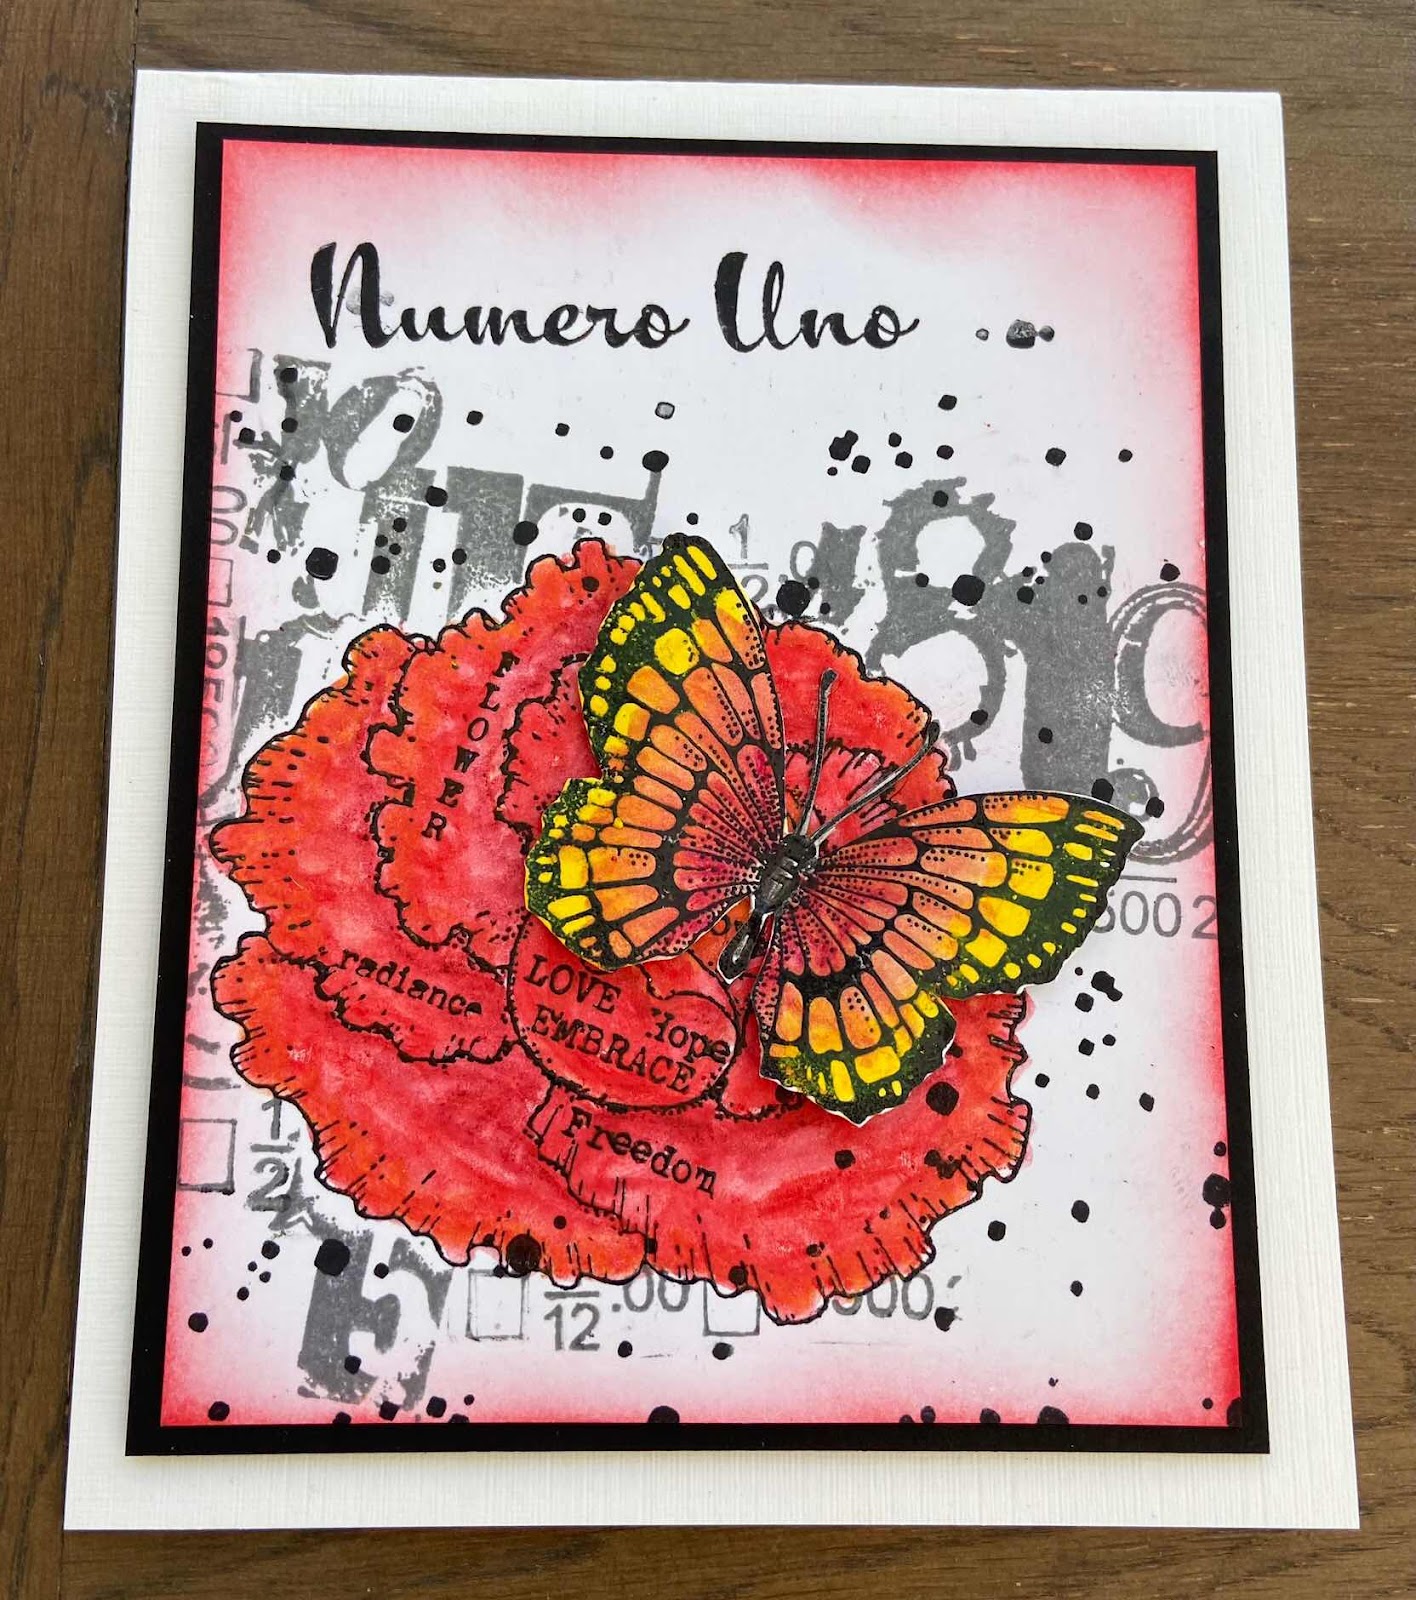
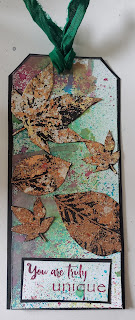
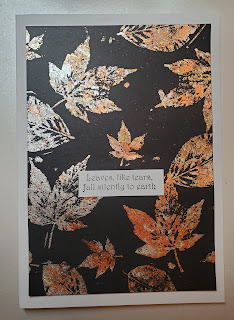
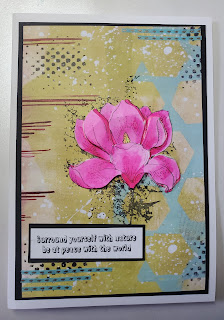
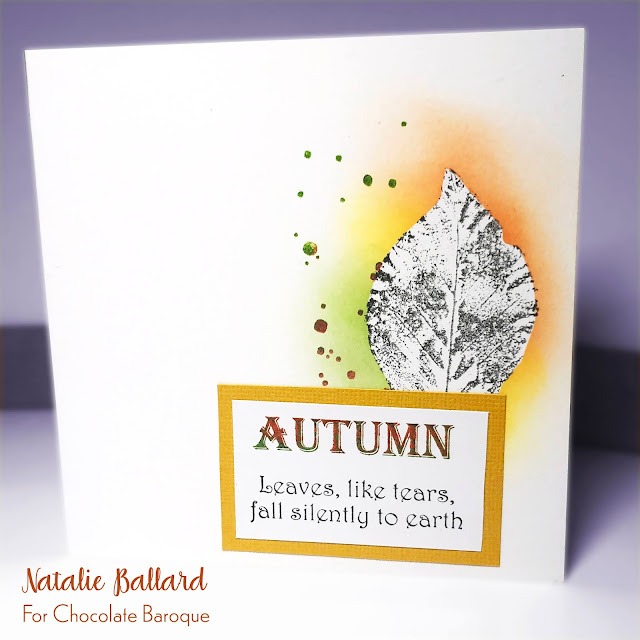
Stamp your image onto your card blank using any stamping ink and even embossing powder if you wish. Heat set the ink and apply your mask. Using a blending brush, sponge or dauber apply ink over the top - Distress Oxides were used in the sample below. Stamp any textural images you want to add using any inks; you could even stencil over the top.

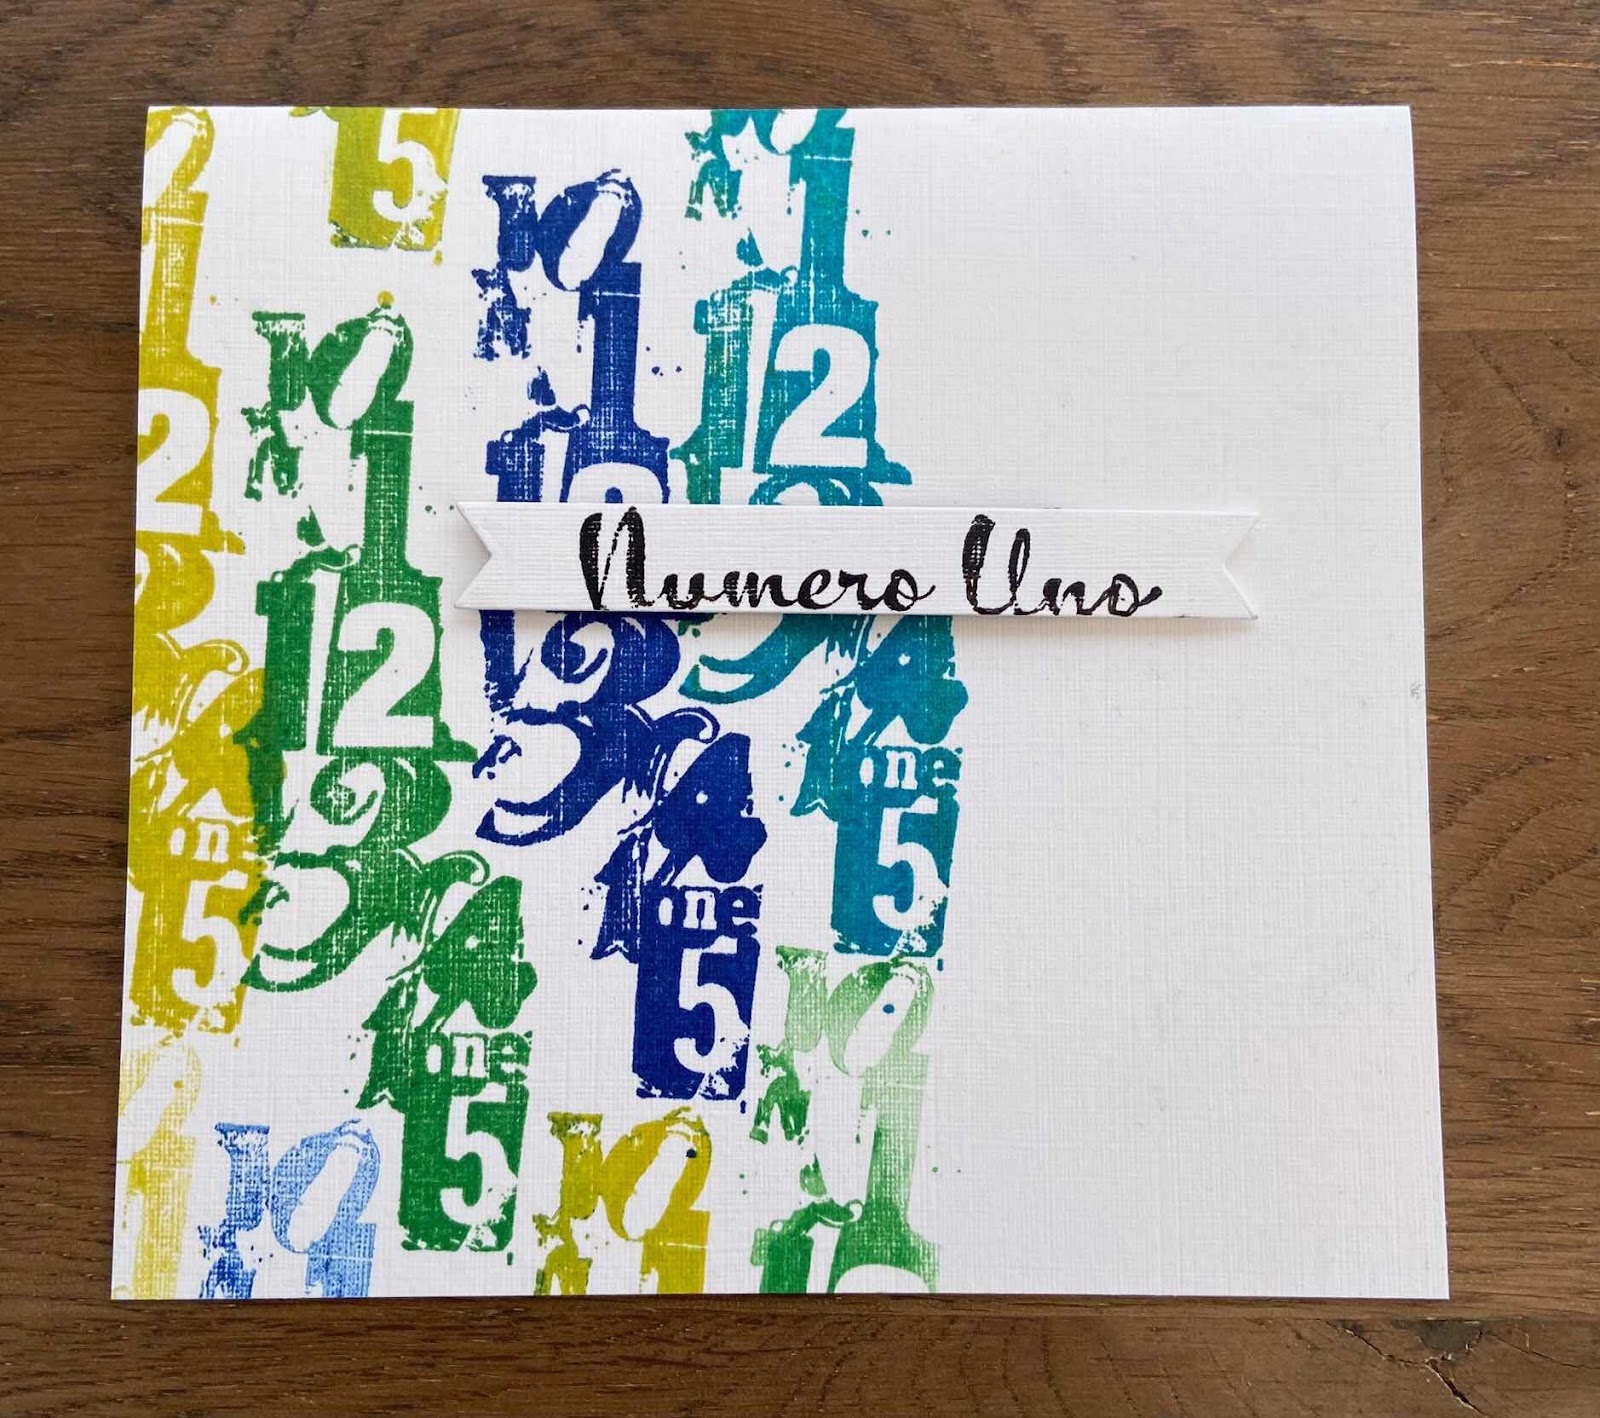
Peel off your mask and allow to dry. Stamp and mount a sentiment to complete the card.


Negative masking

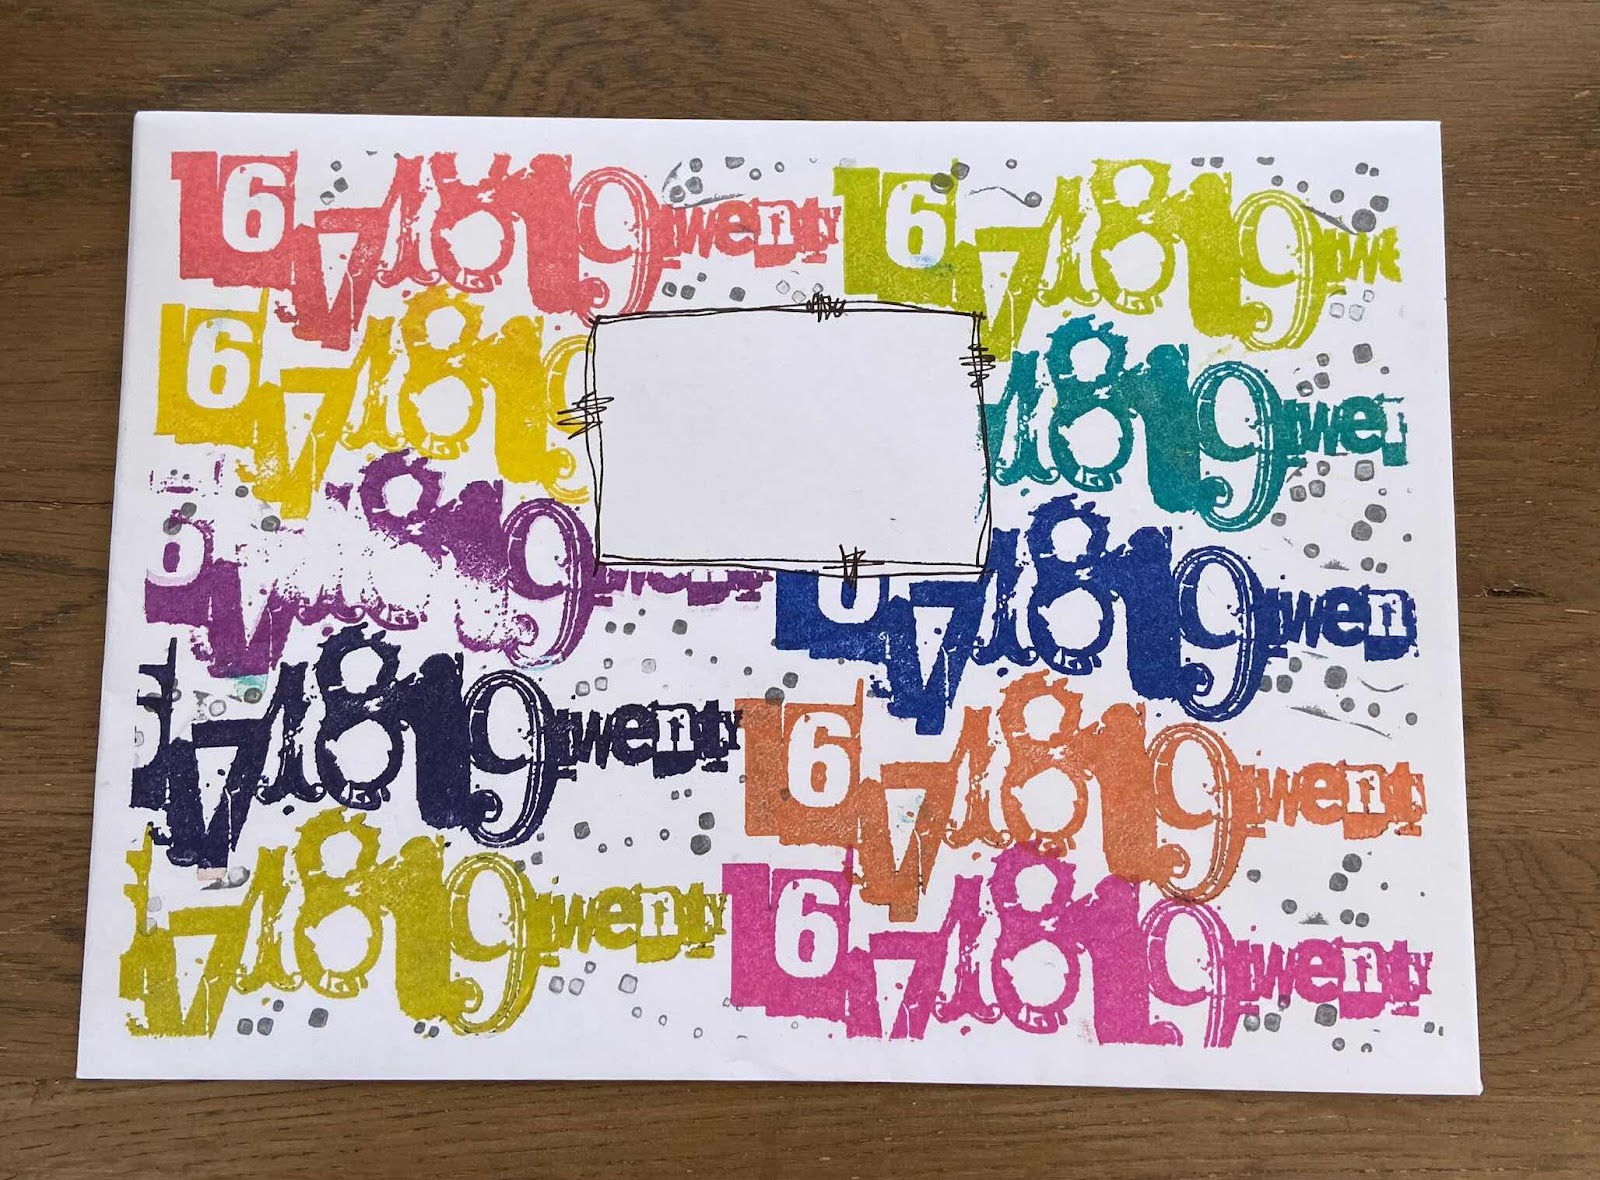
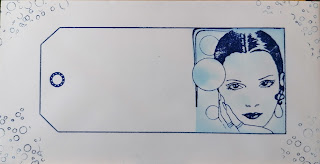
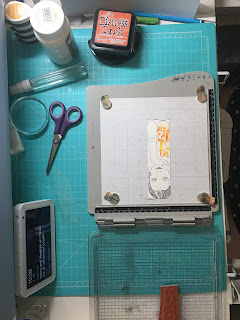
This is where we mask the background instead; this makes colouring your images a much quicker process. This time trim slightly outside the image to prevent an inner halo using a craft knife or scalpel using a cutting mat beneath your masking material.


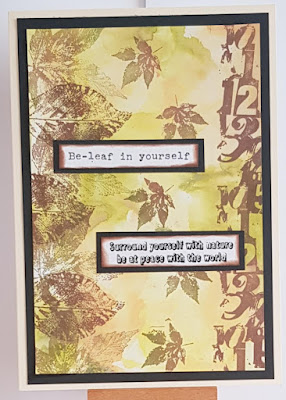
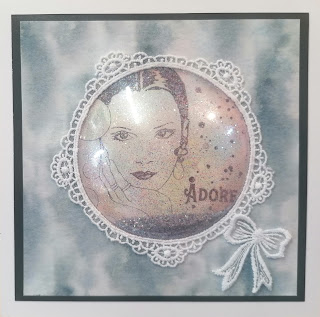
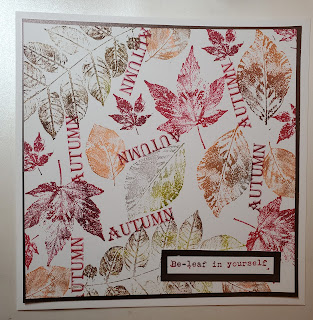
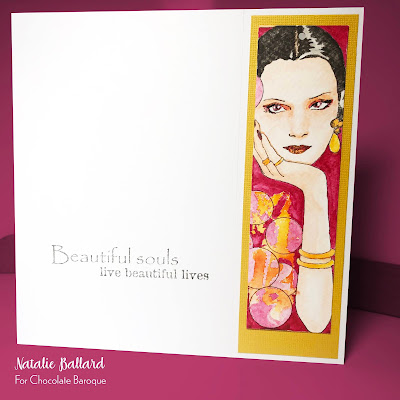
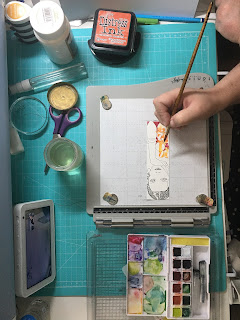
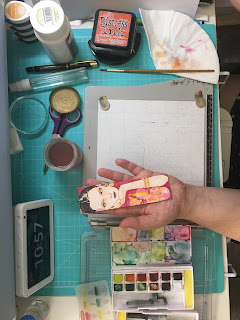
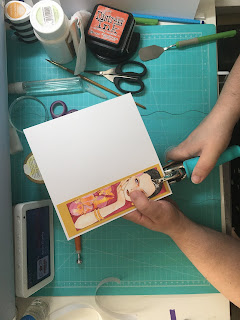
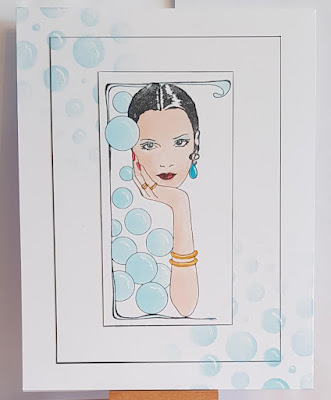
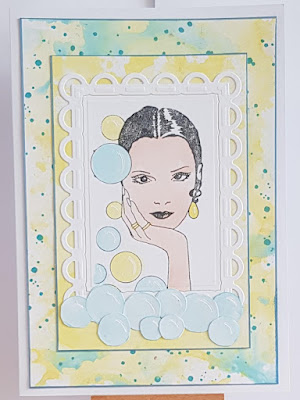
This process enables us to then apply colour to our stamped images quickly. Stamp your image onto your card, in the above sample this was inside a card blank. Apply the mask to your card carefully, working from the aperture outwards. Apply dye based inks over your image; this prevents your original stamped image looking faded.

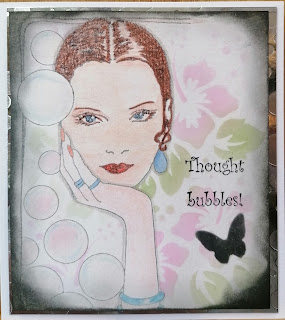
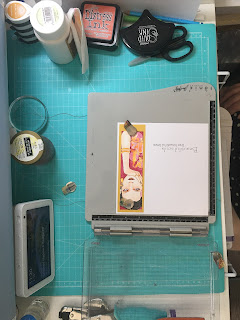
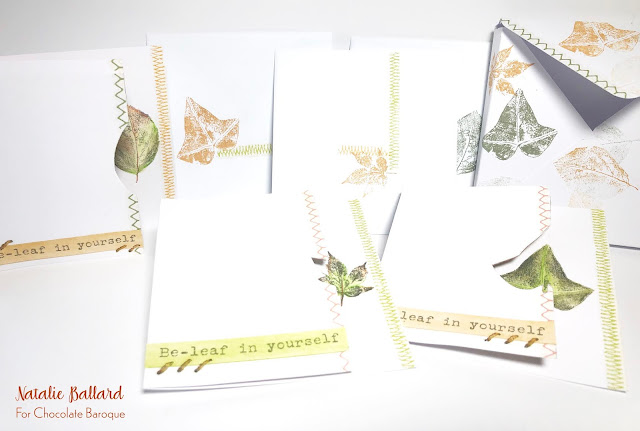
In the sample above, I then used a light box to sketch the outline of the stamping trimmed the card about 1 inch shorter to the front and around the image. I then applied some rub on stitching designs as well as a sentiment border from the stamp set. Then use the same inks you coloured with to add leaf designs to your envelope.


Monday 29 November 2021

Autumn Leaves (Tracy Thompson)

 I'm here with my third post for this month, using From Nature and Numerology from Octobers shows.

For the background on this I used four different coloured inks blended together.  I then used the splatter from Numerology to stamp over the inking.  The leaves were inked with sprays before being  fussy cut and adhered to look like falling leaves.  then all that was left to do was add a sentiment.  I stamped the word Autumn and a mini bulldog clip to the top.


Another inky background done in a couple of colours,  I then stamped leaves to one side of the card and the numerology stamp down the opposite side, then some smaller leaves floating down the centre.  I layered up a couple of sentiments from the same set and added to the card.

Happy crafting
Tracy x

Sunday 28 November 2021

tagtastic (by Veronica)

 I have gone back to the From nature 1  stamp set, this time using tags.

I used the tagtastic  stamp on a spare piece of inked card to create the tag, then stamped the larger maple leaf down the centre in green. The fussycut leaves were left over from a wreath card , and were stamped onto a piece of card coloured with brusho powders, and the sentiment was also stamped onto a bit of leftover bit of card and cut up;  the 'ribbon'  was a scrap of fancy knitting yarn.


My second tag was stamped onto a distress oxide background again, but this time trimmed to fit onto a DL card blank cut from kraft card. The leafy spray stamp was inked with a multicolour inkpad  and stamped twice into the tag shape. The third stamping was with a terracotta ink pad. The sentiments were stamped in black ink, and I added shading round the tag shape with a charcoal pencil

Saturday 27 November 2021

Pretty Grunge! by Sandra


Hello I'm sharing some cards from the October show on The Craft Store.
These feature Floral Grunge, a stamp that is great for different colouring techniques.

For my first card I stamped the flower onto Kraft paper and embossed in white powder. I coloured the flower using the Shimmer paints that Lesley had recently. This colour is an iridescent purple/blue....gorgeous! I added a sentiment from Pretty Poppies.

For my next card I stamped onto smooth cardstock with Memento ink and used my alcohol markers to colour. I added a layer of leafy paper to a 8x8 card, put a narrow band of card across the centre with a  sentiment from Pretty Poppies and then added my flower, raised on foam pads.

Thanks for looking

Sandra x

http://isthatthetime.blogspot.com/

Friday 26 November 2021

Grungy Numbers (by Judith)

Hello everyone, I have two projects to share with you today, showcasing the stamps that we brought to you in last month's TV shows.

To create my first project, I made a quick background by inking up the gelli plate with Distress Ink, and pulled a print using smooth white card. I stamped Floral Grunge in the middle of the card using black ink, and added some leaves from the From Nature 1 stamp set around the flower head and up the 'stalk'. I added the numbers from Numerolgy to the background, and also the splatter, using colours that would match the colours I chose for the flower.

I stamped the flower head again onto a piece of separate card and coloured it with pencils, before cutting it out. I also coloured the leaves that I had stamped onto the background with pencils, to give them extra definition. I attached the coloured flower head to the background.

My second card is a much brighter affair than my first card, and shows how the Numerology stamp set can be used to create a card. I created a Distress Ink background, using shades of green, blue and yellow. I then added the various stamps from the set, and a couple of leaves from the From Nature 1 stamp set, stamped in second generation stamping in the background. I like the subtle effect that the leaves give underneath the numerals. I stamped them with the same black ink for a monochchrome effect.

I hope that you are enjoying the inspiration from the Design Team this month, thanks so much for stopping by,


Judith xx


Thursday 25 November 2021

Numerology part 2 by Zoe

Good morning Lovelies and welcome back.

Here are some more of my samples from last months fab shows on The Craft Store.


So of course I made an envelope lol, nice and easy but colourful and fun, it’s definitely the first one you’d want to open as it drops through the letterbox.

Using the Numerology as the background, I’d first stamped the flower and masked it before using the background stamp, then stamped the butterfly on scrap card and cut out to create some dimension.


Some people find Male or teenagers cards tricky but with these stamps you can’t go wrong, I kept it simple, using cool colours and a simple little banner for the sentiment. I used Linen texture card, I love the effect from it.


Thanks again for popping in.
Have a wonderful day xx Zoe xx


Wednesday 24 November 2021

Have a great day (by Corine)

Today is the last of the 3 guest posts by Corine and I am sure you will agree she has designed some wonderful creations to inspire us. Using fresh bright colours this card really would make a great day for anyone. Enjoy!

Hello!

Here I am again and would like to show you my 3th card as a guest designer. This time I made a card with Lyra aquacolor and Distress Ink.


I used the stamps from these sheets:

Fantastic Floral

Palm Fan Baroque Ornament 

To make this card you need a stamping tool. Place a piece of white watercolor paper on the stamping tool, attach the floral ornament stamp to the stamping tool. Apply three colors of lyra aquacolor on the stamp. I used purple and blue tones. Spray the stamp wet with water and press off. Let this air dry. Repeat if necessary.

Print the stamp again with waterproof ink and cut out the flower. You can color the stamp even more with Distress inks. I also added accents with a transparent glitter pen.

Take another piece of white paper. Sponge through a stencil a branch with Distress Oxide inks. I used Shaded Lilac and Tumbled Glass. Then place the paper on the stamping tool. Stamp the bunch of flowers with Picked Raspberry (Distress Oxide). Repeat as needed for a tighter print. Then stamp over it again with Distress ink Seedless Preserves. Let it dry well. I have chosen to stamp the bunch of flowers upside down so that it resembles hanging garlands.

Stamp the text with waterproof ink on white paper.

Stick the flower and text on the card.

I hope to have inspired you again now. And if you want to try out the technique for this card, I wish you good luck and have fun. 

Kind regards,

Corine van Kuilenburg

Thank you Corine for the past three weeks' posts and for giving us some wonderful ideas. We look forward to seeing Corine again next year.


Tuesday 23 November 2021

Beautiful (by Doreen)

 Beautiful

Beauty is in the Eyes  I absolutely fell in love with this stamp the moment I saw it, so very versatile and lends itself to no end of ideas. The first of mine today is a fan which I bought a month or so ago.

I used acrylic paints and stamped on them using Versafine and Versamark and White Embossing Powder. The Red and White Dots are also Acrylic Paint using a flat ended cocktail stick, the lipstick was applied with a very fine paintbrush.


This card incorporates the use of a circle dome and some lacy odds and ends from my stash. Although I did use an antistatic bag to help the glitter not to coat the dome it didn't really work out that way but now I quite like the affect it gives, lets just call that a happy accident. I stamped the image using a Stazon Gothic Purple Inkpad.


This card uses a really old stencil from my stash for the background and inkpads, plus some watercolour pencils to colour the image which I activated using a shimmer spray instead of water.


A very simple envelope, made using the  Tagtastic stamp and a section of the the Beauty is in the eyes leaving a section of the tag to allow the name and address to be written in, be sure to use an inkpad that will withstand a rainfall as poor postie can't be held responsible for the weather. I would love a stamped envelope to drop onto my doormat I would open it carefully and keep it and perhaps make a bookmark with it.


Thank you for looking in today 

Love Doreen xx 

Monday 22 November 2021

Nature's gems by Rachel

 Hello there! Rachel here today with some samples from the October shows that show the beauty of nature. I have used the stamp sets from nature 1 and floral grunge.

In this first tag I used a mop up background with metal flake foiled leaves from Nature 1. 

In this next card I used more flake to create the leaves from the stamped images.
In this final sample from this set I used different coloured inks to simply stamp the images to make an autumnal card.
In this card I teamed the floral grunge stamp, coloured with water colour pens with some background paper. 
In this final sample I stamped the floral grunge stamp in versa mark and heat set with white embossing powder. I used the crackle background to stamp around the image and also stamped floral grunge parts in versamark on the black and brushed over with mica powder. 
I hope these samples have given you a little inspiration.
Have a great day!
Hugs Rachel xx


Saturday 20 November 2021

Xmas Cards and Tag (by Magda) - Reindeer Landscape, New England Winter, Let get Festive, Winter Edges

 Hello,

as promised I post you the other Xmas cards and tag I prepared and hope you will like them.  For these projects I used the following stamps:   New England WinterReindeer LandscapeWinter Edges and Let get Festive . The colors for the backgrounds are Archival Jet Black, Distress Ink Pad for stamping and wash and watercolor for coloring the Winter Edges Tag.


I wish you all a happy Xmas crafting time, hugs

Magda


Friday 19 November 2021

Intense watercolour by Natalie Ballard


One of my favourite samples from October is this bookmark card featuring Numerology and Beauty is in the Eyes. You might think this card looks complicated, but its actually really simple and there is no masking involved.

The bookmark panel

Start by working onto a piece of watercolour or mixed media cardstock. Remember, the smoother the stock, the more crisp your outline will be. Stamp your main image from Beauty is in the eyes using a water resistant ink pad. Next, you are going to line up the vertical numbers stamp from Numerology over the bubbles; ink it up with a combination of Wild Honey and Crackling Campfire Distress inks and spritz the stamp with water, stamp the image.

You can then watercolour your background using a nice strong magenta colour around the figure bubbles and numbers. Then, using a slightly watered down version of the colour, fill your bubbles also going around the numbers.
You can then paint the figure adding shading to the face using watered down Crackling Campfire or your watercolours.


Mount this panel onto a piece of contrasting cardstock in warm yellow to pull out the colour in your numbers. This can then be adhered to your card base along the open edge. Use a dashed line blade/trimmer to cut in the edge for tearing off the bookmark. Punch a hole in the top of the bookmark using a Cropadile or similar strong hole punch.

Finally, stamp your sentiment and you have a quick and easy card.


Thursday 18 November 2021

Bubbles Everywhere (by Tracy Thompson)

 This is my second post this month showing creations I made for the October shows, using stamp sets Beauty Is In The Eyes and Numerology

I created this card in three layers, the bottom layer and second layer I did first, using a stencil I inked on some circles diagonally across,  then used a white gel pen to make them look like bubbles.  I stamped the image from the set Beauty Is In The Eyes on a third piece of card and coloured it using inks.  


My background on this one was created with inks and then splatters stamped on from the Numerology set.  I made another layer with ink and on to that I added a frame with the image stamped on and coloured.  I cut out some circles to add along the base of the frame.

There will be another post from me near the end of the month.
Happy crafting
Tracy x


Wednesday 17 November 2021

Fairytale (by Corine)

Hello!

Here I am again. This is my second post this month. Today I share a fairy tale with you. I had so much fun making this card with the masking technique.


I used stamps from the sheets:

Autumn Poppy

October Fairy

Gothic Fragments

Apply to a craft sheet Distress Ink Peeled Paint. Spray it wet with water and run the paper through it. You repeat this step in sequence with the following colours Carved Pumpkin and Salvaged Patina. Make sure that each step is completely dry before you start the next. 

Stamp the fairy on the mushroom with black waterproof ink using a stamping tool. Partly mask the fairy and stamp the gothic window. I stamped the branch on the right with Archival Vintage Photo.


Colour the mushrooms and the window with watercolour markers. Mask the window again and sponge with Distress Ink Prize Ribbon and Villainous Potion. Then stamp the leaves with Archival Peeled Paint.

Sponge at the bottom with Distress Ink Vintage Photo.


With a glitter gel pen you can add some accents in the image. 

To get more depth, you can create shadows with a charcoal pencil. Carefully spread the charcoal with a feather.

It's quite a lot of work, but fun to do. 

I hope I have inspired you. If you want to try this technique, I wish you a lot of fun.

Until next week!

Kind regards,

Corine van Kuilenburg

Tuesday 16 November 2021

pensive (by Veronica)

Today I have samples using the very different and rather striking  Beauty is in the eyes stamp set. 

The first one is very simple, stamped in black versafine onto white card and coloured using a bluegrey pencil, trimmed down, a silvery grey mat onto a white card blank, and the sentiment stamped in black 


The second version was stamped onto a square of card coloured with distress oxides and texture added using a stencil. The image was stamped and coloured  using the brush  pens from Koh-i-noor. Sentiment  stamped in black, and some very elderly jewels added along with a black mat.


 A second share for this offbeat version, previously a separate post on my blog.  This was the first idea I had , and it took a bit of fiddling to get it to work!  In hindsight i should have just gone with the one hand to save the several attempts with acetate before I got a  a good print of the second hand, and i should have used a black ink too. I really liked the misty stencilled distress oxide background though, and I still like the moth from the Sacred set by Fiona Randall.


Monday 15 November 2021

Celestial inspiration (by Miranda)


Hi there crafty people,

It's been a while but here I am again and I am happy to say that I will post every month some Chocolate inspirations. Still love to work with these wonderful stamps.

The first time I saw the new A4 sheets ' Celestial' and 'Sacred' I was in awe...... I am always attracted to geometrical shapes and themes like the celestial and mystical.

I created a background on black mixed media paper applying some chalky paints with a brayer. So it became a grungy kind of background.

 The large circle shape is embossed using the Seth Apter Weathered gold embossing powder from Wow. And also the words are embossed with the same powder.

 I stamped the 2nd geometric shape using a dark brown ink and embossed it using clear gloss embossing powder.

Than I used some pastel pencils and a paper stump to accent some parts of the circles. As a finishing touch I sprinkled some metallic, black and white frantage embossing powder and heated it from underneath.  The edges are darkened using some distress crayons.


I think it has become a great masculine card. 


I hope you did like my take on this one and next time I will be back with something with a Christmas twist.......

Thanks for visiting and till next time,