Pin It button on image hover

Thursday 31 December 2020

A New Year's Eve Wish (by Judith)

Hello everyone, I hope that you have had a good Christmas, and enjoyed some time celebrating the festive season, even if it has been very different to your usual celebrations. Many of you will not have been able to have spent the time together with your loved ones, or to have seen as many of your family as you would have done under normal circumstances. 

This year has been such a strange and turbulent year for many reasons, we have been thrown into a life that is so different from what we are used to, and many people have lost their jobs, their businesses, faced floods, illness, or the loss of loved ones. Lockdown has been very hard for everyone, the isolation and separation from friends and family has been really difficult. Social media, and contact through technology has really been a big help. Zoom, Whatsapp, Facebook Messenger, video calling, have all come into their own as a means to interact with other people to be able to 'see' each other and chat face to face. 

Chocolate Baroque has tried to do its part with the Butterfly Tree get togethers, allowing members of the Choolate Baroque Facebook Group to join in with the meetings and feel part of the community. The sense of belonging that is part of Chocolate Baroque, the community of crafters, learning together, and having fun getting messy and inky, has always helped to make us feel less isolated. Many friendships have been forged through the Chocolate Baroque community, I have several amazing friends that I have made personally, so I can vouch for magic of this wonderful group.

As we turn to thoughts of the approaching New Year, one thing that has continually come to my mind is that we can be grateful for what we have. We have lost so much this year, but we still have friendship, we still have family, we still have a shared love of crafting. My New Year's Eve wish for you all is that 2021 will be a better year. It may not turn out exactly as we would all like, but may you all find peaceful, contented, healthy times ahead. I hope that you will enjoy what we at Chocolate Baroque continue to share with you over the coming year, and that you will keep crafting along with us. Most of all, look after yourselves and be happy. 

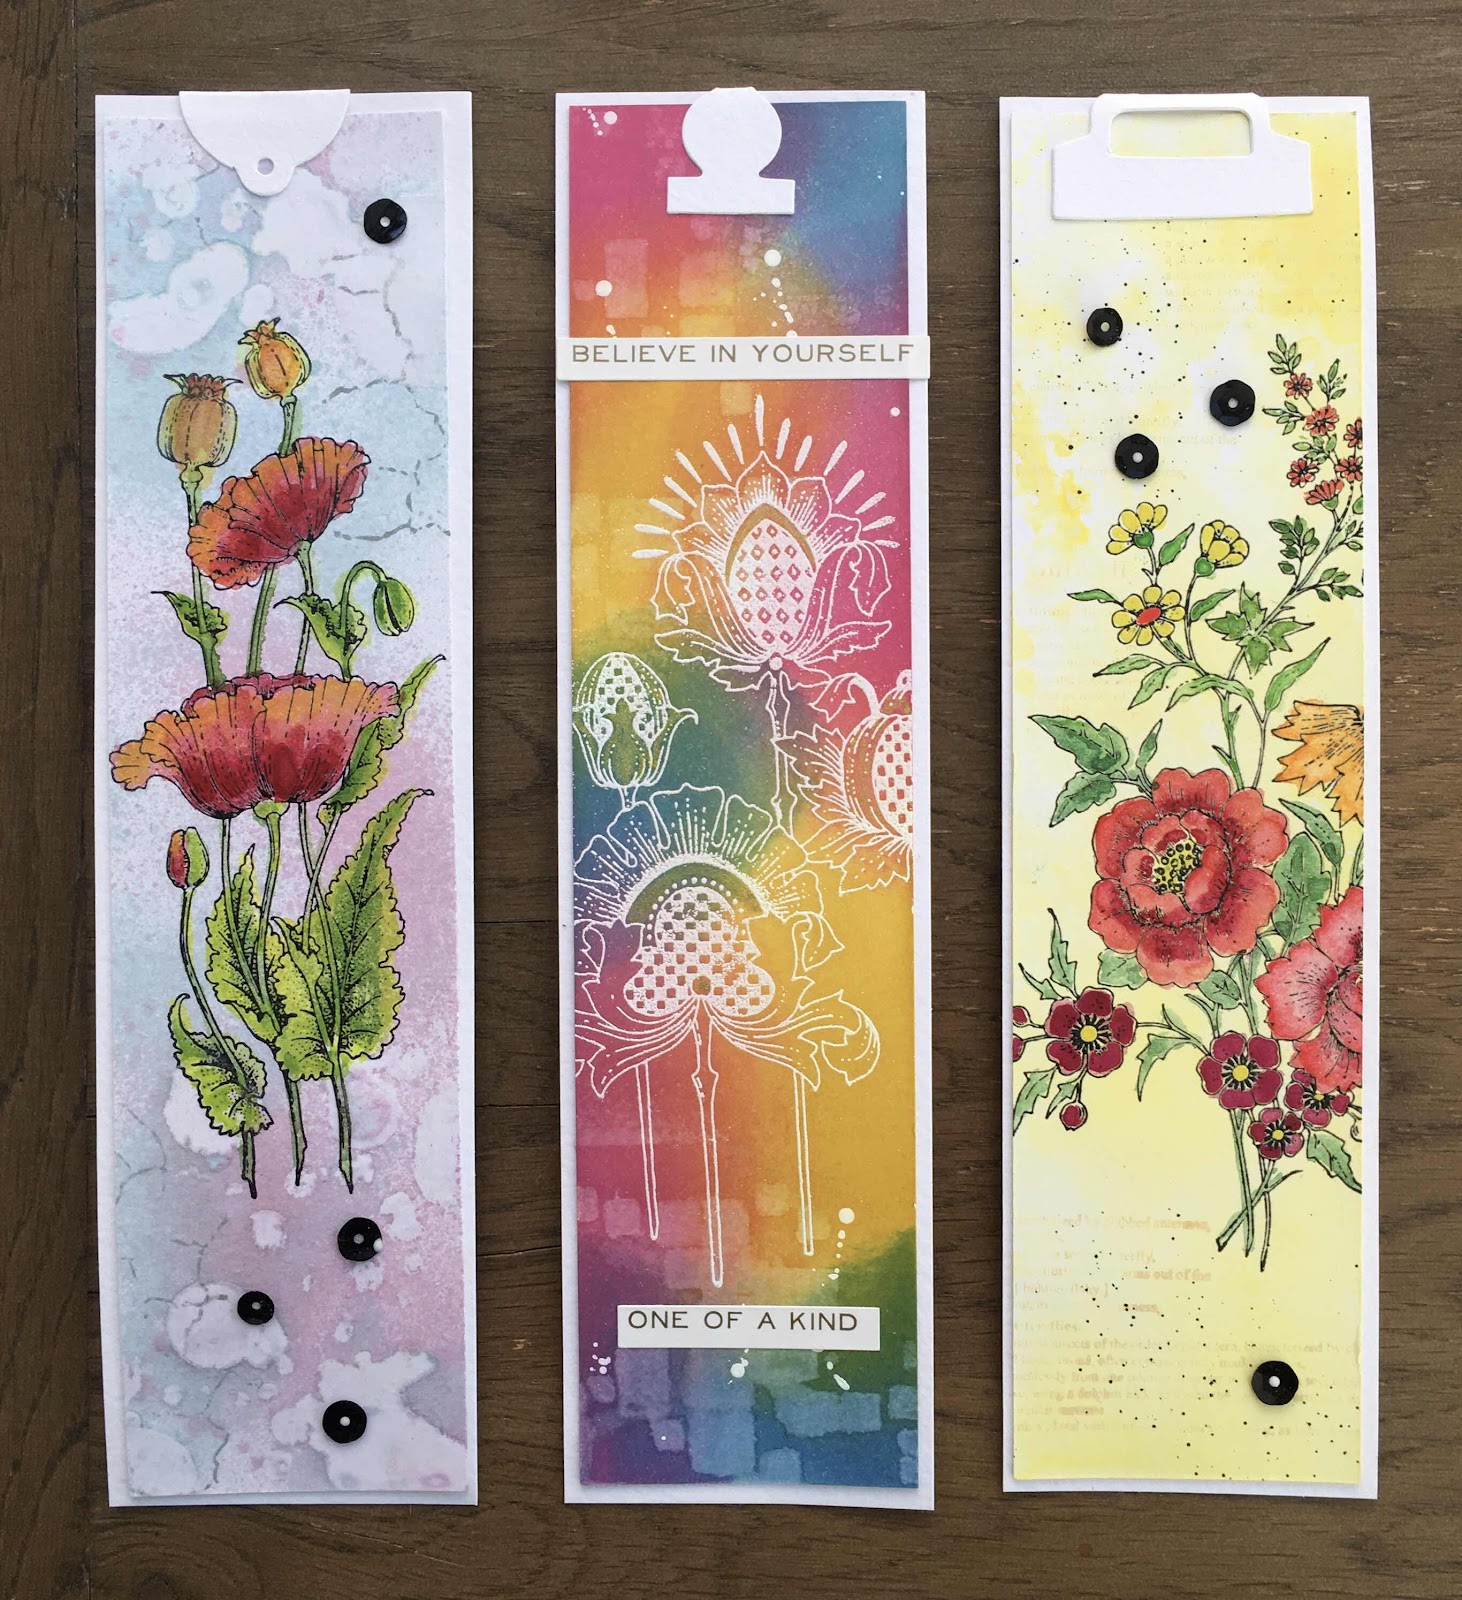
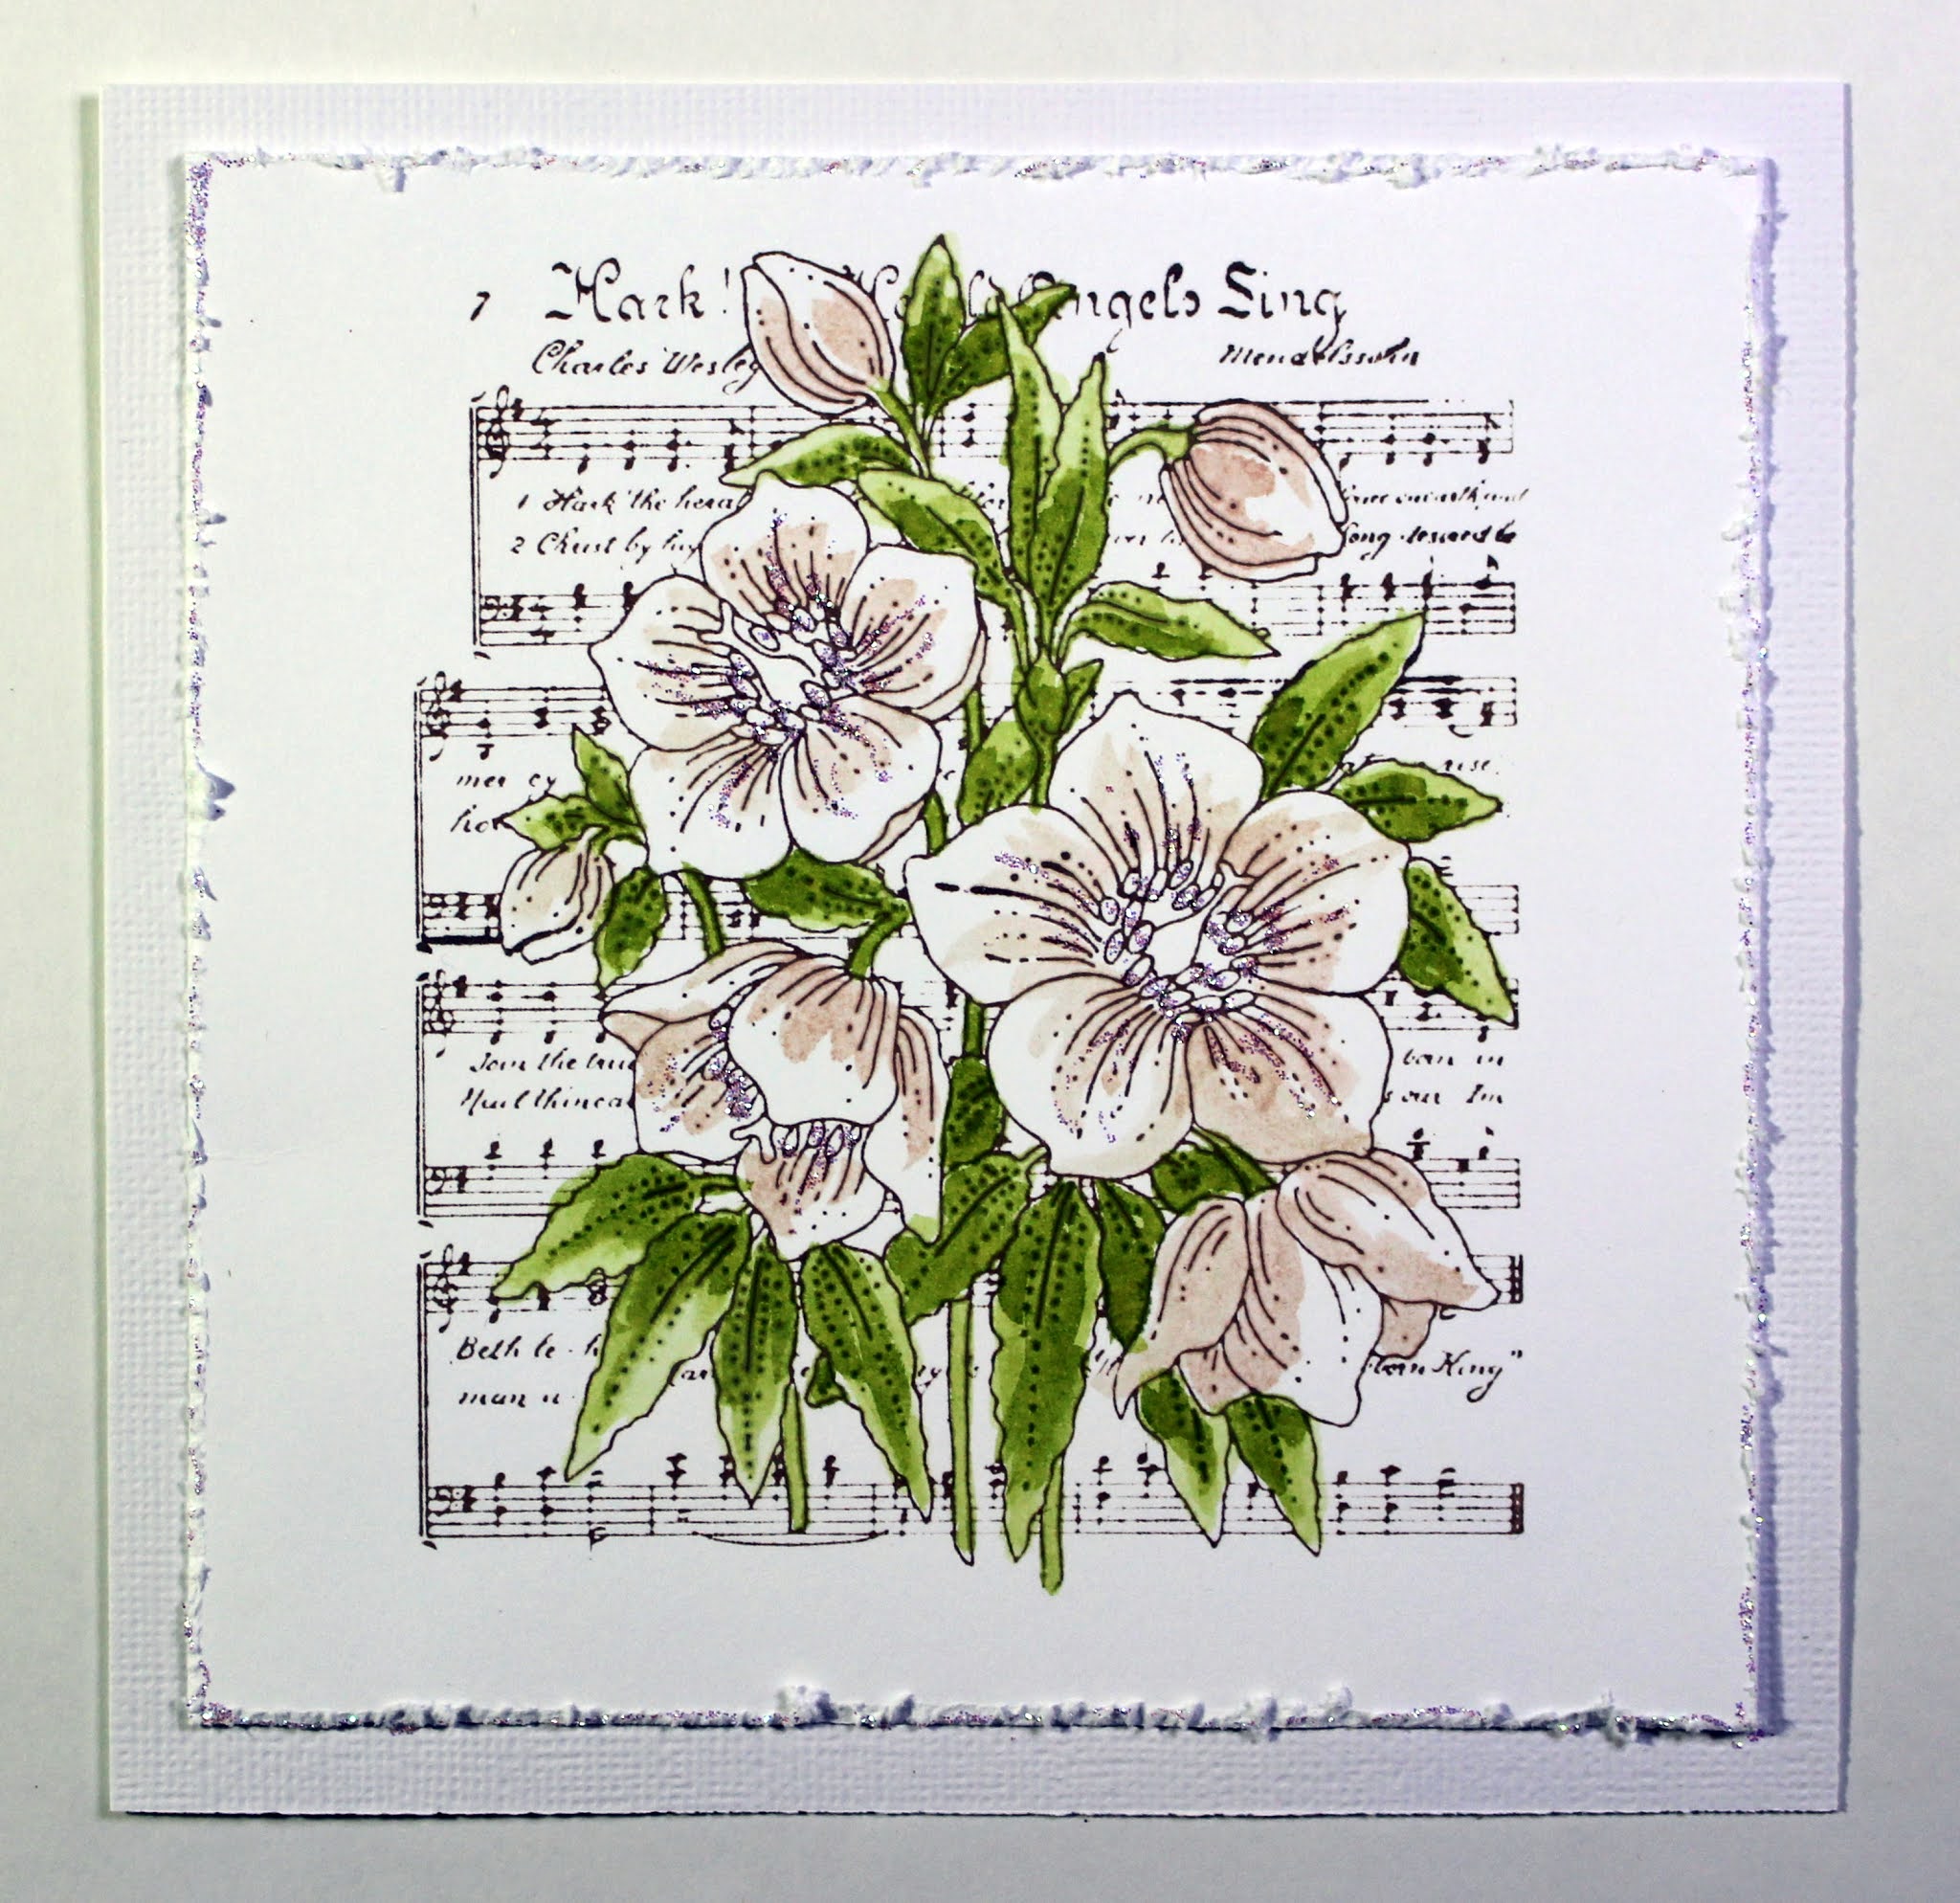
I am sharing a project with you today, part of a play session that I had using a few favourite stamps.

Stay safe, and thanks for stopping by,

Judith xx

Wednesday 30 December 2020

My favourite makes of 2020 part 3 by Zoe

Good morning Lovelies, I hope you all had a lovely Christmas, stayed safe and well.

So back again with my last post of the year. 

I’m just featuring some favourites of the year as I was unable to contribute to last months Hochanda show.

I’d like to take the opportunity and wish you all a very Happy and Healthy 2021 and let’s hope it’ll be a better one than this year.


Thank you so much for the support.

Have a wonderful day xx Zoe xx

Tuesday 29 December 2020

Quirky and Cute! By Rachel

 Hello there - Rachel here with todays inspiration - using the  fabulous and fun Acorn and Heath Robinson house stamps.

Firstly the Acorn house. I stamped the image directly to the card and then added distress ink around the outside before flicking with water, Next I used watercolour pencils to colour the image.


For the Heath Robinson House my process was identical - love the details in this stamp - there are plenty of friends I know I can make a card for using this stamp!


I trust you have had a good Festive season and I look forward to catching up with you in the New Year!
Big hugs
Rachel x


Monday 28 December 2020

Fabulooous darling by Brenda


It's more Roses from me this morning, this time shades of yellow using Floral Perfumery onto a piece of linen which I brayered with Distress Inks and added some stencilling around the edges. The leaves are from the same stamp set and a die cut sentiment.

A linen background again created much the same as above but with some stamping using a grid stamp from Small Graph. The buildings are Acorn House stamped twice, to me they have a rather Russian influence to them and the towers are coloured with watered down gold acrylic. A die cut frame with the Butterflies from Butterfly Perfumery stamped and the tops cut out before die cutting so they create the base of the frame.

Saturday 26 December 2020

mixup

 Good morning everyone, I hope that you had as good a Christmas as possible this year, and that you haven't suffered from the heavy rains and strong winds - the weather definitely doesn't know this is supposed to be the season of goodwill!

edited - apologies, we had electrical problems thoday, and I forgot tto check this had loaded , hopefully all now fixed  Veronica

I am sharing something different first today, a small wooden bowl I decorated using the special set of stamps for the craftalong on Hochanda that eventually ws broadcast in August. I loved the seedheads, and stamped them using black versafine ink and clear embossing powder. The heads were coloured with alcohol marker pens.

My next all feature brusho powders, so my apologies if you can't stand them.... this uses a different seedhead, from glorious rubber and a gelli plate background. Green dye ink brayered onto the gelli plate, and diluted brusho in red, blue and yellow splashed on randomly using a fan brush before pulling the image.  Tjhe seedheads were stamped in black versafine and clear embossed, then coloured with marker pens - the background was pale enough that the marker pens covered up any creeping colour. It's a fascinating technique for backgrounds, but totally uncontrollable and great messy fun!
This one is vey simple, just grey powder and a fair amount of water to give a misty effect, and the dreamcatcher stmaped in black and clear embossed.

Another simple one, this time with black powder, then stamped in black and clear embossed - the lily was coloured with watercolour paints, and the leaf painted with green brusho 

My last is of a hanging using the lovely magnolia stamp from happy flowers day and whiteboard heart shapes. I used both black and grey brushos here and the spray starch and cling fim technique -black brusho on the hearts and grey on a piece of white card. The magnolia was stamped on the grey piece in black and clear embossed, then fussy cut out and glued onto the hearts. The two smaller hearts came out looking rather more blue than the large one


T

Friday 25 December 2020

A look in the Mirror by Lesley

It's Christmas Day, the 25th of December 2020, but for most of us it is not the Christmas we are either used to or were planning on. Normally I turn up today with a blog post about how great the year has been and our plans for the next one etc, etc. But this has not been a normal year and we are not living in normal circumstances.

It has been tough for everyone, and really very tough for those of us who have not been able to see families, for businesses, for our mental health and for our general wellbeing. Getting through each day, never mind each week or month, has been a constant battle. There have been many life lines thrown out there from individuals and groups who have tried to support others. Social media has paid a big part in keeping us connected and I suspect a lot of us have learned new techie skills we didn't think we could. We have cried and laughed, baked, crafted, learned new skills, made new virtual friends but most of all we have dug deep to keep going.

And we have done it together, with the help of so many people including many of my crafty colleagues and friends - Di Oliver, Jean Hardy, Pete Simpson, Natalie Ballard, Louise Withers, Jo Rice, John Lockwood to name but a very few. These people have given their time, energy and inspiration to hold us up, they have breathed light into some very dark days to try to stop the loneliness from stealing in - even if only for a few hours.  And we have been supported by you - you have kept us going, you have shown your kindness and care to us too and for that we will be forever grateful. 

So on this not so normal day whilst we salute our NHS, all our key workers and all the volunteers up an down the country, please take a look in the mirror and be grateful to yourself. You have been amazing and you will continue to be so because as individuals we can achieve much, but as a united group we can achieve anything!

From Chocolate Baroque may we wish you a safe and peaceful Christmas xx


Thursday 24 December 2020

Hello and Happy Christmas Eve. 
I hope you are all keeping well in these strange times. 

I am sharing a couple more of my cards. 

First I took a piece of card and blended Distress Ink over a Holly stencil. I then stamped the plain bauble from the Shaded Baubles stamp set and embossed in gold. I added a sentiment from Christmas Cheer. I then added some die cut leaves and a silk foam flower, and mat and layered in gold and green.


My second card uses the shaded baubles too. This time I stamped the Snowflake Bauble onto some pattern paper and embossed  it. I then masked it and stamped it again, just below the first. With both baubles stamped, embossed and masked I did the third Bauble, this time the plain one as a contrast. I added a sentiment from Christmas Garden stamp set. 


Thank you for looking.

I hope you have a lovely Christmas 

Sandra xx

Wednesday 23 December 2020

More Stamping Delights (by Anne)


Good morning. This is the last of my guest posts for Chocolate Baroque this month. I had planned a completely different set of projects but just had designer block! Horrible when that happens, especially when working to a deadline. This happens to us all at times, particularly this year with all the added stresses.

After several days of wasted effort I just stopped working on my original plan, went away from my desk and tried to clear my head. I then went back and decided to just ‘go for it’ – no plan, no nothing. I just picked up stamps and got started. Finally ideas started to flow – phew. I find that this usually works for me, although it is not always easy to do – ha ha.

I hope that you enjoy my offerings. Everyone take care and enjoy Christmas as best you can. Spring will soon be here and I am hopeful for far better times to come soon. Big hugs Anne xxx.

Blue and White Mandala

This one is a quick and easy make using the lovely mandala style stamp.

Materials Used:

  • 15cm square white card blank, decorative die cut circle in blue card and scrap white stamping card
  • Palm Fan Silhouette stamp (Chocolate Baroque)
  • Versamark Inkpad
  • Dark blue embossing powder (WOW Earthtone Blueberry)
  • White pen

How it was done

  1. Faux stitching was added around the die cut circle to frame it. It was glued to the card front with 3D foam for added depth.
  2. The Mandala was stamped and embossed with blue powder, cut out and glued to the card front with 3D foam.

Dazzling Butterfly

Chocolate Baroque have so many wonderful butterfly stamps – love this one.

Materials used

How it was done

  1. A mix of the Distress Inks were used to blend the outer edges of the card blank (this mix closely matched my blue die cut circle).
  2. The blue card topper was stamped with Versamark and embossed with white powder.
  3. The butterfly was stamped with Memento, coloured with alcohol pens. It was then heat embossed with a layer of clear sparkly powder and cut out.
  4. Everything was stuck down and the card was finally finished with glitter glue and PVA pearls.

Hydrangea Card

When pushed for time I will often use some ready printed papers in the background. They can also help with inspiration at times too.

Materials used

How it was done

  1. The background paper was trimmed and edged with black marker. The base texture was stamped with black Versafine.
  2. The main image was stamped with blue Versafine, the card trimmed to approx. 9 X 13cm and edged with black marker. The floral section was stamped again with black Versafine. The stem was extended by drawing with black pen and the image cut out.
  3. The topper was then spritzed with water and Brusho powder dropped onto the wet card. When dry the monochrome Hydrangea was glued on top, curling the edges up slightly for dimension.

Floral Thank You Card

This one was a super quick make. Ideal if you have a last minute card to do.

Materials used

How it was done

  1. The watercolour card was spritzed with water and stamped using a mix of the Distress Inks. These bled out giving a lovely watercolour effect.
  2. When dry the image was overstamped with Versafine. Versafine was also used to stamp the border and sentiment.

Dreamy Elephant Card

I love the Indian themed stamps from Chocolate Baroque – definitely amongst my faves. To save a bit of time I again used a pre-printed background paper.

Materials used

How it was done

  1. The sentiment and base texture was stamped and embossed with copper powder.
  2. The flowers were stamped with Versafine. The background was then edged and embossed using the embossing pen and copper powder.
  3. The elephant was stamped onto white card with Versamark and embossed with gold powder. The image was then coloured with pencils and pens and cut out. The elephant was lightly shaped and glued down with 3D glue gel for dimension.


Tuesday 22 December 2020

My favourite makes from 2020 part 2 by Zoe

Good morning Lovelies and welcome to my second post this month. And it’s actually my birthday too, I hate having my birthday right at Christmas.

I am featuring my favourite makes of this year this month as I was unable to contribute to last months Hochanda show.

I went a bit Bookmark crazy this year, the second picture is actually a phone case insert. I had so much fun creating these. I hope you like them too.


Thank you so much for spending your time visiting today.
Hope you have a wonderful day xx Zoe xx

Monday 21 December 2020

Damask Reindeer (by Rachel)

 Hello there,

Rachel here today with a quick card I made for my mum for Christmas. I used stamps from the beautiful damask reindeer set and stamped them onto a piece of background paper I had. Such beautiful paper but I thought the stamps really went with it ....


So to the scene I added the deer and snowflakes, to which I added white pen - then I added I stamped the words in versamark and set in white embossing powder and then added them. I also added a little frantage around the edges. 
Wishing you all a very Merry Christmas and looking forward to sharing designs with you again next month.
Big hugs
Rachel x

Saturday 19 December 2020

You light up my World by Brenda


Hello all, today's first card uses the lovely Floral Perfumery and Butterfly Perfumery stamped onto an Oxide background and lightly coloured in with the same colour Distress Markers. I added some random stamping in the background using worker stamps from various sets, a sentiment from Lupin Blueprint and the word Love built up with several die cut layers.


Here is another one, this time using Floral Grung and there's a YouTube video of how I made it, a really quick one with a Gelli Plate background.


And a very simple shaker card, a die cut base, one of the circles from Shaded Baubles stamped with Versafine Clair and the Tomte Gnomes stamped in the same colours on the inside, sequins and glass beads for the shaker element.


This is my last post before Christmas so I would like to wish everyone a peaceful and joyous festive season, stay safe and well and let's hope 2021 is a better year for us all.

Friday 18 December 2020

Bright cards by Magda - Gothic Fragments, On the Tiles, Punky Flowers, Sketchy Doodle Landscape, Scrumptious Succulents,Blossom and Grow, Amazing Mackintosh Words

 Hello everyone

I want to end this December post with 3 bright flower cards as a good wish for a colorful coming year.

For each card I used white cartdstock for the mats and the decoupage in addition to the stamps of Chocolate Baroque.

Grow Positive :  Distress Ink Pad  blue, red violet and yellow shades, Archival Black Jet, Gothic     Fragments, Punky Flowers and  Blossom and Grow Stamps


Friends are only a thoughts away :  Distress Ink Pad  green and blue shades, stencils, Archival Black Jet, Scrumptious Succulents  and Amazing Mackintosh Words Stamps


Floral Notes :   Brusho wash,  Distress Ink Pad pink, violet and green shades, On the Tiles, Punky Flowers  and Floral notes Stamps


Thanks for reading and stay safe, hugs

Magda

Wednesday 16 December 2020

Gerbera Delights (by Anne)

 Hi everyone. I am delighted to be a guest designer for you this month. For my second set of projects I have had a play with the lovely new Gerbera and Friends stamps from Annabel. Love this set. Hope that these give you a few more ideas and fun playing with some of your stash.

I have also finally finished the last of my Christmas card batch making - phew. Why do I always leave them until the last minute! Ha ha.

Lots of hugs, Anne.

GERBERA AND FRIENDS

Materials List

  • Stamp sets (Chocolate Baroque): Gerbera and Friends (main images), Words to Dazzle & Sparkle (sentiments), Glorious (leaf stamp)
  • Card blanks and smooth card (sky blue, white or black)
  • Inkpads: Stazon (Jet Black), Versafine (Onyx Black), Distress Ink (Gathered Twigs), Versamark
  • Versamark embossing pen
  • Embossing powders: detail white and metallic gold
  • Mica powders: yellow gold, pink and purple
  • Water based inks: Turquoise, yellow, green, red and magenta (I used Spectrum Noir Aquatints)
  • Acrylic paint metallic pink (Starlight)
  • Acrylic mat medium (clear drying)
  • Colouring pencils (pink, green, yellow)
  • Alcohol in pens (pink, purple, yellow)
  • PVA pearls and Glossy Accents
  • Acetate and translucent shrink plastic
  • Decorative circle dies (Tonic)

Make a Wish Cards

I created a couple of cards using the lovely dandelion clocks. I remember as a child how we would blow the seeds from the flower heads whilst making a wish. Happy memories.

My card blank measured approx. 13 X 17.5cm. I trimmed my stamping card to 12 X 16.5cm and rounded off the corners.

I painted on the water based inks, blending them wet in wet (working from the top down). When dry I flicked with water and lifted out colour with tissue to add texture. I also applied a circle of water and lifted it out to create the moon.

The dandelions, sentiment and foreground texture were stamped with Versafine. I lifted out some of the colour from the seed head bases).

I also used Distress Ink to stamp more texture at the base and to blend around the card edges. Black alcohol ink pen was used to edge and frame the card before mounting.


My next card was more clean and simple. The card blank was 15cm square and the blue background mat was trimmed to 14.5cm.

I used dies to cut the decorative circle (approx. 14cm diameter) and circular centre (approx. 9cm). A white paper doily would also look good if you don’t have decorative dies.

The images were stamped with Versamark and embossed with white powder. I mounted with 3D foam for added dimension. Finally finished with PVA pearls.

Bright Gerbera Cards

I adore this huge Gerbera stamp and wanted to make something really bright and cheery.


My card blank was 15cm square. I trimmed black card to 14.5cm to create the background mount, and white stamping card to 13.5cm.

The card was painted with the yellow, red and magenta inks, blending them outward from the centre. Versafine was used to stamp the images.

Oh that Gerbera!

Again I used a 15cm square card blank and trimmed a black mat to 14.5cm. The background texture was stamped with Versamark and yellow/gold mica brushed over with a soft brush. Excess mica was removed with a microfiber cloth. Versamark was then applied around the edges which were embossed with metallic gold powder.

The sentiment and leaves were stamped and embossed onto black card. An embossing pen was used to edge the sentiment plate.

The Gerbera was stamped onto acetate and shrink plastic using Stazon which were then cut out.

The back of the shrink plastic was coloured with alcohol pens before shrinking with a heat gun. Coloured pencil was used to enhance the colour on the front before covering with Glossy Accents.

The back of the acetate image was coloured with mica powders mixed with mat medium. When dry the back was then painted with the metallic acrylic.

The photo really doesn’t do justice to the shine and mica sparkle on the Gerbera. Love this one.


LAST OF MY CHRISTMAS MAKES

Materials List

How it was done (including my boo boo)

I love these collage panel style stamps for creating quick and easy batch makes – one stamp does all the work for you. I have stamped and coloured these but they would look equally good without colouring or perhaps stamped and embossed with a pretty metallic powder. I like to use a stamping platform for batch making as it makes it easy to line up and repeat stamp in a production line.

Stamped with Majestic Blue Versafine and coloured with Distress Ink (Chipped Sapphire).

I just had to make a blue and white set. Those of you that know me will know that I love making these. However, I have been a little out of practice with my stamping and colouring this year and my first attempt was a flop – ha ha.  I have shown my blooper as I thought it may be helpful if you have struggled with colouring.

This was my first attempt – eeek! Initially I tried to colour with watercolour pen and attempted blending out with a damp brush. It wouldn’t work very well and my watercolour just sucked straight into the card. This really shows the importance of choosing the correct type of card for the techniques that you wish to use. For watercolouring you need a card that will hold the pigment without it bleeding out too much, but then release it again when water is applied to allow blending and shading. This brand of card used to work well but recent batches really have not worked as well so I suspect they have changed the ‘formulation’.

As my watercolour pens were not behaving well with my card I tried switching to Distress Ink. Applying to my mat, diluting out and picking up with a damp brush. Distress Inks are specifically formulated to stay wet longer and to blend more easily. It worked out much better on this card. The two flowers on the left were my quick trial with Chipped Sapphire Distress Ink.

Another mistake I made was to go in far too heavily with the colour. I was aiming for a softer colouring more suitable for the delicate flower petals. This is achieved by using a more diluted colour and gradually building up the layers and shading.

This shows the first stage of Distress Ink colouring using very dilute ink.

Deeper colour was then added to give shading. Working more heavily on the leaves and stems helped the delicate flowers to stand out more.

The edges of the card were distressed (using the edge of my scissors) to give a soft textured border before mounting onto the card blank. Lastly sparkly glitter glue was added to the flower stamens and around the edges. Cannot have Christmas without at least a little bling.

My next set were also coloured with Distress Inks. I went quite dark on the leaves to enhance the delicate flowers.


I was pleased with the delicate vintage look.


Next I coloured with soft pastel coloured alcohol ink pens.


Again my first attempt at colouring this batch was not really what I wanted. I felt that the flowers were a bit too much, too Summery and had lost their delicacy. Despite this I mounted this one as good enough.


I was happier with this colouring for the wintery theme. Coloured pencil details (outlines, leaf & petal veins) were added in to enhance the soft colouring.

Glad to have finally finished my Christmas cards – now to get them all written up and posted.

I will be back again next week with some more stamping play x.