Pin It button on image hover
Showing posts with label Versafine. Show all posts

Tuesday, 29 June 2021

Time to Re - Visit

Time to Re - Visit

Today we re - visit these lovely houses.


It was more than a pleasure to re-visit these lovely stamps, they really are very versatile.

I have used different mediums to colour but in the main they have been stamped with Versafine inkpads in either grey or black. 
Backgrounds have been coloured using Distress Inkpads smooshed onto a glass mat and applied with a paintbrush.

To extend the Bridge House I used a mask using the Masking Tissue.
This was also used in the making of the Turret House which also used a sentiment from Life Is So Much Better.

Thank you for looking in today

Love Doreen 


Sunday, 20 June 2021

Orchard Designs

 Orchard  Designs


Using a blank wood plaque and Versafine Clair Acorn and the taller of the trees from the Orchard Design a Tree set, which I slightly extended. A dye inkpad was used to colour the sky applied with a stencil brush. The heads of the flowers were also coloured from a dye inkpad and paintbrush. The foliage on the tree was stamped with a Plum Archival Inkpad. Both the stems of the flowers and grassy area used a green inkpad and paintbrush. The white gel pen daisies were left to dry before applying 2 coats of Deco Art  Decoupage medium to seal.


This card needs a little pre preparation I have used something called
 ' Goosebumps' Which is basically a clear medium that remains raised when dry this was flicked onto the card not sprayed. Anything you have in your stash that does the same will do equally as well.

 Once dry you can carry on as normal.
Using a mix of Distress Inkpads, for the sky I have used ; 
Wild Honey, Rusty Hinge and Crackling Campfire, which have been applied to the card using a soft brush randomly building up the colour to give the illusion of a sunset.

The trees and hills have been stamped and using a torn piece of paper and soft brush to build the colour for the hills from the really dark working the colour from the brush without adding more colour to build the distant hills , if more colour is required on brush use the brush very lightly or using a scrap of card apply the dark ink to be used at a later date. The trees and hills used a Versafine Clair Inkpad 'Pinecone', stamping the foliage until no ink remains on the stamp which will add depth. Buff the colour from your raised dots and although some will stay most will come off and mount onto  Craft Card for contrast. 
 

This card is so very simple, again using a remnant of the above card with the raised medium. I used a circle of  Masking Tissue. Then using Distress Inkpads in colours Shaded Lilac, Faded Jeans and Hickory Smoke using circular motions fading the colour out to the lovely soft grey. The Hills were coloured using Black Soot with a make up sponge and a torn piece of copy paper. Then the tree was stamped with Versafine Clair Nocturne.

So there concludes three relatively quick and simple cards from the  Orchard Dress a Tree set.

Thank you for looking in today

Love Doreen


Monday, 11 November 2019

Vintage Ephemera by Debbie

Gosh don't the weeks just whiz by, can't believe Christmas is almost upon us again. It's my turn on the blog today and a chance to share my samples from the October show with all the lovely vintage themed stamps.

My first thought when I saw the plethora of labels, tickets and old postcards was to make a mini scrapbook so I began by making a "masterboard" in 2 complimenting colours. I took most of the small stamps from Baroque Ephemera1 and Baroque Ephemera 2 and placed them randomly on a large acrylic block. I used Distress Inks Wild Honey, Tea Dye, Weathered Wood, Frayed Burlap and Hickory Smoke to sponge over 2 A4 sheets of card. I then over stamped with the stamps on my block using Versafine Vintage Sepia to form a great background.


I die cut the 2 sheets then and stuck the 2 colourways back to back to form my mini scrapbook. I used old family photos to compliment the general look and added lace, paper flowers, buttons, pearls, washi tape etc before putting all together with a book ring.


 Also featured in the October shows on Hochanda  was Movie Strip and I was really pleased how well this went with the Ephemera stamps.
For the next sample I simply white embossed the flower onto white card and added some black Brushos before spraying with water and letting the Brushos do their thing. I just love the fact that you never know what you're going to end up with! I stamped a few of the vintage stamps randomly using Versafine Onyx Black.


 I then took a 7 x 7  ivory card blank and stamped with  Versafine Vintage Sepia before layering the image onto orange card and attaching to the card blank.

 A closer look


For my final sample for this time I've used another lovely floral stamp Floral Grunge.
I took a white A4 card blank and masked the top and bottom with masking tape leaving a band in the centre approx. 3" wide. I then sponged Distress inks Wild honey, Peeled Paint and Rusty Hinge over this band and when the inks were dry I carefully removed the tape.
I used Floral Grunge to stamp  in 3 areas partly over the inked area using Versafine Onyx Black. I like the clean simplicity of this design.

That's all for this time but I'll be back later in the month with more samples. 
Bye for now Debbie

Sunday, 4 October 2015

Ruby Wedding Card using the new Exquisite Edges Stamp Set (by Anne)

I love the new Exquisite Edges stamp set. It is so versatile and useable on a multitude of projects.

I have used one of the lovely borders to create an Art Deco style Ruby Wedding Card for my friend’s anniversary. They don’t do computers so I am sure that they won’t mind my sharing.


Materials:

  • Exquisite Edges stamp set
  • A5 white card blank, pearlescent white card for stamping
  • Versafine Inkpad (Onyx Black)
  • Clear embossing powder
  • Alcohol ink pens (black and red)
  • Adhesive, sticky foam pads and 3D glue gel
  • Dies for decorative mat and heart, and personalised sentiment printed from computer

 How it was made:

  1. Stamped the border with black ink three times onto pearlescent card, and embossed with clear powder. Coloured the image with red alcohol pen.
  2. Cut out the various elements, enhanced the edges with black pen, layered and glued to the card front.

I printed a personalised sentiment from my computer but you could stamp any message to suit your own project.

I hope that you like it my first project with the new edges set, Anne xxx.

Monday, 23 February 2015

A Black and White Classic


Sketchy Doodle Flowers
This card was so quick to make,the stamp is just one of the images on this sheet and you don't need anything else with it. I did consider adding some colour but decided against it.
I have simply clear embossed this with black Versafine ink and then matted onto black and white card.xxx


Monday, 5 January 2015

Purple and Pink Heart by Doreen

Hello to you all, I am sharing a sample made from the new stamps 
that have just been released for January 

"Punky Hearts"

I used one of my Gelli Plate papers for this card and just overstamped with the hearts.My main image has been clear embossed with black Versafine ink and then coloured with distress inks Seedless Preserves and Spun Sugar.


Tuesday, 24 June 2014

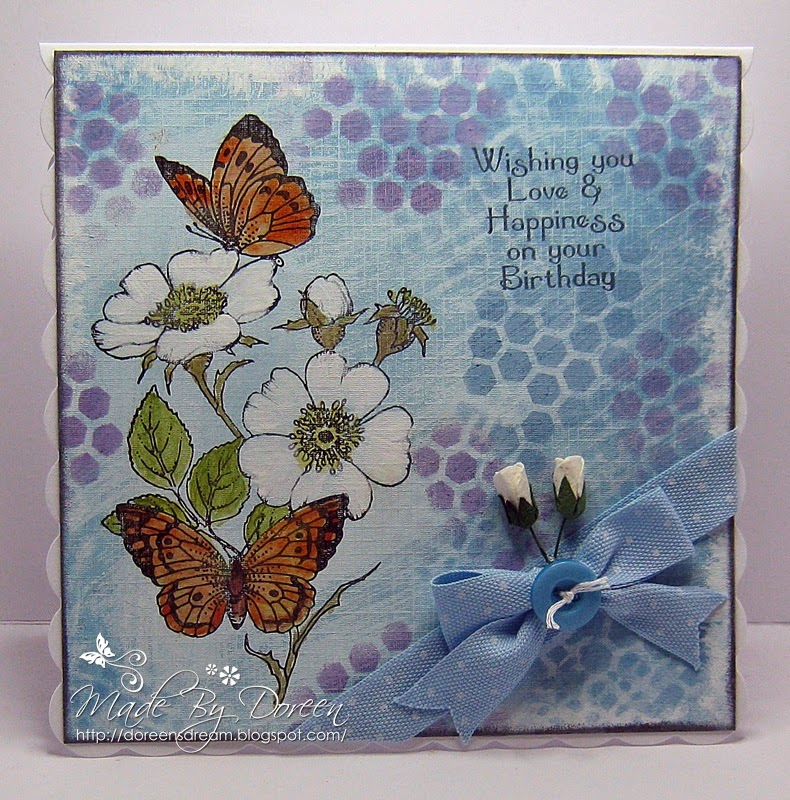
Wishing you Love by Doreen

Hello to you all. Today I am sharing a card made using one of the beautiful new stamps from 
 "Briar Rose Butterfly" stamp sheet. 


I first painted my card with Blue and white Acrylic paint,then inked up my image with Black Versafine Ink,  using Acrylic paints I proceeded to colour it. After this I used some Shaded Lilac Distress ink through a stencil and edged with Black Soot Distress ink. 
The sentiment is from the Birthday Words stamp sheet again inked up with Black Versafine.

Saturday, 14 June 2014

A Magical Scene by Doreen

Hello to you all, I am sharing a card made with one of the beautiful Summer Fairies I have used the June Fairy which is a gorgeous silhouette. 
I have made the background by masking off the moon and mountains and sponging with distress inks Shaded Lilac and Spun Sugar.....I have then stamped my images with black Versafine  onto the background.The flowers have been coloured with Shaded Lilac,Dusty Concord and Mowed Lawn distress inks...I finished off with some glitter and the sentiment which is from the "Birthday Words" stamp sheet.xxx 
Enjoy you weekend whatever you are up to.

Monday, 12 May 2014

Green Elegance by Doreen

Hello.I am back sharing another Fabulous Flapper  from the May releases

I have stamped the image onto white card with Black Versafine and coloured her with distress inks.For the backing I have cut a square of green card and cut an oval aperture then using a stencil run it through the Big shot,placed the image behind and framed her.

The urn is also on the stamp sheet and I have stamped and clear embossed this before fussy cutting and distressing it. It is finished off with with feathers and gems.

Friday, 2 May 2014

Flapper Girl by Doreen

Hello to you all, today I am sharing a card made with one of the gorgeous new releases.

I have stamped this Fabulous Flapper Girl with Onyx Black Versafine onto white card and then coloured in with distress inks and matted onto red card. 
For my background I have used Versamark through an embossing folder and sprinkled with gold embossing powder and heat embossed. I matted this onto red and gold card.
 The sentiment from the Birthday Words stamp sheet has been Gold embossed too.

Saturday, 19 April 2014

On Top of the World by Doreen

Hello to you all, Doreen here, I am sharing a card I have made using the Patchwork Landscape stamp sheet 


I first stamped my image using black Versafine ink  and after colouring with watercolour pencils,I then masked off the image and  made my background  by sponging with Faded Jeans and Festive Berries distress inks. The backing card has been stamped all over with one of the smaller flower stamps.using Faded Jeans Distress ink. and then matted this onto a dark blue card.