Pin It button on image hover
Showing posts with label Poppy Edges. Show all posts

Sunday, 1 September 2019

My House (by Judith)

Hello everyone, I have a few projects to share with you today featuring a very special stamp showcased on last month's TV shows on Hochanda, but first of all I would like to talk to you a little bit about the background of the stamp.

You are all probably very familiar with the very talented Kim Moody whose stamps are manufactured by Chocolate Baroque. His quirky stamps feature architectural images, and seaside scenes which are such a delight to work with. Kim also does commission drawings of houses and other buildings, adding his particular eye for detail. I decided to ask Kim some time ago to draw a picture of my own house Poppy Cottage, and we discussed adding lots of features that I love about my house; the dragonfly door knocker, the wrought iron butterflies on the balcony, the dovecote in the garden, and of course, he needed to include Poppy and Bella, my two cats. Poppy is a bit plump, and Bella is rather skinny, so you can tell them apart! I sent a few photographs, and Kim came up trumps with a delightful drawing, beautifully framed for me.


A few months on, and I asked Lesley if it would be possible to have the stamp made, as I would really love to create Christmas cards using 'Poppy Cottage' as a personal touch. We hoped that you would love the image as much as we did, and decided to try it out as a small batch on one of the TV shows. I was so touched that you really liked it!

I created a couple of samples for the show, the first one was created by stamping an image from the Poppy Edges stamp set a couple of times, then masking these images before stamping Poppy Cottage itself. I masked the house also, then added a Pan Pastel background.

I added foliage from the Silhouette Grasses stamp set before removing all of the masks. I coloured the images with pencils and added one of the sentiments which I stamped onto sections of card, and edged with a plum coloured ink. I chose the same coloured card to mat the project onto before adhering it to a large card blank.

My second project was a Christmas card, to show the versatility of this lovey stamp. You could use it at any time of the year really, by adding extra foliage, and varying the colours. I have chosen to stick to the true colours of my house for these samples, but you can let your imagination run riot.

I stamped the house once again, and masked the image. I used a snowflake from The Christmas Garden and white embossing over the top two thirds of the background. I covered the background with Distress Ink, and the embossing acted as a resist.I coloured the image with Koh-I-Noor paints, and added a bit of Stickles for some Christmas bling. The sentiment comes from the Let's Get Festive stamp set.

My final project was a heart stopping TV demo, and it could have gone horribly wrong on live TV, but fortunately, it all worked out well. I decided to create a little key ring or handbag charm using shrink plastic. I die cut a large tag, and stamped the image using Archival Ink. I coloured the image using alcohol markers and cut a hole at one end. I shrunk the plastic using a heat gun, turning it over regularly to ensure even heating, and flattened it with an acrylic block before it had time to cool.

I drew around the shape onto a piece of greyboard, and covered this with some scrapbook paper using Matte Medium. For the keyring, I stuck the shrink plastic to the greyboard shape with Matte Medium, but for the handbag charm, I let the shrink plastic swing freely.

Even shrunk down you can still see the details so clearly, and these little charms make a fabulous little gift. You could try this idea using the Tagtastic stamp and any of the tall houses that either Kim Moody or Sue Page have designed recently.

I will back later in the month with more ideas to share with you. I hope that you will watch Lesley on this month's TV shows on 3rd September, she has some amazing new stamps to share with you. Sadly I will not be there this month, but I will be back again in October.

Thanks for stopping by,

Judith xx

Tuesday, 18 July 2017

Flowers in Her Hair (by Judith)

Hello everyone, I have a colourful project to share with you today, featuring the Summer Fayre stamp that was part of the recent TV shows on Hochanda.

I have stamped the image onto a square topper, and then masked the image. I coloured the background with Distress Ink, and then loosely coloured the image with water based markers, sometimes using a water brush to dilute the colours.

I created a larger background using matching colours of  Distress Ink, and spritzed the background with water. Once the background was dry, I stamped an image from the Poppy Edges stamp set, to frame the central image, using Distress Ink. I added a large red bow before I assembled the card, choosing a toning olive green card to finish.

I hope you like her pink hair and green eyeshadow. She reminds me of a festival goer, with her bright accessories!

Thanks for stopping by, Judith xx


Tuesday, 26 July 2016

Quick and easy Summer Fair (by Miranda)


Hello there,

Here Miranda with another version of the Summer Fair lady. The first time I did a lot of coloring and I can imagine that it sometimes encourages people who does not want to spent so much time in coloring.
 So just plain black stamping this time and I've added some die cut flowers which give a splash of colour. I have use the Crealies flower die nr. 24 and you can find it here.

I have stamped the Summer Fair lady using Versafine black and added the Poppy edges which is a perfect match. 
The sentiment is from the ' Butterfly dreams sheet'.


So as you can see it's possible to create a quick and simple card with this lovely stamp too. Hope to have you inspired!

Thanks for visiting and hope to see you next time!


Monday, 1 February 2016

Some old favourites (by Judith)

Hello everyone, I am taking a look back at some of my favourite stamp sets during this blog post, and I daresay that those of you who know me will not be too surprised to see poppies featuring heavily in my designs!

For my first card, I have chosen to combine stamps from the Poppy Meadow and Flora and Fauna stamp sets. I have stamped these images, and after masking them off, created a sponged background using Distress Inks, and a stencil. I have added a sentiment from the Loving Sentiments stamp set.


My second card uses a stamp from the Poppy Edges stamp set, which I have stamped several times onto watercolour paper sprayed with coloured inks. I cut the images out, and stuck them onto another sprayed background, adding a smaller image from the Poppy Meadow stamp set. I used some black card to mat and layer the background, and then added a sentiment from the Mackintosh Sentiments stamp set.


Please pop back for more retrospective projects from my Team Mates over the coming days. Thanks for stopping by, Judith xx

Thursday, 22 January 2015

Birthday cards (by Maria)

Hello  everyone,

Aren't these stamps lovely for some sweet Birthday cards? I really think they are!
This card I made with a Tim Holtz technique.  First I took some smooth white paper, a mask and some  Antique Linen Distress Paint.  I let it dry, then I went over it with 3 different colours of Distress Stains, and again I let it dry. With Versafine Ink, I stamped  my flower border from the Poppy Edges stamp set and I stamped the flowers again on masking paper, cut them out and masked the flowers with the mask. Then I stamped the flowers from the new stamp set Fluttering Hearts behind the flower border. With my alcohol markers I coloured the flowers, but first I took out the colours from the flowers with some bleach. With my white gelly pen I gave the card some white accents, and on the border of the card I made a golden frame with Versamark and some golden embossing powder.


The second card is made with the same technique as the first one, I really hope you like my cards, and that you try out this technique it was really fun to do! Have another great crafting day, and enjoy!


Greetings,
Maria

Thursday, 8 January 2015

All of a flutter (posted by Claire)

Good morning and Happy New Year, today is my first post of 2015 with this month's new release stamps which are perfect for getting ahead with those Valentine projects. This card uses stamps from Fluttering Hearts with one of the borders from Poppy Edges which co-ordinates beautifully with the new stamps.


I began by stamping the floral edge stamp with Memento Tuxedo Black ink on a scrap of stamping card. I took a larger piece of card and stamped both the large and small bird/heart stamps, again with Memento Ink. I used Graph'It markers to colour the images before cutting out the floral edge.

I took a cloud template that I'd cut from some scrap card and used PanPastels to create a cloudy effect in the background. PanPastels are perfect for this as if you go over the image you can use a pencil eraser to remove the colour. I layered the floral edge over the little scene with 3d foam and used a layer of white and then pink card to mat the scene. Lastly I stamped the sentiment with black ink.

Thanks for visiting today
Claire xx

Monday, 27 October 2014

Stamping on acrylic blocks (posted by Claire)

Good morning, Claire here with some samples made by stamping on some acrylic blocks. Its always fun to find a new surface to stamp on and acrylic blocks are cheap and make lovely paper weights and home decor projects. There's a great range of sizes at Chocolate Baroque, you can find them here.

I had so much fun experimenting with different products and some worked better than others so I thought I'd share some of my projects which were made using the beautiful new stamps Poppy Edges


The first acrylic block was  made using the lovely seed heads stamp. I gave my acrylic block a good dusting with an antistatic bag and stamped the image with gilding glue. I left the glue to set for a few minutes before applying the gilding flakes and then painted with Twinklin H20 paints mixed with a little gloss gel medium. The gel medium helps the water based paints adhere to the acrylic . Here's a pic of the painted image. I then tried using gilding wax around the edge of the block, I wasn't sure if this would work but after leaving it to dry for a few hours it polished off beautifully and gives the acrylic block a lovely edge.


This acrylic block wasn't so successful. I stamped the image with Black stazon and very carefully coloured with Graph'It markers. It looks quite pretty against the white card but I decided I wanted to make the image stand out a bit more so I painted the back with gesso and got in a dreaful mess lol. Lesson learned, next time i'll leave it much longer to dry 


If you have a go at stamping on your acrylic blocks instead of with them, we'd love to see your projects. Thanks for visiting today
Claire xx


Friday, 24 October 2014

Thank You by Doreen

Hello to you all, I am sharing a sample made from the new stamps that have just been released for October


 This is one of the stamps from the Poppy Edges stamp sheet.
I started by inking up a piece of white card with Broken China Distress ink,then stamped and clear embossed the moths and Thank You sentiment. 
On another piece of card I stamped and clear embossed the image and coloured in with again with Broken China Distress inks. A very quick and simple card.xxx

Sunday, 19 October 2014

AUTUMN AND MUSHROOMS (by Maria)

The mushrooms on the stamp set Autumn Poppy are super, I really love them, so I made some samples here to show you how I have used them. I hope you like them!


The leaves that I used are all from the same stamping set,  this is really a set that  you can't miss, all the stamps on the set are so beautiful and useful I really adore them!

For the background  of the first two cards I've used the Indian Elephant stamp set! My background itself is made with an acrylic  block and Distress Inks. The moths I found on the Poppy edges stamp set.  I have used all the autumn colours I had in my collection (watercolours).  These were very easy cards, made with very beautiful stamps, and I think the result are quite good aren't they? I wish you a very good stamping time in Autumn and enjoy!

Greetings
Maria

Thursday, 16 October 2014

Poppy Edges - By Florence

Hi Everyone
 
Thank you to everyone for your lovely comments and kind words left on the posts.  We all love to hear from you.

Today I would like to share with you all two cards made using the beautiful new Poppy Edges Rubber Stamps.
 
These stamps are brilliant for making tags, cards, altered art projects, lovely boarders/embellishments for scrap-booking.  They also stamp brilliantly onto wood.

For my first card, I mixed the Poppy Edge stamp with one of the boarder stamps from the Elegant Edges set which was released a few months ago.


For the main focal piece I coated a piece of basic white card stock with White Gesso.
 
I stamped the purple flowers first, masked them with Masking Tissue and then stamped the poppies.
 
I then, using a piece of Cut'n'Dry, covered the surface, avoiding the flowers as much as possible, with Distress Ink. 

I dribbled some water, mainly around the flowers, onto the background to give it a mottled look. 
I placed a mask/stencil over the card and applied more of the Distress Ink.

I then cleaned up my stamped images by removing any unwanted ink.  By using Gesso for the base, it is easy to remove any unwanted ink from the stamped images using a clean damp paint brush and paper towel.
 
I stamped my little bees. They are adorable!! 

I colored the flowers and bees with felt pens and added highlights and shadows by moving around and removing the ink with a damp paint brush.

I gave everything a quick spray with a fixative, made up the card as seen and added a touch of Gel Medium to just the flowers.
 
 
For my second card I just used one of the flower boarders from the set and repeat stamped it using Masking Tissue.


 This was a really quick card to make.
 
I stamped the images using Archival Ink onto Coated Card Stock for my main piece.  
 
I colored the flowers roughly using some diluted Distress Ink and a damp paint brush and then fussy cut around the stamped piece.
 
I punched some holes in the top of the card and thread some ribbon through.

I made up the card as seen using pretty papers which I scuffed up the edges and added a little bit of bling to the center of each flower.

Thank you for looking.

Happy Stamping.
Florence x

Tuesday, 30 September 2014

Autumn Tones (posted by Judith)

Hello Folks, I have some cards to share today, using some of the lovely new stamps that have been recently launched on the website. I love this time of year, as we are moving into Autumn, and enjoy working with the rich warm colours that are so evocative of the foliage that you see around on the trees and in the hedgerows.

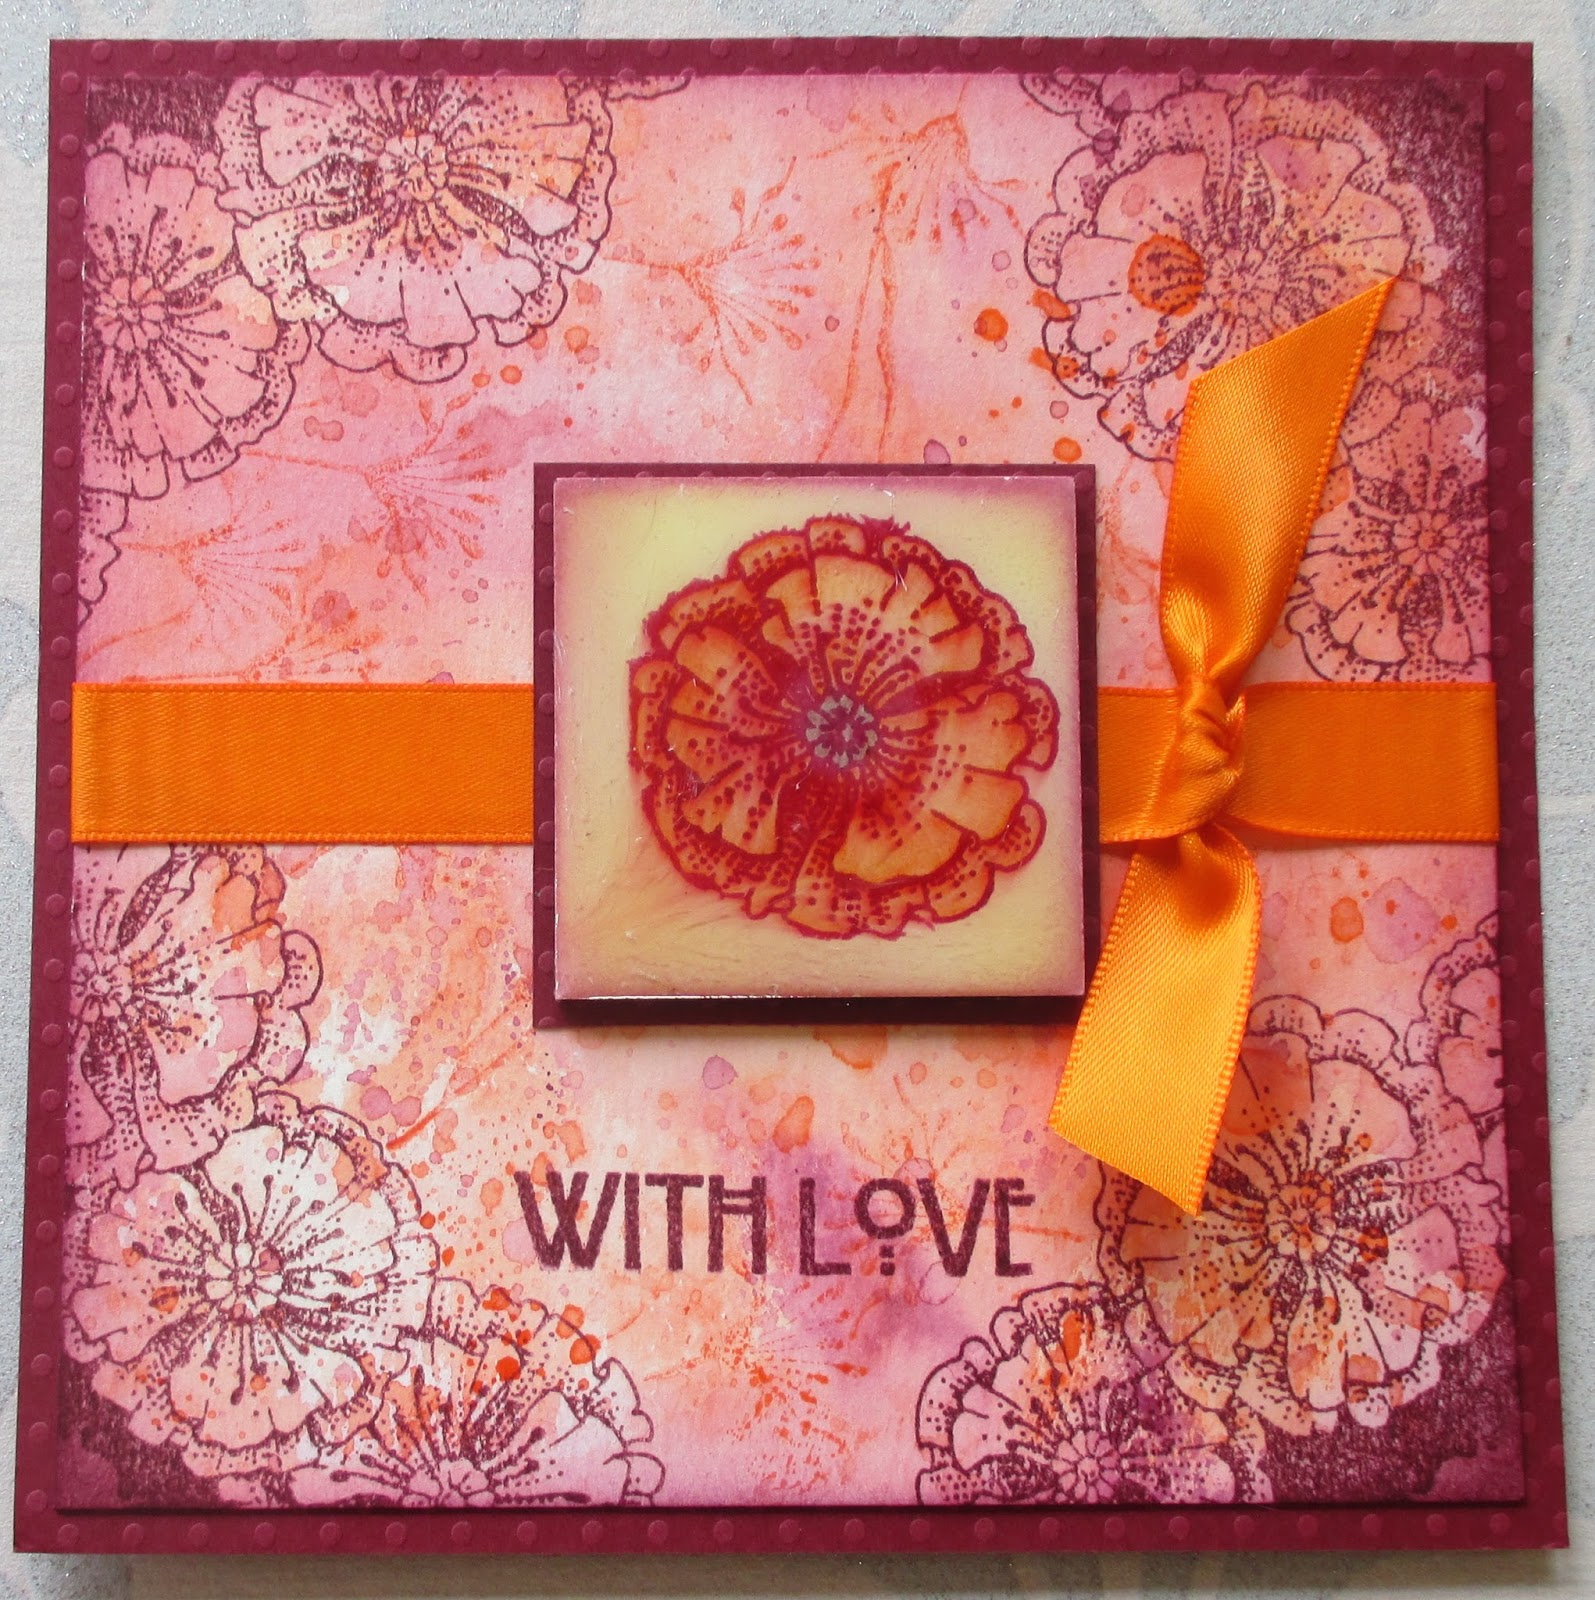
For my first two cards, I made a wrinkle free Distress background, using orange and plum coloured Distress Inks. I have used a stamp taken from the Poppy Edges stamp set, and stamped around the corners of a piece of the background, using a darker plum ink. I masked the corners, and then stamped an image from the Poppy Meadow stamp set over the background using the orange ink that I used to make my background. However, I stamped the image onto scrap paper first, before I stamped onto the background, as I did not want the image to be too vibrant. I masked off part of the poppy edge stamp with masking tape, before I inked up one of the flowers, and then peeled off the masking tape. I then stamped the single flower onto a piece of stampbord. I coloured the image with pencils, and then covered the surface with three layers of ultra thick embossing powder, to create a tile effect. I added a sentiment from the Mackintosh Sentiments clear stamp set.


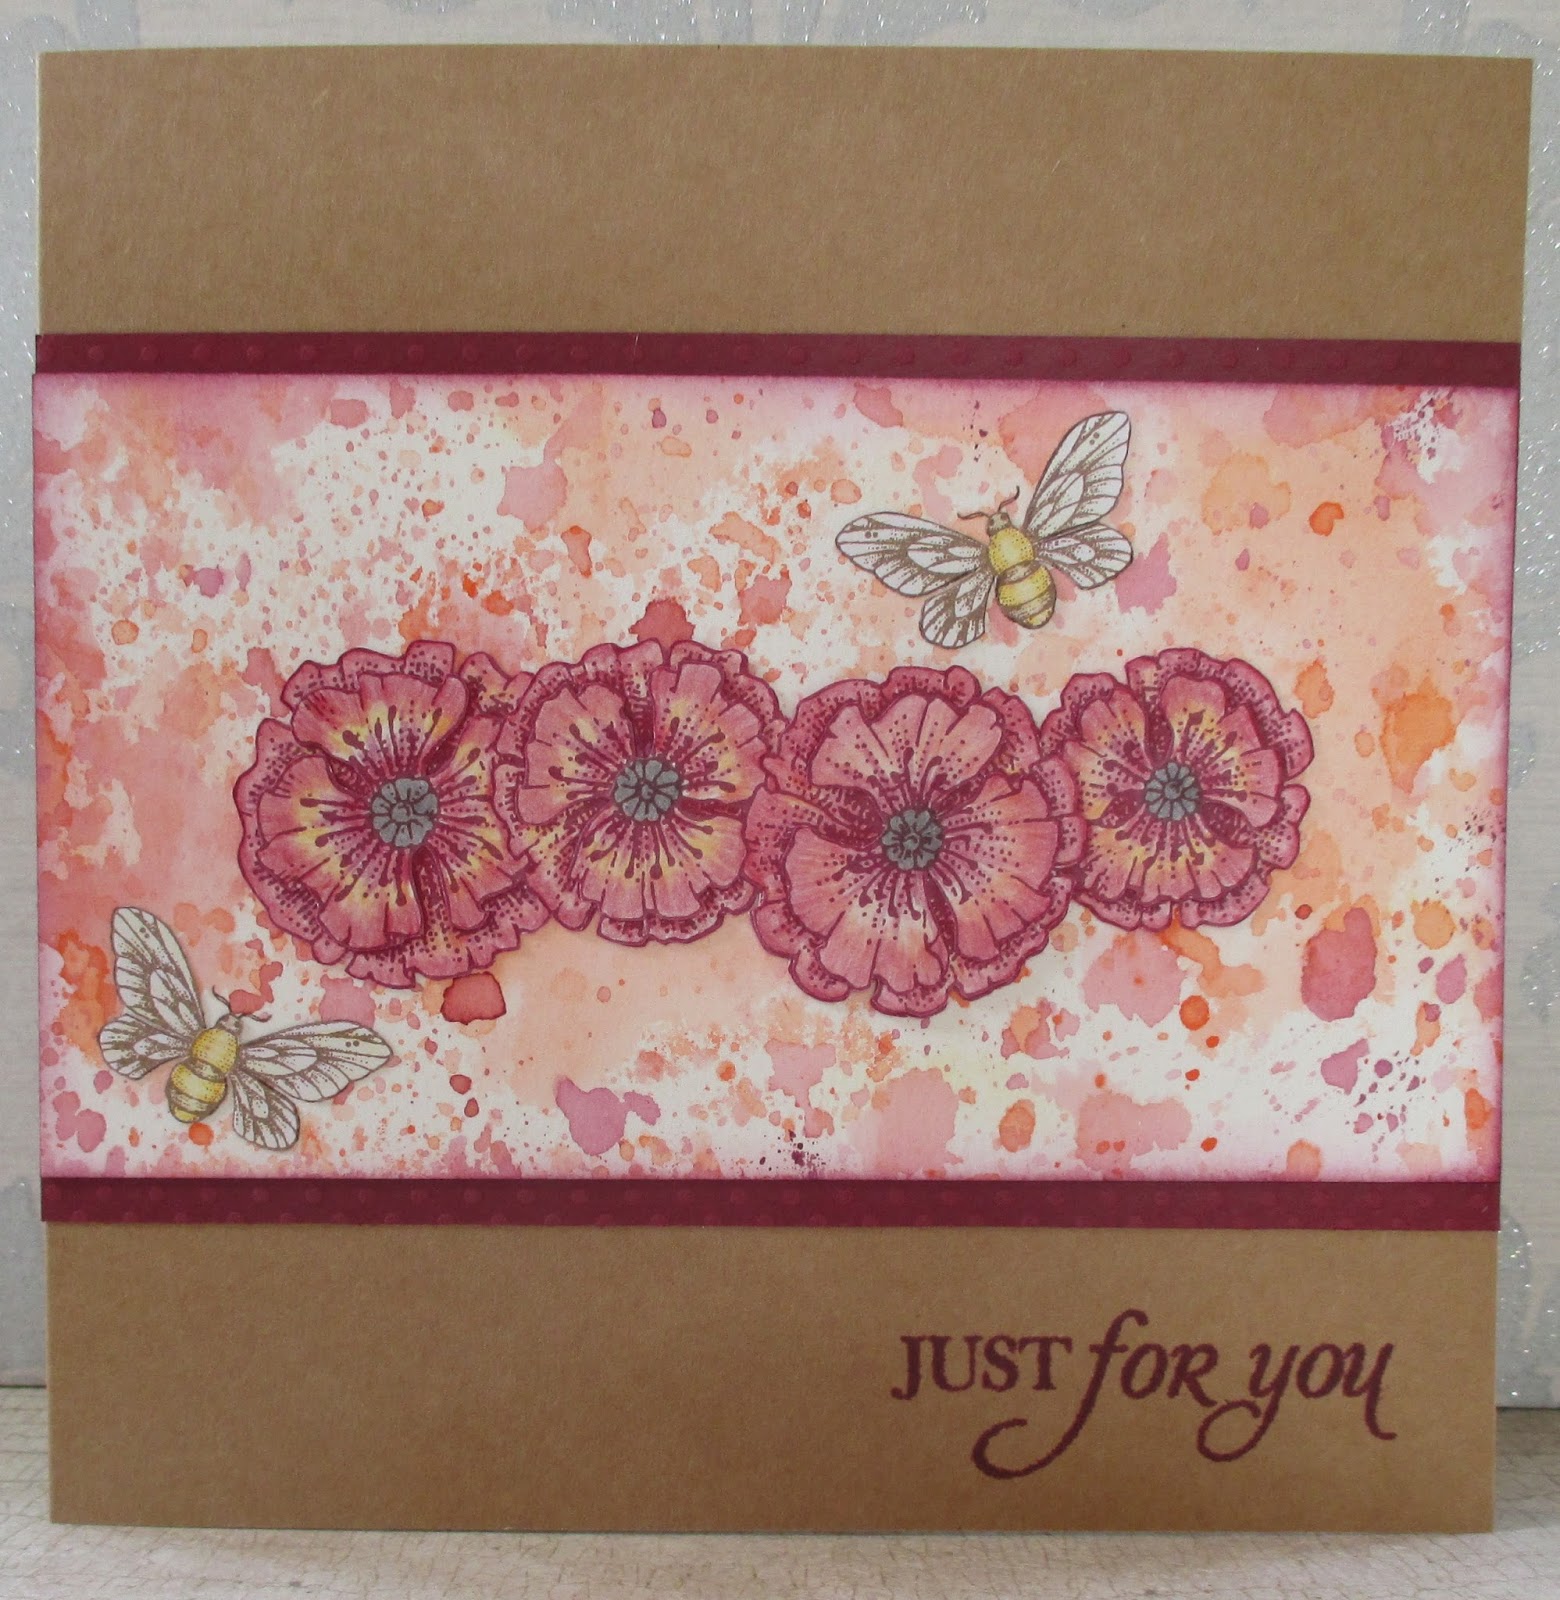
On my second card, I used a strip of the same wrinkle free distress background, matted onto burgundy card, and placed it onto a kraft card base. I stamped the poppy edge four times onto card, and coloured sections of the image with pencils, before cutting them out, and layering them onto the background. I added two of the little bees, which were also coloured with pencil. The sentiment was taken from the Amazing Birthday clear stamp set.


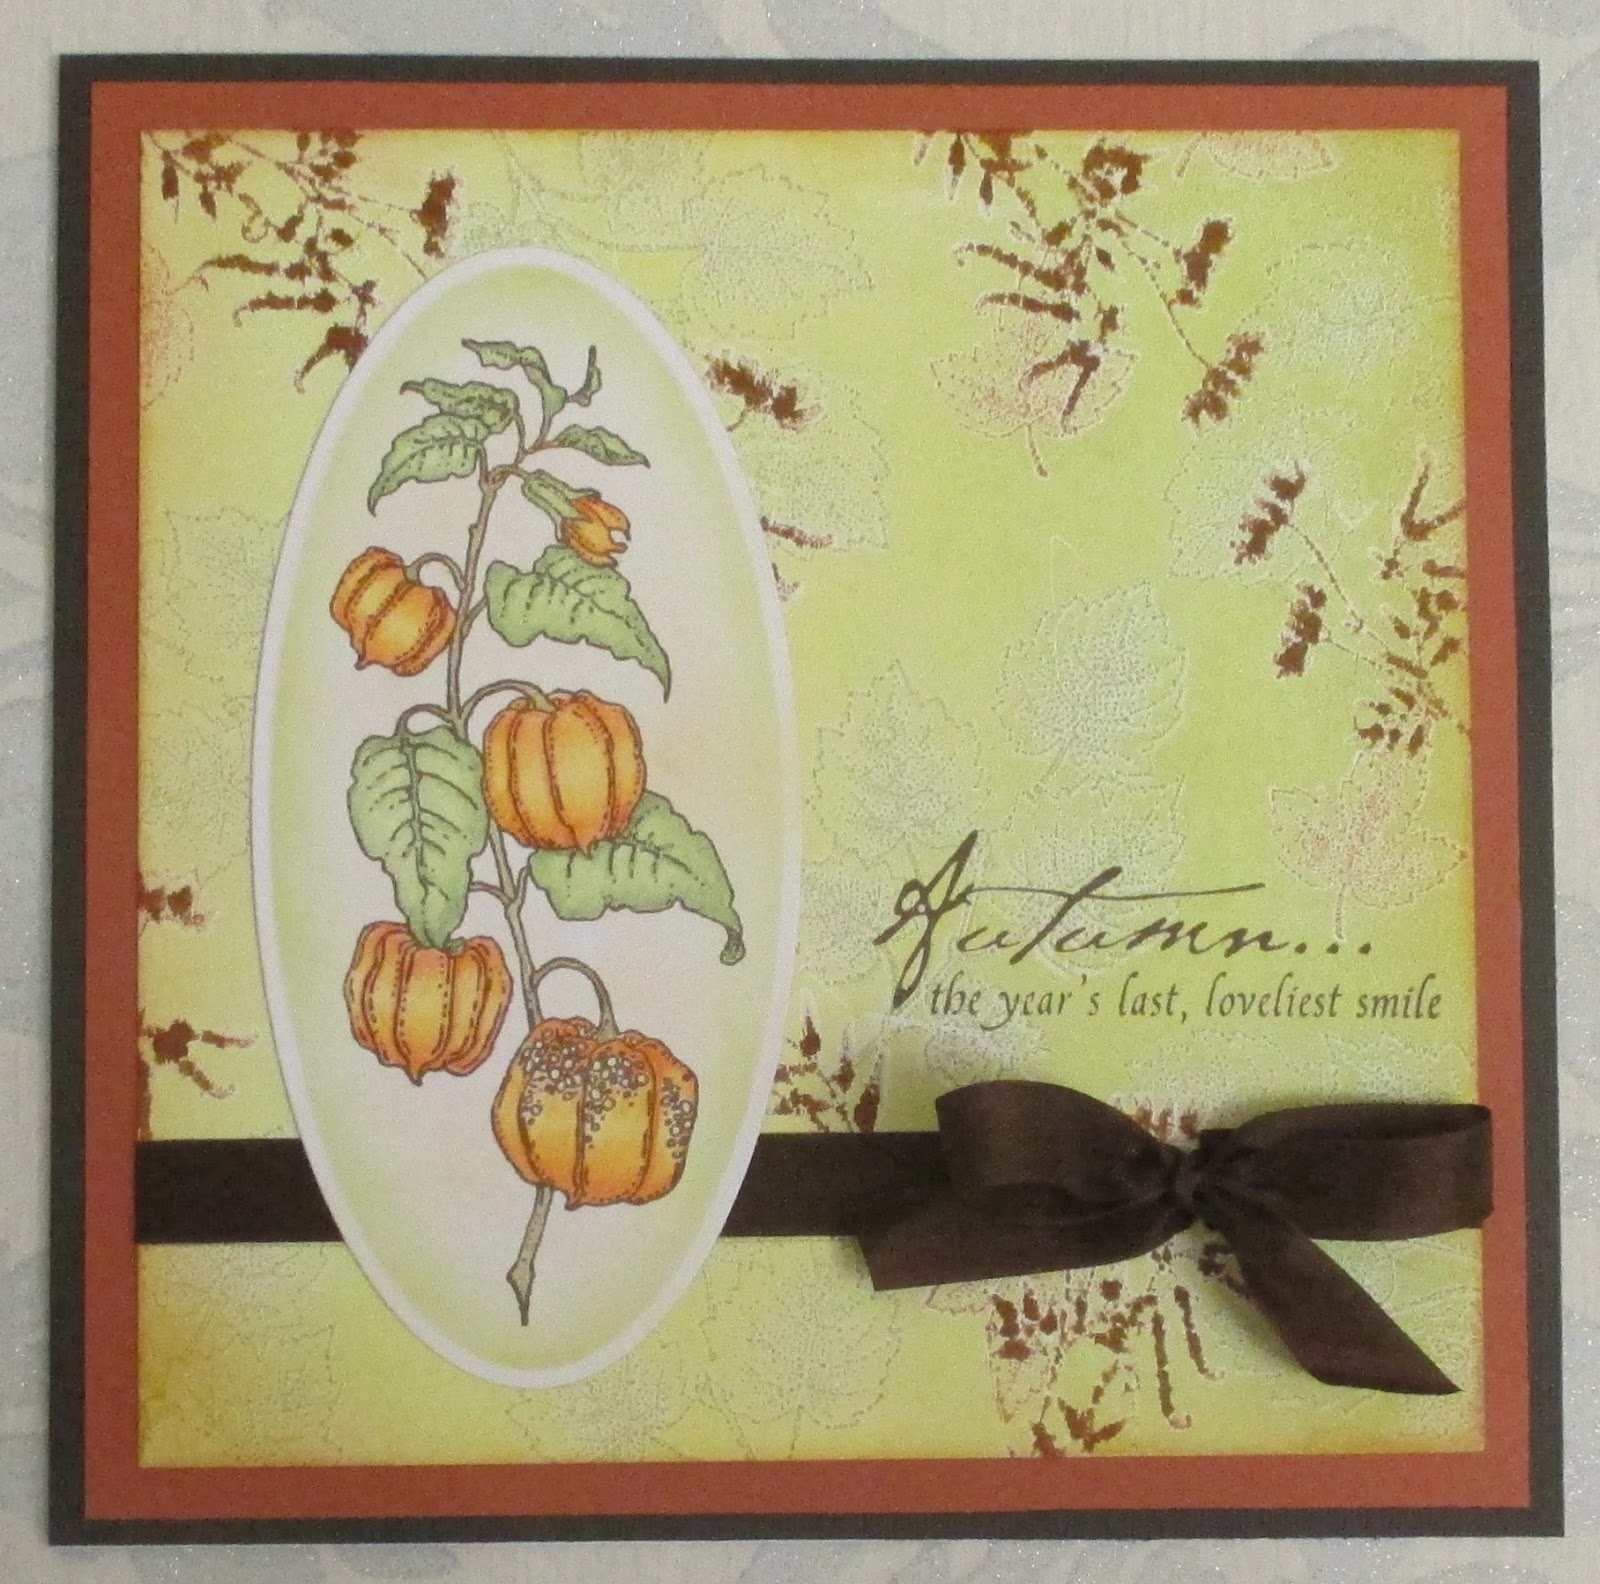
For my final card, I made a gelli plate background, using a selection of green inks, and stamped the single leaf and foliage stamp taken from the Autumn Poppy stamp set randomly over the plate. I took a print from the plate and trimmed it to size, before edging the background with a rusty coloured ink. I stamped the main image onto a large oval die cut, adding some colour to the background with green and orange inks. I coloured the image with pencils. The sentiment comes from the Nature's Peace stamp set, and is one of my favourites.


You are in for a real treat over the coming month with the samples created by my Team mates, so keep checking back to see their beautiful projects. Thanks for stopping by, Judith xx

Thursday, 25 September 2014

Take a walk with Nature as we launch our latest stamps

It's definitely getting chillier in the mornings and the nights are drawing in, as my Nanna would say, so I guess it looks like Autumn is upon us. I love the colours that Autumn brings although I can do without the other stuff. I also like the fact that I can share our new stamp releases with you to help celebrate this glorious season.

First is our Stamp of the Month, which is a scrumptious A4 set called Autumn Poppy.

  This next set is one of two new additions to our A5 Edges series and is called Poppy Edges,

whilst the following three stamp sets are all A5 and are this year's Halloween releases. Halloween Edges is our second new Edges addition

then we have Book of Spells and Things that Go Bump

both of which are also available as our usual money saving multi-buy

All these gorgeous images are just crying out to be coloured with your favourite medium, and have sent the Design Team into a frenzy of Autumn and Halloween splendour.  Here are just a couple of samples to whet your appetite.

Here Maria has given the Poppy Edges a wonderful hedgerow feel, whilst Florence evokes all things spooky with her delicious Halloween card.

There are lots more inspirational designs to come over the next few weeks, so please keep tuning in to catch up with the latest creations from our talented girls. 

Finally, thank you for all the lovely comments that you continue to send to us, it does us all good to know that you are so appreciative of everyone's contributions to this blog.