Pin It button on image hover
Showing posts with label Tagtastic. Show all posts

Friday, 8 April 2022

Hope ( by Doreen )


 Hope


This is the first of my posts for April and carries a message everyone needs or at least I believe that we do.

This tag uses The Tagtastic stamp, easy to use and to cut out. The tree is from the Trees a crowd stamp set and the cute owl is to be found in the Country Reflections Elements stamp set. I find all these sets to be really useful. 

The tree is stamped using Versafine Clair Acorn and again to stamp the broken circles and the Owl.
The solid circles are stamped using a mix of Distress Oxide Inkpads .... colours Abandoned Coral and Fossilised Amber. To colour the own I used Koh-I-Noor Pencils. 

To finish this tag I Mounted it onto Black Card and some random coloured ribbon from my stash of ribbons.

Thank you for looking in today

Love Doreen


Saturday, 13 November 2021

Autumn Colour (by Judith)

Hello everyone, I have some leafy projects to share with you today. I thoroughly enjoyed using the new From Nature 1 stamp set that Lesley created and showcased last month on the TV shows. This set is so versatile, and will be a 'go to' set for me when I need to create cards for so many different occasions.

For my first project, I chose a piece of patterned paper, and stamped the large tag from Tagtastic using black ink. I added a bit of shading using Distress Ink around the edges. I stamped two of the flower heads from Floral Grunge onto book paper, and coloured them using pencil, in colours that matched the tag. I worked out where I wanted the flowers to go and stamped some little leaves from the From Nature 1 stamp set so that they would be peeking out from behind the flower heads. I used Versafine Clair ink. I also added the fabulous splatter stamp from Numerology, before adhering the flower heads, and trimming them to fit the tag shape. I then edged the tag again with black ink.

I created a background on a piece of Drawing Cartridge using Distress Ink, using colours to match the tag. I used a larger leaf and Versafine Clair ink as before to stamp all over the background, to echo the design on the tag.

For my second design, I inked up my gelli plate with a shade of green Distress Ink, and stamped one of the leaves from the stamp plate randomly over the plate. I pulled a print with smooth white card, and cut the card to the size that I wanted. I then chose a shade of green Versafine Clair, and stamped a smaller leaf stamp over the background, and added one of the sentiments. This was a really quick card, but great fun to create.

You could vary the colours, and each card would turn out differently.

My final card is a variation of a card from my previous post. I inked up a background using Distress Ink, and then just stamped lots of leaves in first and second generation stamping using Versafine Clair and Archival Inks. I love this riot of Autumn colour.


I will be back later in the month with more projects to share. Thanks so much for stopping by,


Judith xx


Thursday, 14 January 2021

grand mansions.....


More of Kim Moody's houses to share today, from the once posh to the normalish.

I started with the posh house, which definitely looked like it could do with a make-over rather than a house-warming! 
I stamped the tag shape twice on white card using brown ink, and inked round the edges with the same inkpad.I stamped the house on one tag and the words and keys on the other. in the same brown ink. I added shading to the house using a waterbrush.
I stmaped the house twice again on spare card colouring just the doorway and the urns, and fussy cut out the urns, doorway and just the door frame. The cut out bits were then decoupaged using foam pads 
The background square of card was randomly sponged with the lighter brown ink and stamped using stamps from make your mark and edged with the darker brown . Tags added at angles to finish.

The normal house was used to make this stepper card,  from a pack bought may years ago and rediscovered..... I stamped the house on the upright and coloured using watercolour pencils. The house was stamped out three times onto spare card twice using marker pens to colour the stamp and a stamnping pklatform to repeat stamp until i had enough depth of colour, and once using grey ink. these were cut out and glued onto the the steps to create a city scene


My final sample shows the same house coloured with marker pens again but in brighter colours and stamped onto a cream DL card blank
 

Sunday, 1 September 2019

My House (by Judith)

Hello everyone, I have a few projects to share with you today featuring a very special stamp showcased on last month's TV shows on Hochanda, but first of all I would like to talk to you a little bit about the background of the stamp.

You are all probably very familiar with the very talented Kim Moody whose stamps are manufactured by Chocolate Baroque. His quirky stamps feature architectural images, and seaside scenes which are such a delight to work with. Kim also does commission drawings of houses and other buildings, adding his particular eye for detail. I decided to ask Kim some time ago to draw a picture of my own house Poppy Cottage, and we discussed adding lots of features that I love about my house; the dragonfly door knocker, the wrought iron butterflies on the balcony, the dovecote in the garden, and of course, he needed to include Poppy and Bella, my two cats. Poppy is a bit plump, and Bella is rather skinny, so you can tell them apart! I sent a few photographs, and Kim came up trumps with a delightful drawing, beautifully framed for me.


A few months on, and I asked Lesley if it would be possible to have the stamp made, as I would really love to create Christmas cards using 'Poppy Cottage' as a personal touch. We hoped that you would love the image as much as we did, and decided to try it out as a small batch on one of the TV shows. I was so touched that you really liked it!

I created a couple of samples for the show, the first one was created by stamping an image from the Poppy Edges stamp set a couple of times, then masking these images before stamping Poppy Cottage itself. I masked the house also, then added a Pan Pastel background.

I added foliage from the Silhouette Grasses stamp set before removing all of the masks. I coloured the images with pencils and added one of the sentiments which I stamped onto sections of card, and edged with a plum coloured ink. I chose the same coloured card to mat the project onto before adhering it to a large card blank.

My second project was a Christmas card, to show the versatility of this lovey stamp. You could use it at any time of the year really, by adding extra foliage, and varying the colours. I have chosen to stick to the true colours of my house for these samples, but you can let your imagination run riot.

I stamped the house once again, and masked the image. I used a snowflake from The Christmas Garden and white embossing over the top two thirds of the background. I covered the background with Distress Ink, and the embossing acted as a resist.I coloured the image with Koh-I-Noor paints, and added a bit of Stickles for some Christmas bling. The sentiment comes from the Let's Get Festive stamp set.

My final project was a heart stopping TV demo, and it could have gone horribly wrong on live TV, but fortunately, it all worked out well. I decided to create a little key ring or handbag charm using shrink plastic. I die cut a large tag, and stamped the image using Archival Ink. I coloured the image using alcohol markers and cut a hole at one end. I shrunk the plastic using a heat gun, turning it over regularly to ensure even heating, and flattened it with an acrylic block before it had time to cool.

I drew around the shape onto a piece of greyboard, and covered this with some scrapbook paper using Matte Medium. For the keyring, I stuck the shrink plastic to the greyboard shape with Matte Medium, but for the handbag charm, I let the shrink plastic swing freely.

Even shrunk down you can still see the details so clearly, and these little charms make a fabulous little gift. You could try this idea using the Tagtastic stamp and any of the tall houses that either Kim Moody or Sue Page have designed recently.

I will back later in the month with more ideas to share with you. I hope that you will watch Lesley on this month's TV shows on 3rd September, she has some amazing new stamps to share with you. Sadly I will not be there this month, but I will be back again in October.

Thanks for stopping by,

Judith xx

Saturday, 20 July 2019

Stand out from the Crowd and A Partridge in a Peartree by Penny

Goodly morning everyone, I hope you are all well and enjoying some beautiful weather.  I have a couple of cards to share with you all today, the first is one of my samples from the April shows and the second is a Christmas design from last year.


Stand Out from The Crowd.

I have used stamps from the Heath Robinson House and Tagtastic sets; Koh-I-Noor paints, copper soft relief paste, Distress Inks, alcohol pens, copper EP, Versamark ink, gilding waxes,die cuts and a stencil from my stash.


I began by creating the tag, I stamped it with Versamark onto white card and embossed it with copper EP.  I then stamped the house and embossed it and cut the tag out.   I coloured the house with my pens then painted the background before mounting it onto black card.


I created the background by spritzing paints onto white card through a stencil.  When dry I used some copper paste through a small cogs stencil in each of the corners.  I blended black DI around the edges and mounted it onto black card.  I attached the panel to a white base card, added some die cut cogs that I had coloured with gilding waxes then attached the tag with 3D gel. 


I stamped and embossed a sentiment onto a spare piece of card coloured to match the background and matted it onto black card before attaching it to the card.


 A Partridge in a Peartree.


For this card I have used stamps from the Christmas Song set; alcohol pens, black Versafine ink, clear EP, Distress Ink, an embossing folder and some glitter from my stash.


I stamped the Peartree image in black ink onto smooth white card, and embossed it with clear EP.  I coloured it with pens and added glitter to highlight.  I used a couple of nesting dies from my stash to cut out the focal panel and a piece of black card.  I blended some DI around the edges of the focal panel then matted it onto the black card. 


I took a piece of Kraft card and embossed it in a Christmas folder from my stash.   I then die cut it and added DI to the edges. I added some ribbon to the bottom of the focal panel then  I attached both panels to a white base card overlapping them slightly.  I stamped and embossed a sentiment onto white card and cut it into a banner, added DI around the edges before attaching it to the card. 


This is a slight variation of the design.


Thank you very much for popping in today, I hope that you've enjoyed this post.  I'll be back next month with a few more crafty projects, in the meantime my team mates will be bringing you lots of crafty inspiration!  


Take care peeps until next time,


                             xx  Penny  xx

Tuesday, 16 July 2019

A Bit of Romance (by Judith)

Hello everyone, I have a couple of projects to share with you today, both with a slightly romantic feel, showcasing stamps used from last month's shows on Hochanda.

My first project features a beautiful image from the Harlequin Rose stamp set. I love this image, and it has proved so useful for Weddings and Anniversaries. It can be used on its own, or linked with another one, as I have done on this card.

I chose a piece of patterned paper designed by Lesley, and stamped and embossed the image twice, using white embossing powder. I fussy cut the images, and cut one of the hearts where I needed to join them together. I simply slipped the 'broken' heart through the gap in the other heart. I used a piece of the same paper as a background, and cut a slightly smaller piece of kraft card as the forground. (If you are trying to stretch your papers as far as possible, you can use what would be hidden underneath for the hearts). I embossed the sentiment using white embossing powder once more, and added faux stitching using a white gel pen.

The addition of the kraft card makes this a great Anniversary or Valentine's card for a man.

To create my second card, I coloured some Drawing Cartridge using Distress Ink on a craft mat, spritzing it with water, and patting the Drawing Cartridge into the ink. I dried the paper with a heat gun, and then blotted up some of the remaining ink before drying the background once more. I stamped the Tagtastic stamp at one end of the background and cut this out, the remainder of the background was sufficient to create a background for the card.

I used words from the Amazing Mackintosh Words stamp set to create a random background on the tag, stamping them in black ink. I stamped some horizontally and some vertically, making sure that they were straight, whichever direction I was stamping. I stamped a rose from the Rose and Thistle stamp set onto a spare piece of Drawing Cartridge, coloured it in and fussy cut it out. I attached this to the tag, and added some bright red ribbon to the tag. I attached the tag to the larger background, added a Birthday sentiment, and used some black card as a matting layer. You could add some of the tiny rosebuds from the Rose and Thistle set to the background if you feel that the background is too plain, but I did not mind it like this. I had added some red spatters to the tag as a contrast anyway.

I hope that you will try some of my ideas out for yourselves, thanks for stopping by,

Judith xx

Saturday, 22 June 2019

Mushrooms and Apples by Penny

Hello peeps, I hope you are all well and enjoying some sunshine after all the rain we've been having.  I have a couple more samples from last month to share with you today, featuring some of the gorgeous CB stamps.  


Shrooms Galore!

For this first project I have used stamps from the Mushroom HouseThe Toadstool Garden, Mellow Fruitfulness and Tagtastic sets; Koh-I-Noor paints, pearlescent paints, black Versafine, silver and clear EP.


I began by stamping a tag onto black card and embossing with silver EP.  I cut it out, then stamped and embossed one of the 'holes' at the top.  I stamped the Mushroom House in black ink and embossed it with clear powder, then painted the image.  On a spare piece of card I stamped and embossed a sentiment with silver EP.  I used a silver pen around the edges before attaching to the tag.   To complete the tag I added the cherry branch, which I had stamped, embossed, painted  and cut out of black card, and some red raffia.


On a piece of white card I stamped the Toadstool Garden image in black ink and painted the toadstools and leaves with watercolour paints.  I added silver pen around the edges then attached it to a black base card.  I then attached the tag to the card beside the focal panel.  


Colourful Orchard.


For this project I used stamps from the Mellow Fruitfulness and Artistic Affirmations sets; grey Versafine ink, red Versafine ink, clear EP and alcohol markers.


I started with a piece of smooth white colouring card and stamped the apple branch image with grey ink.  I masked it with Masking Tissue and stamped the image twice more.  I removed the mask and coloured all the images with alcohol pens, adding light and shading to make the apples appear 3D, and did the same with the leaves.  I added some highlights with a white pen, and a shadow line around the images.  On a spare piece of card I stamped and embossed the apple branch three times and coloured them as before.  I then cut the images out.


I stamped a sentiment in a bottom corner of the focal panel using red Versafine ink and embossed it with clear EP.  I added gold pen around the edges of the panel then matted it onto red card before attaching it to a white base card.  I attached two of the cut out branches to the top corners of the card with 3D foam, and the other to the bottom of the card.


Thank you for popping in today and taking time out to read this post, I hope you've enjoyed it.  I loved creating both cards and I hope these samples give you a little inspiration.

I'll be back next month with more crafty fun, so until then take care,


                               xx  Penny  xx


Friday, 7 June 2019

Bountiful Birthday and Magic Mushrooms by Penny

Goodly morning lovely peeps, I hope you are all happy and well.  I'm here with my first post of the month, a couple of lovely projects featuring the beautiful stamps that were showcased in May's shows.  


Bountiful Birthday

I have used stamps from the Mellow Fruitfulness, Autumn Edges  and Birthday Words  sets; Distress Inks, Versamark ink,white EP and CB Kraft Card


I began by stamping the large artichoke image, using Versamark ink and embossing it with white EP.  I did the same with  the fruits and a sentiment, then I painted the images with DIs.  I matted the panel onto orange paper. 
I took a cream base card and stamped the collection of fruits and nuts images along the edges of the card in DI, then I attached the focal panel to the base card. 


A beautiful and simple card that you could use for a lot of occasions and recipients.


Magic Mushrooms.

A tag for you now using stamps from the Mushroom House, Tag Tastic and May Fairy sets; black Versafine ink, clear EP, gold EP, Versamark ink, Koh-I-Noor paints, a white pen and a sparkle pen from my stash.  


On a piece of white card I stamped the tag with Versamark ink and embossed it in gold EP.  I then stamped the Mushroom House image inside the tag, using black ink and clear EP.  I took another piece of white card and stamped and embossed the fairy.  I then painted all the images, adding white pen dots to the mushrooms and sparkle pen to the fairy and her wings.  I attached the card tag to a greyboard tag then cut around it.  I fussy cut the fairy and attached her to the tag.  I also stamped, embossed, painted and cut out a small butterfly and attached it to the tag.  


I then added some ribbon from my stash to complete the tag design.


This pretty tag could be a bookmark or a keepsake, and it would suit a recipient of any age.  


Thank you so much for popping in today and spending a few minutes with me, I hope that you've enjoyed my post.  I'll be back later this month with more crafty fun!


                         xx  Penny  xx

Monday, 27 May 2019

Autumnal Tag Art and Summer Garden - by Penny


Hello lovely Peeps, I hope you are all well and enjoying some lovely weather wherever you are.  I'm back with my second post for May, a couple of cards featuring some of the gorgeous and quirky house stamps from the April shows.


Autumnal Tag Art.

I have used stamps from the Acorn House, Trees A Crowd, and Tagtastic sets; sepia Versafine ink, clear and gold embossing powders, alcohol markers, Distress inks, and some ribbons from my stash.


I began this project by creating the tag.  I stamped the Tagtastic image onto white card with Versamark ink and embossed it with gold EP, and did the same with one of the 'holes'.  I then stamped one of the tree images in sepia ink and embossed it with clear EP.  I coloured the trees with pens and painted a background using DIs, then cut out the tag.  On another piece of white card I stamped the Acorn House in sepia ink and embossed it with clear EP.  I coloured it with pens and cut around the image, leaving a margin around it.  I blended ink around the edges then attached it to the tag with 3D foam.  I completed the tag with some ribbon and bakers twine from my stash.


I took a piece of Kraft card and stencilled some trees onto it using DIs.  I used a gold marker pen around the edges of the background panel and attached it to a white base card.  I then attached the tag to the card.  On a spare piece of Kraft card I stamped a sentement using brown DI, put gold pen around the edge and attached it to the card.


Summer Garden.

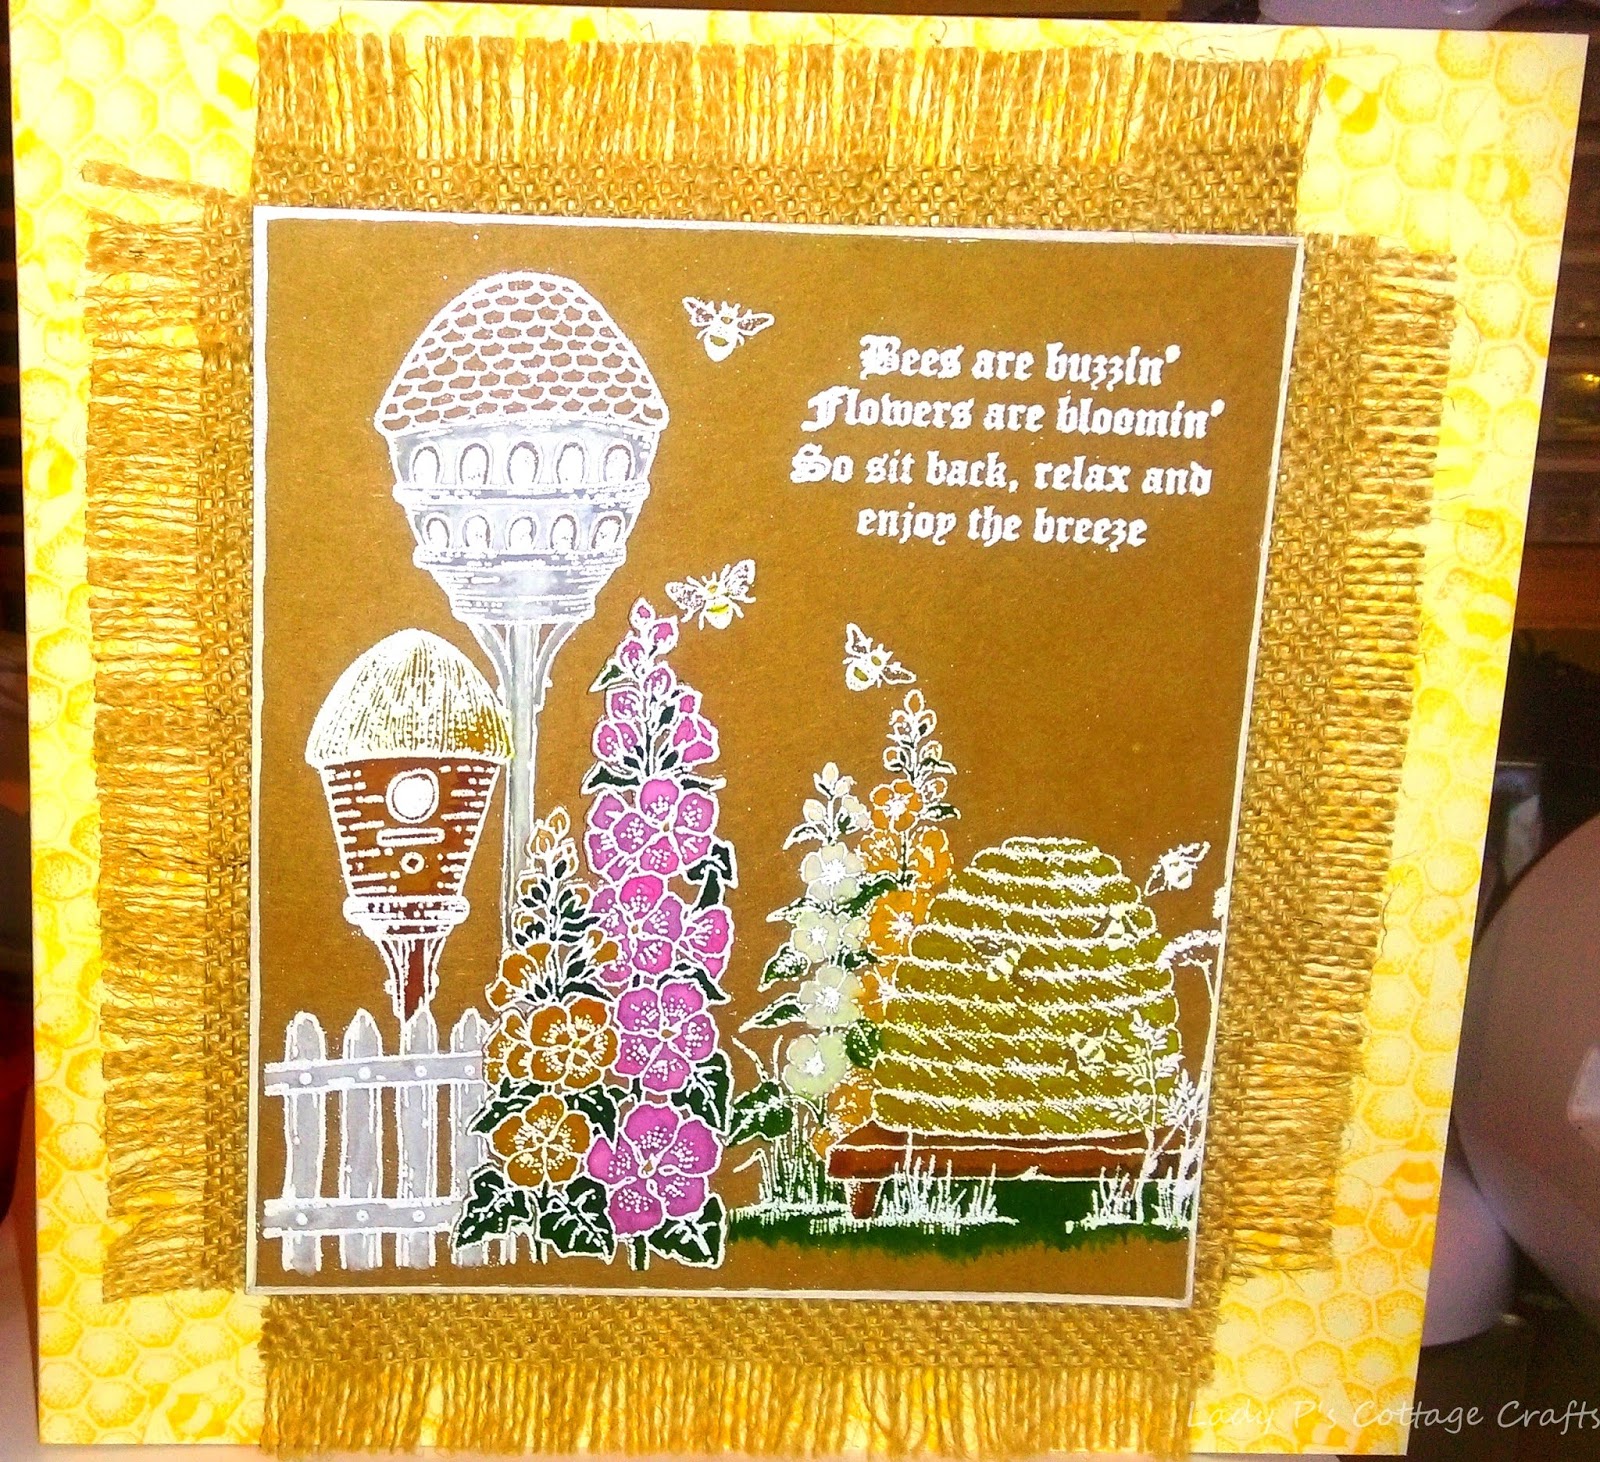
I have used stamps from the Garden House and Honey Bees sets, white embossing powder, Versamark ink, Distress Inks, and some Hessian from my stash.


I took a piece of Kraft card and stamped the Garden House image and the Bee Hive image using Versamark ink and embossed them with white EP.  I added a couple of Bee images then painted the images using Distress Inks.  I added white marker pen around the edges of the panel, then stamped and embossed a sentement at the top of the panel.  On a spare piece of Kraft card I stamped and embossed the flowers from the Garden House image, painted them and cut them out.  I took a cream base card and stamped a honeycombe image repeatedly around the edges of the card using DI.  I then used strips of Hessian from my stash, pulling out some fibres to create a fringe.  I attached it to the back of the focal panel with red liner tape, then attached the whole panel to the base card.  I added the flowers with 3D foam.


Thank you for joining me on the CBDT blog today, I hope you have enjoyed these projects - I certainly enjoyed creating them!

Take care everyone, I'll see you next month with more crafty fun,


                            xx Penny xx

Saturday, 25 May 2019

Stamping on Patterned Paper (by Judith)

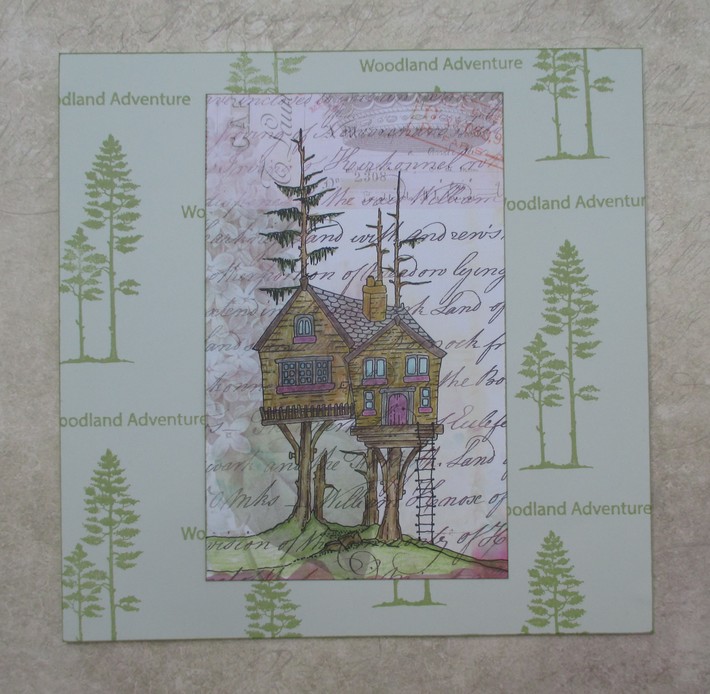
Hello everyone, I have some more projects to share with you today showcasing the beautiful bookmark style houses that we brought to Hochanda last month. These three projects formed part of a TV demo that I did on one of the shows. I wanted to demonstrate how to stamp onto a patterned surface, and when an image is coloured, the image pops out, and the patterned surface recedes to the background.

I used a piece of Lesley's Chic Script Designer paper pack, and cut  a piece of the script paper to size. I stamped the Tree House onto the paper. I added a few lines at the bottom using a fineliner pen to finish the landscape, and coloured the image with pencils. I added shading with grey pencil for added depth.

I took a plain piece of green paper from the pach, and using one of the trees from Trees a Crowd and a sentiment, I created a piece of background paper using Memento Ink. This was really quick to create, and you can have your own designer background in minutes! I inked the edges of both pieces of paper with the green ink for definition. As you can see, the script paper looks great as a background, and the house sits really well on the pattern.

For my second card, I used the large Tagtastic stamp and stamped onto a piece of book paper. I stamped the Garden House image inside the tag, and coloured the image with pencils once again. I added a bit of shading on the background using Distress Inks.

For the large background, I used a large acrylic block and added pink, blue and green Distress Oxide which I spritzed with water. I smooshed it across a piece of drawing cartridge in one go. I stamped two bees from the Honey Bee stamp set, and added a sentiment. I coloured the bees with pencils.

For my final card, I created a gelli print background, adding a bubble effect texture, and stamping a sentiment randomly over the background. I used a Crafty Individuals script effect tag and stamped the Heath Robinson House, which I then coloured with pencils. I added bright red highlights which I matched with a bright red ribbon. I added shading to the tag with Distress Inks, matching the colour of the gelli print background.

I hope that you have enjoyed my projects this month, I will be back next month with lots more to share with you, thanks for stopping by,

Judith xx

Saturday, 29 December 2018

Floral abundance! (by Rachel)

Hello there! I hope you have had a wonderful Christmas and are now gearing up to the New year! I have some final makes from November's shows to share with you today....
This first one used the stamp shared beauty and tagtastic plus one of the designer papers. I stamped the image all over the card then coloured in using distress inks. Finally I have added a piece of the designer paper cut out in the shape of the tagtastic stamp.


In this next one I used the movie strip collage stap and stamped onto a ready made background that I had done using brushos. I then used inks to colour the image.This image was then added to another layer of the designer paper and finally onto a card.


My third card was made using a piece of designer paper that I stamped onto. I then added some lolly sticks which I had already sparingly covered in gesso and once dry hadcovered in oxide inks. I then did a bit more stamping and finally added the flower from the movie strip collage stamped image.


In this finally card I stamped directly onto designer papers using first the Be Kind stamp and then some of the grasses from the show. I also added the word stamps to the right hand side of the card.


I hope you have enjoyed seeing what I have done with these stamps and those fabulous papers.

Wishing you a peaceful last few days of 2018 and all the very best for 2019.

Rachel x

Saturday, 22 December 2018

Wildflowers Through the Seasons (by Judith)

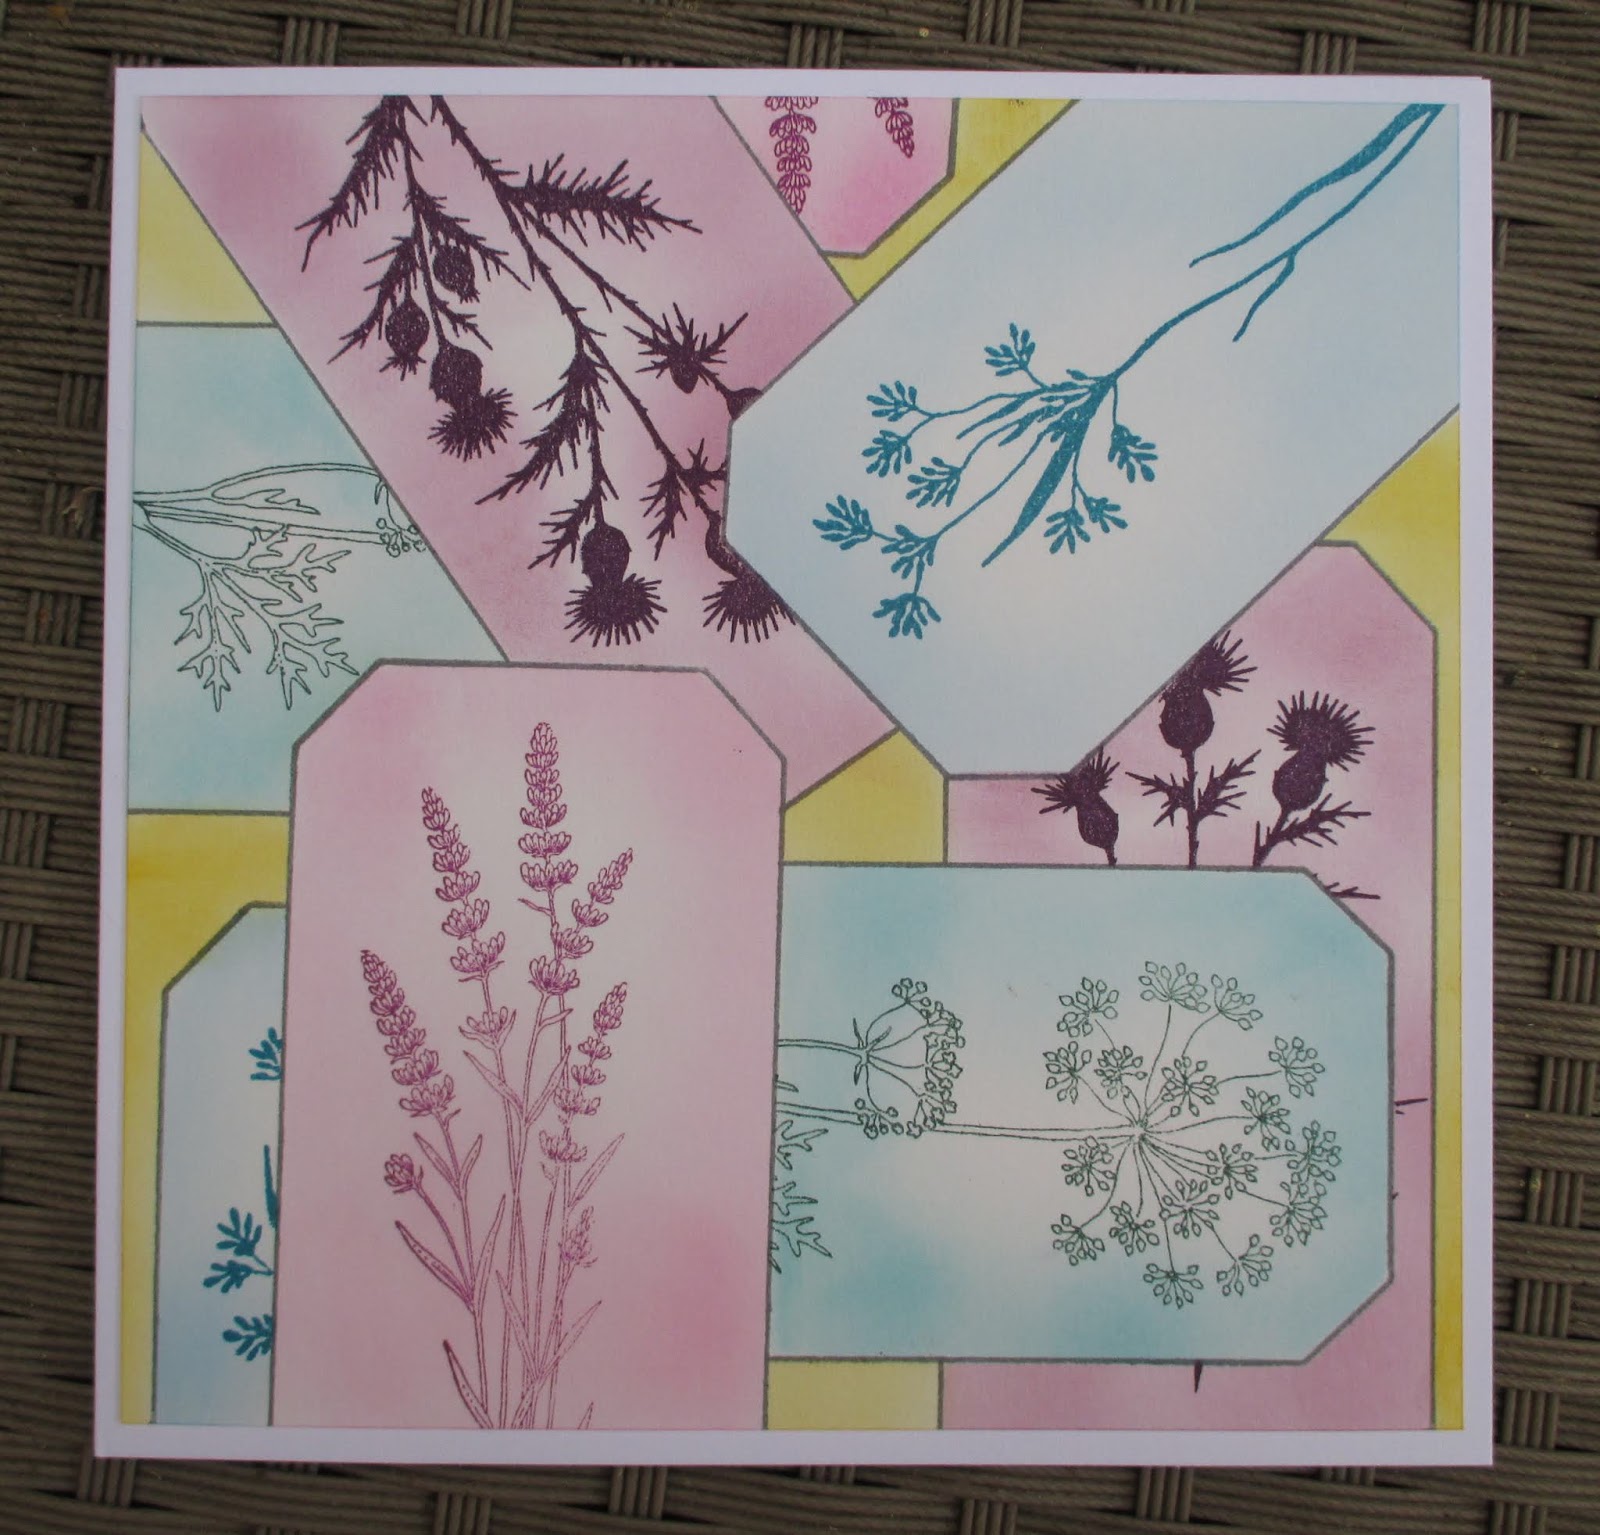
Hello everyone, I have a project to share with you today ustilising the fabulous Tagtastic stamp featured on last month's TV shows on Hochanda. I wanted to show another use for this stamp, and paired it up with the Wild Meadow stamp set for my project.

I started by stamping the image on masking tissue several times, and cutting the image out. I then stamped the image onto my background a couple of times, and then masked the images. I stamped the image again, masking those images, and continued, building up layers of the tag, until I had filled the page. I then added a background colour to fill in the 'blank' areas. I added different colours to the tags, using reverse masking, and then stamped foliage into each tag, while the reverse masks were in place. This meant that the foliage stalks did not overlap the edge of the tags.

I had great fun creating this card, and you could use the idea in a much smaller way for a tag or mixed media project.

I have a bonus project which I created more recently, as I needed to make a Christmas card for my lovely Hubby. I used one of Lesley's beautiful papers, one of the plain designs. I drew a circle in pencil, and added a few snowflakes, which I embossed using white embossing powder. I added a sentiment from the Let's Get Festive stamp set, and built the wreath using foliage from the Wild Meadow stamp set. I added a touch of shading to make the snowflakes really pop.


I will be back later in the month with more ideas to share with you, but would like to take this opportunity to wish you all a very Happy Christmas. I hope that you can enjoy the day, whatever you are doing. Thanks for stopping by,

Judith xx

Wednesday, 19 December 2018

Butterfly frame by Brenda


Good morning to you all, Brenda here and I hope you are almost prepared for Christmas, only 6 sleeps now!!

My first share this time is a little frame which I stamped with Distress Ink and the lovely Fern from the Wild Meadow set, I used two colours to ink the stamp to give a variegated look and then distress the edges with the same colours. Inside the frame I used one of the Designer papers and stamped a sentiment from Shared beauty and stamped, coloured and cut out three Butterflies from April Fairy and Just Butterflies.


Here I have a tent card using Movie strip collage which I stamped once, masked and stamped a second time, coloured with with pencils and added some Distress Ink around the blooms.


I loved the colour of this particular sheet from the Designer papers and followed the colourway stamping images from Wild Meadow and Floral grunge with Versafine Clair inks. I made the base shape with the Tagtastic stamp stamping three times with Versamark and embossing with detail white, then cutting out the three tag shapes slightly larger to create a black frame. I fixed the thee together with card hinges in the back, fixed the stamped papers, some cord and embellies. I also stamped sentiments from Be Kind and Shared beauty.

This is my last post before Christmas so I would like to wish everyone a peaceful Christmas season.