Pin It button on image hover
Showing posts with label Santa Baby. Show all posts

Sunday, 14 December 2014

Little Gifts For Christmas (by Asha)

Good morning, everyone. We are now a fortnight away from Christmas. Ideally all your cards should be in the mail and it's time to look at finalising the gifts. I've got 3 projects to help you make those pressies extra special.

1. Gift Card Holder

Gift cards make perfect presents ... when you run out of ideas! It can be a special gift when housed in a beautiful box. And you can't beat the wow factor of heat embossing.
Red and Gold - always a striking combo. That magnificent tree is from the Turtle Doves A5 sheet, heat embossed in gold and matted on gold card stock. I also did some tone-on-tone stamping in the background with the little snowflake from the Snowy Scenes A5 sheet with Versamark.

This is a top opening box, revealing a pocket for the gift card in a slide-up mechanism. The sentiment is from the Christmas Magic clear stamp set, heat embossed in gold. I have link to a video tutorial for this project on my blog.


2. Gift bag

If you're super organised and have all your gifts ready for giving, how about making gift bags to house them. The WRMK Gift Bag Punch Board, available from the Chocolate Baroque store, makes light work of it. Here's one I prepared earlier:
I made the medium sized box and the main star is the jolly man from the Santa Baby A5 sheet. He is coloured with water-colour pencils, fussy cut and popped up with foam tape in front of heat embossed snowflakes from the Snowy Scenes A5 sheet.

Water colouring is easy and very forgiving - just what you need when in a hurry. Trust me, it really is that simple. Just lay down the colour as shown below and, using a fine brush, let the water do all the work. No fancy blending or shading. I have details of the colours used on my blog.


3. Gift Card and Treat Box

And when you want to spoil someone - go for the double whammy: Gift Card and a treat  - all in one box.
 I decorated the top of the box with the wreath from Hearth and Home A4 sheet, coloured with alcohol markers. Keeping it simple with just some ribbon.

The box opens revealing the gift card in a pop-up mechanism with room for a few golden nuggets! I've got details on how to make this box on my blog.

Three project ideas to help you with your festive preps: elegant, playful and extravagant - there's something for everyone. I hope these projects inspire you to play with your Chocolate Baroque Christmas stamps.

Thanks for stopping by. The rest of the Design Team are having fun with the gorgeous December release stamps, so please stop by regularly for more crafty ideas.

Beijinhos,
Asha

Wednesday, 24 September 2014

Guest Post - Santa by Venronica Pell


This is the last of Vernoica's mini series of guest posts and today she has designed a cheery Santa card using the Santa Baby stamp set.

I used a piece of card that had been sprinkled with grey and turquoise Brusho ink powders after being splodged with Perfect Pearls on crumpled cling film. By some minor miracle, it looked like mountains in snow, so perfect for Santa and his sleigh.

My usual technique of stamping with Versafine and clear embossing powder didn’t work very well over the pearly bits, so I ended up stamping the sleigh again onto white card, colouring with Promarkers and cutting out the main body and presents and glueing onto the original stamped image.

Santa was also done separately, cut out and glued in front of the sleigh after I had sponged some Stormy Sky Distress ink across the bottom of the card  to give him something to stand on.

Matted onto silver and blue (the blue was card coloured along the edge with a Promarker to give a better match to the background) then onto a 7” square base card.

Have to admit I stamped and embossed the greeting in silver before I added the image – I am very good at getting greetings crooked, but the clear greeting stamps make life a lot easier! I have this small one stuck onto the flat side of a small clear ruler, so it is straight in the first place, and I can use the ruler to make sure it is straight on the card as well.

That's a great tip about placing the greeting stamp onto a clear ruler Veronica. Thank you for the wonderful designs you have made for us over the past three weeks and for telling it like it is. We all have projects that don't go the way we planned but it's how you turn then around that's important and you have shared your skills beautifully. 

Don't forget to leave a comment to show your appreciation for all Veronica's hard work and remember to visit her blog, Vrons Cards.


Sunday, 21 September 2014

Sleigh Bells and Snow Balls (by Asha)

Good morning, fellow Chocoholics. I have more Christmas projects to show you - all made with the new stamps.

First up is the gift laden sleigh from the Santa Baby A5 sheet, set against the magical Northern Lights. I used various shades of Distress Inks to create the sky and added little silver dots for the stars. I coloured the presents with alcohol markers and sprinkled some shimmery fibres for the snow on the ground . The greeting is from the Christmas Magic clear stamp set. Details on the products used to create this card is available on my blog

My second project is a set of tags. I have to admit to not being a great fan of tags. But there's something about the images from these new stamp sets than inspired me to make these. The trio of bells is from the Holly Bells A5 sheet and the tree is from the Santa Baby sheet. I heat embossed the bells in gold onto some red cardstock, fussy cut and adhered to the tag base with foam tape.  The tree is just stamped directly onto the tag and dotted some red Liquid Pearls for the baubles. I blended Distress Inks to create the background on both tags.


And finally, here's an icy number I recently posted on my blog. For this easel card I used the Snowy Penguins clear stamp set. Super simple to make and has all the glitter and shimmer of a perfect Christmas. Details on how I made this card can be seen here.


Thank you for stopping by today. I hope you enjoyed looking at these projects as much as I enjoyed making them. There are so many ways to works these gorgeous new Christmas stamps. Please drop in regularly to see more inspirational work from the rest of the Design Team.

Beijinhos,
Asha


Thursday, 11 September 2014

Going around in Circles (posted by Judith)

Hello Folks, I have some samples on circular theme for you today, using the stamps of the month.

For my first sample, I created a watercolour background in shades of green and purple, and then added a circle mask in the centre. I stamped an image from the Harlequin Fragments stamp set around the edge of the mask, using green ink. I sponged a little bit of green ink around of the mask to add some shading, before removing the mask. I stamped and embossed the holly and bell images from the Holly Bells stamp plate using gold embossing powder. I also stamped another set of  images onto a spare piece of card. I coloured the spare images with water based markers and a water brush  and decoupaged them onto the background. I added some hand drawn 'string'. The sentiment is from the Christmas Magic stamp plate.


For a more detailed  explanation of how I made this card, you can hop over to My Blog

I have a couple of CAS cards that I would also like to show you. In these days of rising postage costs, flat cards are always useful to make, and these two cards would make good batch cards, that you could make in lots of different colour options as well. The first card was made using blue and lilac tones, and I simply created a reverse mask, sponging coloured ink through a circle aperture onto my card. I coloured the top and bottom circles first, and overlapped the middle one last. I then selected three baubles, taken from the Santa Baby/Holly Bells Multi-Buy stamp set, and stamped them in the same inks that I used to create the circles, giving a tone on tone effect. The sentiment was taken from the Christmas Sentiments Multibuy


The last card was made in much the same way, except that I created a single circle, blending yellow and green inks, and chose a stronger ink to stamp the bells. The sentiment comes from the Bold Christmas Words stamp set.


Thanks for stopping by, Judith xx

Wednesday, 10 September 2014

Guest Post - The Mantlepiece by Veronica Pell

This week I would like to issue a warm welcome to Veronica who will be 'guesting'  for the next three weeks. For her first week she has chosen to create a wonderful vintage style card with the Santa Baby stamp set. So, it's over to you Veronica.

I thrilled to be asked to do a blog post by Glenda, as I have always loved her stamps since discovering them on C&C many years ago, back in the days when they only came on wooden blocks.

When I received my stamps to play with – Santa Baby and Holly Bells – the one image I really couldn’t see how to use was the mantelpiece – to me, it was unfinished, I wanted the rest of the fireplace! Funnily enough, it is the one I have used the most..............

My moment of inspiration came when I was using a friend’s holly wreath stencil and suddenly thought that the mantelpiece stamp would fit in the centre. I quickly stencilled it in Vintage Photo distress ink onto some spare card and took it home to play.

To me, this was a very Victorian image, which was why everything is vintage photo. I stamped the image in the centre and coloured it by dragging the colour out with a waterbrush. I sponged Scattered Straw distress ink very lightly round the image, then Vintage Photo working from the edges in towards the holly, finally adding a touch of Black Soot in the corners. Finally I matted it onto dull gold and dark brown card before adding to a white 7"x 7" card base.

This actually resembles a vintage photograph Veronica, very clever and thank you for designing is for us. I know you will want to add your comments to show your appreciation and if you want to see more inspiring creations then why not visit Vernoica's blog -Vrons Cards
 

Tuesday, 9 September 2014

CAS with Christmas stamps (by Maria)

Hello stamping lovers, this is not my usual style, but when I don't have too much time and a lot of other stuff to do, now and then I have to make a CAS (clean and simple) card. They are ideal for Christmas. I need something like 100 Christmas cards so high time to make it CAS! So here are my simple cards:


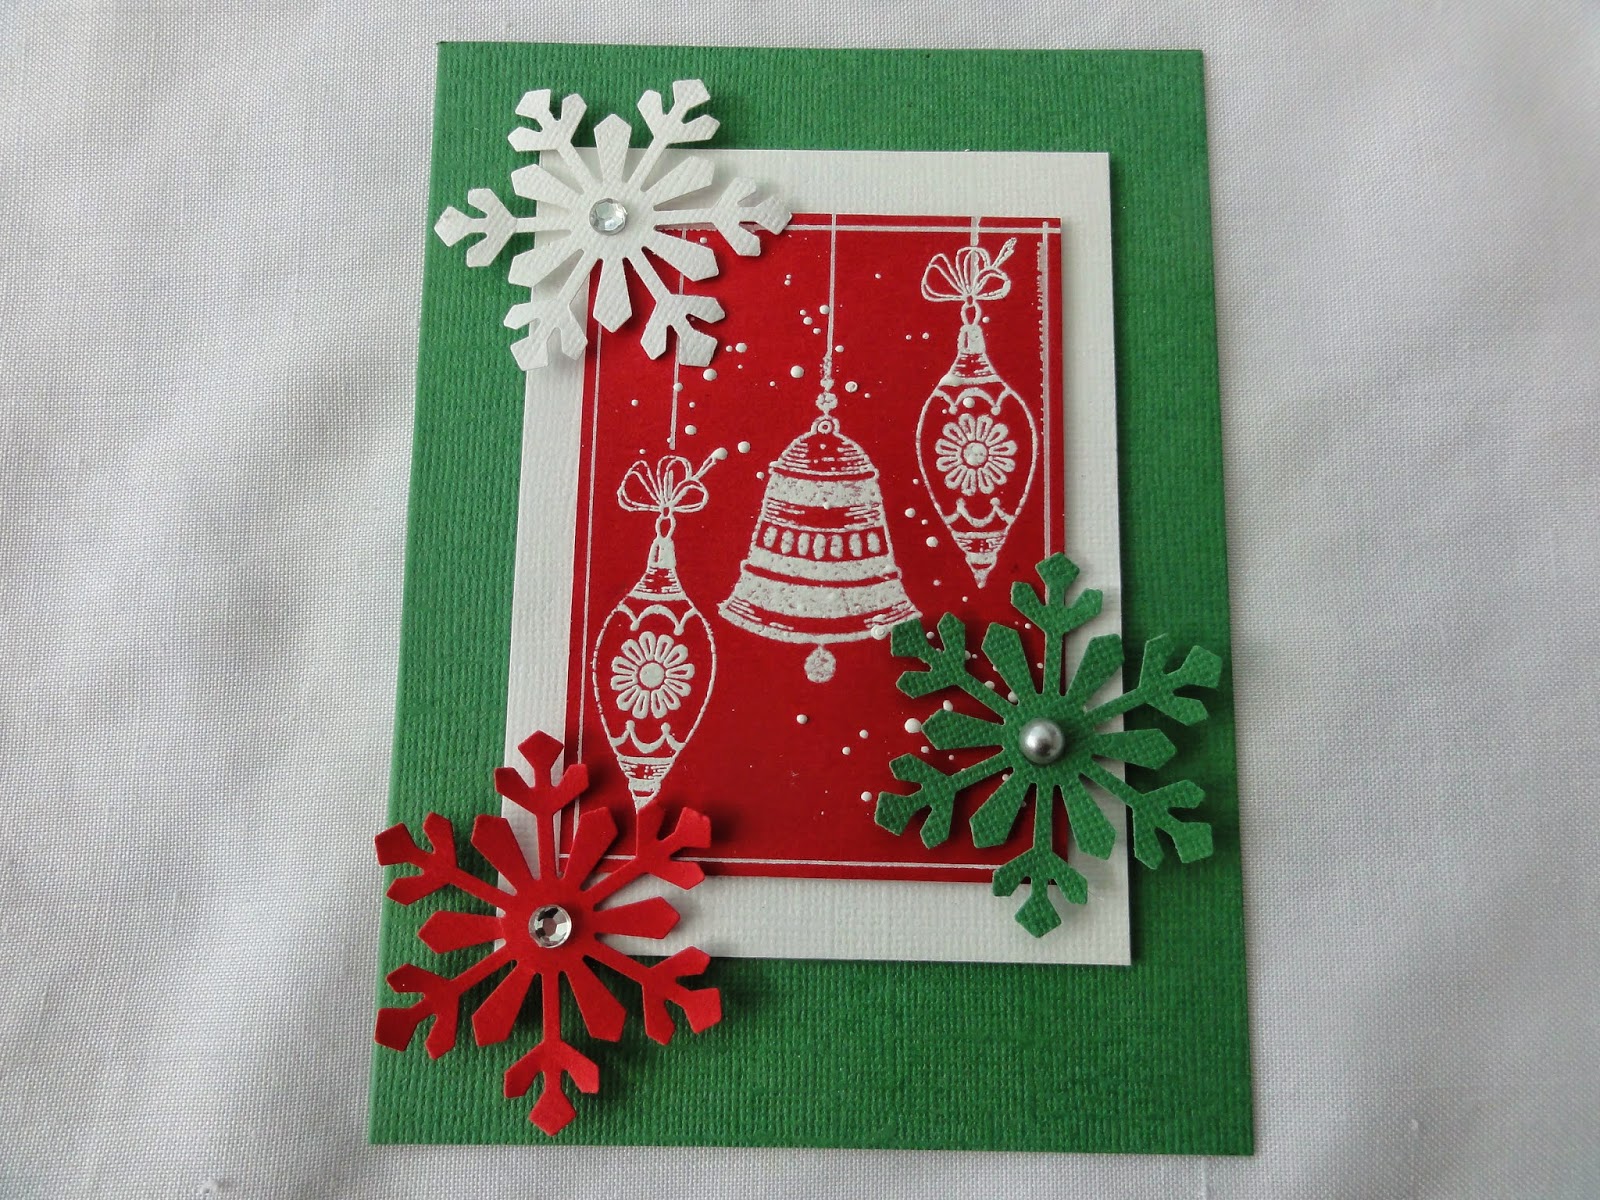
Some of the new Christmas stamps from Chocolate Baroque are just the way I like to use them "simple" in design. What do you think about them? I took red cardstock and Versamark, stamped the images, then gave them a bit of silver (first one) and white (second one) embossing powder, and embossed it with my heat-tool.  I put it on white and green cardstock paper.  From the same cardstock, I made some ice cristals with a paper punch, placed them on my card and added some gems in the centres. For the snow on the second card I used a white jelly pen. Very quick makes for very busy people. Have fun!

Greetings
Maria