Pin It button on image hover
Showing posts with label On the Tiles. Show all posts

Tuesday, 22 March 2022

Mosaic Circles (by Judith)

Hello everyone, I hope that you are keeping well. I have a project to share with you today showcasing stamps from last month's TV shows.

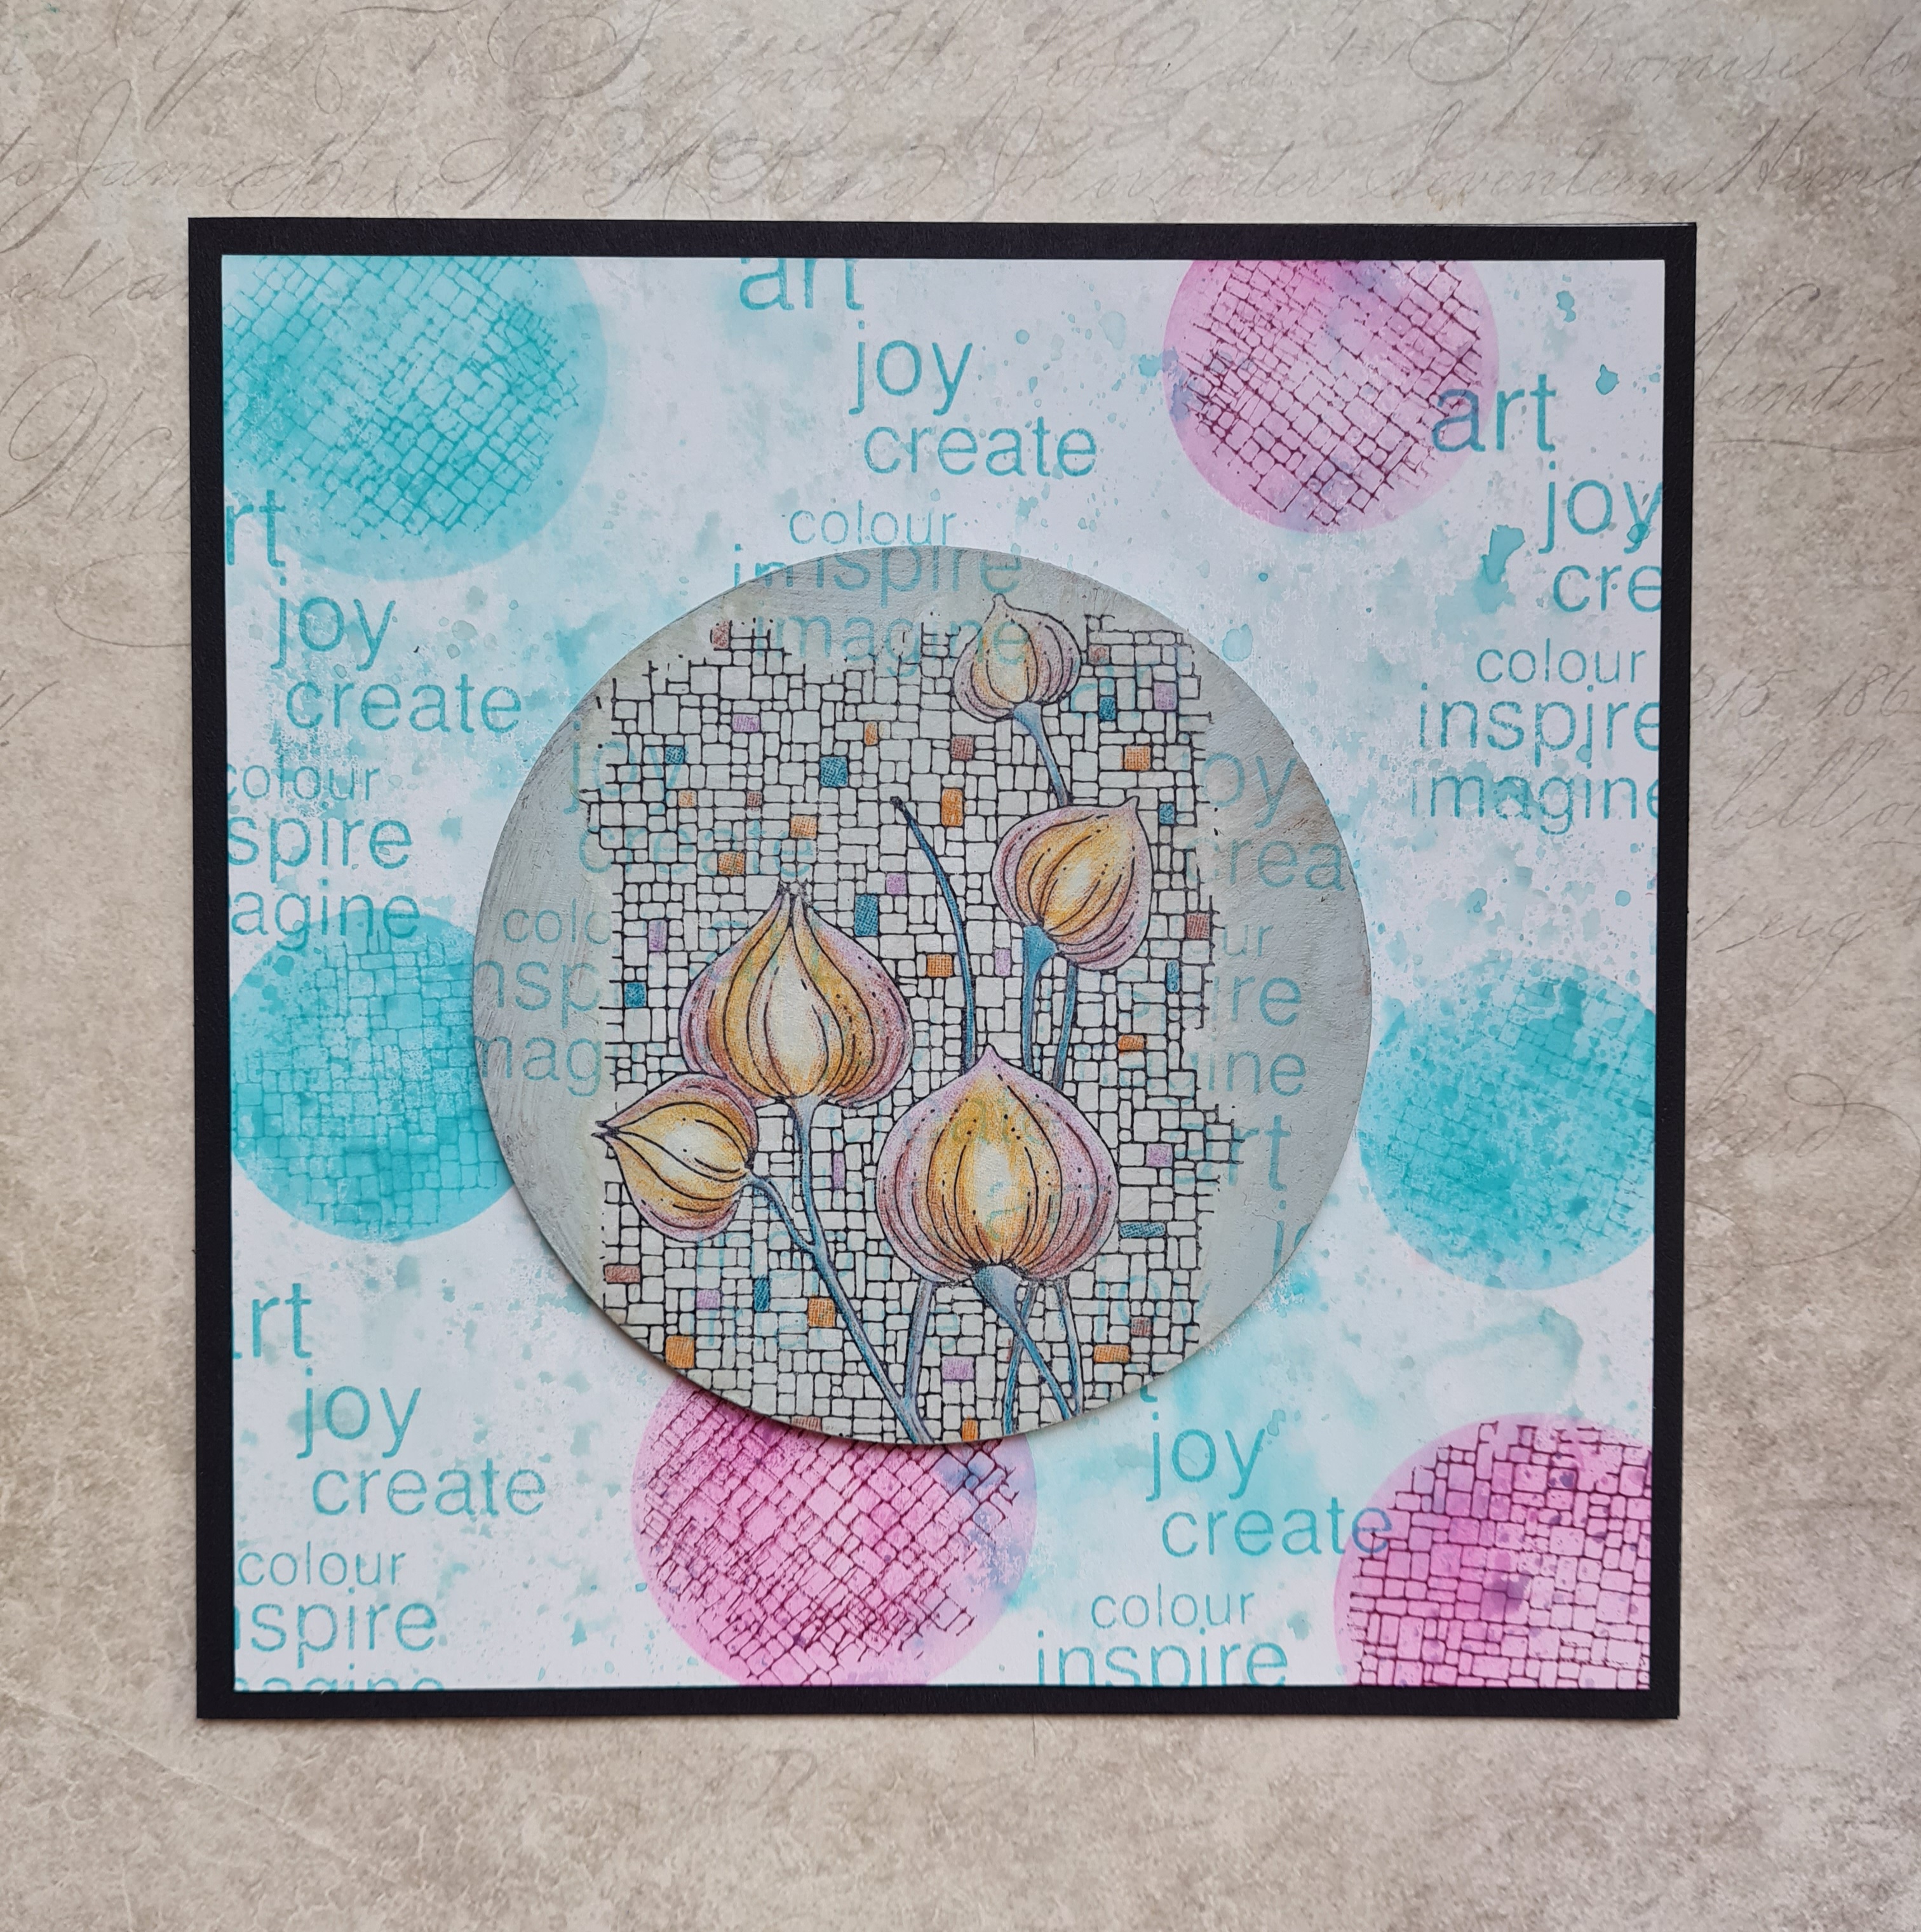
I created a background using Distress Oxides, and then used a stencil to apply colour over the top with blending brushes, and stamped On The Tiles through the stencil with a corresponding colour in Archival Ink. I added some words from the Bird of Joy stamp to the background to finish.

I painted a chipboard circle with acrylic paint, mixing white with a dark green to get the colour that I wanted. I added the same words that I had used on my background over the circle. I stamped the Mosaic Flower onto a piece of tissue paper, and coloured it with pencils, before sticking it to the circle with Matte Medium. I then attached the circle to my background, and used a piece of black card as a mat before adhering the background to a card blank.

I will be back next month with more projects to share with you. Thanks so much for stopping by, take care,

Judith xx


Thursday, 17 March 2022

Vintage Or Bright's? (By Tracy Thompson)


This is my second post for this month, showing some of my creations from  February's shows.  So let's start with the one above using the seed pod from the stamp set Glorious,  I love this card and loved the process too, my base layer is made using Distress Mica Sprays in three colours , wow does it shimmer.  Then for my main layer I stamped the seed pod onto some Chocolate Baroque's super smooth stamping card, then masked it.  Using Distress Oxides I smooched a background in three colours.  Removing the mask I coloured the image with pencils.  I stamped one of the leaves from the set in second generation around the image randomly.  I stamped out some words from the set, cut them out and inked the edges and adhered them to the card.  I just love the mica base card and then the vintage colours, they suit the seed pod so well I think.


So for my Notelet set I used several of the background stamps.  I used Square Bubbles, On The Tiles, Large Crackle and also I used the Butterfly Mind set and Words Of Comfort & Cheer.
My front cover is created by inking in three colours onto card, then I stamped the crackle background  to cover the whole of the background, then with a white gel pen I highlighted randomly along the lines.  I stamped a sentiment and a butterfly which I cut out but left in black and white for contrast against the bright colour of the background.


Now for the inside of the folder, I created a pocket on one side and layered a backgound on the other side.  Added a sentiment to one side then put some notelet cards which are below and matching envelops into the pocket. 


I created three Notelet cards and three matching envelopes, For each card I used each background stamp over an inky background made using Distress Oxide.  On each card I added detail with gel pens to give interest.  I added sentiments and butterflies to each one.  For the envelopes I stamped in grey the background stamp all over each one.

Thank you for popping by and I will be back near the end of the month with another post

Happy crafting
Tracy x

Saturday, 12 March 2022

Fabulous Flowers by Sandra


Hello everyone.
I am sharing some more of my cards from the February shows on Create and Craft.

For my first card I have stamped one of the flowers from the Glorious stamp set onto black card and embossed in Gold embossing powder. I have then coloured the flower with shimmer paints and added a border from Modern Textures and a Sentiment from Say it Vertically. I have mat and layered onto some gold card and then onto a 7x5 card base.


My next card uses the same floral image which I have stamped twice and fussy cut. I created a background from a master board I made using Distress Inks and On the Tiles, Square Bubbles and Large Crackle Background. I cut a piece down to fit onto a 7x5 card base and added the flowers on some foam pads to give some dimension. 
                                            ,

For my next card I stamped the second floral image  from the Glorious stamp set.  I coloured the flower with Distress Inks. Using the left over ink I made two little border strips and added a background using the smaller stamps from the set. I finished by adding gems and die cuts.

For my last card today I stamped the flower from Glorious in Memento Ink. I then coloured in different shades of grey alcohol markers and added corners stamps from Nature Swirls.


 Thanks for looking

Sandra x 

Friday, 24 July 2020

Make your mark (by Miranda)


Hello there,

It's me again, with some inky inspiration.......hope you like it.

Today I have used these stamp sets:


Again a background from my stash, this time made with Derwent Inktense art bars. When you use these, your background will be waterproof......

First I stamped the Mosaic flower using Memento London Fog. Then I stamped fragments of the 'on the tiles' background around the image.

I have used one of the stamps of the 'make a mark' set to create a structure on the edges using Memento Cottage Ivy. You can see that grungy structure below ...


here you can see the sparkle of the embossing powder a bit better.....
I have colored the flowers with my Derwent Colorsoft and used a white acrylic marker for some accents.

Then I did some embossing on the circle stamps and the dot texture. Make your mark is such a versatile stamp set, a real must-have and I will use that one a lot!

For the circles I have used Wow Cupcake Heaven, a lovely hot pink glittery powder and on the sequin dot stamp I have used Wow Peridot and 'jealous guy'. They have such funny names......

I stamped the text 'I make time to make Art't  from the Artistic Affirmations but only the words ' make Art'


Thanks for your visit and hope to 'see' you next time. Will be back next week!
Stay safe and creative,


Monday, 22 July 2019

A Trio of Cards (by Debbie)

Hi everyone it's my turn on the Chocolate Baroque Design Team blog today. I love all the great background stamps from Chocolate Baroque and my first design is just concentrating on using Damask Panel.
I started out by embossing three times on white card using a black inkpad and clear embossing powder. That done I got out my Distress Inks and sponged Seedless Preserves and Salty Ocean softly over the entire area. I then cut around two pieces leaving a narrow border and then mounted onto black card. The card blank is a white DL used sideways and as you can see I've attached one piece at the bottom right of the card and then turned the other piece up the other way and mounted it slightly over the bottom piece and standing up over the top of the fold of the card. I used 3D foam tape for this piece to give some dimension. From the 3D piece I die cut the tag and layered it onto some white card. The sentiment which has been stamped onto a punched circle, comes from Words to Dazzle and Sparkle, and I've edged the circle with a black pen. To finish I've punched three smaller circles, edged them also with black, and attached to the bottom left.

For my next design I've used one of my favourites, the very useful Mosaic Flower. I'm a great fan of monochromatic designs using just one colour but this technique using a spot of colour works well too for quite a dramatic effect.
I've stamped twice and coloured one piece with simply red and grey pens. I've then punched four circles from the image and again edged them with black pen. I've then simply overlaid them onto the other image matching up the design carefully. The 5" x 7" white card blank has been randomly stamped with On The Tiles using a grey inkpad and the image mounted onto red card before attaching to the card blank. The sentiment once again comes from Words to Dazzle and Sparkle.


My third design is a December birthday greeting using Hark the Christmas Rose stamped onto White Silk Board with black ink and embossed with clear embossing powder. I've watercoloured with the gorgeous Koh-I-Noor Brilliant Water Colour Palette and mounted onto brown card before attaching to a 6" x 6" ivory card blank. To finish I've wrapped some baker's twine around the fold of the card. The cute birthday greeting comes from the newly launched Christmas stamps, Christmas Circles.


Thanks for stopping by,

Debbie.
 

Saturday, 30 June 2018

A Rose With Love (by Zoe)

Good morning Lovelies and welcome to my final post this month featuring the beautiful stamps from the May Hochanda shows.

My first card I used some papers from my stash. I heat embossed first onto my background in white and secondly onto a red backing paper and then a green. I fussy cut my second and third image to decoupage and added some gold sparkle brush pen to the ribbons and added a few sequins to finish.

I used my Gel press to create this background and stamp with the gorgeous On the Tiles background stamp using a similar colour. I stamped the grasses from the Rose Duo stamp set in various Versafine inkpad colours, and the final grasses I used sparkle embossing powders in gold and copper to give some sparkle and texture.

Thank you so much for spending your time to visit and leave a comment.
Have a wonderful day xx Zoe xx

Wednesday, 27 June 2018

Feather (by Marga)

Hello everyone, today it's my turn to show you a card I made.


I stamped the background with an Orange ink and the feather I embossed with white embossing powder. I coloured the Feather with Distress Ink.
I used a red gel pen for the stiches and made some dots on the card and feather.
The sentiment I stamped with Versafine Onyx Black.

These are the stamps I used:


Hugs Marga


Saturday, 23 June 2018

Wish - by Magda

Good morning
Let's start this day with a wish after all the rain we have had lately.  I hope my rainbow card will bring some warm sunshine to everybody.

Step by step

1. Blend dark sky colours on a white cardstock using Stylus Tool and Distress Ink Pad
2. Apply rainbow colours of Distress Ink Pad on the feather from the sheet  "I shall be your wings"
3. Stamp as topper the sentiment of the same sheet and glue it on the card


As you can see, my second card is a decoupage one
Step by step

1. Stamp on a white cardstock two feathers from "I shall be your wings"  with 
    Distress Ink Pad Vintage Photo and one feather with Distress Ink Pad Black Soot in second
    generation
2. Blend the feathers using a Watercolour Brush - Detailer Tip, let dry and cut the image out.
3. Colour a white cardstock with Distress Ink Pad Mowed Lawn 
4. Stamp the background stamp "On the Tiles Individual" with Distress Ink Pad Fired Brick
    and cut the sape out.
5. Stamp ""I shall be your wings" sentiment on a piece of white cardstock coloured with           
    Distress Ink Pad Vintage Photo
6. Assemble the mat as shown in my sample and glue with Zig 2way Glue Pen - Broad Tip


I thought to use a Kraft Tag as third project for today.

1. Stamp the rose from the"Rose Duo" rubber set with Versafine Onyx Black 
2. Colour the rose with white Charcoal Pencil 
3. Blend if necessary with Lyra Splender Blending Pencil 
4. Colour a white cardstock with a mix of yellow  Distress Ink Pad shades to have a contrast
4. Stamp the sentiment from the plate Words of Inspiration with Versafine Onyx Black                    
    in second generation


I hope you had fun in visiting my page, thank you for passing by and see you next month with more samples.
Magda

Sunday, 17 June 2018

Mostly Masking (by Judith)

Hello everyone, I have several projects to share with you today showcasing the lovely stamps featured on the May TV shows on Hochanda. We also took Masking Tissue onto the show, and a lot of my projects reflected the use of this product.

For my first card,  I created a Pan Pastel background, tearing strips of paper to create hills, and adding a green colour at the bottom half of the card, toning in some grey as I moved up the card, to represent hills in the distance. I created a sky using blue and pink pastel coloured tones.

I stamped the floral spray from the Lords and Ladies stamp set repeatedly across the lower half of the card, varying the height of the stamp. I added a stamp from the Silhouette Grasses stamp set using second and third generation stamping for this stamp, to create some depth, as if there were a meadow of flowers. Two little butterflies from the Baroque Meadow stamp plate, and a sentiment from the Words to Dazzle and Sparkle stamp set completed the card. All of the stamping was done with a green Versafine ink, and the images were coloured with watercolour pencils.


I wanted to create a one layer card that would be cheap to send in the post, but still have the look of a multi layered card. Using a piece of masking tissue, I coloured a piece of drawing cartridge with Distress Ink, first around the outside of a central panel, adding shading, and then stamped over the background using the Square Bubbles stamp. I then removed the mask, and added the corresponding reverse mask, leaving the central panel uncovered, and inked the edges of that area with the same background colour as before.

I stamped the foliage stamp from the Rose Duo stamp set using first and second generation stamping in blue and green dye based inks, then ensured that all of the ink was completely dry. I stamped and embossed the foliage image with Versamark Ink and copper embossing powder. An optional extra at this point was to edge the background with Versamark and tip copper embossing powder over the edges, before embossing the foliage.

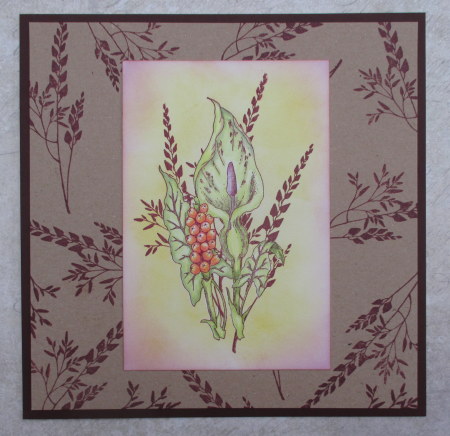
My next two cards are based on a very similar colour scheme to each other, and use the lovely Cuckoo Pint image from the Lords and Ladies stamp set. For the first card, I created a background using the foliage stamp from the previous card, stamping onto kraft card with a plum coloured ink. I created the main image by stamping the Cuckoo Pint, masking the image, and again stamping the foliage, again using plum coloured ink for stamping. I coloured the flower with pencils. adding Distress Ink to the background for a soft finish.

The next card was created by adding Brushos to kraft card and spritzing them with water. I added some toning hessian, a button and ribbon to the background. To create the focal piece, I stamped the Cuckoo Pint, and masked the image before stamping the On The Tiles image. I coloured the image with Distress Inks and a water brush. The two images have been coloured in similar colours, but the different mediums give a very different effect.

I hope tht you are enjoying the DT's projects with these lovely stamps, do keep checking in for more inspiration. Thanks for stopping by, xx

Tuesday, 12 June 2018

I shall Be...(by Marga)

Hello everyone, today it's my turn again to show you a card.


For this card I used three different colours of embossing powder to make the background, and with two of them I made the feathers also. The feathers and the sentiment I have stamped on black paper. The background I stamped on white paper.

I used these stamps for making this card.


Hugs Marga

Thursday, 7 June 2018

Rose and Feathers - by Magda

Hello,
I am so pleased to share with you the new stamps from Chocolate Baroque that are as usual, very detailed.
Here below you will find two step by steps, a journaling page and a card.


Journaling Page:
1. Cover your journaling page with white gesso
2. Blend Distress Ink Pad  Seedless Preserves and Worn Lipstick with a Stylus blending tool
3. Stamp randomly with water the background stamp  "On the Tiles Individual" and some
    feathers from "I shall be your Wings"  and let dry
4. Stamp some other feathers with Distress Ink Pad Antique Linen
5. Stamp with Versafine Onyx Black    the "Rose Duo" image
6. Add some colour to the rose
7. Stamp the sentiment from the rubber plate "I shall be your Wings" with Versafine Onyx Black 


Card:
1. Colour the white cardstock mat with Brusho watercolour red, yellow and orange, and let dry
2. Stamp the feather from "I shall be your Wings" on the right side of the mat with Versafine Majestic 
    Blue
3. Stencil white embossing paste on the left side of the mat and let dry
4. Apply a light coat of Stickles on the feather and on the embossing paste
5. Stamp the sentiment from the same plate "I shall be your Wings"  
6. Use some twine as decoration
7. Colour the second mat using a matching colour of the stamp
8. Glue both mats on your card


Thank you for passing by
Magda