Hello everyone, I am sharing my last Fairy project of the month with you today. I hope that you have enjoyed the beautiful projects that the Design Team have brought to you this month using these lovely stamps.
I have created my project using Pan Pastels for the background, adding stamps from the Fantasy Castle stamp set initially in the back of the picture, and then I added images from the Design a Tree collection to create a forest effect. I used coloured ink to add the little flowers to the trees, and a deeper shade of Pan Pastel to ground the trees, so that they did not float in mid air.
I stamped the fairy from the Spring Fairy collection onto a separate piece of card, and coloured the image with pencils, before cutting it out and adhering it to the background.
Thanks for stopping by, Judith xx
Showing posts with label Spring Fairies. Show all posts
Tuesday, 30 May 2017
Tuesday, 23 May 2017
Mystic Night (by Anne)
Good morning. Here is another of my samples for the recent TV shows on
Hochanda featuring the Spring Fairies stamp sets. I had so much fun with these.
Materials:
Materials:
- Spring Fairies Collection (March Fairy, Butterflies from March, April and May)
- Floral/foliage stencil and circle template
- 13.5 X 18cm card blank, card (black, turquoise glitter and white stamping)
- Watercolours with mica (green, pink)
- Watercolour pencils (flesh, blue, green, pink)
- Clear sparkle pen
- Stickles glitter glue (Star Dust)
- Glitter paste (turquoise)
- Versafine (Onyx Black)
- Apply glitter paste through the stencil onto black card using a palette knife. Leave to dry.
- Paint the background and moon using sparkly mica paints. Use a circle template to help (I used a circle die to draw around). Glue mats and layers to the card front.
- Stamp the fairy and butterflies onto white stamping card and cut out. Colour with pencils and paints with mica. Shape and glue to the card front with 3D glue gel.
- Finish with Stickles for added sparkle.
Friday, 12 May 2017
Butterfly Wishes (by Anne)
Good morning. Today I am sharing another of my samples for the recent shows on Hochanda.
I played with the butterfly stamp from the Spring Fairies April set. I used a stamping gear to create the wreath but you can achieve the same by drawing a circle (lightly in pencil), placing a little mark at 8 points around it and stamping freehand. Stamp and turn the card, stamp again keeping the angle of your stamp constant.
A simple wreath stamped onto a plain background, perhaps with variegated inks, would look quite pretty too.
Materials:
- Spring Fairy Collection (April) and Words to Dazzle & Sparkle stamp sets
- 6X 6 inch white scalloped card blank, plain card (black and white) and silver mirror card (plus ready made scalloped frame)
- Inkpads: Versamark and StazOn (Black)
- Embossing powders: white detail and silver tinsel (with glitter)
- Clear glitter glue
- Trim the black card panel and stamp the sentiment in the centre with Versamark. Heat emboss with white powder.
- Randomly stamp the butterfly with Versamark. Heat emboss with the silver powder. Glue to the card front along with the silver frame.
- Stamp the butterfly wreath onto silver mirror card with StazOn ink. Cut around the outside and layer onto white card. Trim around the outside to leave a white border and cut out the centre. Layer onto the card with foam pads.
- Finish with dots of glitter glue for added sparkle.
Wednesday, 3 May 2017
Decoration for a children room (by Magda)
Hello everyone, are you enjoying the stamps of the month?
The collections of Chocolate Baroque stamps: Spring Fairy Collection, Fantasy Castles and Magical Landscapes are really beautiful and you can use them in several ways.
Therefore, tales, castles and fairies made me think about making a decoration for a child's room.
Step by Step :
1. Take a round metal lid and cover it with gesso
2. Colour the dry gesso with Distress Ink Pad - Antique linen
3. Blend randomly through a stencil, Tim Holtz Mini Distress Ink Pad - Broken China and Distress
Ink Pad - Worn Lipstick
4. Stamp with Distress Ink Pad Vintage Photo the chosen castles from Fantasy Castles Rubber
stamp sheet A5
5. Blend some details of the stamp with Watercolor Brush - Detailer Tip
6. Colour the domes with Distress Ink Pad Fired Brick and the bushes with Distress Ink Pad - Peeled
Paint
7. Stamp the flower of May Fairy Rubber Stamp sheet - DL with Distress Ink Pad Fired Brick and
Tim Holtz Mini Distress Ink Pad - Broken China
8. On a sheet of A4 White Cardstock 250 stamp the fairy of May Fairy Rubber Stamp sheet - DL with
Tim Holtz Mini Distress Ink Pad - Broken China and cut it as decoupage
9. Glue with Inessentials Glue n Seal matte the blue Fairy between the castles and add the twine all
around the border of the lid
10. Add some dots of Stickles - Crystal on the wings of the fairy, on the flower stamens and on the
windows of the castle.
I hope you liked my first project for May.
Magda
The collections of Chocolate Baroque stamps: Spring Fairy Collection, Fantasy Castles and Magical Landscapes are really beautiful and you can use them in several ways.
Therefore, tales, castles and fairies made me think about making a decoration for a child's room.
Step by Step :
1. Take a round metal lid and cover it with gesso
2. Colour the dry gesso with Distress Ink Pad - Antique linen
3. Blend randomly through a stencil, Tim Holtz Mini Distress Ink Pad - Broken China and Distress
Ink Pad - Worn Lipstick
4. Stamp with Distress Ink Pad Vintage Photo the chosen castles from Fantasy Castles Rubber
stamp sheet A5
5. Blend some details of the stamp with Watercolor Brush - Detailer Tip
6. Colour the domes with Distress Ink Pad Fired Brick and the bushes with Distress Ink Pad - Peeled
Paint
7. Stamp the flower of May Fairy Rubber Stamp sheet - DL with Distress Ink Pad Fired Brick and
Tim Holtz Mini Distress Ink Pad - Broken China
8. On a sheet of A4 White Cardstock 250 stamp the fairy of May Fairy Rubber Stamp sheet - DL with
Tim Holtz Mini Distress Ink Pad - Broken China and cut it as decoupage
9. Glue with Inessentials Glue n Seal matte the blue Fairy between the castles and add the twine all
around the border of the lid
10. Add some dots of Stickles - Crystal on the wings of the fairy, on the flower stamens and on the
windows of the castle.
I hope you liked my first project for May.
Magda
Tuesday, 9 June 2015
Fairy Wishes (posted by Judith)
Hello everyone, I have a card to share with you today, using some of the new Seasonal Fragments stamps.I wanted to create a little scene using one of the older dandelion clock images from the Fragrant Honeysuckle stamp set and add the clock seeds as if a fairy was blowing them off the flower head.
I stamped the main flower image onto a piece of card, and then added the flower fragment across the bottom of the card. I added some colour to the background using Distress Inks. I stamped the seed fragment, and added a fairy from the Spring Fairy stamp set. I coloured the images with watercolour pencils, and added a little bit of Stickles glue here and there as an accent. I stamped a sentiment from the Card Sentiments clear stamp set to finish.
I created a larger mount for my image using Distress Ink once again to colour the background card, and stamped the seed stamp around the edges using the same colour for a tone on tone effect. I attached both pieces of card to a large white card blank.
Thanks for stopping by, Judith xx
I stamped the main flower image onto a piece of card, and then added the flower fragment across the bottom of the card. I added some colour to the background using Distress Inks. I stamped the seed fragment, and added a fairy from the Spring Fairy stamp set. I coloured the images with watercolour pencils, and added a little bit of Stickles glue here and there as an accent. I stamped a sentiment from the Card Sentiments clear stamp set to finish.
I created a larger mount for my image using Distress Ink once again to colour the background card, and stamped the seed stamp around the edges using the same colour for a tone on tone effect. I attached both pieces of card to a large white card blank.
Thanks for stopping by, Judith xx
Saturday, 31 May 2014
A little bit of Summer (posted by Judith)
Hi Folks, I have some samples to show you today showcasing the Summer Fairy Collection unmounted stamp set. This set is full of lovely fairy images, and some great floral images as well.
My first card uses one of the large silhouette fairies, which I have placed on an inked background, made using Distress Inks. I chose several colours which I blended across the page, and then placed a leafy stencil over the top, and used the same colours again to stipple colour through the stencil. I added some deeper colour around the edges of the background to create a frame, and then stamped the trailing ivy across the top of the page, using a navy blue ink. I added a border around the bottom half of the card, using a tree stamp taken from the Fantasy Woodland stamp set. The two trees are a stamp from the same stamp set. I added some shading underneath the trees using a paper mask, and a toning green ink. I stamped the silhouette fairy, and the little butterfly, which comes from the Autumn Fairy stamp set, using Versafine ink.
I added some glitter glue to the fairy and butterfly wings for a little bit of sparkle.
My second card uses a couple of the flower stamps from the collection to create a fairly clean and simple card. I cut a rectangle of smooth watercolour paper, and stamped the freesia stamp at the bottom of the card. I covered the image with a mask so that I could stamp the image again on either side of the original image.
I coloured the silhouette freesia stamp with Distress Markers, blending several colours, and stamped the background with the mask in place. I placed the mask on top of each freesia image in turn, so that I did not stamp over them. I then coloured the three freesia images with Distress Markers and a waterbrush.
I matted the picture onto a piece of dark green card, and then placed this onto a larger square of light green card, adding some orange and green ribbon to my main image. I added three Crealie butterflies to the large background.
My last card was created using lots of masking again, and a hand cut stencil. You can buy Stencil Blanks from the website and cut your own stencils very easily.
I used one of the large fairies from the collection, which I stamped and masked off, before stamping poppies from the Poppy Meadow stamp set. I then masked these flowers and stamped the little silhouette flower from the same set. I added the stencil and coloured the sun rays using Distress Inks, before inking the remaining sky with blue. I have added a shimmer spray over the top.
I have coloured the fairy and flowers with Distress Markers. The two tiny butterflies are half of a butterfly stamped twice, taken from the Spring Fairy stamp collection. I simply covered half of the stamp with masking tape before I inked it up, then removed the masking tape before I stamped it onto the page. I have decoupaged them, and added glitter glue to their wings. The sentiment is taken from the Fairyland Words clear stamp set.
Thanks for stopping by, Judith xx
My first card uses one of the large silhouette fairies, which I have placed on an inked background, made using Distress Inks. I chose several colours which I blended across the page, and then placed a leafy stencil over the top, and used the same colours again to stipple colour through the stencil. I added some deeper colour around the edges of the background to create a frame, and then stamped the trailing ivy across the top of the page, using a navy blue ink. I added a border around the bottom half of the card, using a tree stamp taken from the Fantasy Woodland stamp set. The two trees are a stamp from the same stamp set. I added some shading underneath the trees using a paper mask, and a toning green ink. I stamped the silhouette fairy, and the little butterfly, which comes from the Autumn Fairy stamp set, using Versafine ink.
I added some glitter glue to the fairy and butterfly wings for a little bit of sparkle.
My second card uses a couple of the flower stamps from the collection to create a fairly clean and simple card. I cut a rectangle of smooth watercolour paper, and stamped the freesia stamp at the bottom of the card. I covered the image with a mask so that I could stamp the image again on either side of the original image.
I coloured the silhouette freesia stamp with Distress Markers, blending several colours, and stamped the background with the mask in place. I placed the mask on top of each freesia image in turn, so that I did not stamp over them. I then coloured the three freesia images with Distress Markers and a waterbrush.
I matted the picture onto a piece of dark green card, and then placed this onto a larger square of light green card, adding some orange and green ribbon to my main image. I added three Crealie butterflies to the large background.
My last card was created using lots of masking again, and a hand cut stencil. You can buy Stencil Blanks from the website and cut your own stencils very easily.
I used one of the large fairies from the collection, which I stamped and masked off, before stamping poppies from the Poppy Meadow stamp set. I then masked these flowers and stamped the little silhouette flower from the same set. I added the stencil and coloured the sun rays using Distress Inks, before inking the remaining sky with blue. I have added a shimmer spray over the top.
I have coloured the fairy and flowers with Distress Markers. The two tiny butterflies are half of a butterfly stamped twice, taken from the Spring Fairy stamp collection. I simply covered half of the stamp with masking tape before I inked it up, then removed the masking tape before I stamped it onto the page. I have decoupaged them, and added glitter glue to their wings. The sentiment is taken from the Fairyland Words clear stamp set.
Thanks for stopping by, Judith xx
Tuesday, 22 April 2014
Magic Happens (posted by Claire)
Good morning, I hope you've all enjoyed the Easter Weekend. It seems to have gone so quickly but although Easter is over Spring is well and truly here and the Springtime Edges stamps are perfect for so many different projects. I've used them with one of the beautiful Spring Fairies for this card she is from the March set

I began by stamping the fairy with Memento Tuxedo Black ink and masked her with Masking Tissue to stamp the lovely primrose edge in the background (this time I used Memento Bamboo leaves). I left the mask in place while I created the background. Using PanPastels I added some shades of green to the foreground of the scene and then took shades of Yellow to create a sunny effect behind the image. I sealed the PanPastels with hairspray and used distress inks through the Lucious Leaves Dylusions stencil. I removed the mask and coloured the fairy and the primrose edges with Graph'It Markers. To finish off I added some tiny die cut flowers and stamped the sentiment which is from Fairyland Words.
Thanks for visiting today
Claire xx
Wednesday, 9 April 2014
Sprintime Edges (posted by Shirley)
Hello everyone, I hope you are doing well. Spring is taking a long time to arrive in our part of the world.
I have two designs using the beautiful new Springtime Edges, I've enjoyed pairing them up with other Spring collections.
The background on the card above was created with Ripe Persimmon and Mustard Distress Inks using the Acrylic Block technique. I stamped the Springtime Edge with Ripe Persimmon DI at the top and bottom. I had some wide canvas style material in my stash that complimented the colours but it's difficult to see the greens in the photo. The Tulip from Spring is in the Air is coloured with Prisma Pencils. I also did a little highlighting with a Gelly Roll pen.
The background of the above card is a piece of designer paper from my stash (pale yellow with tiny green dots). I used Olive Archival ink for all the stamping and coloured with Prisma pencils. The bottom design is from Springtime Edges and the top is from Spring Foliage. The sentiment is from Mackintosh Sentiments, another great set. The decoupaged butterflies are from the Spring Fairy Collection. I added glitter to the top foliage.
Thanks for your visit and have a great day,
Shirley
I have two designs using the beautiful new Springtime Edges, I've enjoyed pairing them up with other Spring collections.
The background on the card above was created with Ripe Persimmon and Mustard Distress Inks using the Acrylic Block technique. I stamped the Springtime Edge with Ripe Persimmon DI at the top and bottom. I had some wide canvas style material in my stash that complimented the colours but it's difficult to see the greens in the photo. The Tulip from Spring is in the Air is coloured with Prisma Pencils. I also did a little highlighting with a Gelly Roll pen.
The background of the above card is a piece of designer paper from my stash (pale yellow with tiny green dots). I used Olive Archival ink for all the stamping and coloured with Prisma pencils. The bottom design is from Springtime Edges and the top is from Spring Foliage. The sentiment is from Mackintosh Sentiments, another great set. The decoupaged butterflies are from the Spring Fairy Collection. I added glitter to the top foliage.
Thanks for your visit and have a great day,
Shirley
Monday, 24 March 2014
Sprinkled with Fairy Dust (posted by Claire)
Good morning, Claire here with another sample using the beautiful Spring Fairy stamps and the Fairyland Words which complement them perfectly.

I began by brayering the scene by masking the moon and using torn paper masks and Memento Inks in Pear Tart and Elderberry. I love memento inks for brayer work, the colours are lovely (they are on offer at the minute too, you can find them here). I wanted to create a distressed look to the scene so I splashed on some water and blotted it off with kitchen roll and then set to with a Crafters Workshop Harlequin stencil and Memento Tuxedo Black ink. Next I stamped the images, again with Memento Tuxedo Black and added some colour with Graph'It Markers. For a little sparkle, I stamped the images again on acetate and embossed with black EP and glittered the back. Once the wings were dry I added them with a little silicone glue for dimension.
The sentiment was stamped on white card using Memento Elderberry ink. I then brushed Matte medium over the image, sprinkled with glitter and popped the acrylic tag on the medium while it was still wet. Once it was dry I trimmed the excess card and added a little green ribbon.

To finish off I've matted on white, lilac and then black card and added some green silk ribbon and a lilac paper rose.
Thanks for visiting today
Claire xx
Wednesday, 12 March 2014
Fairy Friends (posted by Claire)
Good morning, Claire here with a sunny card made using the beautiful new Spring Fairy stamps. I love to work with sunny spring colours so I really enjoyed making this card.

I stamped the fairy (from May Fairy) and the bird on the grass (from April Fairy) and coloured them with Graph'It markers, adding the grass by flicking the markers. I used PanPastels to add the sky to the little scene.

The background was made using distress inks in shades of yellow and green. I used the acrylic block technique and then stencilled over them using the same inks with the Crafters Workshop Punchinella Template. I stamped the delicate flourish from March Fairy around the edges. I added a some lace, gingham ribbon, paper flowers and a little bee charm from my stash to finish off and popped my design on a scalloped card blank.
I hope you're enjoying some sunshine after all the rain we've had here in the UK
Claire xx
Tuesday, 11 March 2014
Have a Fairy Happy Birthday! (posted by Judith)
Hi Folks, here's a project for you using stamps from the new Spring Fairy Collection stamp set combined with some older favourites. I wanted to create a gift set that comprised of a card, gift tag and matching wrapping paper, using soft pastel tones. I picked five shades of Memento Ink, and created a background on my tag, and a large piece of white card. I stamped the fairies and butterflies using Versafine Onyx Black Ink. The extra fairies and buterflies are from the Winter Fairy and Autumn Fairy stamp sets.
For the tag, I added a sprinkling of glitter on the butterfly wings and the trail of stars. The sentiment comes from the Fairyland Words clear stamp set. For the card, I added some clouds from the Magical Landscapes/Fantasy Castles Multibuy stamp set and a flower from the Decadent Brocade stamp set, which has been decoupaged. I have added some die cut leaves, and a sentiment as before.The wrapping paper was created using the same stamps as the tag, stamped with each of the ink colours, graduating across the paper.
Thanks for stopping by, Judith xx
For the tag, I added a sprinkling of glitter on the butterfly wings and the trail of stars. The sentiment comes from the Fairyland Words clear stamp set. For the card, I added some clouds from the Magical Landscapes/Fantasy Castles Multibuy stamp set and a flower from the Decadent Brocade stamp set, which has been decoupaged. I have added some die cut leaves, and a sentiment as before.The wrapping paper was created using the same stamps as the tag, stamped with each of the ink colours, graduating across the paper.
Thanks for stopping by, Judith xx
Saturday, 8 March 2014
Magical Spring Fairy (by Shirley)
Hello Everyone, I hope you are doing well. I'm dreaming of
Spring......but we still have 2 to 4 feet of snow on the ground and it hasn't been mild enough to melt much of it.
I have two cards to show today using stamps from the beautiful new Spring Fairy Collection. This first one features the beautiful March Fairy.
The background was created with London Blue, Cut Grass and White Linen Dylusions inks. To create the water marks, I sprinkled sea salt while it was still wet and when dry, brushed it off. I stamped the fairy from March Fairy & beautiful sentiment from Fairyland Words with Deep Purple Archival ink (it looks blue in the photo). I stamped the Winter Aconites from Spring is in the Air with Mowed Lawn Distress Ink. I coloured the images with my Prisma pencils. I added glitter to the fairy wings and some tiny pearl flowers that I found in my stash.
I also have a CAS design, that was quick to create.
I cut a circle in card stock and used the negative for a mask. I blended Squeezed Lemonade and Peacock Feathers Distress Ink inside the circle. I stamped 'Spring' from March Fairy and the pretty little Robin from April Fairy with Cobalt Archival Ink and coloured it with my Prisma pencils. I also added some glitter to the foliage and bird.
Thanks for your visit and have a great weekend,
Shirley
I have two cards to show today using stamps from the beautiful new Spring Fairy Collection. This first one features the beautiful March Fairy.
The background was created with London Blue, Cut Grass and White Linen Dylusions inks. To create the water marks, I sprinkled sea salt while it was still wet and when dry, brushed it off. I stamped the fairy from March Fairy & beautiful sentiment from Fairyland Words with Deep Purple Archival ink (it looks blue in the photo). I stamped the Winter Aconites from Spring is in the Air with Mowed Lawn Distress Ink. I coloured the images with my Prisma pencils. I added glitter to the fairy wings and some tiny pearl flowers that I found in my stash.
I also have a CAS design, that was quick to create.
I cut a circle in card stock and used the negative for a mask. I blended Squeezed Lemonade and Peacock Feathers Distress Ink inside the circle. I stamped 'Spring' from March Fairy and the pretty little Robin from April Fairy with Cobalt Archival Ink and coloured it with my Prisma pencils. I also added some glitter to the foliage and bird.
Thanks for your visit and have a great weekend,
Shirley
Monday, 3 March 2014
Butterfly Fairy (posted by Judith)
Hi Folks, my mind turns to Spring at this time of year, as the tulips and bluebells start to push their green shoots up through the surface of my garden borders. There seems to be a flurry of activity in the air, and a bright day seems to bring the promise of better weather.
The new Spring Fairy stamps were just the ticket to create a Spring scene that seemed to echo those feelings. I created a background using paper masks and Memento inks in soft greens and lilacs. I added some foliage from the Spring is in the Air/Spring Foliage Multibuy stamp set, again using Memento inks. I painted the flower heads with bleach, before colouring them with pencils.
I stamped the fairy, and the large butterfly from Patchwork Butterfly and coloured them with pencils. I stamped the antennae of the butterfly onto the background. I cut off the fairy wings, and the butterfly body before adding them to the background.
The new Spring Fairy stamps were just the ticket to create a Spring scene that seemed to echo those feelings. I created a background using paper masks and Memento inks in soft greens and lilacs. I added some foliage from the Spring is in the Air/Spring Foliage Multibuy stamp set, again using Memento inks. I painted the flower heads with bleach, before colouring them with pencils.
I stamped the fairy, and the large butterfly from Patchwork Butterfly and coloured them with pencils. I stamped the antennae of the butterfly onto the background. I cut off the fairy wings, and the butterfly body before adding them to the background.
Thanks for stopping by, Judith xx
Thursday, 27 February 2014
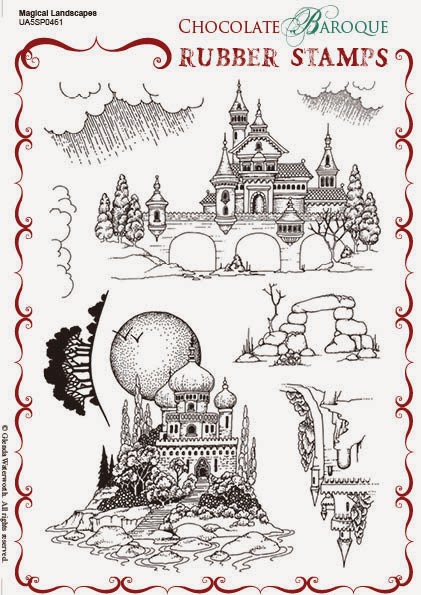
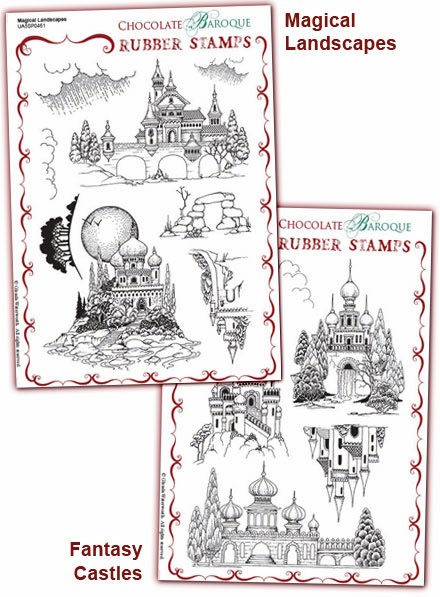
New stamps: Fantasy Castles and Magical Landscapes (by Glenda)
which go perfectly with Fantasy Castles
and of course we have a multibuy
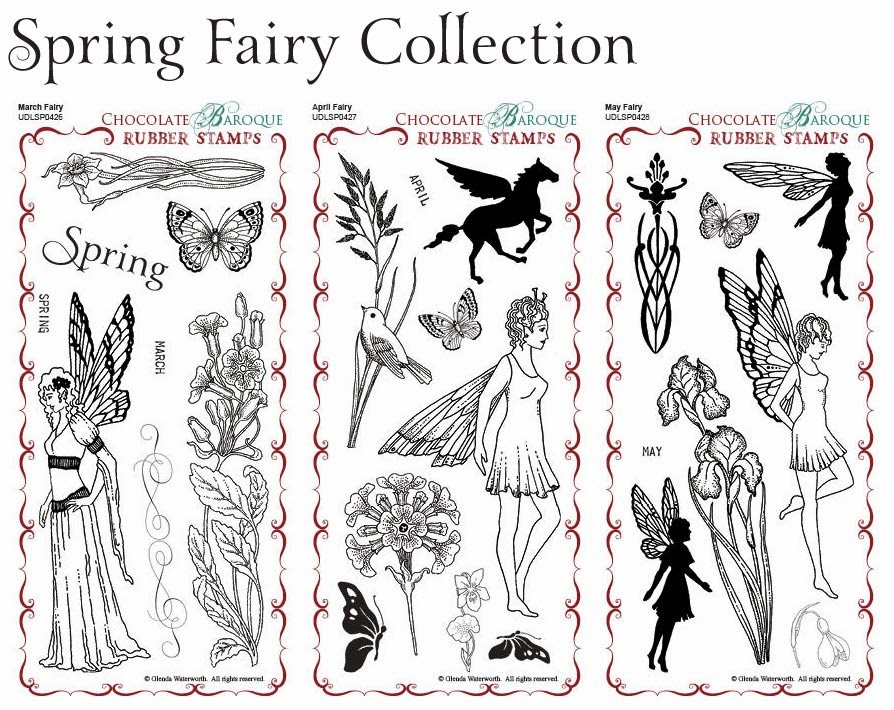
We are also launching our Spring fairy stamps comprising March, April and May, available individually or as a multi-buy.
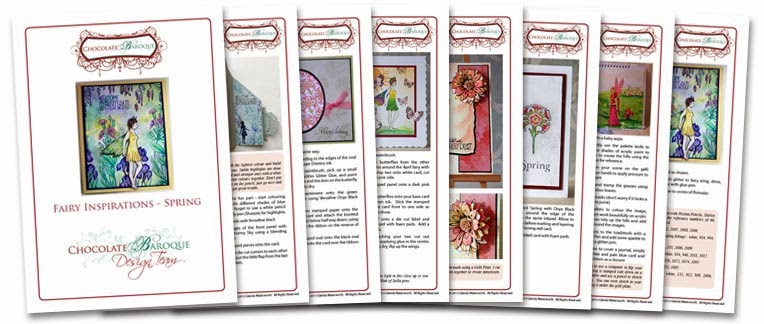
As with our previous Autumn and Winter fairy collections, we've put together a Fairy Inspirations Leaflet which is free for a limited time when you purchase the Spring Fairy Collection.
The
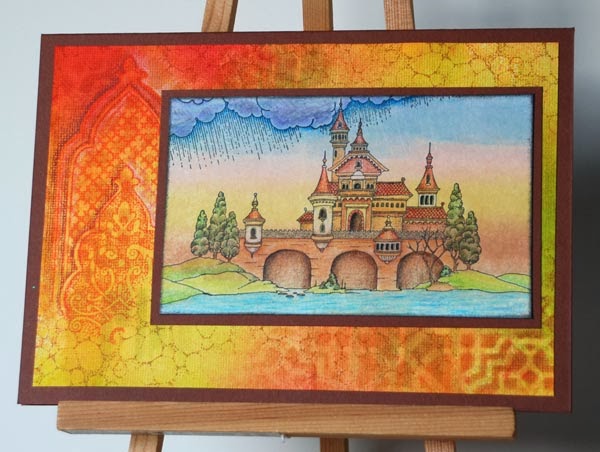
card above has been stamped onto a brayered background using a home
made kaleidacolour inkpad (I inked the strips with Distress Reinkers)
and I brayered onto a matte card rather than the usual glossy or silk.
After stamping the image, I continued some of the lines of the hills out
to the edge of the card, then masked off the roof and stamped the
clouds.
There
are two sets of clouds on Magical Landscapes with rain going in
different directions, so I simply rotated the small one and stamped it
so the angle of the rain is the same as the large. The scene is
coloured with Coloursoft pencils.
The
background is Dylusions sprays with a little stencilling and stamping
and I've used a nutmeg brown card for the base and layer.
At the moment you can find all these stamps in our New Stamps department and until the end of March, they are all at fantastic introductory prices.
I can see lots of possibilities for these stamps and you'll be delighted with what the DT come up with over the next month so stay tuned.
And if you don't already know, we reward our loyal commenters each month with a Chocolate Baroque gift voucher, and the more often you comment, the more chances you have of winning, so why not leave a kind word or two for the girls - it means a lot.
PS - talking of Design Team, yes we have selected our new team members and we will be introducing them in a couple of weeks once they've settled in!
Subscribe to:
Posts (Atom)