Pin It button on image hover
Showing posts with label O is For. Show all posts

Monday, 29 August 2022

Inky Inspiration by Natalie

So, this blog piece is actually three in one; August has been a mad month in both good and bad ways. Here, are my three projects all in one go for this month's blog.

Inky Background 1

This project is all about cartridge paper, which often gets overlooked in our stamping. It is a great way of adding layers without bulk, and is much easier to fussy cut.

Start with an A6 piece of cartridge paper, ink up with Saltwater Taffy Distress Ink and Weathered wood using a large blending brush. The paper is easily saturated so allow it to dry completely naturally. Once dry, tear it into two at roughly a third of the way down. Adhere to a piece of stiff card with a gap between the pieces. Trim this to a tag shape. Again, allow any wetness to dry and then brush around edges with more Saltwater Taffy.

Onto another piece of cartridge paper stamp two butterflies and flower bud, using Prize Ribbon Archival ink; such as these from Harebell Butterfly. Add a touch of watercolour using Saltwater Taffy squeezed onto your glass mat to your butterflies. Set aside to dry. Onto the next piece of cartridge paper, stamp the diamond background pattern using Weathered Wood. Tear a small strip to form the top section of your tag.

Adhere the diamond background piece to your tag. Next, ink up a couple more stems with Prize Ribbon Distress Ink and spritz with a light coating of water for an instant watercolour look. Stamp onto your tag directly and allow to dry. You can also add a smaller stem in Saltwater Taffy.

Going back to your Prize Ribbon Archival ink, stamp the herringbone ribbon from Making more Marks at the centre top of the tag and at the bottom left hand edge. The cotton thread stamp from the same collection looks great stamped in Saltwater Taffy as a finishing touch to your stamping. Add a pink toned eyelet to finish your tag.

Optional: Adhere your tag to your card, doodling a thread for it to hang on either vertically or horizontally. I used a blue fineliner to complement the colours used in the tag. 


Using ink as a guide

This project is all about your ability to write an x. If you are looking for a mindful project, this is the one for you. Grab your coloured pencils, turn on the zen music of your choice and focus on those x's.

Start by stamping the grid image from Small Graph Paper using a brown ink of your choice. You want to get this as clear as possible without looking too perfect. Over the top, stamp the O from O is for... in a pale ink that is just dark enough for you to see the edges of the tree detail.

Next, start by "colouring" in the O with a dark brown pencil drawing an x to every square wholly covered in ink, or use a half stitch, quarter stitch or ¾ stitch around the edges. I found it easier to do the colouring this way round. You then want to use different shades of green to make the tree canopies pop along the a different shade of brown for the trunk. Finish with the green of the hills.

Inky Background 2

This card uses the images from Thistle Butterfly by stamping wet in wet.

Start by creating a splodge background by applying your dye based ink to your glass mat or blending mat. Spray watercolour card with water generously and place into the ink multiple times to pick up colour. To add stronger colour, ink up one of the stamps with the same ink and spritz lightly with water to stamp wet into wet. Allow the colour to bleed into the still wet background by holding slightly longer in the stamp.

Heat dry and stamp with the same ink using the dandelion image in green archival ink around the outside. Add watercolour to the buds of the dandelions and a little warm yellow to the tips. Stamp your main image the same way and colour with the same ink as your background to make the image feel like a field of the same plant.

Mount to a white card base and create a border around with a fineliner. Stamp your sentiment onto a spare piece of card. Trim and add a border of green card. Adhere your sentiment and voila!
 

Sunday, 28 August 2022

Old Oaks And Roses


 This is the last post for this month showing some samples from July's shows, where we had lots of gorgeous stamps to use.  For my first creation I used 'O Is For' , you get three stamps with this set, the main image , a small oak tree and a verse.  I used the small oak tree to build up a background on a Distress Oxide background, I stamped the little tree using Versafine Clair in a green.  Using the same inky background I did it on a die cut circle.  I stamped the main image and added detail with some gilding flakes then matt and layered.


My second creation is made using Freedom Flower, another set with a main image then two worker stamps.  So for the background using the new Saltwater Taffy Oxides I edged the card fading to the centre.  Using the dotty worker stamp I went over the top of the ink around the edge.  I stamped out the main image colouring with matching Distress Ink, I stamped a further twice fussy cutting two layers to decoupage.

Thank you for looking and I will see you next month with more samples to see.

Happy crafting

Tracy x

Saturday, 13 August 2022

Freedom (by Sandra)

Hello, I am sharing a couple more of my cards from the July shows on Create and Craft.

My first card uses the O is for.... stamp set.
I stamped the main image onto some smooth cardstock in Memento ink and coloured with alcohol markers. I then used the mini tree stamp from the set and stamped around the edge of a slightly larger piece of card, changing the direction of the stamp each time. I then mat and layered these onto some black card and onto an 8x8 card base.


I used Freedom Flower for my next card.
I started with a piece of drawing cartridge  about 6.5" square. I stamped the flower image in the top right corner in archival ink and then covered with a mask. I repeated this 2 more times, varying the placement of the flower across the top of the card. Whilst the flowers were masked I used the splatter stamp from the set and stamped along the lower edge of the flowers. I removed the masks and coloured the flowers with watercolour pencils. I added the word "Gratitude" from Artistic Expressions.


 Thanks for looking

Sandra x

Sunday, 29 December 2019

Reflections by Brenda


Good morning, Brenda here with some more samples from last month's Hochanda shows.

My top card features Remembrance Tree with a Pan Pastel background, stencils and Distress Inks used to build up the scene and then the Tree stamped with Versafine Black and a reflection in the water and sentiment from the Harmony Tree set.


Here we have a Brusho background over-stamped with Small Graph Paper and then using Verafine black I stamped 'O' is for just as laid out on the set before cutting into separate stamps. I used my stamp platform to allow several inking to achieve a sold finish.


This is one of the Whiteboard Trading Hearts and inked with Distress Oxides, then stamped first with the grids from Small Graph Paper using a blue Versafine Clair ink, then Freedom Flower using with Versafine Clair, added some splatters around the edge using one of the worker stamps from the same set and highlighted with a white gel pen. The word is from 'F' is For, stamped onto vellum using the same ink and heat embossed with detail clear EP.


Yet more Distress Oxides and then the large image from Butterfly Mind stamped in Versafine Clair and texture paste and a stencil used to add sections of script. I also used the splatter stamp from Freedom Flower to add more interest and sentiment from the Butterfly set. I then stamped the Butterflies again onto vellum using Versamark, heat embossed with white EP, cut out, decoupaged and added wire antenna.


The background for this one was a leftover piece using Alcohol Inks and I simple stamped Harmony Tree and the sentiment with Versafine black and heat embossed with detail clear EP to prevent smudging as the base piece is a gloss coated card.

As always I appreciate your visits and words of encouragement.


Friday, 27 December 2019

Faux Stitching and Tree Landscapes (by Julie)


Hello, hope you all enjoyed your Christmas celebrations. I have a selection of cards to show today that I made for Chocolate Baroque's November, Hochanda TV shows.


My first is a DL card stamped with the Small Graph Paper design. There is a chain link design that comes with the stamp set and I used it to make the stitched design on top of the graph paper image. The back ground has been coloured with Distress ink and the distress stamp is from Freedom Flower.
The sentiments are from Journal Today


Following on the theme of stitching, I decided to make the small graph paper stamp look like a cross stitch design by stamping the flower from Freedom Flower over the top. I then mounted it onto some frayed burlap fabric. The background has been coloured with Distress inks and over stamped with the distress stamp from Freedom Flower. The sewing images are from Haberdashery
I finished the design off by colouring in the squares on the thin strip of graph paper from Freedom Flower to form Happy Birthday, much like you would on a cross stitch design.


This tree design is on the reverse of a recycled hanging ornament that I bought from my local supermarket. I stamped the tree from Remembrance Tree and the small tree from O is for... using an oil based dye ink that dries permanent. I then applied texture paste with a pallet knife to form the hills and when it was dry I coloured with Distress inks and gilding waxes. I made a mask for the sun/moon before colouring the background with Distress inks. I sealed the picture with a glitter spray varnish.


My last card is stamped with O is for.... The main central image was stamped with a blue, dye based ink and coloured with polychromos pencils. The background has then been stamped with the small tree that comes in the set and the edge was stamped with the distress stamp from Freedom Flower.

Thanks for stopping by and please call back soon for more Design Team inspiration.

Julie xx

Monday, 23 December 2019

F is For...By Debbie

It's time for my second visit to the Chocolate Baroque blog and more of my samples from the November Hochanda show. Chocolate Baroque launched 2 decorated initial stamps this month and here's the second one F is For and 3 samples with different looks and techniques.
This one has been stamped onto a mica sprayed background using Versafine black and I've added some colour to the flowers with water based pens. The image has been mounted onto black card and the 7 x 7 white card blank has been stamped with one of the butterflies from Butterfly Mind using grey ink.


 This one has been embossed with gold powder onto navy card and the flowers coloured with metallic pens. The A5 white card blank has been stamped with a worker stamp from Freedom Flower

The 3rd sample has been stamped onto white vellum with Brilliance Graphite Black and then the flowers coloured on the back with metallic pens. I have used clear foam pads and transfer foils to mask the pads which I have used to attach the vellum to some white card. To finish mount onto grey card, an embossed lilac piece and finally onto a white 5 x 7 card blank.

Here are the rest of my samples some of which didn't make it onto the show.


Butterfly Mind embossed with white powder on ivory vellum.


Butterfly Mind on a sprayed acrylic background


Butterfly Mind on a inked background 


 Butterfly Mind gold embossed on a card front and cut away on one side


Freedom Flower, Butterfly Mind and 


That's all from me for this time and my last time on the Chocolate Baroque Design team as I've made the decision to concentrate on my own workshops and craft projects. I'll still be keeping up to date with Lesley and all the team so from me, bye for now! Debbie


Tuesday, 17 December 2019

Wood Paneling and Beautiful Grunge by Penny

Goodly morning peeps, I hope you are all keeping well.  Are you all ready for the big day?  Or are you like me - chasing your tail to try and get everything finished in time lol!  Ah well, no change from every year then ha ha.  I'm here to bring you my last post of 2019, featuring the beautiful CB stamps that were launched on last month's tv shows.


Wood Paneling.


For this project I have used a stamp from the new Chocolate Blocks stamps - O is for... , and letters from the Classic Alphabet Upper Case set, Versafine sepia ink, Distress Inks, clear EP, CB Seasonal Elements  stencil and a stencil from my stash.
I began with a piece of white card and stamped and embossed the 'O', using sepia ink and clear EP.  I did the same with the other letters to spell the word 'Wood'.  I painted the tree and hill with DIs and added another hill in the distance.


I used both stencils to add leaves  and a woodgrain pattern to the focal panel.  I then attached the panel to a dark brown base card.  


Beautiful Grunge.


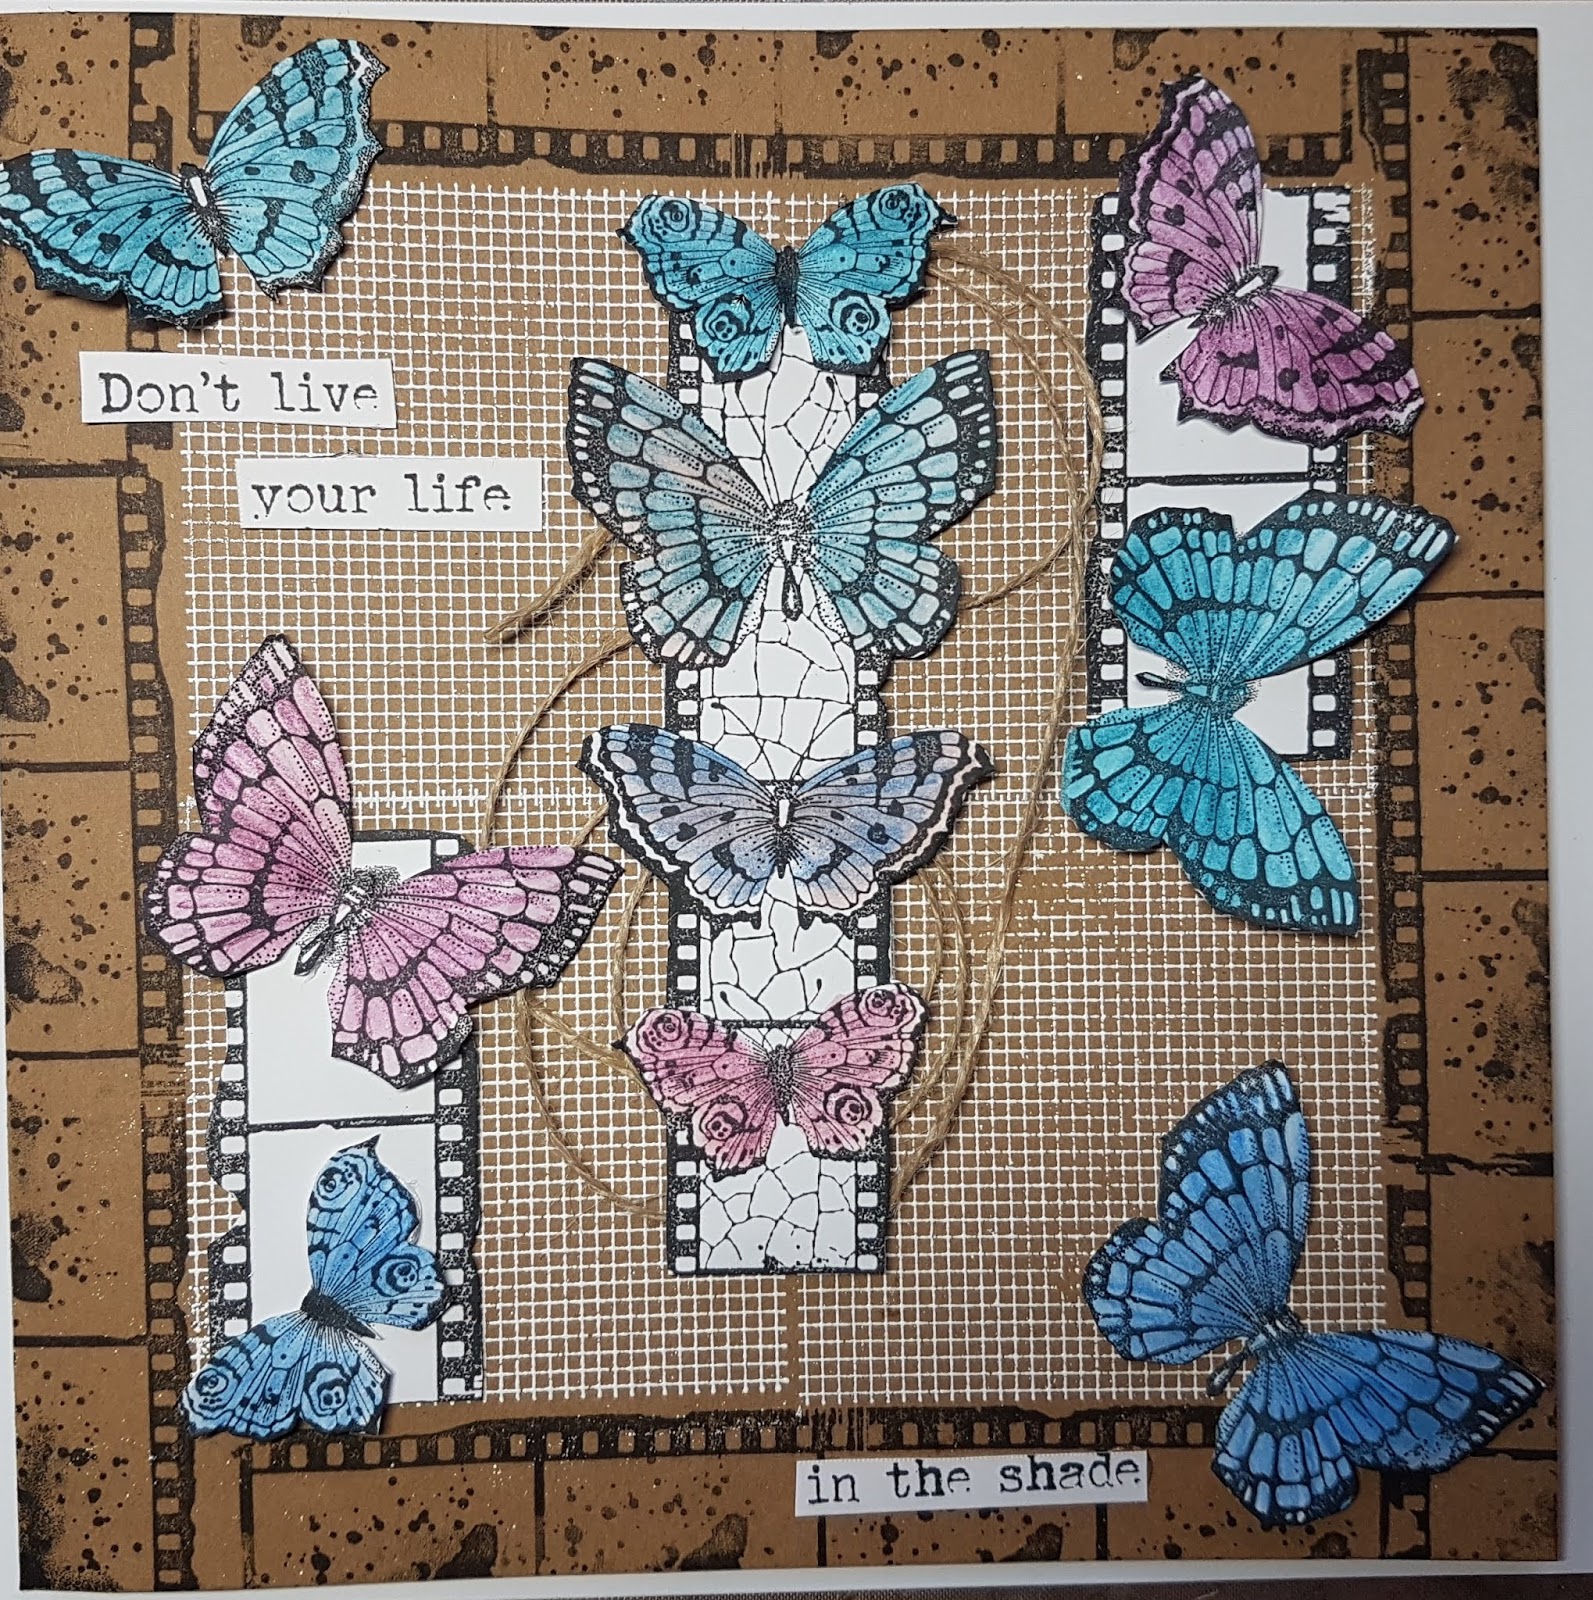
This is another card but with a grungy, pretty, mixed media theme to it.  I have used stamps from the Butterfly Mind and Freedom Flower sets, black Versafine ink, clear EP, Koh-I-Noor paints and metalic copper acrylic paint from my stash.
I started with a piece of corrugated cardboard and peeled away the top paper layer in various places to add texture.


I used  DIs to stamp the grid strip  randomly over the cardboard then added the dots.  When the inks were dry I dabbed copper paint all along one edge and held the panel up to allow the paint to run and drip down the panel. 


I took some white card and stamped and embossed the film strip images using black ink and clear EP.  I used the paints to colour the images before cutting them out and attaching them to the background panel.  I repeated the last step with the sentiments then attached the whole completed panel to a white base card.


Thank you very much for dropping in today, and for all your support and lovely comments throughout the year, I really appreciate it, and so do my team mates!  

I'll be back with more craftiness in 2020, in the meantime I wish you all a wonderful Christmas a very Happy New Year!


                           x x  Penny  x x

Tuesday, 10 December 2019

Fabulous Trees

Hello
I am sharing some of the pieces I made for the Hochanda show in November.

My first cards are from the new collection of Chocolate Blocks. Each stamp set comes with a focal image and a couple of extras. My first card uses the F is for...stamp set, great for a small, simple card or as part of a larger one . This was coloured with watercolour pencils.
 My second card uses the O is for.... stamp set with the dictionary script. Again, I used my watercolour pencils.

For this card I used the small tree stamp that comes with O is for..... and stamped repeatedly using my stamp platform using a couple of shades of Distress Inks.
Next I used one of the White Board Trading Hearts and coloured with Distress Inks.  I then stamped the Remembrance Tree, along with one of the many words, and embossed with white Embossing powder.

Finally, I used the bridge scene from the Kingfisher Song set and masked off the lower left section before stamping with the  Harmony Tree set.
These are really beautiful stamps and I hope you are inspired,

Sandra xx

Saturday, 7 December 2019

Beautiful Butterflies by Rachel

Good Morning - Rachel here with some of my makes from the November shows - most of these used the butterfly mind stamp set.


Firstly I have my ceramic piece - I used the film strip stamp and stamped the image on the piece - I then overpainted in glaze and added a few glaze dots too before firing.


In this card I first used the small graph paper stamp and versamark ink and white embossing powder on kraft...then I added the filmstrip butterflies and some extra butterflies too. I also outlined the card using the blank film strip.


My final card is on a brusho background and I used the small tree from the O is for stamp set to create a circle..... then I added butterflies from the butterfly mind stamp set and the sentiment from the F is for stamp set.

I hope you have enjoyed seeing these samples again!

Big hugs

Rachel xx

Friday, 6 December 2019

O is For.....By Debbie

Hello again and time to show you my samples from the November Chocolate Baroque  show on Hochanda. I really loved this month's launch, really versatile with lots of scope for ideas. Here's my first design featuring O is For.

 For this design I took an 8 x 8 ivory card blank. I started with a square of ivory card and masked a circle at the centre. I then took a circle die just to mark a larger circle around the masked area. I then sponged the entire area using Distress inks Peeled Paint, Wild Honey and then Vintage Photo around the edges. Now remove the mask from the centre. I used the small tree from the set to stamp all around the outer circle at clock number intervals. Next I stamped the "O" from the set into the centre of the masked circle using Versafine Vintage Sepia and sponged the sky and ground using a piece of torn card. I then coloured with water based markers. To finish, layer onto brown and Kraft card before attaching to the card blank.


Here's another look at O is For which I've stamped onto a mica sprayed background using Versafine Onyx Black and added some touches of colour with water based pens. I've used  the small tree again in the corners of the pink layer and then mounted onto a die cut background before attaching to a 7 x 7 white card blank.


For my next design I've used Remembrance Tree and Harmony Tree and I think this has to be my favourite of my samples. I've tried to depict the 4 seasons and I think it's worked out very well. I used backgrounds made with Distress inks with the spray & smooch method and then stamped with Versafine black. I just added a touch of colour with water based pens and the 4 pieces were mounted onto an 8 x 8 white card blank.


Here are a few more looks at those lovely tree stamps and ideas to go with them.


 Here we have 2 Artist Trading Hearts but I decided to turn them into pretty little plaques.

That's all from me for this time I'll be back later in the month to show you the last of my samples. Bye for now Debbie