This is my second post for this month, showing some of my creations from February's shows. So let's start with the one above using the seed pod from the stamp set Glorious, I love this card and loved the process too, my base layer is made using Distress Mica Sprays in three colours , wow does it shimmer. Then for my main layer I stamped the seed pod onto some Chocolate Baroque's super smooth stamping card, then masked it. Using Distress Oxides I smooched a background in three colours. Removing the mask I coloured the image with pencils. I stamped one of the leaves from the set in second generation around the image randomly. I stamped out some words from the set, cut them out and inked the edges and adhered them to the card. I just love the mica base card and then the vintage colours, they suit the seed pod so well I think.
Thursday, 17 March 2022
Vintage Or Bright's? (By Tracy Thompson)
Saturday, 12 March 2022
Fabulous Flowers by Sandra
For my last card today I stamped the flower from Glorious in Memento Ink. I then coloured in different shades of grey alcohol markers and added corners stamps from Nature Swirls.
Thanks for looking
Wednesday, 9 March 2022
Spring Flower (by Caroline)
Hello everyone, today sees the first of three posts this month from our Guest Design Team member Caroline Whatling. Caroline has created a beautiful floral themed card for your inspiration. Caroline writes:
Hello everyone.
It's my turn to blog this month, and I can't believe it's March already!!! I'm looking forward to Spring and all those gorgeous spring bulbs flowering. Talking of flowers, this week's card was made using one of the main flowers from the Glorious stamp set, and the background is the individual leaf from the same stamp set. I coloured the images with pencils and a white pen. I adore colouring florals, so these stamps are right up my street.
Hope you all have a lovely week. Bye for now,
Caroline xx
Sunday, 6 March 2022
Panelled Blending by Natalie
Today's card is all about healing thoughts: whether someone is under the weather or having a rough time. Today is a bad day for me as it marks a sad anniversary, so here's a little colour tip to brighten all our days.
Panel Blending
For this technique you will need some blending tape. You could use some low tack masking tape but it can be tricky to find it in narrower widths. Start with an A6 card panel. Use a wider width masking tape around all 4 sides; this ensures an even border around the panel without measuring. Use a narrower tape to mask the spaces between; you can do this by eye, or measure for accuracy.
Use scrap paper to cover the panels you aren't currently inking. With a blending brush and ink, start at the top of the outside panels and from the bottom in the centre panel. With a flicking motion sweep along the length of the panel from your starting point to create an ombre blend. Here's I used Peacock Feathers, Squeezed Lemonade (with a little Wild Honey) and Picked Raspberry.
Using worker stamps from the Glorious stamp set, stamp an image to the bottom of each panel without removing the masking. Black ink can go a little cloudy over Distress Oxide, so be sure to use a strong black hybrid ink pad.
Assembling the Card
Stamp and emboss in white your desired sentiment; mine was from the Words of Comfort and Cheer stamp set. A detail embossing powder typically works better for sentiments.
Mount the A6 panel onto a slightly larger piece of aqua or teal cardstock before mounting the entire panel and sentiment onto a 7x5" card base.
Saturday, 5 March 2022
Glorious Floral Delights (By Tracy Thompson)
For my next creation I made a large tag, using a die I cut the tag set which is a base, top layer and the eyelet covers.
Wednesday, 16 December 2020
Gerbera Delights (by Anne)
Hi everyone. I am delighted to be a guest designer for you this month. For my second set of projects I have had a play with the lovely new Gerbera and Friends stamps from Annabel. Love this set. Hope that these give you a few more ideas and fun playing with some of your stash.
I have also finally finished the last of my Christmas card batch making - phew. Why do I always leave them until the last minute! Ha ha.
Lots of hugs, Anne.
GERBERA AND FRIENDS
Materials List
- Stamp sets (Chocolate Baroque): Gerbera and Friends (main images), Words to Dazzle & Sparkle (sentiments), Glorious (leaf stamp)
- Card blanks and smooth card (sky blue, white or black)
- Inkpads: Stazon (Jet Black), Versafine (Onyx Black), Distress Ink (Gathered Twigs), Versamark
- Versamark embossing pen
- Embossing powders: detail white and metallic gold
- Mica powders: yellow gold, pink and purple
- Water based inks: Turquoise, yellow, green, red and magenta (I used Spectrum Noir Aquatints)
- Acrylic paint metallic pink (Starlight)
- Acrylic mat medium (clear drying)
- Colouring pencils (pink, green, yellow)
- Alcohol in pens (pink, purple, yellow)
- PVA pearls and Glossy Accents
- Acetate and translucent shrink plastic
- Decorative circle dies (Tonic)
Make a Wish Cards
I created a couple of cards using the lovely dandelion clocks. I remember as a child how we would blow the seeds from the flower heads whilst making a wish. Happy memories.
My card blank measured approx. 13
X 17.5cm. I trimmed my stamping card to 12 X 16.5cm and rounded off the
corners.
I painted on the water based inks,
blending them wet in wet (working from the top down). When dry I flicked with
water and lifted out colour with tissue to add texture. I also applied a circle
of water and lifted it out to create the moon.
The dandelions, sentiment and foreground
texture were stamped with Versafine. I lifted out some of the colour from the
seed head bases).
I also used Distress Ink to stamp
more texture at the base and to blend around the card edges. Black alcohol ink pen
was used to edge and frame the card before mounting.
My next card was more clean and
simple. The card blank was 15cm square and the blue background mat was trimmed
to 14.5cm.
I used dies to cut the decorative
circle (approx. 14cm diameter) and circular centre (approx. 9cm). A white paper
doily would also look good if you don’t have decorative dies.
The images were stamped with
Versamark and embossed with white powder. I mounted with 3D foam for added
dimension. Finally finished with PVA pearls.
Bright Gerbera Cards
I adore this huge Gerbera stamp
and wanted to make something really bright and cheery.
My card blank was 15cm square. I trimmed
black card to 14.5cm to create the background mount, and white stamping card to
13.5cm.
The card was painted with the yellow,
red and magenta inks, blending them outward from the centre. Versafine was used
to stamp the images.
Oh that Gerbera!
Again I used a 15cm square card blank and trimmed a black mat to 14.5cm. The background texture was stamped with Versamark and yellow/gold mica brushed over with a soft brush. Excess mica was removed with a microfiber cloth. Versamark was then applied around the edges which were embossed with metallic gold powder.
The sentiment and leaves were stamped and embossed onto black card. An embossing pen was used to edge the sentiment plate.
The Gerbera was stamped onto acetate and shrink plastic using Stazon which were then cut out.
The back of the shrink plastic was coloured with alcohol pens before shrinking with a heat gun. Coloured pencil was used to enhance the colour on the front before covering with Glossy Accents.
The back of the acetate image was coloured with mica powders mixed with mat medium. When dry the back was then painted with the metallic acrylic.
The photo really doesn’t do justice to the shine and mica sparkle on the Gerbera. Love this one.
LAST OF MY CHRISTMAS MAKES
Materials List
- Hark the Christmas Rose stamp set (Chocolate Baroque)
- 15cm square card blanks
- 14cm square smooth stamping card (suitable for watercolour and/or alcohol ink colouring)
- Inkpads: Versafine for watercolouring (Majestic Blue, Vintage Sepia), Memento for alcohol ink colouring (London Fog), Distress Ink (Peeled Paint, Tattered Rose and Chipped Sapphire)
- Alcohol ink pens (I used Chameleon pens) and coloured pencils (pink, yellow and green)
- Stickles glitter glue (Crystal)
How it was done (including my boo boo)
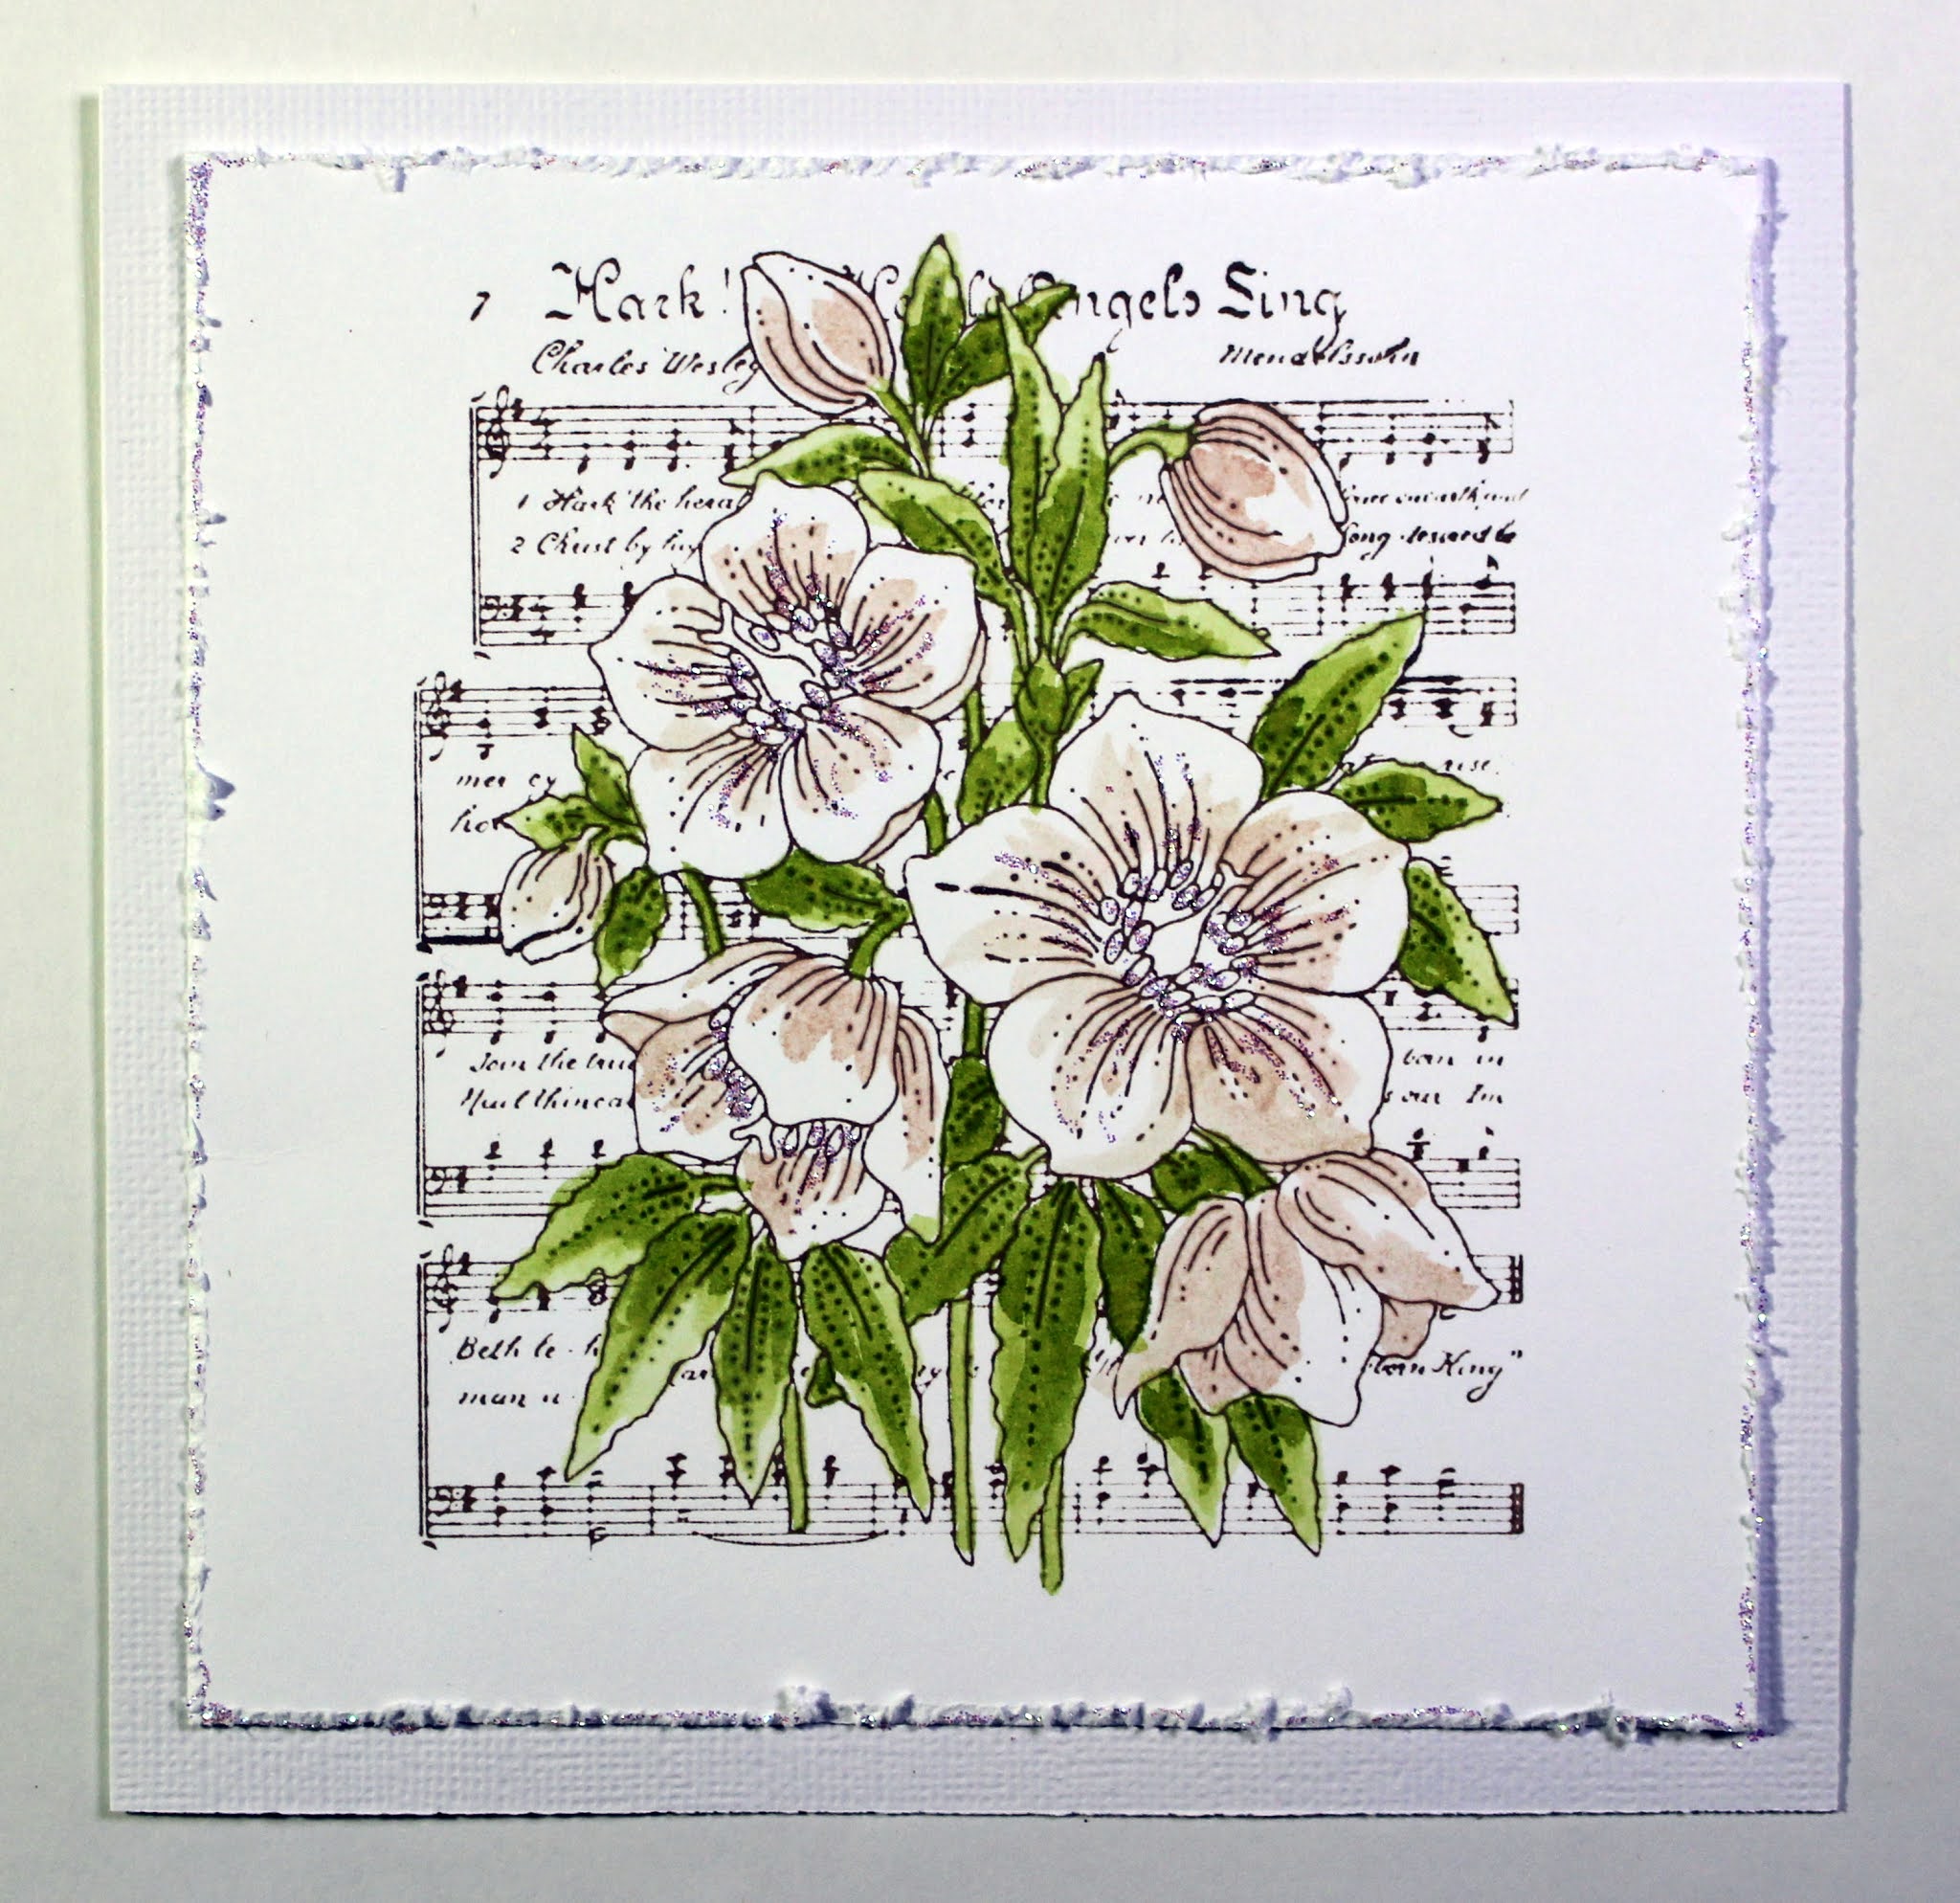
I love these collage panel style stamps for creating quick and easy batch makes – one stamp does all the work for you. I have stamped and coloured these but they would look equally good without colouring or perhaps stamped and embossed with a pretty metallic powder. I like to use a stamping platform for batch making as it makes it easy to line up and repeat stamp in a production line.
Stamped with Majestic Blue Versafine and coloured with Distress
Ink (Chipped Sapphire).
I just had to make a blue and white set. Those of you that know me will know that I love making these. However, I have been a little out of practice with my stamping and colouring this year and my first attempt was a flop – ha ha. I have shown my blooper as I thought it may be helpful if you have struggled with colouring.
This was my first attempt – eeek! Initially I tried to
colour with watercolour pen and attempted blending out with a damp brush. It
wouldn’t work very well and my watercolour just sucked straight into the card.
This really shows the importance of choosing the correct type of card for the
techniques that you wish to use. For watercolouring you need a card that will
hold the pigment without it bleeding out too much, but then release it again when
water is applied to allow blending and shading. This brand of card used to work
well but recent batches really have not worked as well so I suspect they have
changed the ‘formulation’.
As my watercolour pens were not behaving well with my card I
tried switching to Distress Ink. Applying to my mat, diluting out and picking
up with a damp brush. Distress Inks are specifically formulated to stay wet longer
and to blend more easily. It worked out much better on this card. The two
flowers on the left were my quick trial with Chipped Sapphire Distress Ink.
Another mistake I made was to go in far too heavily with the
colour. I was aiming for a softer colouring more suitable for the delicate
flower petals. This is achieved by using a more diluted colour and gradually
building up the layers and shading.
This shows the first stage of Distress Ink colouring using
very dilute ink.
Deeper colour was then added to give shading. Working more
heavily on the leaves and stems helped the delicate flowers to stand out more.
The edges of the card were distressed (using the edge of my
scissors) to give a soft textured border before mounting onto the card blank.
Lastly sparkly glitter glue was added to the flower stamens and around the edges.
Cannot have Christmas without at least a little bling.
My next set were also coloured with Distress Inks. I went
quite dark on the leaves to enhance the delicate flowers.
I was pleased with the delicate vintage look.
Next I coloured with soft pastel coloured alcohol ink pens.
Again my first attempt at colouring this batch was not
really what I wanted. I felt that the flowers were a bit too much, too Summery
and had lost their delicacy. Despite this I mounted this one as good enough.
I was happier with this colouring for the wintery theme.
Coloured pencil details (outlines, leaf & petal veins) were added in to
enhance the soft colouring.
Glad to have finally finished my Christmas cards – now to
get them all written up and posted.
I will be back again next week with some more stamping play
x.
Saturday, 25 April 2020
gelli seedheads (by Veronica)
Good morning everyone - today I am sharing some of the samples using the seed heads image from the glorious set of stamps. I loved this large stamp - my samples were done using a 7" square card base, to give an idea of the size - and it was the perfect image to go with a stack of backgrounds I had. The backgrounds were all made using inks and brusho powders on a gelli plate - I really liked the random nature of the results, even using the same colour combinations gave totally differing results.For my first card I used an autumn colour background, stamped the complete image using versafine onto the background and again on white card and clear embossed this one. I coloured the spare one with alcohol markers, cut the seed heads out and glued over the original image. I also added glossy accents to the front image to make it stand out a little.
The second background was more spring tones,and I stamped the words and the cracks from make your mark in grey ink round the edges before stamping the seedheads in black ink and clear embossing them. Seed heads coloured with alcohol markers - the centre of the background was light enough that the markers covered it quite well. Again i added glossy accents to the front image.Here I added the circles and cracks from make your mark, and the words from both of the main images of glorious randomly across the background. Seed heads stamped in black and clear embossed onto spare card, coloured with alcohol markers, cut out and glued in place.
This version I stamped the image and words in black ink, onto another gelli plate background, clear embossed, then used bleach on the seed heads. I used similar shades of distress ink to create a background for the base card using random stamps from make your mark.
When I cut the stamps out, I carefully cut between the main images and the words, so I could use the words separately if I wanted, but still line them up with the image as they were originally.....a tip from Judith that really works, it's a bit hair-raising the first time you do it though!
Tuesday, 21 April 2020
Fabulous Floral and Beautiful Seedheads by Penny
I took another of the backgrounds that I had made on a CB Craftalong, created with a Gelli plate and acrylic paints. This one was a lovely mixture of yellows and oranges I felt it only needed black, white and a touch of green. I stamped and embossed the large floral image and a sentiment onto the background and a couple of leaves on a spare piece of card. I used a white paint pen to colour the tiny flowers and painted the leaves with green DI before cutting them out and attaching them to the flower.
I trimmed the background panel and added black pen around the edges. I took a piece of CB Art Texture card which I had made into a base card and stamped two images from the Make Your Mark set using DIs around the edges. I stamped and embossed a large Bee image, coloured it and cut it out, then attached it to the card.
Beautiful Seedheads.
For my second project I have used stamps from the Glorious and Make Your Mark sets; Distress Inks, alcohol markers, sepia Versafine ink, clear EP, and a CB stencil from my stash.
I began by stamping and embossing the seedheads, masking them and repeating the step.
I then coloured the images with alcohol pens. I used DIs to stamp and stencil a background, then blended ink around the edges of the panel. I matted the focal panel onto black card, and created a sentiment panel in the same way
I took a white base card and stamped the seedheads in DI on one side. I used a brush and water to colour the image then attached the focal panel and sentiment panel.
Sunday, 19 April 2020
Book Making and Making Marks (by Judith)
My first project is a handmade book, I love books, and used to buy so many of them. Nowadays, I like to make my own, from simple accordian books, to fabric covered books that I have stitched together and used more complicated bookbinding techniques. This project uses a corrugated cardboard envelope that I received from a mail order company, and I have simply taken advantage of the fold of the envelope to create the spine of the book. I folded twelve pieces of drawing cartridge in half, splitting them into three groups, and these became the signatures of my book. I popped the pieces inside each other, so that I had four pieces of drawing cartridge sitting neatly inside each other, in groups of three. I made three holes up the fold of each group of paper.
I cut the cardboard envelope to make a cover so that it was slightly larger than the drawing cartridge, and made three lots of three holes in the spine, which would enable me to sew each signature into the cover in a simple bookbinding method. There are lots of You Tube tutorials for this, just do a search online for 'simple bookbinding', and you will find lots of help. If I were to make another one of these books, I do think that I would put washi tape on the spine for added strengthening, but I am not intending to put this book through a lot of tough use, so it will probably be okay.
I used bookbinding thread to sew the signatures into the book, but you can used dental floss if you do not have any specialist supplies.
I used black card as a matting layer, this really sets off the zingy colours that I chose for my masterboard background. I used Distress Inks to blend across some drawing cartridge, and added tone on tone stamping using the bubble wrap effect stamp from Make Your Mark stamp set. I added the cracked stamp and circles in grey ink, and some of the word clusters to build up the background. To finish, I stamped the large circle using black ink onto a piece of scrap card, added the words once more, and matted it onto black card, to create a topper. I felt that these words were perfect for a journal, and especially in these uncertain times, they can remind us that life is not so bad after all.
You could create lots of these masterboard backgrounds and cut them up to make cards, bookmarks, book covers, all sorts of projects, it just goes to show that these mark making stamps can be the stars of the show and not just for backgrounds.
For my next project, I created a background of soft greens, and added leaves and a word cluster from the Glorious stamp set using a darker green ink. I stamped the Floral Study onto a smaller piece of card, and coloured the image using watercolour pencils. I edged both pieces of card with Seedless Preserves Distress Ink.
The background on this card contains a bit of everything! I coloured the drawing cartridge using Distress Ink, and added some stamping using the Large Crackle Background stamp. The circles,words and bubble wrap image are from the Glorious stamp set, and I have used the Chocolate Baroque Strip Stencil set. I have stamped and embossed the Poppy Ledger image onto kraft card using white embossing powder, and coloured it using Koh-I-Noor paints.
Finally, a super quick little masculine card using kraft card once more. I used the tape image from Make Your Mark and three different colours of ink; red, brown and white. I then stamped the sentiment onto one of the strips, which is something that Lesley had always envisaged with this strip image. You could change the colours, as some of the other Team members have done, and make really colourful versions of this type of design.
Thanks for stopping by,
Judith xx
Thursday, 16 April 2020
Colour bursts by Brenda
And finally there had to be another using the lovely Poppy Ledger which I stamped with Versafine Claire, coloured with Distress Markers and used a die set to create the card.
Stay safe and well everyone.