Pin It button on image hover

Friday 31 January 2020

concertina book by Veronica

 my final share this month is the small concertina book, with flowers on one side and underwater bits on the other. I risked sanity by playing with editing effects and managed to brighten the photos up a bit, but the colours look a bit pale now.
I cheated and used the strip of ready scored drawing cartridge from the craftalong pack as the base , and coloured both sides using distress oxides and water on my craft mat.
I cut pieces of drawing cartridge for the panels and covers, and inked the covers to match the base piece.
Images stamped in black versafine ink and coloured with watercolour pencils , apart from the cog image which was randomly inked with distress oxide pads.
You will be relieved to hear that the scanner is now talking to the computer - well, I am anyway!- so better pix next time.

Wednesday 29 January 2020

Bouncing Birds (by Pat)

Hi everyone here is another post from our Guest Design Team member Pat, she has created a fabulous Steampunk themed card for your inspiration.

Pat writes:

Hi everybody, this is my last post and I am using the Steampunk Birds and a little flower from Punky Flowers. I have used black permanent ink, Distress Inks, dimensional glue gel, a blending tool and decoupage scissors.

I started by stamping the little chick three times on to white card using the black permanent ink and then watercoloured the three images with a yellow, orange and brown Distress Ink. I cut them out and used the whole image, then minus the egg to the right, then just the wing, followed lastly by just the shell over the chick. I decoupaged using the glue gel which gives it a nice 3D look. I then stamped the little birds and sentiments on to a 4" square piece of white card using more black ink and coloured them using a turquoise Distress Ink applied with a waterbrush. I then blended more orange and brown Distress Ink around the edges and added the decoupaged image to the centre.

Next I cut a piece of white card a little smaller than the square card and stamped the larger double bird image on a spring and also the corkscrew birds image which I thought fitted in nicely with the theme of the card, again using more of the black permanent ink. I then infilled with a small cog image from Steampunk Birds and the smallest flower image from Punky Flowers using yellow Distress Ink and finished with more yellow and orange and a small amount of brown Distress Ink blended around the edges.

Thank you for joining me here for the last three weeks and I hope that you have enjoyed my take on these really lovely and fun steampunk themed stamps.

With Best Wishes,

Pat.

Monday 27 January 2020

Breath, Dream, Explore by Penny

Good morning peeps,  I hope you are all managing to keep warm and dry in this horrible weather!  I'm here with my last post this month with a sample from the December shows featuring my favourite CB Steampunk stamps.  For this card I have used stamps from the Funky Fish and Punky Expressions sets, Distress Inks, black Versafine ink, clear EP, clear texture gel, die cuts, metalic paints and some air dry clay embellishments from my stash.


I began by creating the background panel.  I took a piece of  white card and blended three colours of DI's then dried it with a heat tool.  I used a couple of small worker stamps and randomly stamped them over the panel.   I then took a stencil from my stash, applied texture gel through it and left it to dry.  I blended DI around the edges of the background.


On another piece of white card I stamped a seahorse in black ink and embossed it with clear EP.  I painted the image with metalic acrylics then cut it out.  I used a die from my stash to cut out some 'seaweed', and painted a few air dry clay shell embellishments with the metalic paints.


  I took a white base card and stamped the same worker stamps around the edges.  I attached the background panel to it, then attached the sea horse and the embellishments.  I stamped a sentiment and cut some of the words off to attach them seperately.


Thank you for popping in today I hope you've enjoyed this little project.  I'll be back next month with some more crafty projects, in the meantime stay safe and warm,


                                xx  Penny  xx

Sunday 26 January 2020

Quick Gelli Print Cards (by Judith)

Hello everyone, I have a couple of cards to share using the stamps featured on last month's TV shows on Hochanda. Both cards follow the same basic recipe, but with a few tweaks here and there, I have created two very different cards, one for a male and one for a female recipient.

If you have a spare afternoon, create a few gelli print backgrounds, or rummage through some of the backgrounds that you have already made to see if you have something suitable for this project. I simply used a brayer to apply two colours of Distress Ink to the gelli plate, then stamped a dotty tool over the top to get the background effect before pulling the prints. You could press bubble wrap onto the gelli plate for a similar effect.

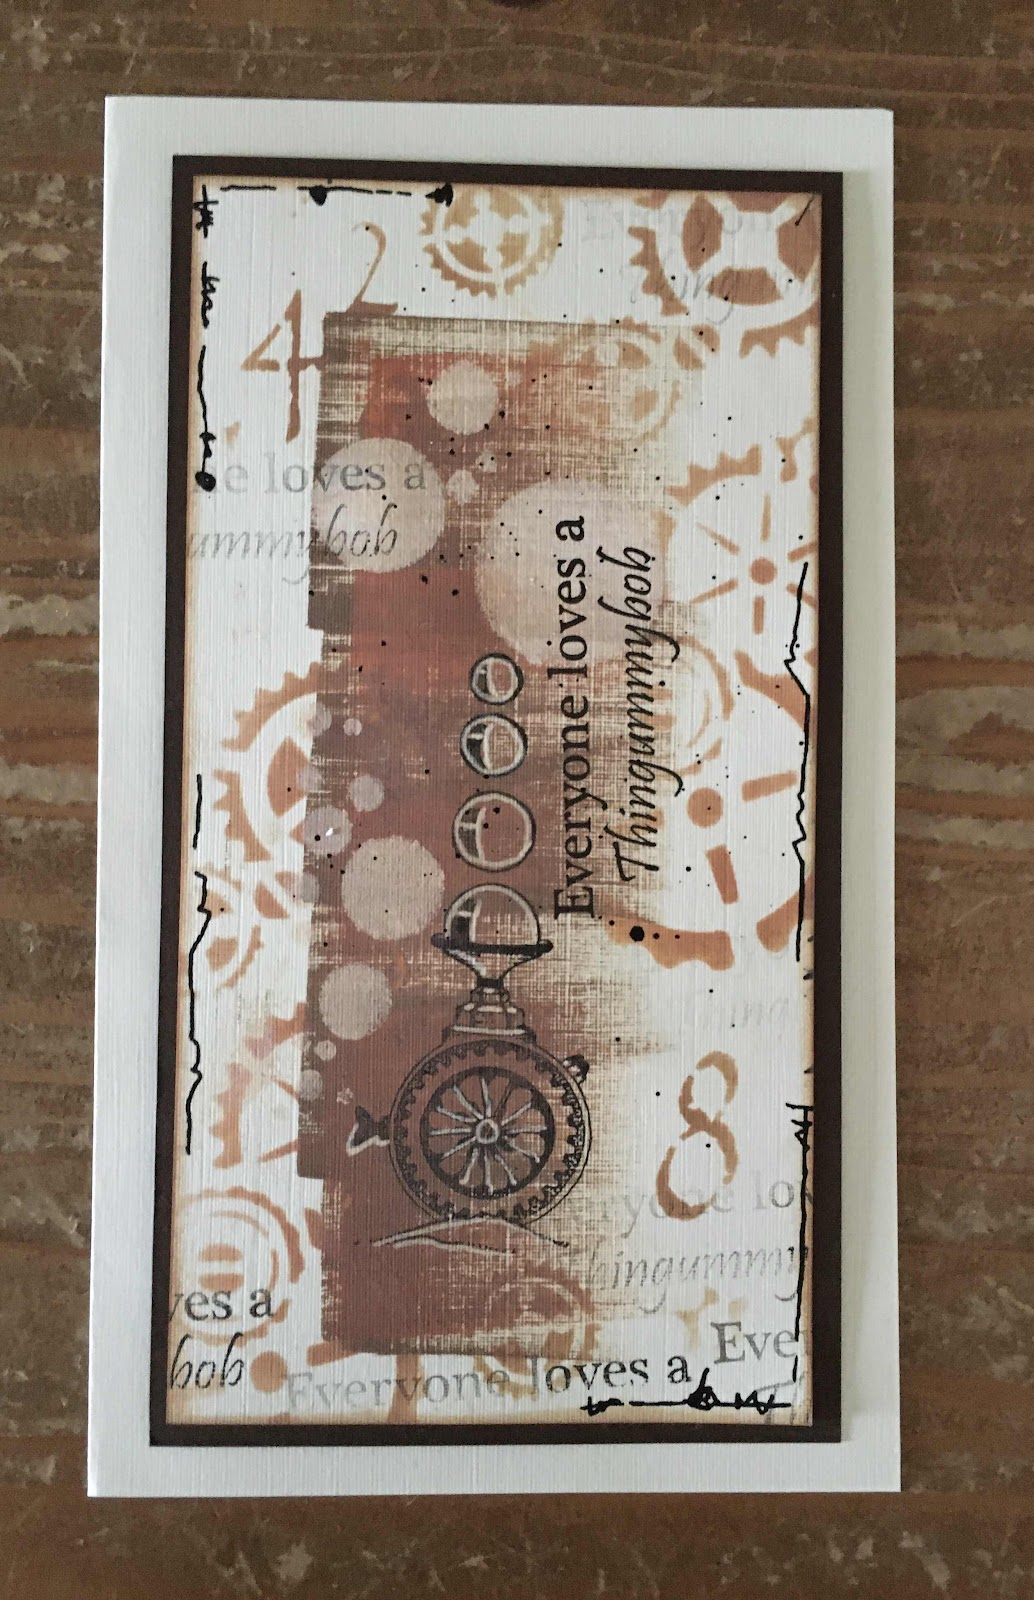
For my first card, I stamped and embossed a couple of cog images from the Punky Flowers stamp plate along the bottom of the background, using gold embossing powder. I stamped an image from 
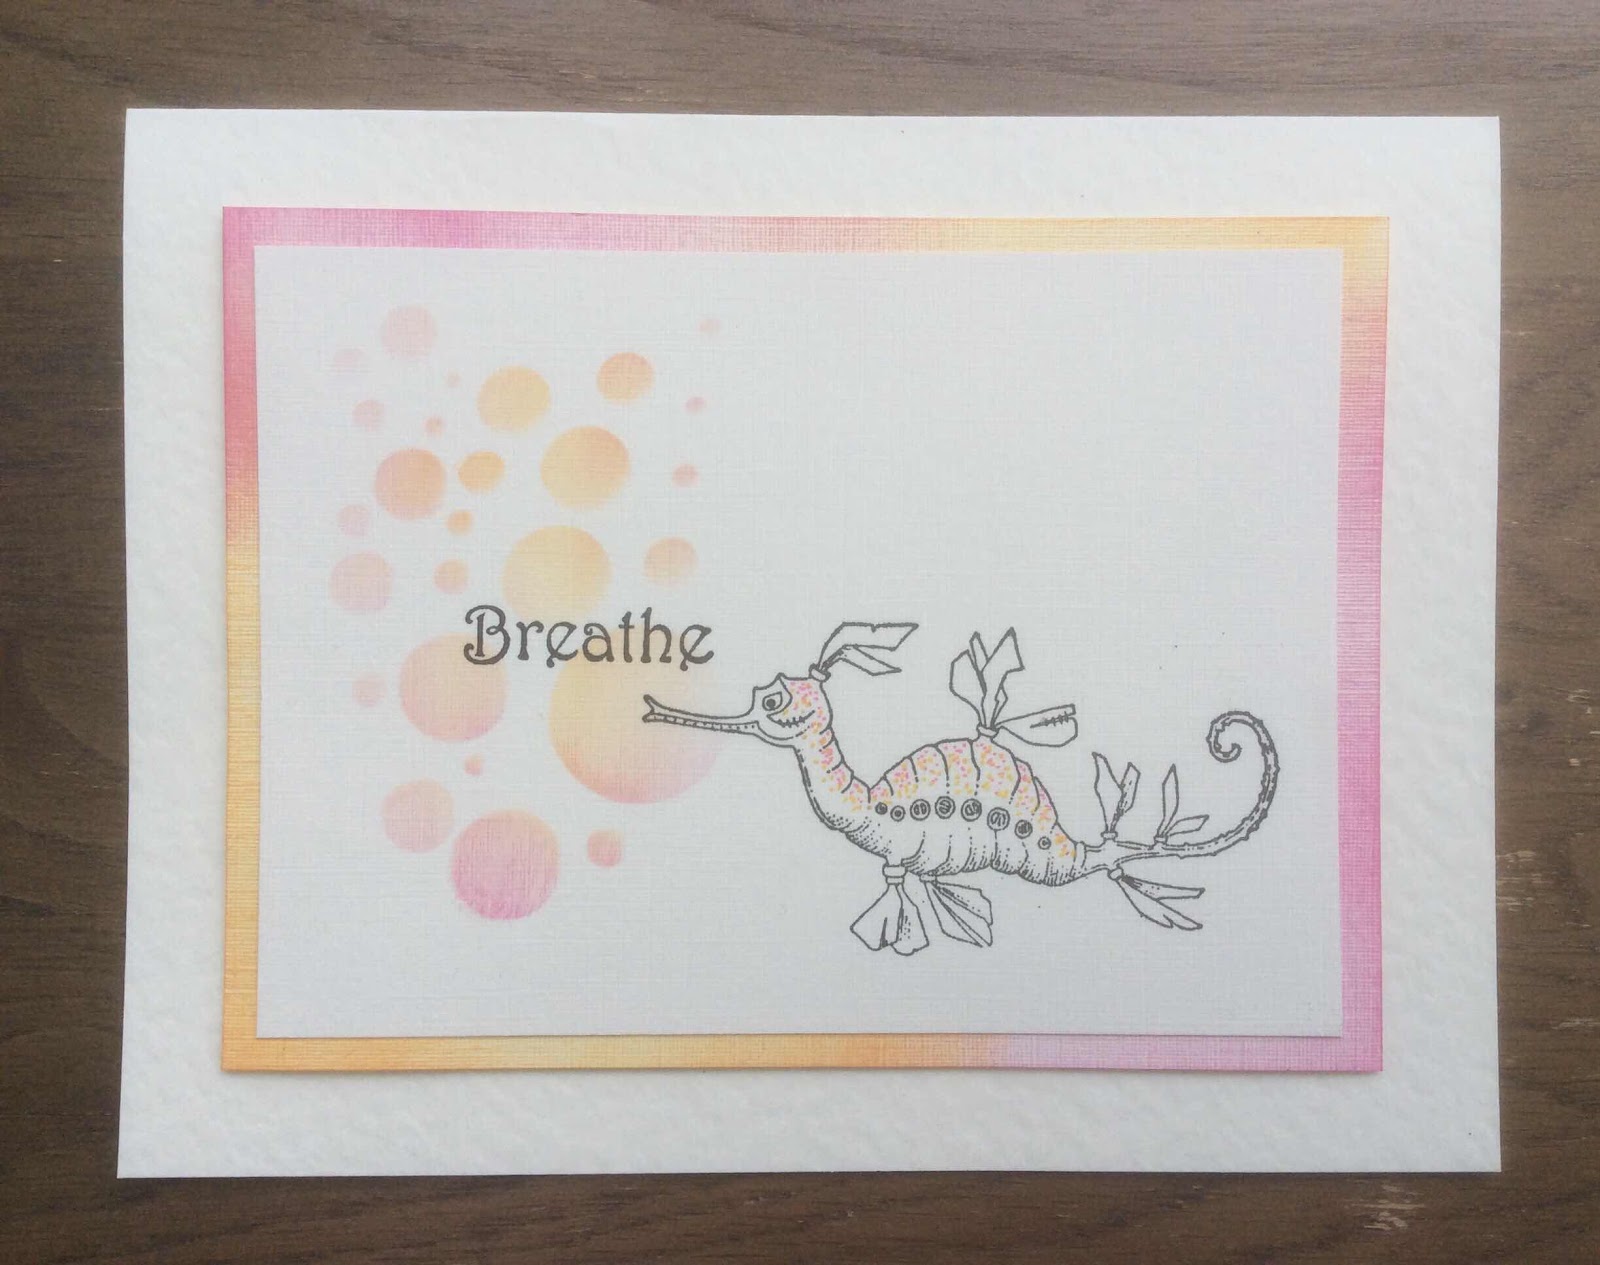
Steampunk Funky Fish and added a sentiment from Punky Expressions, using Archival Ink. I coloured the images using Koh-I-Noor watercolour pencils. Finally, I edged the background with blue Distress Ink.

For my second card, I created the background in exactly the same way, and then stamped an image from Punky Flowers using Archival Ink. I masked the flowers and stamped the image again a few times using Versafine Clair in a toning orange colour. I added a sentiment from Punky Expressions, and coloured the images with pencils as before. Before I attached my background to the card, I edged it with pink Distress Ink.

Punky Expressions is a very versatile stamp set, with words for lots of different occasions. These cards will be great for lots of different purposes, and can be sent to cheer someone up, just because, or for a particular reason. I hope that you will be inspired by my projects and try the ideas out for yourselves.

Thanks for stopping by,

Judith xx

Saturday 25 January 2020

Strut your punky stuff part 2 by Zoe

Good morning Lovelies and welcome to my final post this month featuring these fabulous funky punky stamps.

I’ve used a variety of mediums, Stencils and techniques on my samples, some backgrounds I had in my stash already.
I hope you like them?


Thank you for visiting, happy crafting, and have a wonderful day xx Zoe xx 

Thursday 23 January 2020

Imagination meets reality by Brenda


I'm here with some more Steampunk inspiration starting above with a triptych style creation using the birds from Steampunk Birds, all stamped onto an Distress Oxide background with some stencilling added. The birds have been coloured with pencils and some cogs added around the edges using stamps from Punky Romance.


A small shoal of fish here along with a pink Octopus - well it is fantasy! An Oxide background, stenciling and repeat stamping across the bottom using stamps from Steampunk Sea World and the fishes are all from Steampunk Funky Fish along with a sentiment from Punky Expressions.


My favourite Cockerel again from Steampunk Birds, this time stamped onto a piece of inked artboard and then covered with three coats of UTEE. The base layer has been stamped with several images from Steampunk Sea World and Timeless and a focal element mounted onto a piece of corrugated.

Have a lovely day everyone.

Wednesday 22 January 2020

Sailing Underwater Steampunk Style (by Pat)

Hello everyone, here is the second post this month from our Guest Design Team member Pat. She has created a fabulous steampunk themed card, great for those men in your life. 

Pat writes:

Hi everyone, I'm back with my second post for this month and I decided on something more masculine this time, although it doesn't necessarily have to be. I have used the Steampunk Sea World set of stamps, a sentiment from the Punky Expressions set, brown and blue permanent inks, clear gloss embossing powder, brushos in turquoise and orange on stencilled background, Distress Inks using a brown, orange and a blue for everything else, a waterbrush, a blending tool, and a stitched circle die.


I started by stamping the sailing ship using brown permanent ink and heat embossed with the clear embossing powder. I masked it to add the stencilled background using the brushos shaken sparingly on to the stencil itself and spritzed with water before pressing it on to the card. The colours have combined to make a pretty green, but as you can see with touches of orange remaining. I watercoloured the ship and added the blended blue over the background fading it towards the centre.

I then made a background using two more of the stamps from the same set again using brown permanent ink and clear heat embossed, then watercoloured with the brown. I finished by blending the same blue over the background making it darker around the edges and added a sentiment from the Punky Expressions set using the blue permanent ink which I clear heat embossed.

Thank you for joining me today and I will be back again next week with my last post.

Best Wishes,

Pat.

Tuesday 21 January 2020

Splendid! (by Sandra)

Hello
I am here today to share my second post with cards made from the December show on Hochanda.

All the cards are made with stamps from Steampunk Birds, Punky Expressions and  Punky Flowers


A couple of CAS card using the paddle duck and rooster. I coloured them with alcohol pens. I love the sentiments!


Next, I stamped some of the quirky flowers and coloured with Distress Markers.


And finally the adorable owl. I coloured with Distress Inks on a Brushos background.

Thanks for looking
Sandra x

Sunday 19 January 2020

Use Your Imagination (by Julie)


Hello, today I have three cards to show you, starting with my quirky Punky Flowers card.


I stamped the images first, using Onyx Black Versafine ink and coloured them with polychromus pencils. I then added the sentiment from Punky Expressions to look like it was being announced by the flower, before colouring the background with Distress and spray inks.


My second card is stamped with Steampunk Birds. I stamped the duck image in the centre of the card and coloured with polychromos pencils. The background is a mixture of Distress and spray ink. Once the spray ink was dry I stamped the sentiment from Punky Expressions and then sponged on white acrylic paint around the water and duck image.


My third and final card has been stamped with Punky Flowers. The central image is made up from the different sized flower heads in the set and the layered look has been created with copy paper masks. I stamped the flowers onto spare copy paper and cut them out so that they could be placed over the corresponding image so the flower behind could be stamped without creating overlapping lines. 
The sentiment is from Punky Expressions and the background is watercolour.

Thanks for stopping by.
Please call back soon for more Design Team inspiration.

Julie xx

Saturday 18 January 2020

Punky flowers, fish and birds by Rachel

Hello there. Rachel here again with a few more samples from the December shows.

In this first one I used an image from the Punky flowers sheet and teamed it with a sentiment from the punky expressions sheet. The flowers were coloured with water colour pencils.


In this one the background was created by brayering ink on a round gelli plate and printing it. Then I added a punky flowers image and coloured it with pencils before adding a sentiment from the punky expressions sheet.


This one has a brushos background tht I stamped the bird over - I then coloured it in using inks then painted the water before finally adding punky expression sentiment.


My canvas was a bit of a labour of love - the background was done mainly using foam and my fingers with acrylic paints from various sources! Once dry I added the funky fish and steam punk sea world stamps that I had stamped, coloured and fussy cut. I added them and overpainted using a gloss medium. 


Finally my free standing piece - for this I used the funky fish and some punky flowers on a monolith - both images were coloured using acrylic paint.

I hope this has given you more ideas as to how to use your stamps!
Hugs

Rachel xx

Thursday 16 January 2020

Sea Air - (by Magda)

Hi,
it is still Winter, but I am waiting impatiently for the Summer and the holidays at the sea side, therefore I propose to you some projects that smell of sea air,  I created using Chocolate Baroque plate " Steampunk Sea World ".
The images are stamped with Archival Jet Black and the various colours of blue, green and brown of Distress Ink Pad for the backgrounds, allowed me to travel with my fantasy in the depths of the sea.


I hope you liked my posts, thanks for reading, xx
Magda


Wednesday 15 January 2020

Feeling Like Spring (by Pat)

Hello everyone, this month our Guest Design Team member Pat is joining us to inspire you with some creative projects. For her first appearance, she has made a lovely Spring themed card.

Pat writes:

Hi everyone, I'm so pleased to be back with my first of three guest posts for this month. I decided to make us feel as though Spring has arrived, even though it will be a couple of months or so before we feel that Spring is in the air. I am using the Spring Bird Crocus set, Texture Fragments, a small dot stamp from Freedom Flower, the graph stamp from Small Graph Paper and the sentiment from Spring Bird Tulip set. Also Distress Inks- three greens, a lilac, purple and two yellows, clear gloss embossing powder, a waterbrush, a blending tool, and permanent purple and white pearlescent ink.

I stamped the smaller crocus image and the little flower border four times onto a 4" square piece of white card using the purple permanent ink and heat embossed with clear gloss embossing powder. I coloured the flowers using a waterbrush and the Distress Inks mentioned above, and applied the dots around the edge using the purple and some white pearlescent ink. 

I then made the background using the same Distress Inks and stamped one of the Texture Fragment stamps, then the little dots, and finally the graph paper stamp. I also blended more of the purple around the edges. I finished with a sentiment stamped with the permanent ink and heat embossed again with the clear gloss embossing powder. I used a stitched tag die and the sentiment from the Spring Bird Tulip set, and then blended more of the lilac and purple Distress Inks around the edges.


That's all from me for now but I'll be back again next week.

Best Wishes,

Pat.

Tuesday 14 January 2020

punky flowers by Veronica

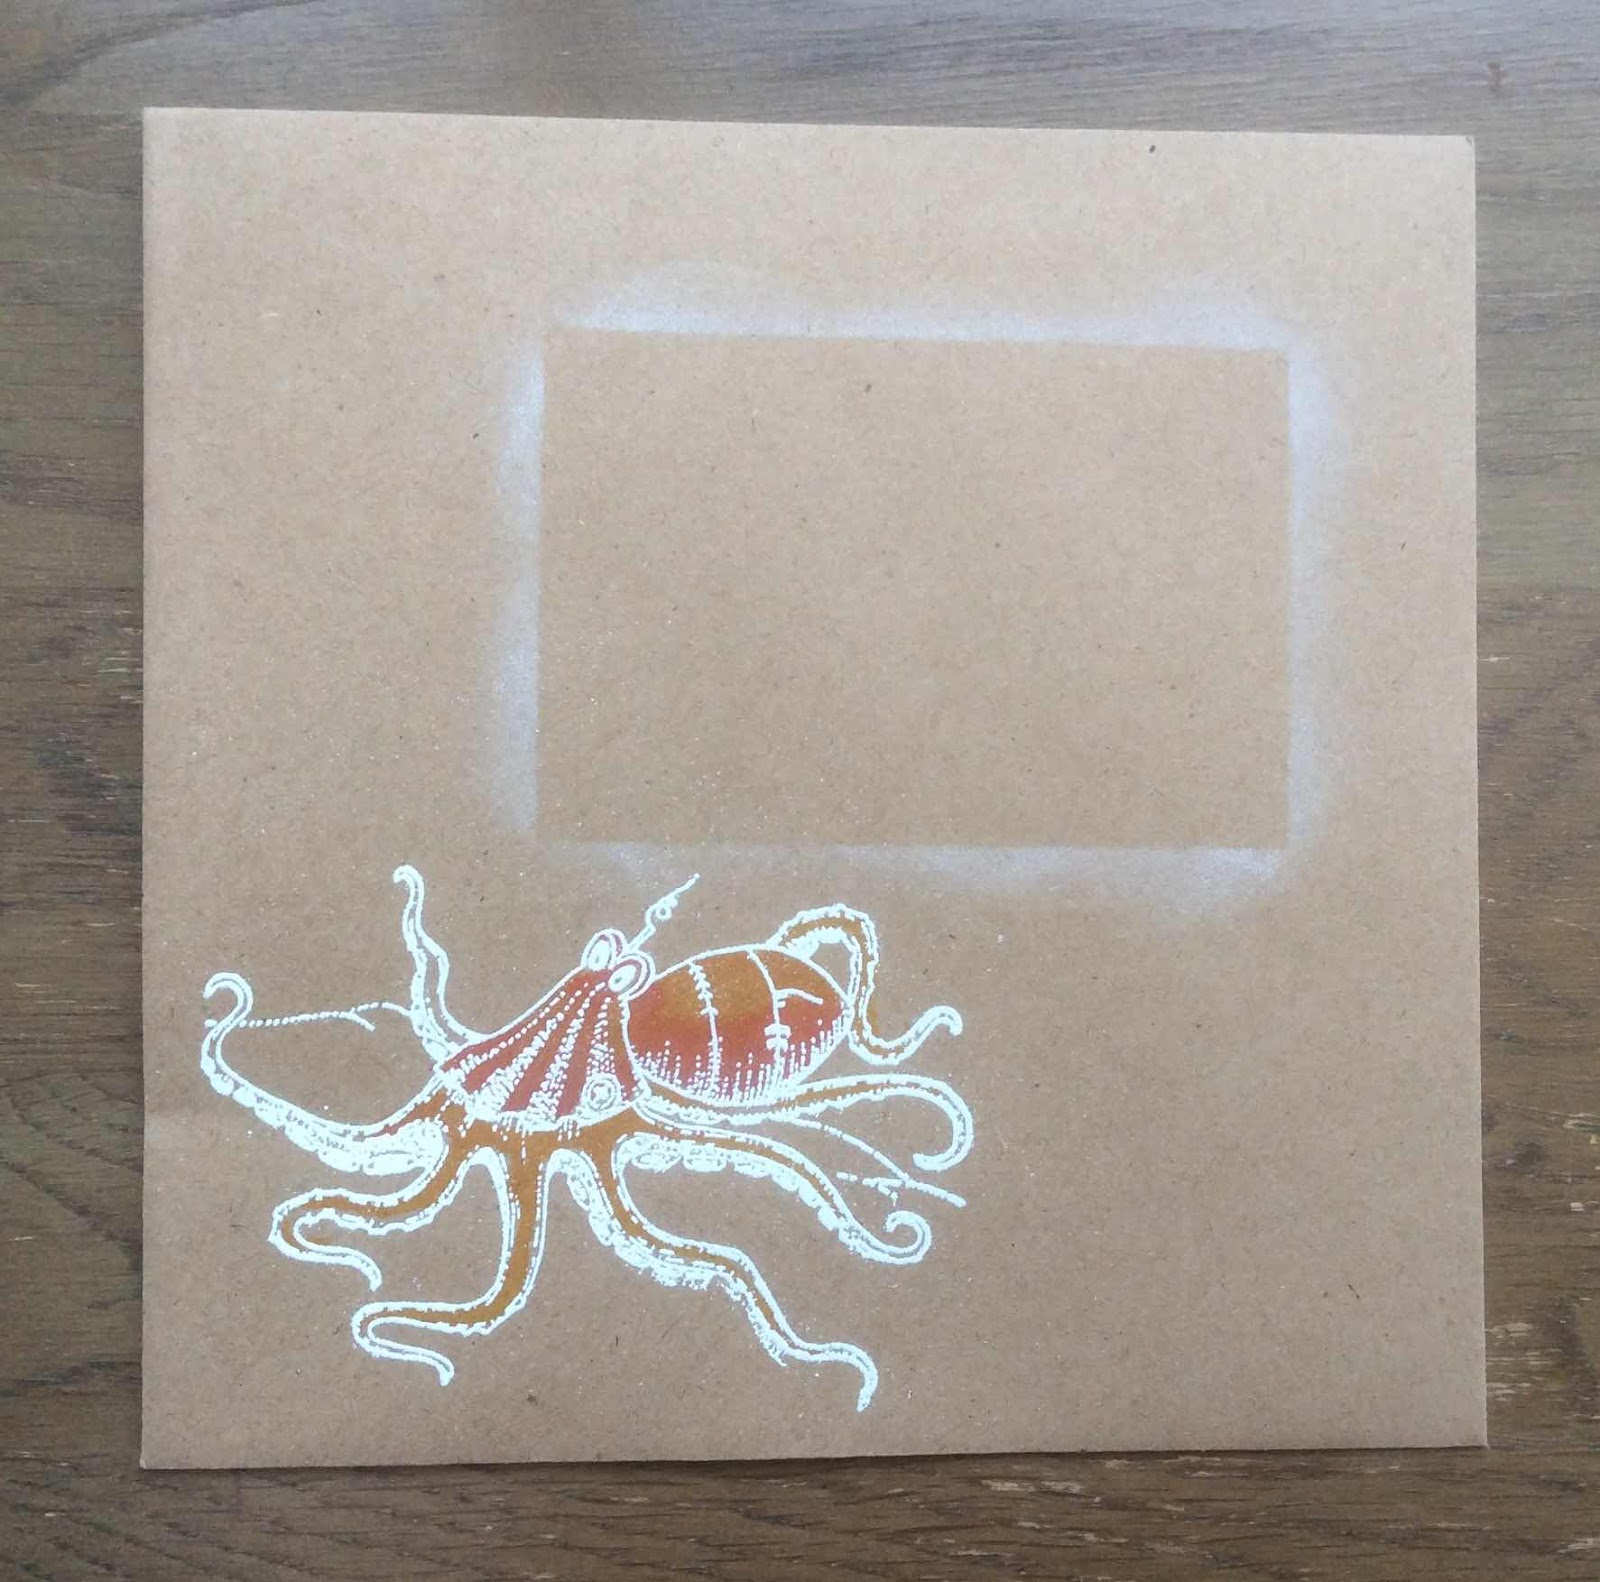
 sharing some samples from last month's CB show on Hochanda - apologies for the poor photos, had to take them in a rush in rather poor light as the scanner refused to have anything to do with the computer after an upgrade, grrr.


Both using the same stamp from the
punky flowers sheet, just changing the size of the card by .5" magically gave me the square in the centre rather than a mess of stems that needed the circle sentiment!
I do use a stamping platform for these, makes it so much easier!
Edging on both cards using a marker pen, and images coloured with watercolour pencils.


This one has a distress ink background, just  to make a change from brusho, image stmaped in black versafine and coloured with pencils again


The box lid was triple embossed with copper EP, the large flower from the same set stamped into the EP while it was still hot


Sunday 12 January 2020

Curios Adventures and Imagine What Lies Beneath by Penny

Goodly morning peeps, I hope you have all settled into the New Year by now.  I'm here today with my first DT post of 2020, and I'm delighted that it features some of my all time favourite CB Steampunk stamps!


Curiosity and Adventure.

For this mixed media piece I have used the beautiful stamps from the Steampunk Funky Fish, Steampunk Sea World and and Punky Expressions, metalic acrylic paints, Distress Inks and a variety of stencils from my stash.


I painted an MDF panel with a coat of white gesso then a coat of blue chalk acrylic.  I then used several stencils and different colours of Distress Inks to create a layered background.  When everything was dry I took some gold Soft Form Paste and added it through a stencil along the bottom for texture and the sea bed.    


I stamped and embossed the fish, sea creatures and two machines onto black card, painted them and cut them out.  I coloured them with metalic paints because they suit the Steampunk, industrial aspect of the images.  Three of the images have 'sand' or 'sea bed' attached to them, so they went along the bottom of the panel attached with 3D glue gel.  After shaping the other images I attached those to the panel with 3D gel too.  I stamped and embossed some sentiments and attached them as before.  To complete this mixed media piece I punched a couple of holes on the top edge and added cord to hang it up with.


Imagine What Lies Beneath.


A card this time featuring stamps from the Steampunk Funky Fish, and Steampunk Sea World sets,
pearlescent spritzers, Distress Ink and an embossing folder from my stash.


I began by creating the background, I spritzed a piece of white card with pearlescent inks.  When it was dry I embossed the panel in a folder that I think expresses underwater currents.  I then matted the panel onto black card.  I took a white base card and stamped one of the larger images around the edges with DI, then attached the background panel.  


I stamped and embossed several fish and a sea creature onto black card, painted them with metalic paints and cut them out.  I shaped them and attached them to the card with 3D gel.  I then stamped and embossed a sentiment onto white card and attached it with 3D gel as before.


Thank you for popping by today, I hope these samples have tickled your crafty mojo a little!  I shall be back later in the month with some more crafty fun.


Until next time,


                             xx  Penny  xx

Saturday 11 January 2020

Flying In To Land (by Judith)

Hello everyone, I have a project to share with you today, featuring stamps from last month's TV shows on Hochanda.

I love a bit of steampunk every now and then, and these sets are amongst my favourites. I have created a garden scene using flowers from the Punky Flowers stamp set, stamped onto tissue paper, coloured with pencils, and adhered to a painted canvas with matte medium. I then stamped the owl from Steampunk Birds onto a piece of drawing cartridge and attached the image with wet glue.

The sentiment is from Punky Expressions.

Thanks for stopping by,

Judith xx