Pin It button on image hover

Tuesday 31 May 2022

Beautiful flowers part 3 by Zoe

Good morning Lovelies and welcome to my final post for May.

These are the last of my samples from last months shows.

My first card was stamped twice and coloured using Watercolour crayons, then I fussy cut the top wing and flower to create some dimension.
I think this card would suit any occasion.


These little row of houses is a die which I coloured using spray inks and using the background stamps featured the show, I added some die cuts and bits and pieces I had in my craft stash.


And of course and envelope!

I used Watercolour pencils to colour this gorgeous tree and created a wash for the background.

Thanks again for visiting today.
Wishing you a wonderful day xx Zoe xx

Monday 30 May 2022

Clean and Fresh by Doreen

 Clean and Fresh


Hello again, well here we are at the end of another month already, where does the time go ??

Today I would like to share a far softer kind of card from me using the Canary Bird Rose Stamp such a pretty stamp used by itself it looks perfect just stamped on its own.

Using the Versafine Clair Nocturne I stamped the image onto a smooth piece of white card waited for it to dry before colouring it with the Clean Colour Brush Pens.
Then mounted onto black card before putting onto a white card blank.

Fairly quick to make depending on how long you take on the colouring, then below is another version a bit grungier but just showing how good the stamp looks no matter how you decide to use it.


Thanks for looking in today and until next month take care and enjoy the late evenings with the beautiful sunsets.

Love Doreen 


Sunday 29 May 2022

Quick Watercolour Stamping by Natalie


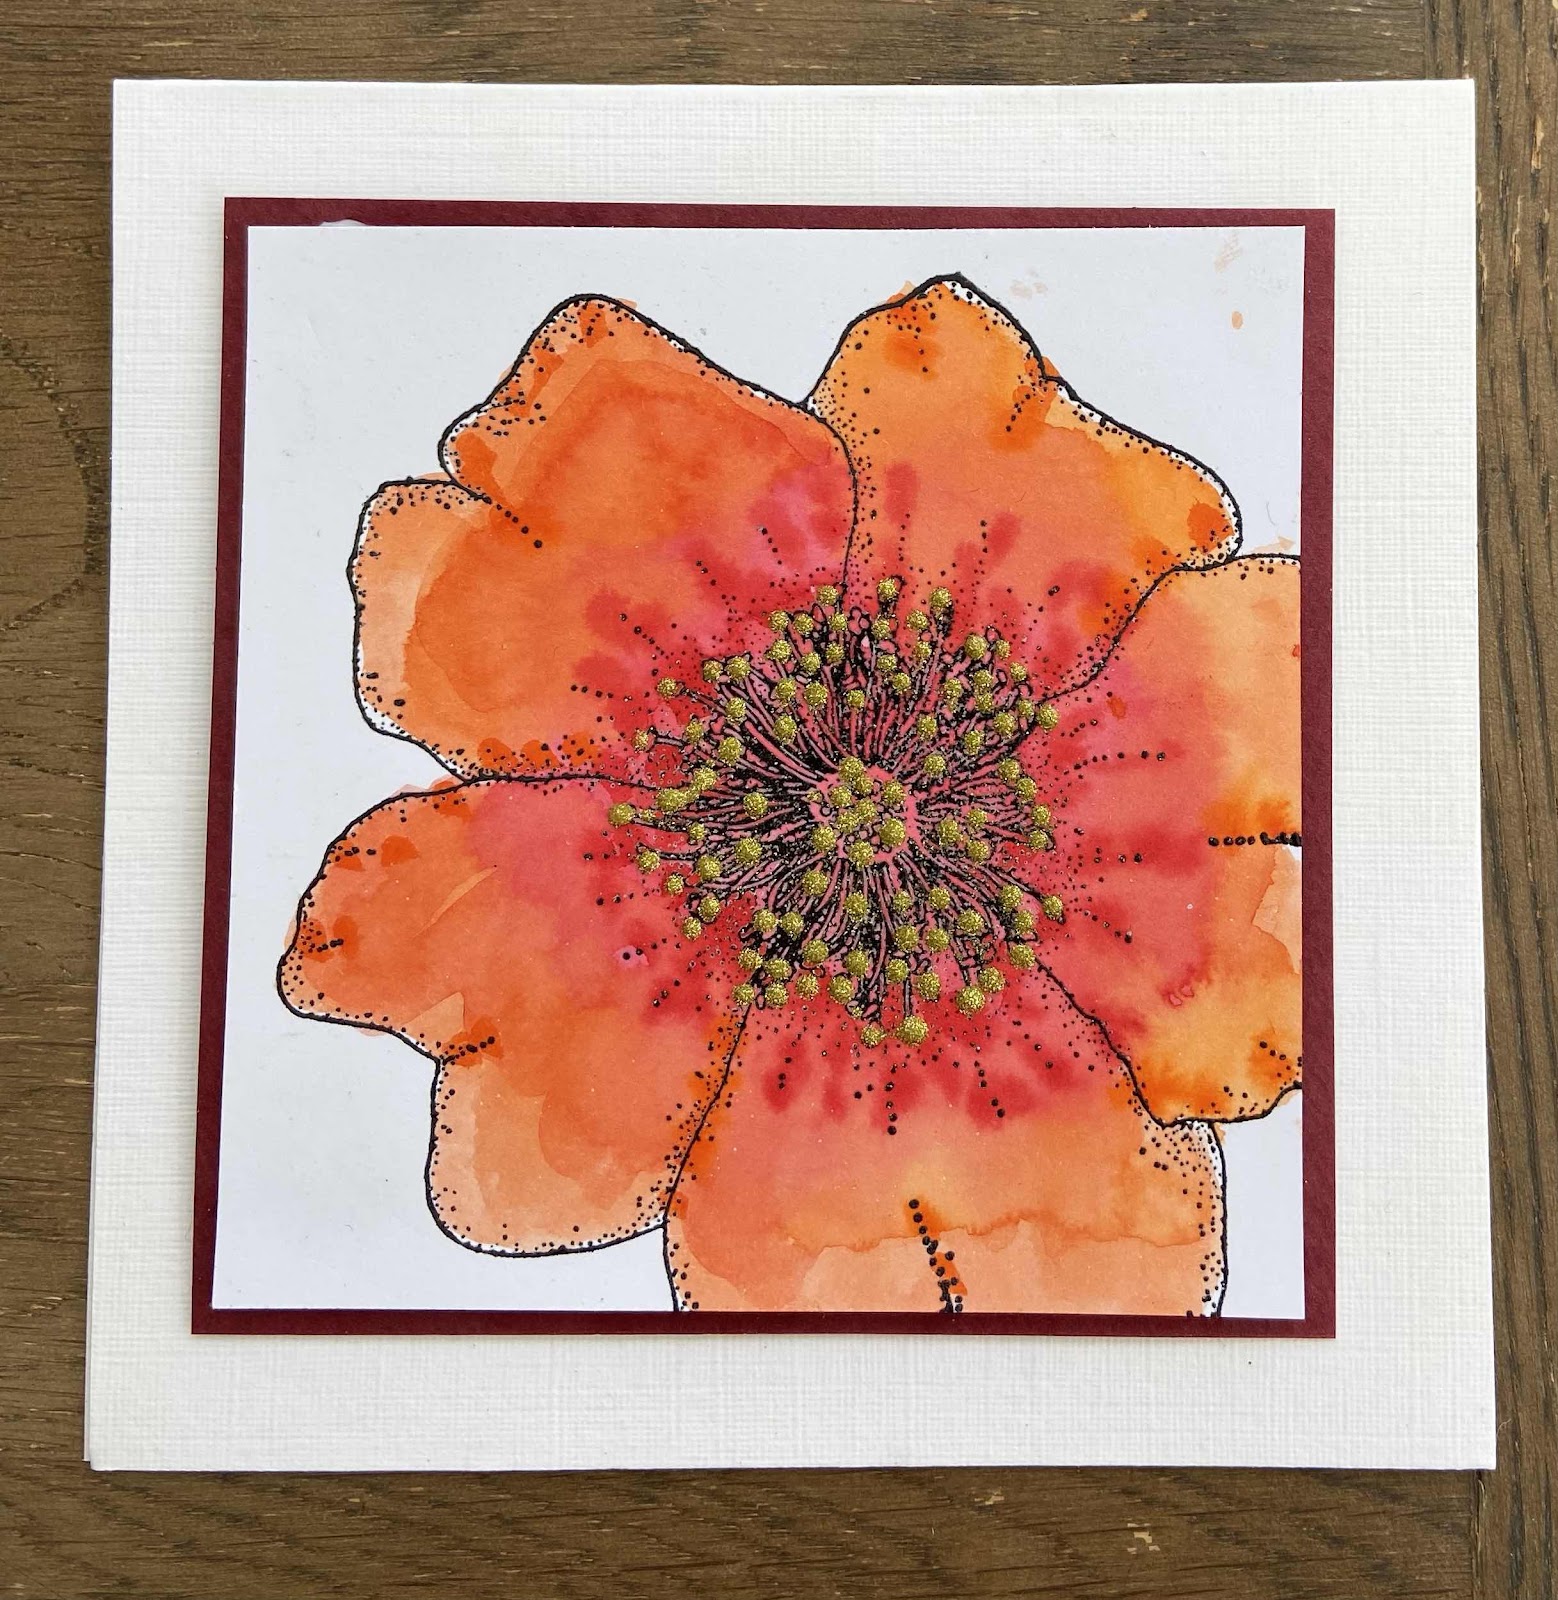
This card uses the Gerbera and Friends stamp set but instead of colouring the Gerbera image as a Gerbera, we can change it up into a sunflower. Sunflowers are on all our minds at the moment, so the sentiment of "peace" is apt. Cut out two in two different colours to give your sentiment a drop shadow. Now for the main technique...

Quick Watercolour Stamping

First Impression

You will need a stamp platform for this technique. Start with a piece of A6 card that can take a lot of water: watercolour card or mixed media card is great for this. Pop this into your platform "upside down" as we will be stamping off the edge. Align your Gerbera stamp so it sits halfway on the longest edge. Your stamp will remain mounted until all impressions have been made

Ink up the stamp petal area with warm yellow coloured dye ink, and spritz your stamp with water so you get a little puddling on the stamp. Stamp your image, and don't rush the impression. Lift up and using a clean damp brush feather the outside edge of your impression. If your card can't take too much water, you can heat set it at this stage. However, it is better to move onto the next impression...

Second Impression

This time we are going to ink up the centre lightly with brown/green ink. Again, mist the stamp with water, but be a little lighter this time so not all detail is lost. Stamp the image, again resting a moment in the downwards position so the brown and yellow can blend.

You can use a clean damp brush to blend out any harsh lines between the yellow and brown. Heat set the image thoroughly at this stage to keep your next impressions clean.

Third Impression

Stamp your whole image with a butterscotch toned dye ink or permanent ink. Heat set this impression if your image isn't immediately dry.

Fourth Impression

Ink up just the centre and some of the shading in brown ink. This will make the centre pop for the main petals.

You can now unmount the Gerbera stamp.

Finishing the image

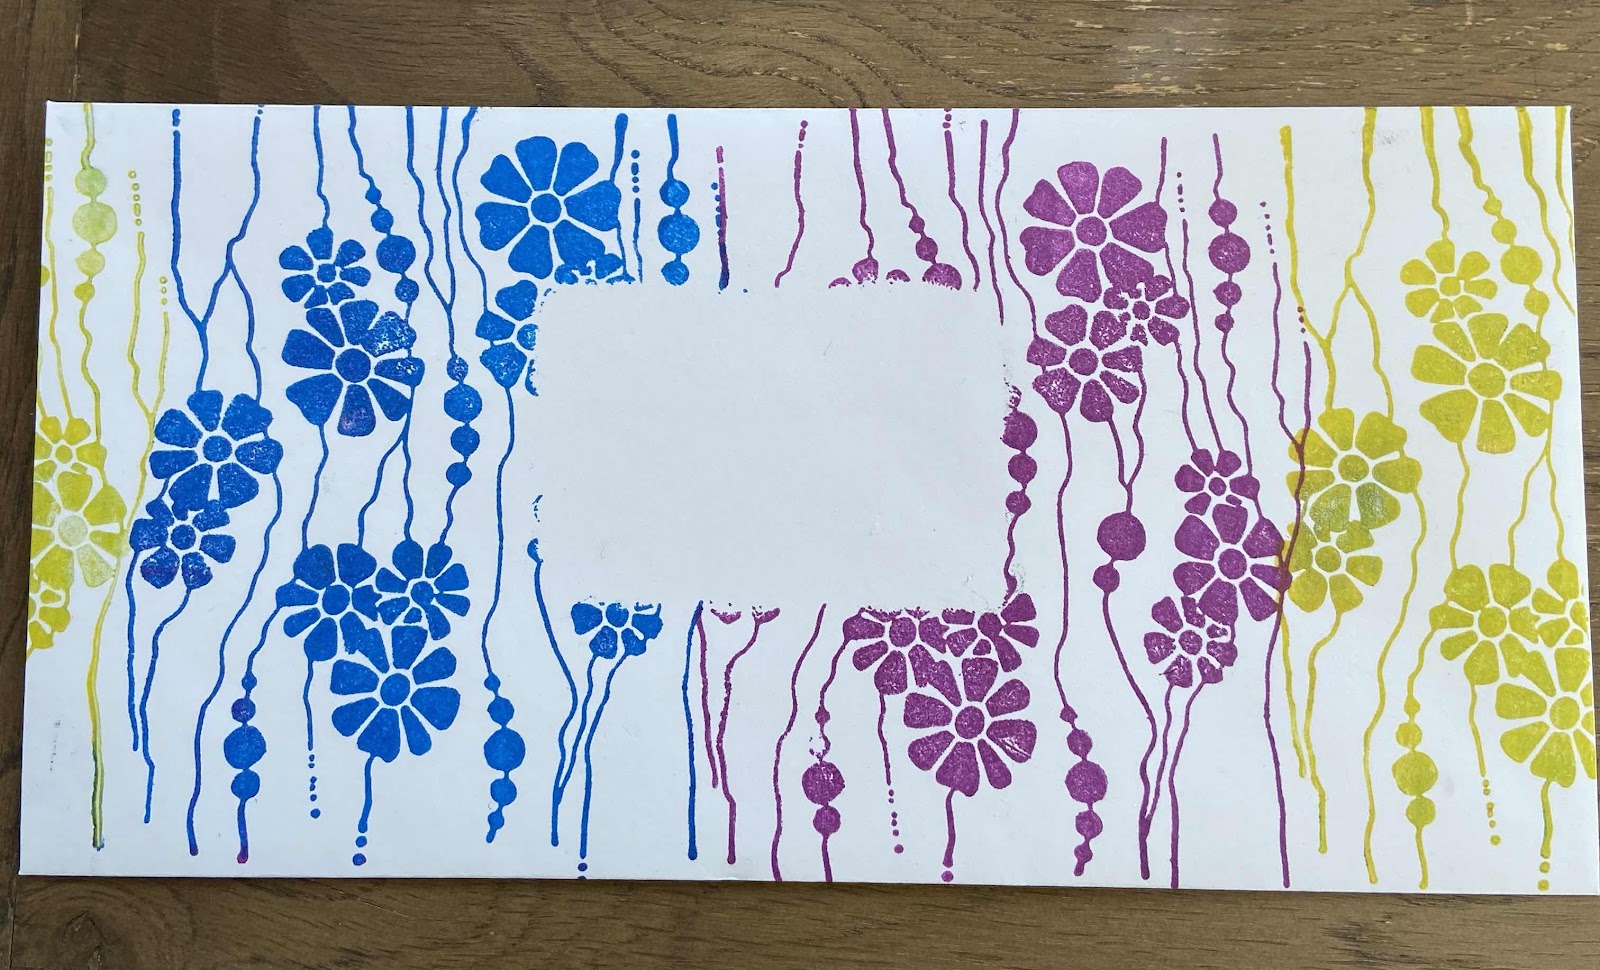
Next, let's use the splatter stamp from the same set. Mount this into your platform or use a block. Ink up in the yellow and spritz. Stamp the image, then use a clean, damp brush to draw out the splurges on one side to give the feeling of movement. I was thinking like pollen, almost as if the flower is sneezing it out (I was having a bad hayfever day LOL).

Mount the piece onto the same colour card as the shadows of your sentiment. 

This clean and simple card is great for when you are in a rush with little time for colouring.


Saturday 28 May 2022

Butterflies And Blooms (By Tracy Thompson)


This is my final post for this month showing samples from April's shows, for my first creation I am using stamp sets Dream Petals and Butterfly Mind.   So I started with a background, using Distress Oxides and stencil brushes gently built colour up in green and blue, I kept it soft and subtle.   On some separate card I stamped out the flowers from the Dream Petals and cut them out.  I always cut out first and colour afterwards as if using water colours the card doesn't cut as crisp when damp.  I coloured with distress inks and when dry used a white gel pen to highlight in the centre of the flowers.  I adhered them to the bottom of the card overlapping them.
I then stamped two butterflies and cut them out, I coloured them the same way and put them on as if fluttering above the flowers. Finally added a sentiment.


For this creation I used the stamp set Life Is Wonderful with a sentiment from Birthday Words.  I started with the background, I used Cadence Metallic Acrylic paints found here,  I sponged them in two different colours all over and left to dry.  Meanwhile I stamped my image twice, and coloured the main one with Aqua pencils, I then cut out parts of the image, the butterfly and the biggest flower then coloured them.  I decoupaged the the cut out pieces.   and adde3d some glitter to the centre of the flowers and the butterfly wings.

I will be back with new posts next month, thank you for looking.
Happy crafting
Tracy x

Friday 27 May 2022

show catch-up (by veronica)


My third post this month for Chocolate Baroque is a bit of a mixture, catching up on other stamps featured in the April show on Create and Craft.

The  canary bird rose stamp is lovely to colour in, but I just used bleach to take the colour out. The background was from a batch made using the inky plate and distress inks with some added stencilling- the leaves and stem were coloured with pencils 

Another inky plate background for the tree from be at peace, with a reflection below it created using acetate, coloured with pencils again. the sentiment was stamped on an offcut of the background piece, cut out and edged with black ink
Another inky plate background, with the open weave  background stamped in grey first, then the floral weave stamp coloured with felt tip marker pens stamped twice to build up the colour - I used a stamping platform for this.

Sentiment on a scrap of the background and a black mat.

 The final card used the flower from life is wonderful stamped in black ink onto a sponged background. The flower was coloured with pencils and the butterfly with shimmer paints. The flower head was stamped onto spare card, painted with watercolours ,fussy cut out and glued over the original image.  Random parts of the open weave stamp were stamped on the background using a green distress ink and then I doodled round the edges with a fineliner pen. The sentiment was stamped onto spare card, cut out , more doodled edges.


Wednesday 25 May 2022

Summer Landscape (by Gerrina)

Again the last project that I made as Guest Designer for Chocolate Baroque this month, so you can see my card at my blog as well. It is lovely and hard to choose one of the stamps from all those beautiful stamps and to avoid looking at what you made before with this one, but just to make what you want to make now and what pops up in your mind. Later on you can look at all the projects you made with this stamp and be amazed about how much you can do with the same stamp... Today I choose this stamp and made it into a summer landscape and had so much fun by sponging and mashing the background:


Used Materials:

Stamp: Floral Notes

Ink: Versafine Onyx Black, Distress Ink Chipped Sapphire, Faded Jeans, Tumbled Glass, Spiced Marmelade, Wild Honey, Squeezed Lemonade, Twisted Citron, Mowed Lawn and Pine Needles

Other: Stamping and Masking paper and a blending tool

Creatieve groetjes,

Gerrina


Tuesday 24 May 2022

Life is Wonderful by Sandra

Hello, I am sharing some more of the cards I made for the April shows on Create and Craft.

My first card uses a 6.5" square of smooth card stock. Using Memento ink I stamped the main image, the dragonflies and the sentiment from Life is Wonderful. I then coloured the images using alcohol markers in shades of Warm Grey and Cool Grey. I then mat and layered this onto some toning card and then onto an 8x8" base.


My second card uses very similar sizes of card, but this time I have used the Be at Peace stamp set. I decided to use some non traditional colours for a more fantasy feel.


 Thanks for looking

Sandra x

Monday 23 May 2022

Floral CAS Cards (by Judith)

Hello everyone, I hope that you are keeping well. I have some clean and simple cards to share with you today for my final post this month. I demonstrated these designs on Create and Craft last month, and I hope that you managed to catch the TV shows.

My first two cards are similar in design; I used a round gelli plate to create a background, inking up the plate, and for the first design, I stamped the Open Weave stamp onto the gelli plate before I stamped the gelli plate straight onto my card blank. I then stamped one of the large flowers and a leaf three times from the Sunny Sunflowers stamp set onto the card using Veesafine ink. I used a fineliner pen to draw some little stems for the leaves. I could have used Masking Tissue to mask the flower, then stamp the leaves, but these cards are all about making life simple. I coloured the image with pencils and added a sentiment from the Amazing Mackintosh Words stamp set.

For the second card, I again inked up the gelli plate and then stamped the Floral Weave stamp onto the gelli plate before stamping the gelli plate straight onto the card blank. I stamped a couple of sunflowers onto the background and coloured them with pencils. I added some black dots with a fineliner pen and some glitter glue in the centre of each flower for a bit of sparkle.

For my final card, I stamped Studded Lattice onto an 8" x 8" card blank using Distress Oxide ink. I added a couple of sunflowers and some leaves in opposite corners. Using a fineliner pen, I drew some lines and curls to link the flowers and leaves together. Do not be aftraid to draw things freehand yourself to add to the stamps. I could see elements within the stamps that I could use to embellish the images and extend the design, you can try this youself. Practise on a piece of paper until you feel confident, and then just go for it! Be brave and do not hesitate, that would be my best advice.

I hope that you will try some of my suggestions, thanks for stopping by,


Judith xx

Saturday 21 May 2022

Beautiful flowers part 2 by Zoe

Good morning Lovelies and welcome to my second post for May.

Today I’m showcasing my samples I made for last months fabulous shows with Lesley and Judith.

These stamps are just so beautiful.

I love making Bookmarks and Envelopes.

My first one I used a different design, this is folded at the top and opens like a card so you can slot it into the page.

My card and envelope were coloured using Watercolour markers.


Thank you so much for spending your time visiting today.
Have a wonderful day xx Zoe xx

Friday 20 May 2022

Purple Pleasures by Doreen

Purple Pleasures


Hello everyone, welcome to my second post of the month, today I would like to share one of my makes using the Floral Weave stamp set. 
 This is a detailed stamp and so versatile it could easily make a nice little set of thank you cards by simply stamping onto a round or square blank and then mount onto to card, even half and half if you make 6 cards make 3 with round images and 3 square images. Even stamped in monotone they will look fabulous.

With this card I used a Brusho background using Yellow, Turquoise and Green. Leave it to dry naturally and then I stamped using Versafine Clair Purple Delight.
To bring out extra detail in the stamp I used a Black Fineliner Pen and a White Gel Pen, using the detail of the stamp to guide me. 
After looking at the finished piece I felt it needed something else so using a Clear Sparkle Brush Pen I decided to paint over the floral features of the stamp.

I mounted the topper onto a piece of Cerise Mirri Card from my stash of card. Then I cut and folded a piece of black card to make a card blank to mount the topper onto.

Here are a couple of other samples using the same stamp.


Thank you for looking in today and until the next time enjoy your crafting and hopefully some lovely weather too.

Love Doreen


Thursday 19 May 2022

Relax (by Magda). - Garden House

Welcome back,

I am sharing with you my second project for May.  This page has several layers of blended colors in the background, on which I stenciled with water and Distress Ink Pad. The glued mat is stamped with Archival Jet Black and I colored all the images with watercolours. You can find all the images in the same plate " Garden House".


Thanks for passing by, hugs

Magda

Wednesday 18 May 2022

Steampunk in CAS Style (by Gerrina)

Today is my second post this month as a Guest Designer at Chocolate Baroque, so you can see my card at my blog as well.

Today I have used the same stamp from one of the steampunk stamp sets as I did last time to make a card/Art Journal page in a somewhat CAs style, but now I kept it all monochrome. So good to see this stamp looking so different by using different colours and so I could use this stamp in so many more ways that pop up in my thoughts now...but first this one:

Used Materials:

Stamp: Steampunk Birds

Stencil

Ink: Versafine Onyx Black

Other: Aquarel paper, chrome/silver paint pen, black aquarelle pencil, brush and water.


See you again next week with a different stamp and make...

Creatieve groetjes,

Gerrina