Pin It button on image hover
Showing posts with label Christmas. Show all posts

Thursday, 16 December 2021

Royal Christmas (by Miranda)


Hi peeps, Miranda here with a festive blogpost. 

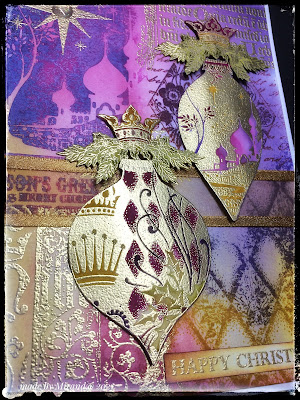
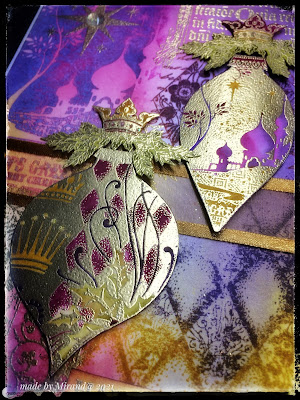
I have browsed through my CB collection and came up with these sets.........Harlequin Christmas A4 set

and this one too 'Gothic Angels A4 set'. Two of my favorite Christmas themed stamp sets.

I have used Distress inks and some Oxydes. Lots of gold embossing powder for a rich shine. A bit of decoupaging and coloring. 


Hope to have inspired you a bit...however....I think you all will have finished your Christmas cards.......but maybe for the next year?

Thanks for your visit and like to read your comments as always,

stay safe and have a lovely peaceful Christmas time,


Saturday, 22 August 2015

Christmas angels......day and night (by Miranda)


Hi there,

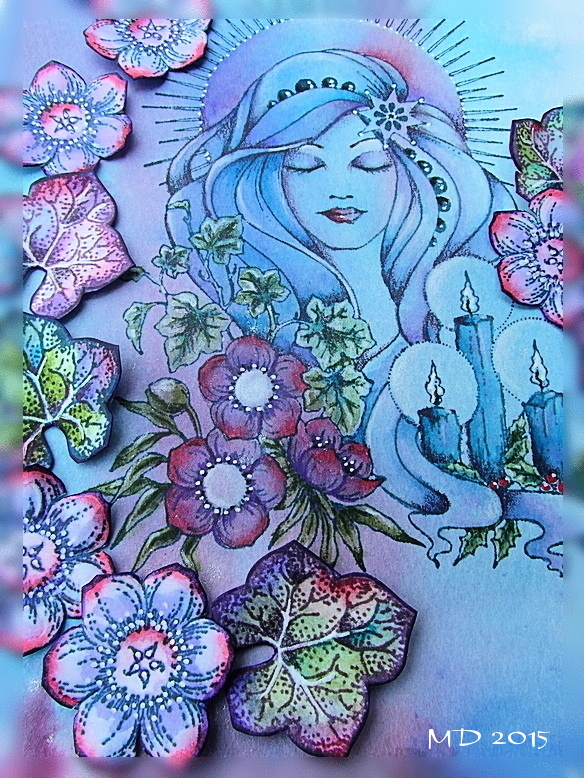
Today I will show you my creations made with  Serena, the lovely Christmas Angel.
 I have made an Angel of Day and an angel of Night, at least that is my interpretation! I love working with faces and these beautiful designs are a joy to work with, thanks to our talented designer! 

I have worked on a background made with acrylic paints and fluid inks, like Ecoline.  Also sprinkled some Iridescent medium which creates lovely shimmer.
The ' Angel of Day' has pale colors and I've combined her with the flowers of the Christmas rose sheet. They are a perfect match with the flowers of the image. I have colored the image with colour pencils and  decoupaged them.
Here is the card.........


And the Angel of Night........here I've added another stamp, an ivy leaf that I've colored with all the matching colors. It's from the New England Winter sheet. Here I have colored the image and the decoupaged items using waterbased markers and gave some accents with a white acrylic marker.


Well, I hope I have inspired you with these beautiful angels! Thanks for your visit and I always enjoy reading your comments!


Saturday, 8 August 2015

O, Christmas tree (by Miranda)

Hi there,

Today I will show you what I have created with one of the new Christmas stamps, Sparkling Trees. Again on a background which was already made before with fluid inks (Ecoline or other brands)I spattered also some silver ink on it which gives a nice effect.
I have embossed the center tree with Wow silver embossing powder and stamped the other trees with colors that matches the background colors. The sentiment is from Warm Christmas Greetings, a clear stamp sheet.
I have colored the baubles with waterbed markers and added some white highlights with an acrylic marker.
You can see the silver spatters even better here........


Hope to have inspired you with this first Christmas card from me........ more will follow and also made by our wonderful Design team! So keep watching......


Friday, 29 August 2014

Honeysuckle Butterfly and Turtle Doves - By Florence

Hi everyone
 

Today I would like to share two card that I made using the fantastic Honeysuckle Butterfly Set and the beautiful Turtle Doves Set.


To make my card, I dapped some Distress Ink onto a plain old plastic file wallet, spritzed it with water and swished a piece of white coated card stock over it.
I then stamped the leaf pattern using Hydrangea and Plum colored Archival Ink.
I stamped the sentiment "With Love" using one of the stamps from the Mackintosh Sentiments set.
I stamped the little butterflies onto white coated card stock and colored them in with felt pens and added some little wires.
I made up the card as seen adding a small piece of plasters tape and attaching the butterflies with foam tabs.


I made this card in exactly the same way as mentioned above but this time just adding a die cut with  "Thanks for being a True Friend" stamped onto it and a few gems.  The sentiment is from the Mackintosh Sentiments Set.


This was such a quick card.  
I stamped the Partridge in a Pear Tree image onto white Coated Card Stock and colored the partridge and pears with a damp paint brush and felt pens.  I fussy cut the image and then added some diamond glaze over the pears.

I then assembled the card as seen using a die cut snowflake boarder, a piece of my own two tone backing paper and a strip of bling down the edge. I used foam tabs to attach the tree to make it 3D.


Have a wonderful weekend.  
I hope you have time to fit in some crafting. 

Thank you for looking
Florence x

Sunday, 17 August 2014

Honeysuckle Butterfly and Snowy Scenes - By Florence

Hi everyone
I hope you are all have a wonderful weekend.

Today I would like to share two cards I made using the Honeysuckle Butterfly set and the Snowy Scene set. 


I dabbed some dye based ink onto a large stamp block. I didn't dilute the ink, I just let the ink separate naturally on the block.  
I then placed a piece of white coated card stock, lightly, onto the inked block.  
I then stamped the Honeysuckle image onto the inked card, using black Archival Ink.  
I added a little bit of extra color, to certain areas, using a damp paint brush and some ink left on the block.  
I then mat and layered as seen.


For my second card I took a piece of white card and laid it over the top of it a mask and dry embossed it using a light box and a embossing tool. 
I then removed the mask and attached it to the raised embossed side of the card, matching it up to the embossed pattern, and colored it using a sponge and some ink.
I cut the green ornate square of card using a die and punched out a square of plain white card, just trimming it slightly.  
I then stamped my pretty little house onto the smaller white square using green Distress Ink, colored it in using a damp paint brush and ink and then edged the square with more Distress Ink.  
I then assembled the card as seen adding a little gem.

Thank you for calling in.  Do check out the fantastic projects made by the Design Team.

Happy Stamping
Florence x

Wednesday, 25 December 2013

Merry Christmas


Wishing you joy, health, love and peace this Christmas day.  May you enjoy good food, good company and good cheer!


With love from Glenda, Adrian and Lesley

Thursday, 14 November 2013

Welcoming our Winter Fairies (by Glenda)


I'm delighted to announce the latest in our collection of Fairy stamps - meet the Winter Fairies. 

https://www.chocolatebaroque.com/Winter-Fairy-Collection-Unmounted-Rubber-Stamps-Multi-buy--DL-_p_5549.html
This time we are releasing December, January and February Fairy sets with a multi-buy available on all three.  There's also a new Winter Fairy Inspirations leaflet with some beautiful artwork from our talented DT girls.
https://www.chocolatebaroque.com/Winter-Fairy-Inspirations-Leaflet_p_5729.html
The leaflet is free for a limited time when you purchase the three set multi-buy.

I made this little set of four ATCs with a mixture of stamps from all three sets and I will be jazzing them up a touch and offering them for trade on Facebook over the weekend, so why not 'like' our page so you can see what we're up to over there.  (Click here to visit the Chocolate Baroque facebook page.)


We also have a super clear set called Amazing Birthday featuring a collection of sentiments which I have been finding incredibly useful lately.  

http://www.chocolatebaroque.com/Amazing-Birthday-Unmounted-Clear-stamp-sheet--A5-_p_5734.html

They really have motivated me to get many of my stamped bits and pieces turned into finished cards as you can see over on my own blog here.  I'm not a natural finisher, I have a huge box of unfinished 'bits', so it was very satisfying to get that sense of accomplishment from finishing a batch of cards.  (It's also very motivational - I haven't stopped crafting all week!)

As always, the girls have some great cards and projects lined up for you and you really don't want to miss the lovely inspiration leaflet - it will definitely get your crafting juices flowing!


PS - we really appreciate you taking the time to leave a comment on all of our DT blog posts, so at the end of this month each DT member (me included) will choose one commenter whose name will go into a hat and one of those names will be drawn randomly to win a Chocolate Baroque gift voucher. 


Thursday, 26 September 2013

New Winter and Christmas stamps (by Glenda)

We have one final collection of Christmas stamps for you this year, though we do like to make our stamps versatile so you will also find images that you can use for non Christmas occasions too.

Our Stamp of the Month for October is Reindeer Landscape


The reindeer image is great for making quick cards - make a stack of gelli prints or sprayed backgrounds and you can quickly whip up a batch of arty cards.  I had to put it sideways on the stamp sheet to fit it on, but here it is right way up.


Then we have two sets of edges - Christmas Edges:


and Winter Edges:


All of these stamps are on offer at introductory prices from now until the end of October and you can save even more with the Christmas-Winter Edges multi-buy too.

As always, our wonderful Design Team have been playing with these stamps for the last few weeks and I've seen what they've been up to with them - you're in for a treat!


Quick Links:

Friday, 30 August 2013

Bewitching new stamps - with a tempting giveaway!

We have just brought out some new stamps including some larger Christmas sentiments and some Halloween stamps.  I'm also doing a giveaway this month - details below.

The Bold Christmas Words are proving to be SO useful - they're big enough to be the focal point for a card which is great if you need to produce a batch of cards in a hurry (which I inevitably will, despite the best of intentions to have a stack of cards made in plenty of time!).


All of the words are available as individual stamps, or you can save money and buy them as a full set.


Here's a super quick card featuring the Big Bold Holly background and one of the new greetings.


This is a super simple card - the holly background is stamped in Versafine Olympia Green and layered onto red card.  The sentiment was stamped onto a die cut with a mix of Versafine Crimson Red and Satin Red.  I swirled the same reds around the edges too with a stencil brush.  A little ribbon and three crystals finish it off - super quick, job done.

For all you Halloween fans, we have two new rubber sets too.


These are both A5 sets and are both our featured Stamps of the Month, on special offer until the end of September.  Again, you can save money when you buy them both together as a multi-buy.


This Halloween card features a background I made with an acrylic block and Splash inks - a technique I covered in Monday Mojo issue 17.  I stamped the tree and bats and embossed with black embossing powder, then drew a horizon line and painted beneath it with black Golden Fluid Acrylic.  I stamped the toadstools and raven along the bottom with orange ink, then sanded the black paint lightly to make it more matte. 

I stamped the sentiment with Brilliance Moonlight white and embossed with white powder.  The witch is an old Martha Stewart punch which actually has a cauldron on, but I cut it into a broomstick shape instead.  There's also a punched railing along the bottom, but the camera struggled to pick up the black on black there so you'll have to take my word for it.

I've got a few of the words and a set each of the Halloween stamps to give away this month, so please leave me a comment here or on Facebook if you'd like to be entered into the draw.  Let me know if you are a fan of Halloween or not, as I'd hate to send out an unwelcome prize to anyone.

I think the girls have been particularly inventive with these Halloween stamps, showing that they can be used for other occasions too.  The Christmas stamps have been rushed out (as so many of you have told us you need them NOW) so most of the DT girls haven't had a chance to work with them yet.  But stay tuned for some glorious artwork heading your way soon.


Monday, 19 August 2013

Gothic Angels in Purple and Blues (by Shirley)

Hello everyone

I have a couple more cards today that feature the Angel in the stain glass window from the beautiful new Gothic Angels set.


I created the background with Victorian Velvet and Seedless Preserves Distress Inks using the Acrylic Block technique.   I stamped the Gothic letters from Gothic Angels and a Fragment from Gothic Fragments with Seedless Preserves, spritzed with a little water on the ink before stamping.

I added the brick using a stencil and molding paste.  When dry I coloured over the bricks again with the Distress Inks and added a little silver Inka Gold.

The Angel and window were coloured with Prisma Pencils.   I added glitter to her dress and wings.   I attached a gothic style key that was hanging out in my stash and sheer silver ribbon to finish off the card.


I used the Acrylic Block Technique as described by Glenda in a recent Monday Mojo tutorial for the background below:

 
The acrylic block that I used has wavy edges and left marks that you can see on the above background.   I used Peacock Feathers Distress Ink on the block.   When dry,  I blended a little Vintage Photo around the edges which I distressed.   I also added the same ink to the lace.    I stamped one of the fragment windows from Gothic Fragments a couple of times after spritzing water onto the inked stamp.   

I coloured the angel and window with Prisma Pencils.  Yuletide Greetings is also from Gothic Angels.    

Thanks for stopping by and have a great day,
Shirley