Pin It button on image hover
Showing posts with label The Toadstool Garden. Show all posts

Wednesday, 16 February 2022

The Toadstool Garden (by Lorraine)

This is a beautiful stamp, which really lends itself to large format cards. There are so many possibilities - stamped in its entirety and coloured, decoupaged over various elements, or simply using elements from within the design.

For this example, I took a piece of cotton rag paper and coloured the background using a variety of Distress Oxide colours. I kept applying ink, then adding a spritz of water until I was happy with the result. I made sure that it was completely dry before stamping the image using my stamp press. As the surface is quite textured, this allowed me to stamp several times to get a good depth of image. I then embossed with fine detail clear powder - I find this enhances the image and provides a better outline for colouring.

I decided to pick out just a couple of details to use as focal points - the toadstools and the flowers seemed the obvious choice to me, but there is plenty of smaller detail which would also work well. I used my pencils to add colour and shading. I also applied some glitter, although this doesn't show too well on the picture.

I mounted the cotton rag onto black paper, with the edge deckled to mimic the rough edge, as I though it didn't suit a more formal square or rectangular mount. Finally, I used a strong adhesive to adhere it to a large card. The cotton rag tends to be quite absorbent, so a belt and braces approach works best to ensure that your masterpiece doesn't fall apart before it reaches your lucky recipient!


Tuesday, 25 January 2022

toadstools (by Veronica)

For my last post this month I am sharing two versions using the Toadstool Garden stamp set from the December shows.                               
The first version of the main image was stamped in black versafine and mostly coloured with grey pencils, apart from the actual toadstools which wwere coloured with marker pens. A very simple edging created by rubbing the card over the ink pad before mounting onto a card blank
The second version of the stamp, also stamped in black but this time coloured with marker pens before mounting first onto a balck mat and then onto a card blank
I used a variation of the first card to make the small card using the songthrush stamp , but here I coloured some of the bckground as well before colouring the bird in blue.. The image was fussy cut out round the edge before mounting onto a blue card blank


Monday, 10 January 2022

Three Gardens of splendour by Rachel

 Hello there!

Rachel here today with the first of my posts from the December shows - these samples are all from the show early in December - and involve garden themed stamps.

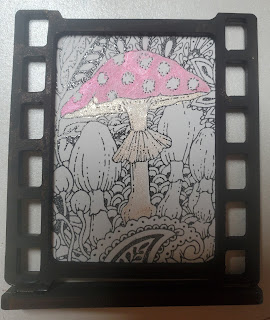
This first one just uses a section of the Toadstool garden and I have put it into a frame from a show many moons ago - the whole this is black and white apart from the main fungi which I coloured using mica powders.


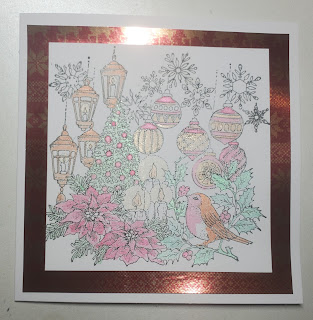
This second sample was simply stamped and coloured using watercolour pencils. Its such a lovely image.


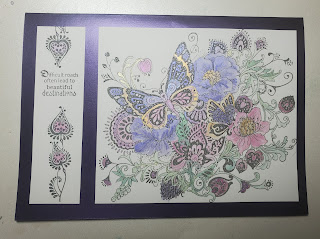
And finally the FolkArt garden - I again coloured this using water colour pencils but I also added some touches of mica powders here and there.


I hope these samples have given you some inspiration in different ways you can used your stamps.
Have a great day!
Hugs
Rachel xx

Monday, 3 January 2022

In the Garden by Sandra

 Hello everyone, I hope you had a lovely and peaceful Christmas and I wish you all a Happy New Year.

I am showing some of my samples from the Craft Store show that was on in December.
These cards feature the Garden range of stamps. 
I have used 8x8 card bases for mine.

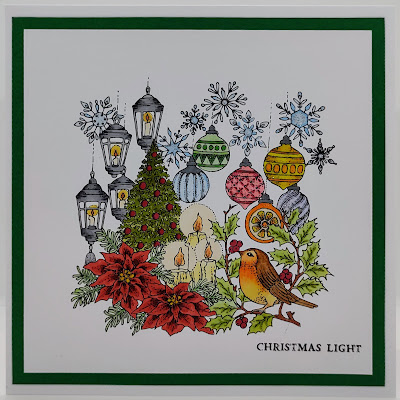
My first card is The Christmas Garden, because it's never too early to start your cards for next Christmas!
I stamped in Memento Ink and coloured in alcohol markers. I added a sentiment from the set and layered onto some dark green card and then onto my card base.


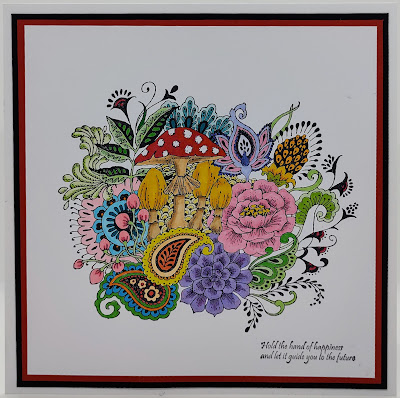
My next card is The Toadstool Garden
There is so much detail in these stamps and are a delight to colour. I have used Memento ink and alcohol markers again as I love the vibrant colours. I added some white gel pen on the toadstool. I have mat and layered in red and black and then onto my card base.


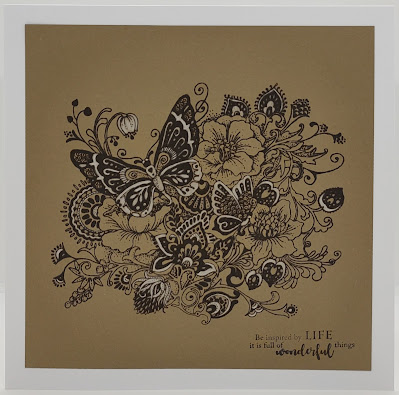
The last one from me today is The Folk Art Garden set.  I stamped onto Kraft card with Archival ink using my stamping platform. I picked out some parts of the design and coloured with a white pencil. I then re-stamped in the Archival to neaten it up
 

These are lovely large stamps that can be used whole or in parts.

Thank you for looking
Sandra x


Wednesday, 15 December 2021

Colourful Garden (by Julia)

Hello everyone,

For this project I have used stamps from The Folk Art Garden stamp set.

Stamp flower heads and sprigs using black Versafine Clair ink onto white card, then cut out.

Paint flowers with yellow and orange water colour, paint sprigs with green.

Stamp large stamp from The Toadstool Garden stamp set, then cut out Toadstools and one paisley shape.

Paint with water colours.

Using a seven-inch square base card, cut a black mat slightly smaller than base, then cut a white mat slightly smaller again.

Paint edges using yellow watercolour.

Cut another white mat slightly smaller again, edge with black.

Glue all mats to base card.

Glue toadstools to top left hand corner, glue flowers and sprigs around the edges of the card.

Stamp the sentiment from The Toadstool Garden onto white card, cut out and edge with black, then mat onto yellow card, and also edge yellow card with black. 

Glue sentiment to centre of card, add paisley shape and another sprig.


Happy crafting.

Julia x


Wednesday, 28 August 2019

Autumn Abundance (by Miranda)


Hello there,

It's me again with another Autumn inspiration using the gorgeous Toadstool Garden stamp set.
I have stamped it on a colorful inky background using a dark purple ink. Than I did die cut it with an oval shape die.
I colored the image with color pencils and some acrylic markers.
I had the idea of stamping around the shape using a small leaf stamp from the Toadstool Garden. 
I did use several colors of Memento die inks. Than I searched for more small stamps on other sheets..........there are lots of sheets you can use......I did use a small leaf from the' Nature table' and a nice wavy line from the 'Wisteria Lane'


I did also decoupage some small flowers and die cut some feathers from the left overs of the inky background.  I had the intention to add these on the card but it was too much!
So I had a little play but did not finish it as a card......what do you think?


Well, hope you did enjoy my Autumn inspiration and this technique......so take out your ' mini' stamps and create a frame around your focal image. And of course I would like to see you creations too!

Thanks for your visit and till next week,

Wednesday, 21 August 2019

'Mir'acle Toadstool garden (by Miranda)


Hello there,

I am happy to be here again and having fun playing with these wonderful stamps!
I did use the beautiful' Toadstool Garden' stamp. What a beautiful design and so many things to see......I also will play with the other huge stamp called 'Folk Art' but that will be another post.

I did use it as a background stamp. First I did make an inky background using Distress inks and a bit of salt. Always like the texture of that.......
I embossed 2 fragments of the stamp using clear matt dull embossingpoeders in each corner. 
With some darker blending it really pops out and comes alive........then some stamping using some matching Memento colors.

There is a light spot in the center of the card and I thought it would be great to use a matching stamp....of course some toadstools too from another great sheet' Autumn Poppy'
I did color the toadstools with color pencils and some accents with an acrylic marker.
The sentiment is also from  the Toadstool garden stamp.

Here it is.......


a close-up of the resist embossing......


Well, this was my first take on this stamp, next week there will be more!
Thanks for your visit, hope you did enjoyed it and till next time,


Wednesday, 3 July 2019

To Have and To Hold and Purple Sunshine by Penny

Hello everyone, I hope you are all enjoying the lovely weather - if you have any in your area lol!  This is my first post of the month, and I have a couple of 'golden oldies' to share with you today.  

To Have and To Hold Heart.


I have used stamps from the A Heart Full of Love set; Versamark ink, silver EP, pearlescent paints, silver Brilliance ink, CB Masking Tissue, a die cut, some gems and some paper flowers from my stash.  


I started with an A4 piece of white pearl card which I scored and folded to create my base card.  I then stamped the large floral heart with Versamark and embossed it with silver EP.  I then masked the image and stamped another heart image randomly with silver Brilliance ink.  I removed the mask and painted the floral images.


On another piece of pearl card I stamped and embossed the floral image again, painted it and added glitter to the centers of the flowers.  I cut the image out and decoupaged it  in 3D onto the focal image.  I stamped and embossed a sentiment in silver onto another piece of pearl card then die cut it with a heart shaped die from my stash.  I attached the heart to the card with 3D foam then added some paper flowers from my stash.  I added some gems to the sentiment heart and added another sentiment with die cut letters from my stash, cut from silver card.  I added a couple of blue gems from my stash to accentuate the die cut sentiment and complete this simple and lovely design.


Purple Sunshine.


This is a bright cheerful design that could be used for many occasions.  I have used stamps from the Mushroom House, The Toadstool Garden and May Fairy sets; grey Archival ink, alcohol markers, Distress inks, CB Masking Tissue, and some shrink plastic from my stash. 


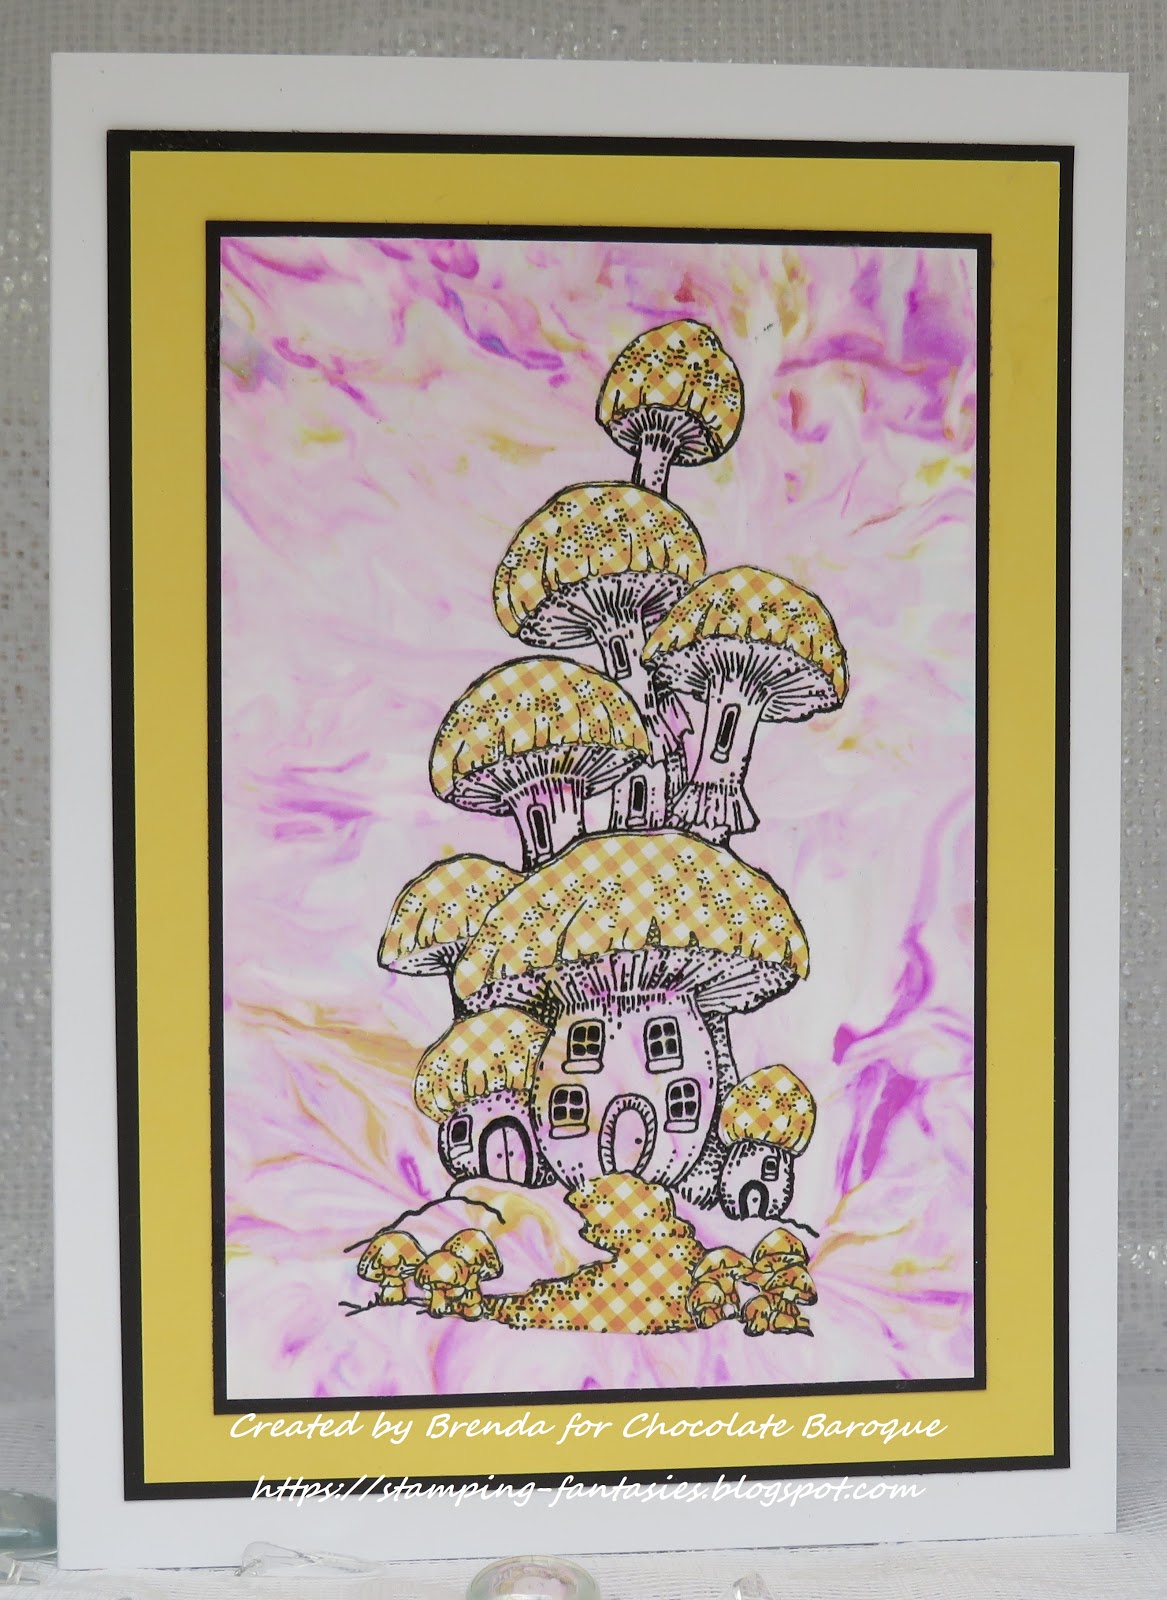
On a piece of matt silk card I stamped the Mushroom House image centrally and masked it.  I then stamped it twice more either side of the first image.  I removed the masking tissue and coloured all the images with my pens.  I matted the focal panel onto some colour co-ordinated card.


On a white base card I stamped one of the worker stamps from the Toadstool Garden set repeatedly around the edges of the card, I then attached the focal panel.  I stamped a couple of silhouette fairies onto some white shrink plastic using DIs, and cut them out.  I then shrunk them using my heat gun and attached them to the card.  On a spare piece of card I stamped a sentiment in DI and partially stamped the worker image  around the edges.  I matted the panel to coloured card and attached it with 3D foam.


Thank you for stopping by today, I hope you have enjoyed this post, and that I might have tickled your crafty fancy and inspired you to have a go.

I shall be back later in the month with more crafty fun, until then I hope you will keep checking out the DT blog to see what my teamies are up to.

Take care peeps,


                                xx   Penny  xx 

Saturday, 29 June 2019

A Trio of Mushrooms (by Julie)

Hello, today I have three cards with a mushroom theme.


My first card is from a new set called the Toadstool Garden. It is such a beautiful design and takes any hard work out of designing a card as it's all done for you. I simply stamped the image with Warm Breeze, Versafine Clair ink and coloured with pencils. I sponged Distress ink in the background with a few dabs of Crystal Stickles for added interest and the card was done.


My second card is made with Autumn Poppy and Autumn Edges
To start with I inked up the mushroom design from Autumn Poppy using Sepia Versafine ink and stamped in the centre of my card blank, followed by colouring in with pencils. The leaf border was inked up with the same ink and stamped around the edge. By more luck than judgement  I chose a card size that fitted the border and did not need masking, making this quite a quick card. To finish off I applied Mustard Seed Distress ink around the edges


My third card is stamped with another new design called Mushroom House and can be used very simply by just stamping and colouring with pencils. I have just layered the design onto a DL card and added some glitter glue to the tops of the mushrooms.

Thanks for stopping by. Please call back soon for more Design Team inspiration.

Julie xx

Tuesday, 25 June 2019

Spot Card - (by Magda)

Hello,
Lesley Wharton  has released recently this big stamp, that is very versatile and could be used in different ways.

Step by Step

1. Blend lightly red Distress Inkpad on and in your card
2. Stamp randomly in several generations with Archival Jet Black the sentiment of the plate
    "The Toadstool Garden "
3. Punch holes in different sizes on the front of the card
4. Stamp with Archival Jet Black the big stamp "The Toadstool Garden " on the inside of the card
5. Color with Faber Castel Art Grip Aquarelle Pencils some details of the image, especially the
    sections the stamp that you can see through the holes
6. Put some gold Stickless to highlight


Flower Card

This cute flower and the sentiment are in  "The Toadstool Garden " plate.  For this card I used blue, yellow and red Distress Inkpad for blending the background and stencil and the white cardstock pieces.  Archival  Jet Black  for stamping the sentiment on the card, Archival Red and Violet  for the flower on a white cardstock.   


Thank you for being here today. 
Magda


Saturday, 22 June 2019

Mushrooms and Apples by Penny

Hello peeps, I hope you are all well and enjoying some sunshine after all the rain we've been having.  I have a couple more samples from last month to share with you today, featuring some of the gorgeous CB stamps.  


Shrooms Galore!

For this first project I have used stamps from the Mushroom HouseThe Toadstool Garden, Mellow Fruitfulness and Tagtastic sets; Koh-I-Noor paints, pearlescent paints, black Versafine, silver and clear EP.


I began by stamping a tag onto black card and embossing with silver EP.  I cut it out, then stamped and embossed one of the 'holes' at the top.  I stamped the Mushroom House in black ink and embossed it with clear powder, then painted the image.  On a spare piece of card I stamped and embossed a sentiment with silver EP.  I used a silver pen around the edges before attaching to the tag.   To complete the tag I added the cherry branch, which I had stamped, embossed, painted  and cut out of black card, and some red raffia.


On a piece of white card I stamped the Toadstool Garden image in black ink and painted the toadstools and leaves with watercolour paints.  I added silver pen around the edges then attached it to a black base card.  I then attached the tag to the card beside the focal panel.  


Colourful Orchard.


For this project I used stamps from the Mellow Fruitfulness and Artistic Affirmations sets; grey Versafine ink, red Versafine ink, clear EP and alcohol markers.


I started with a piece of smooth white colouring card and stamped the apple branch image with grey ink.  I masked it with Masking Tissue and stamped the image twice more.  I removed the mask and coloured all the images with alcohol pens, adding light and shading to make the apples appear 3D, and did the same with the leaves.  I added some highlights with a white pen, and a shadow line around the images.  On a spare piece of card I stamped and embossed the apple branch three times and coloured them as before.  I then cut the images out.


I stamped a sentiment in a bottom corner of the focal panel using red Versafine ink and embossed it with clear EP.  I added gold pen around the edges of the panel then matted it onto red card before attaching it to a white base card.  I attached two of the cut out branches to the top corners of the card with 3D foam, and the other to the bottom of the card.


Thank you for popping in today and taking time out to read this post, I hope you've enjoyed it.  I loved creating both cards and I hope these samples give you a little inspiration.

I'll be back next month with more crafty fun, so until then take care,


                               xx  Penny  xx


Friday, 21 June 2019

A Mixture of Mushrooms (by Judith)

Hello everyone, I have a few projects to share with you today showcasing the fabulous mushroom stamps that we brought to you on last month's TV shows on Hochanda.

For my first projects, I stamped some Mushrooms from the Autumn Poppy stamp set onto large sticker sheets before cutting them out. This is an alternative to stamping and masking images, and allows you to add your images to patterned backgrounds very quickly. I found a lovely speckled background in my stash box which was a great colour for some mushrooms, which I had created using the wrinkle free distress method.

I stamped the sentiment onto spare card, splitting it in two, and colouring the edges with coordinating Distress Ink.

The next two cards show how backgrounds which are not altogether successful can be used when adding something over the top. The first, a remake of an old project that I made a long time ago, I actually spilled my cup of tea on the background! However, I liked the colours, so carried on anyway.

The next is the TV demo itself, and although I do not like this background so much, perhaps with a bit of pencil shading around the mushrooms, it will grow on me.

I used The Toadstool Garden next, embossed in white on a piece of kraft card, then added some paper piecing for a change. I simply rummaged through my stash box again for scraps of backgrounds left over from other projects, and stamped parts of the image using white embossing powder as before. I cut out the flowers and mushrooms before adding them to the main image.

So there you have it, a few more ideas for you using these fabulous images. I hope that you will try some of them out yourselves. Thanks for stopping by,

Judith xx

Monday, 17 June 2019

A Fenland walk by Brenda


Good morning to you all, Brenda here with some more samples using the Autumnal stamps showcased on Hochanda last month.

My top creation is my take on an Autumnal wander in the Fenland fields where I live, the trees are losing their leaves and there is an abundance of fungi to be found underfoot. 

I stamped a piece of card with the trees from Autumn Edges and added some background using Koh-I-Noor paints, a mask for the sun and some hand drawn birds. Next I stamped the Toadstools from the same stamp set, stamping a few more at both ends to extending the line, then I cut around the tops of the central ones and used a die to create a frame (when doing this tuck the bottom of the die behind those you have cut out so that section is not cut by the die). I coloured in with pencils and used foam tape to raise the frame over the trees.


The Artichoke from Autumn Edges was stamped with Versafine Clair and I then used Distress Inks and a stencil to create some background interest, matted and layered onto a die cut hexagonal shaped card.


I have used the trees from Autumn Edges to create a concertina card through the seasons, using various colours of Distress Inks for the background, a mask for the sun and various colours of Versafine Clair for the trees.


I stamped The Toadstool Garden using Versafine black onto an Oxide background, bleached out the colour from some elements of the image and them painted in some of the flowers with coordinating colour.


Mushroom House has been stamped onto a shaving foam background using Versafine Clair, then stamped again onto some yellow DP, but our and paper pieced.


And I couldn't finish this post without including at least one Poppy which is the one from Autumn Poppy stamped with Versafne black onto an Oxide background , bleached out and then coloured in with paint and stencilling added around the image.

Many thanks as always for your visits and encouragement.