Pin It button on image hover

Monday 31 May 2021

Retro part 3 by Zoe

Good morning Lovelies and welcome to my final post of May.

Here are the rest of the samples I made for the shows on The Craft Store TV last month.


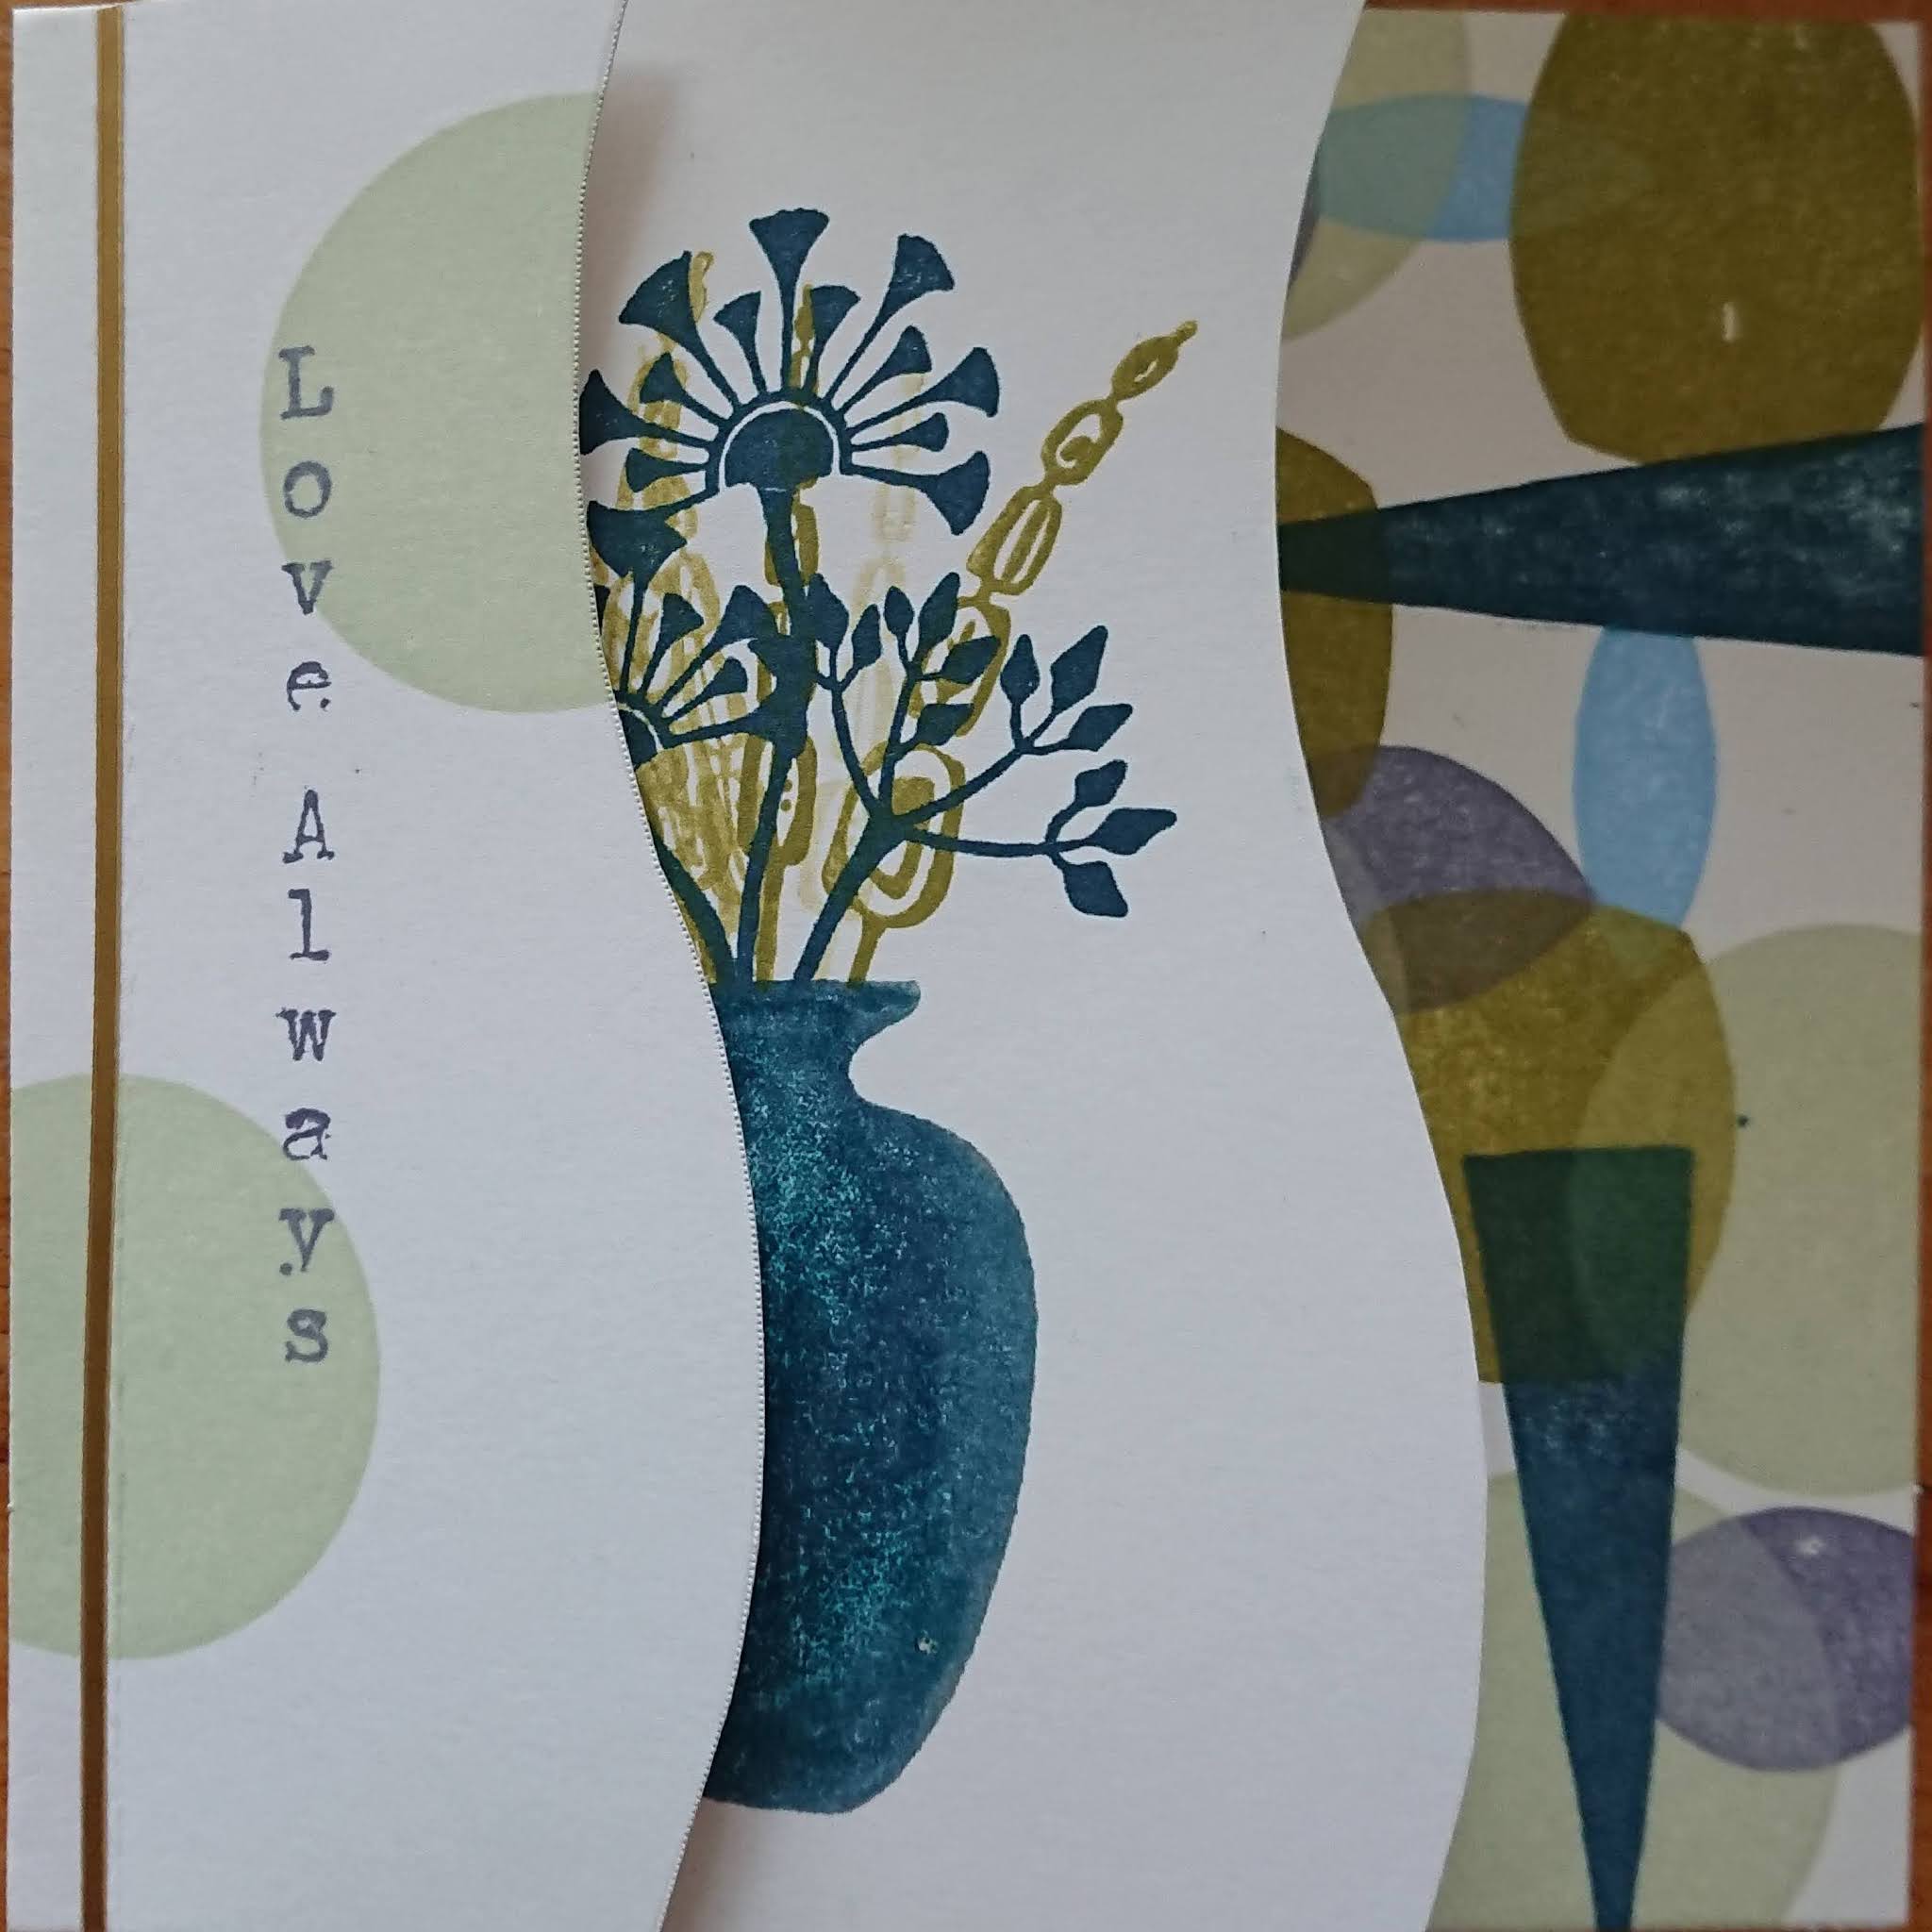
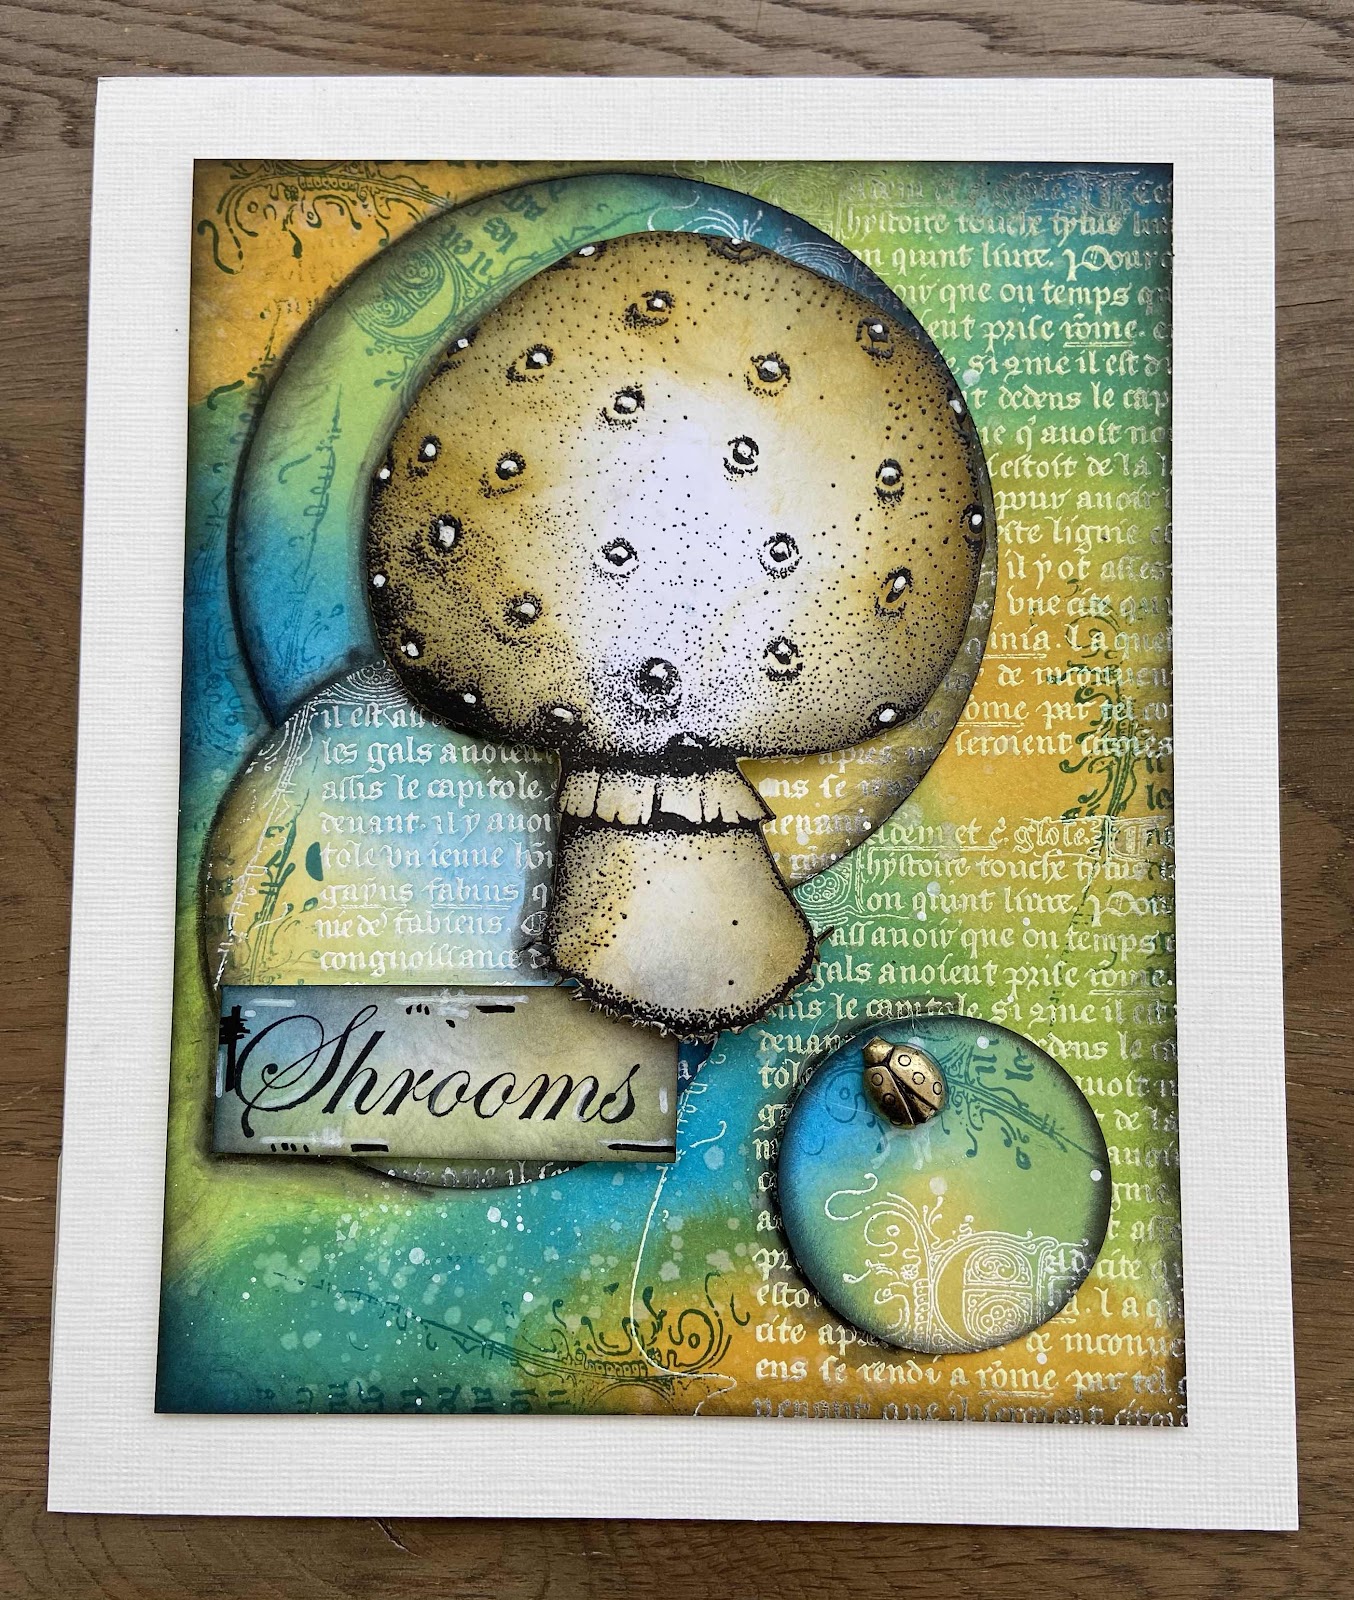
My first project is a Journal page.
I started by heat embossing in white on the topper and a spare piece of card, I cut the circles using a circle cutter in different sizes and blended Distress inks over the embossed background which created a resist, and randomly stamped parts from the same set using Versafine Claire ink and edged with Black Soot Distress ink, I repeated the same technique for the topper but also splattered some water and dried it to create some texture, I stamped the Mushroom on a another piece of card and used Distress inks to colour it, and then decoupaged it. I used a white gel pen to add some dots and lines for finishing touches and a bit of splattering too, I used a charcoal grey Inktense pencil to create a drop shadow, it really gives it that 3D look.
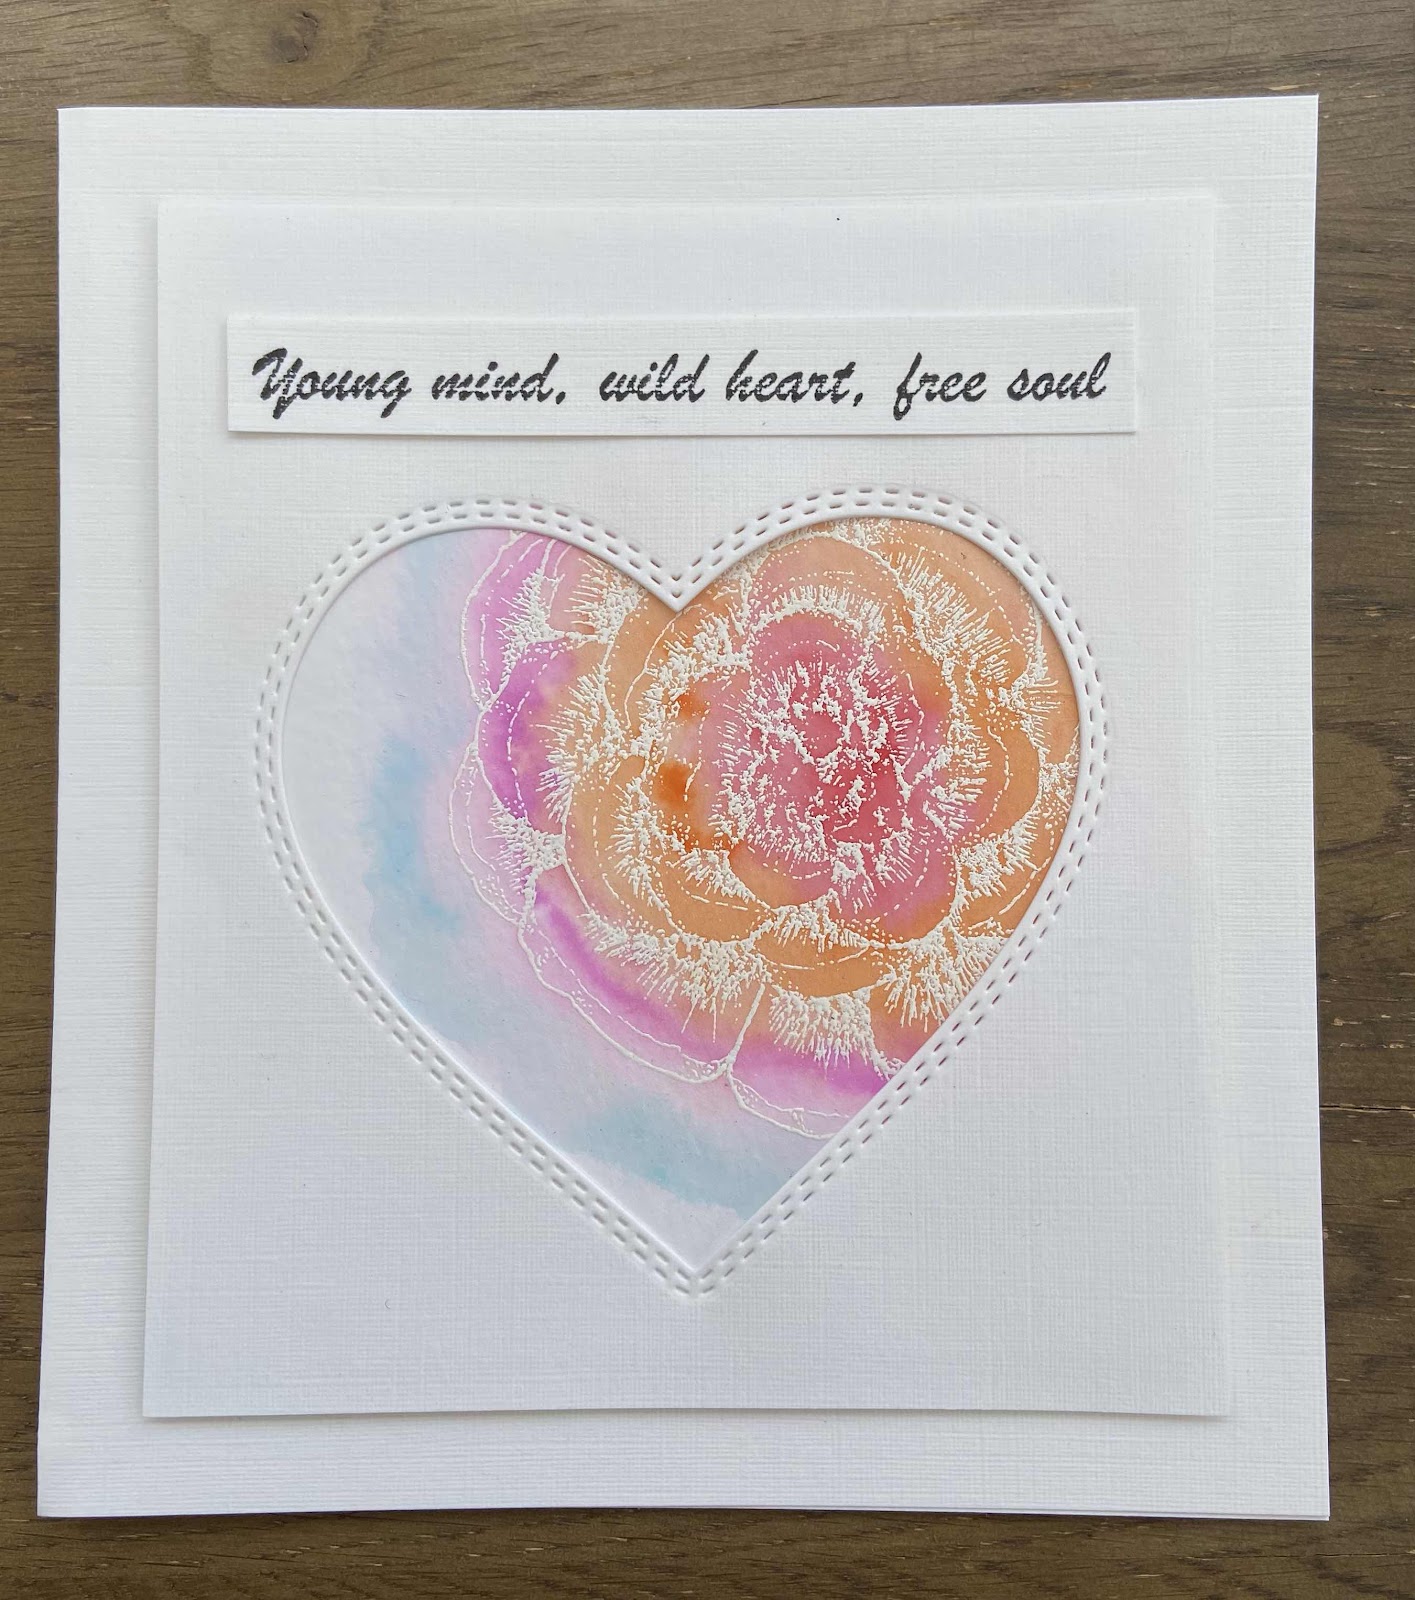
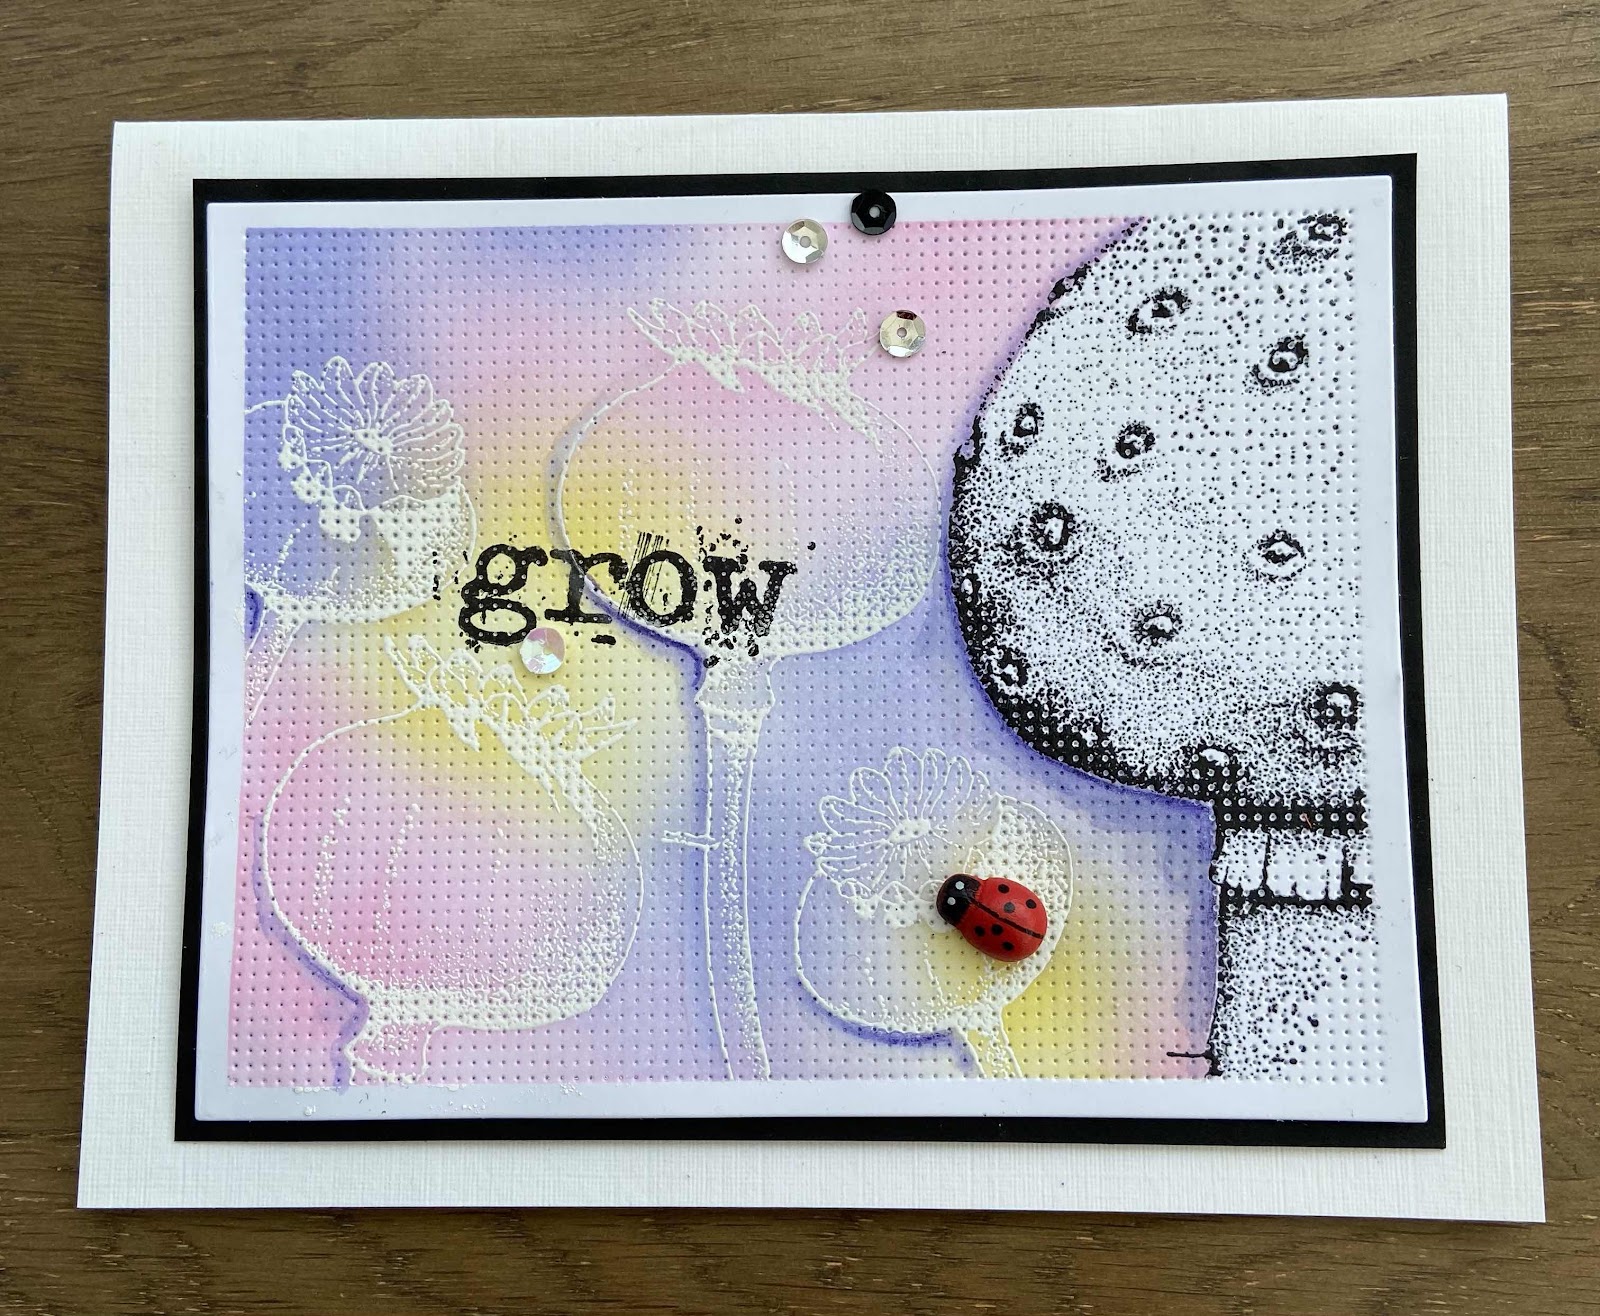
I used a Die to create this card which has a cross stitch fabric type effect but it’s card! I used low tack tape around the edge to create a frame and stamped the Mushroom, I masked it using Masking Tissue from the CB website, I then heat embossed in white the Seed Pods and blended Distress inks over the top, removed the tissue and used Inktense pencil to create drop shadows.


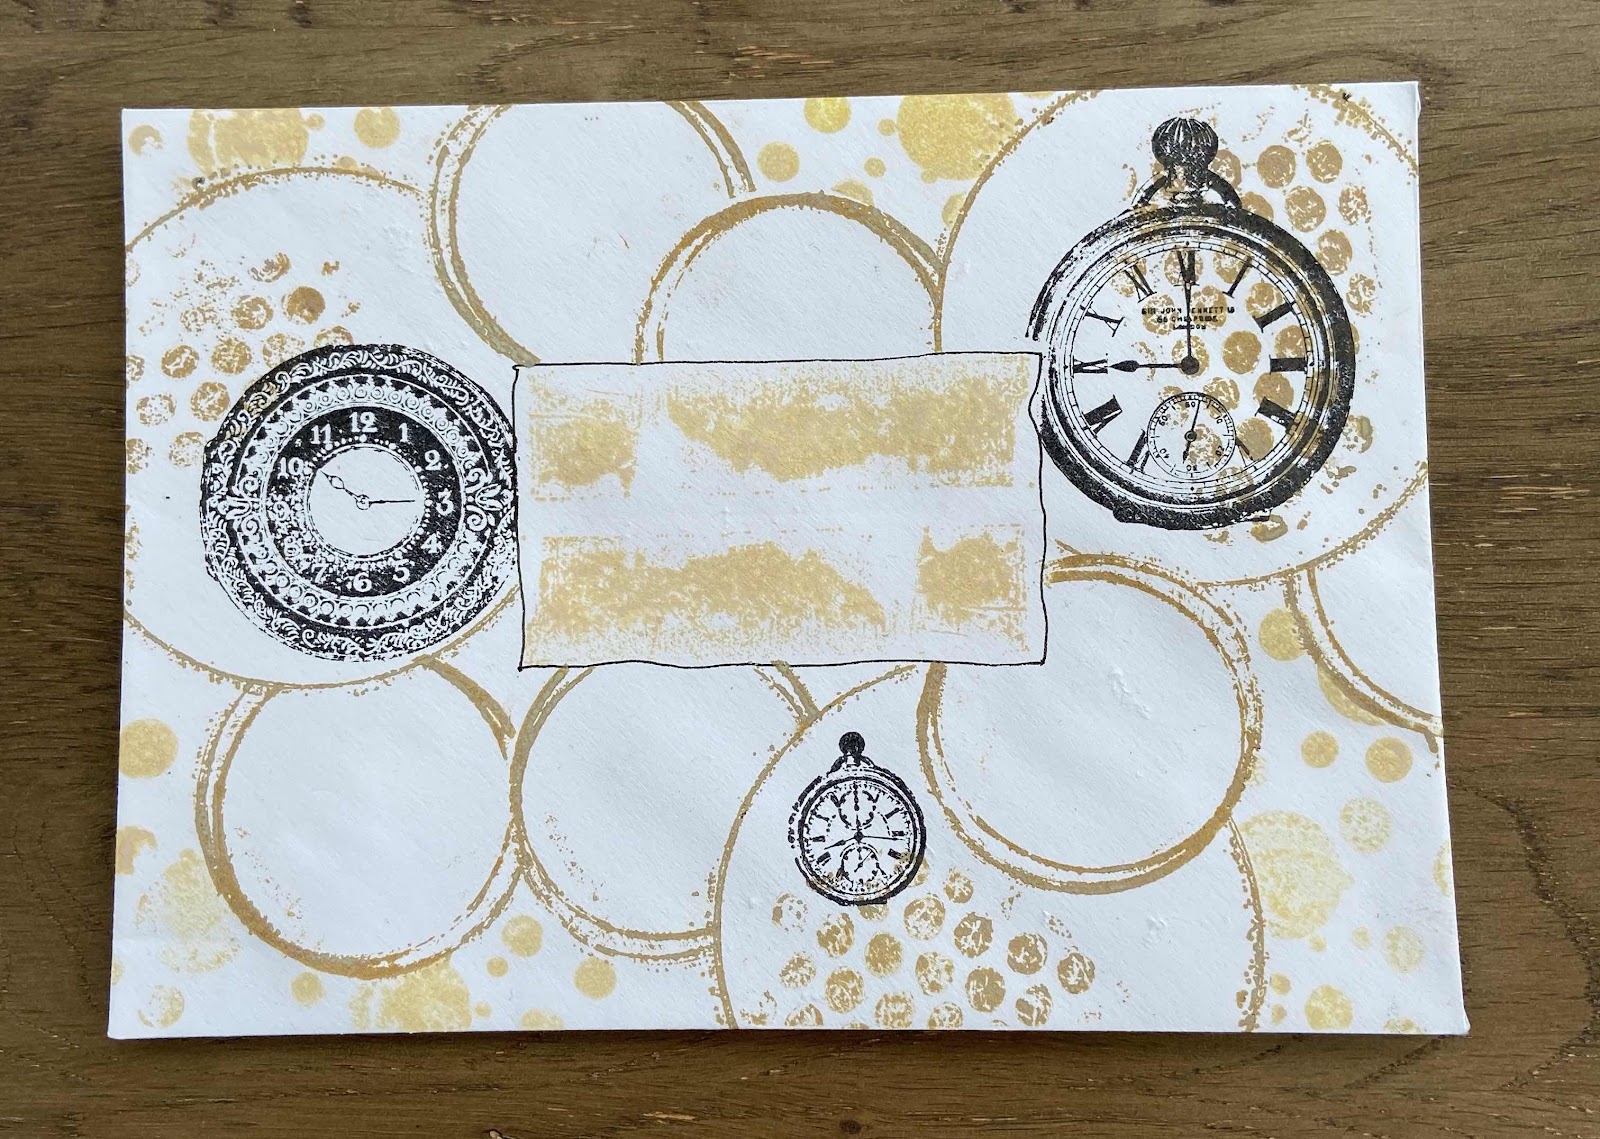
I stamped my Envelope with Distress Oxides and Versafine Clair inks.

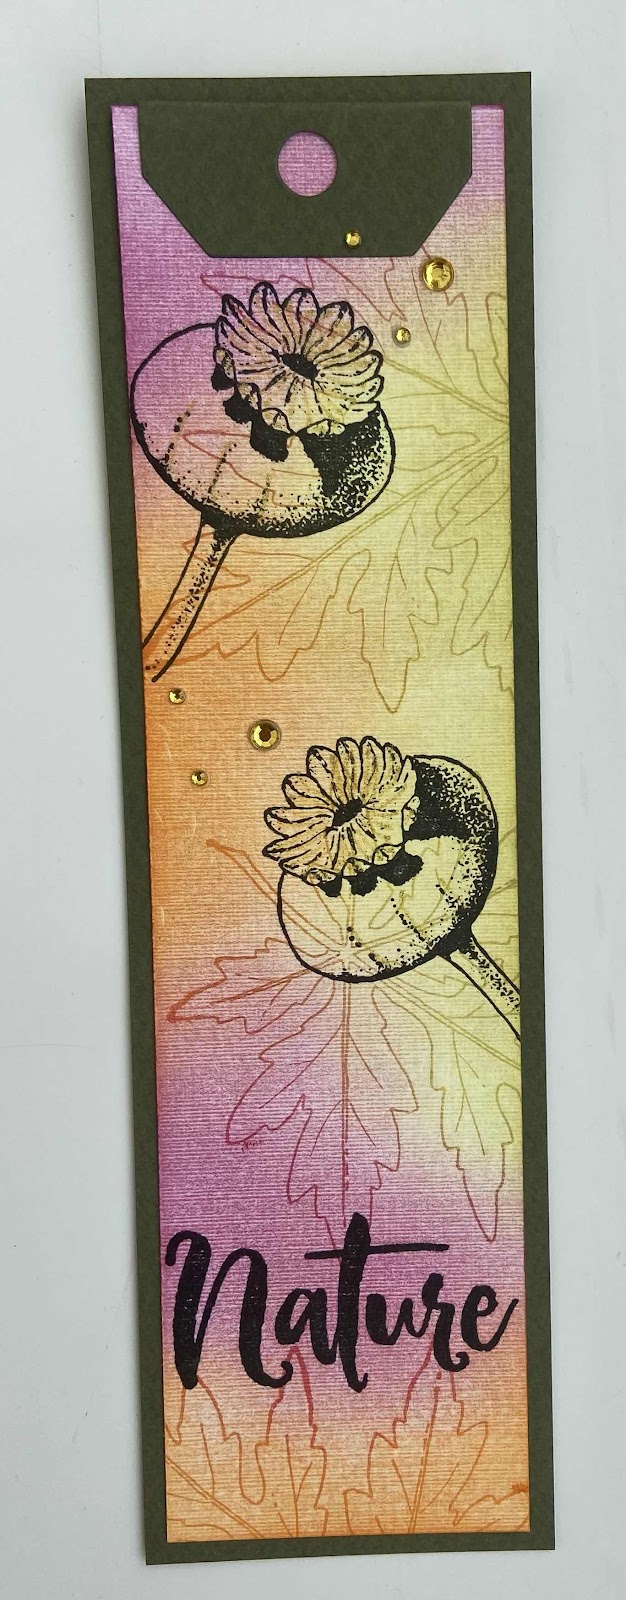
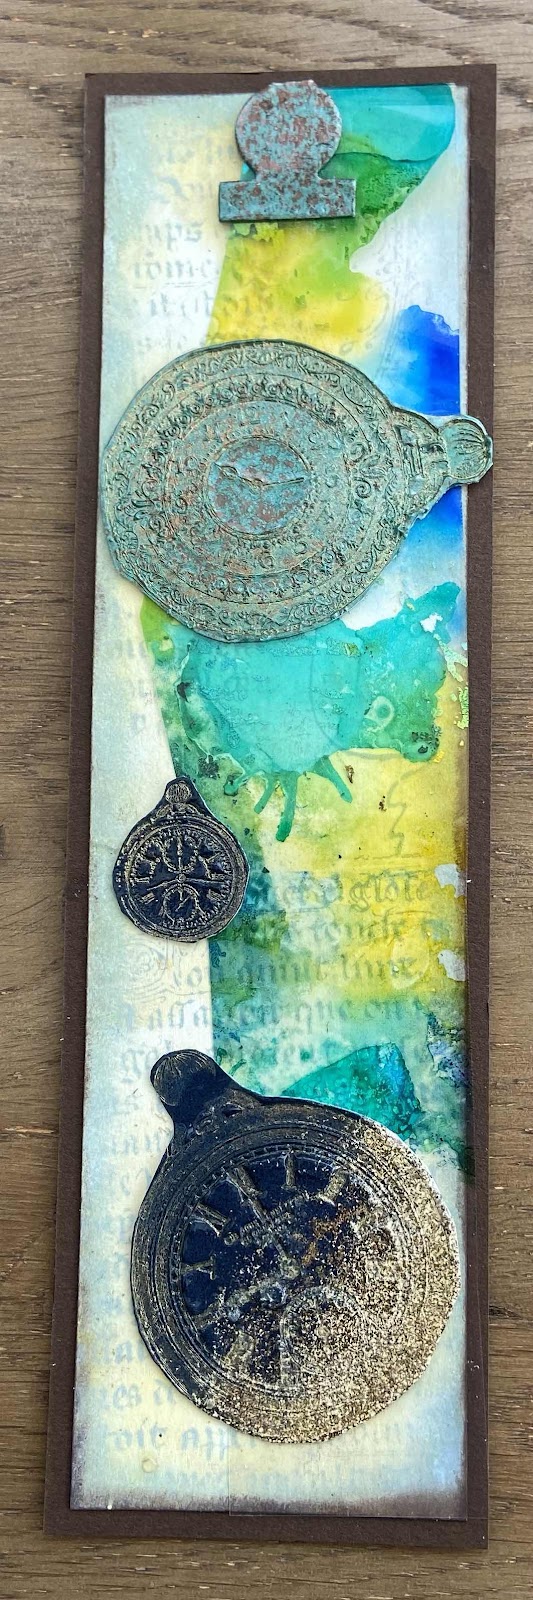
My Bookmark was a scrap of card from my stash which had been a Gel press print, I stamped lightly using Distress Oxide inks to create some texture, I also had some Acetate in my stash which I had already coloured with Alcohol inks so I used that as an uneven overlay, the pocket watches are heat embossed with a variety of chunky embossing powders and stamped into, cut out and stuck on.
Simple stamping with Distress Oxides on my next Bookmark 


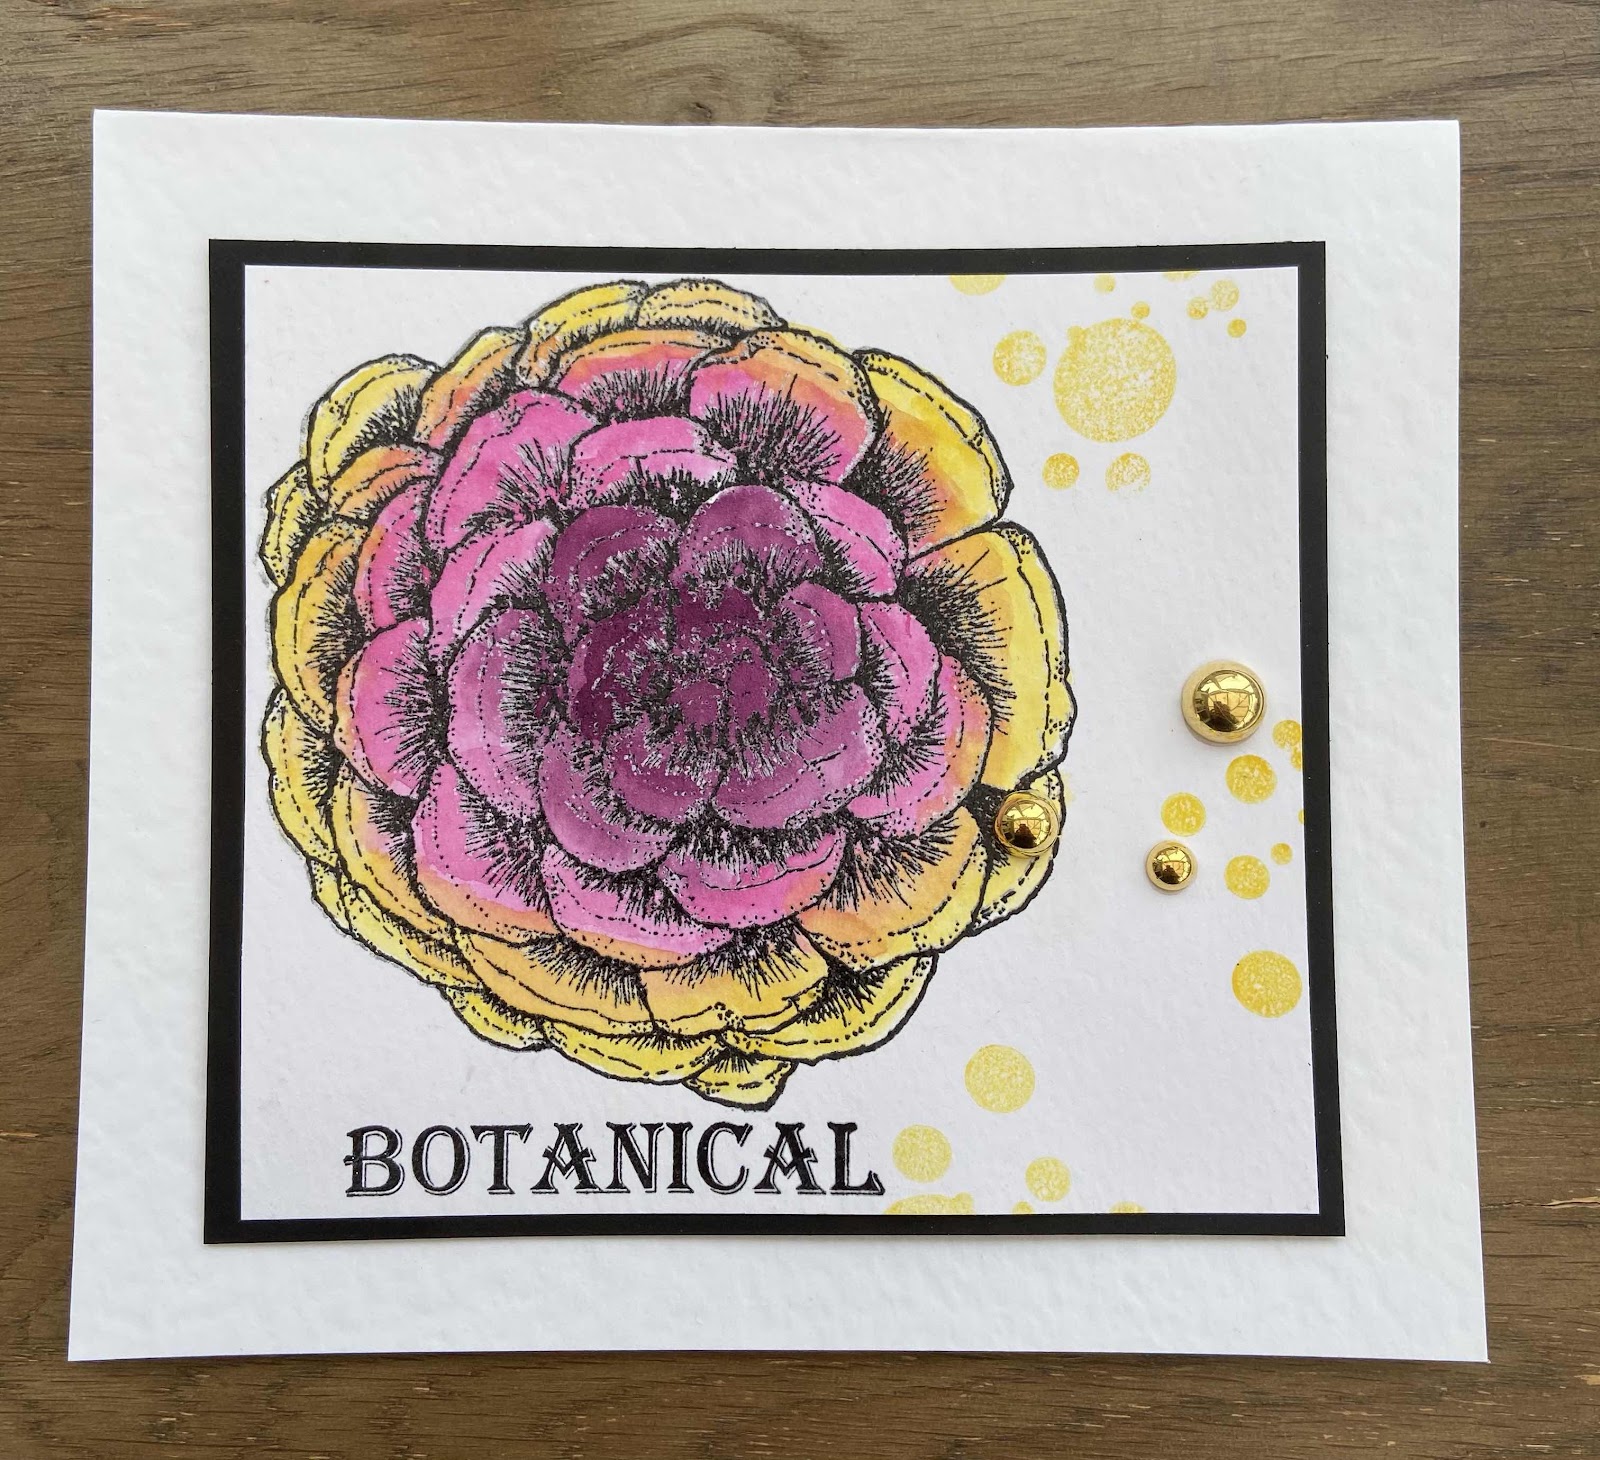
And for the last 2, simple stamping and masking.


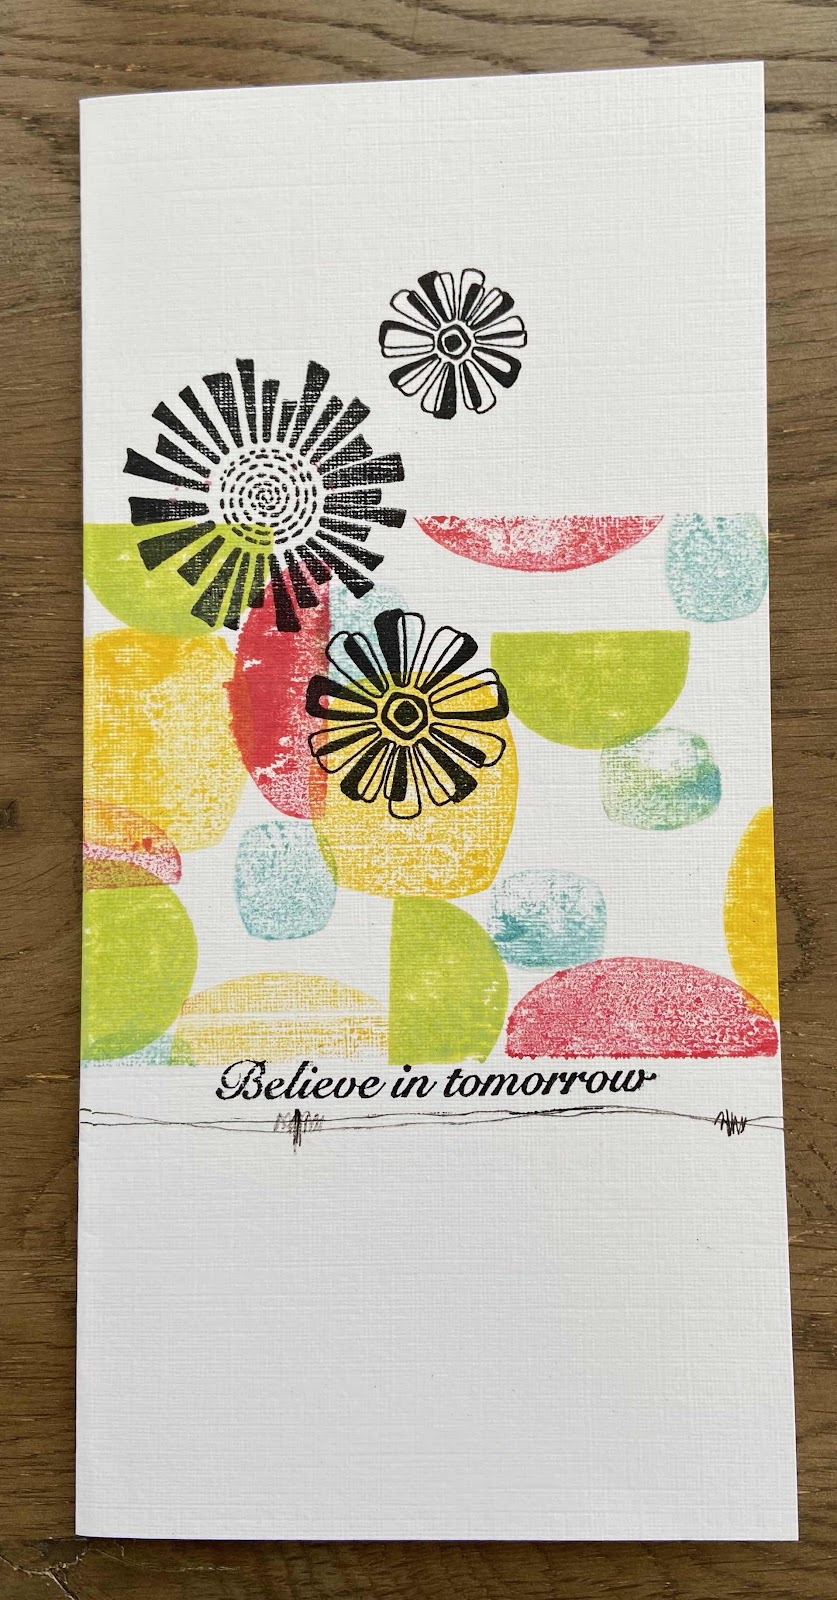
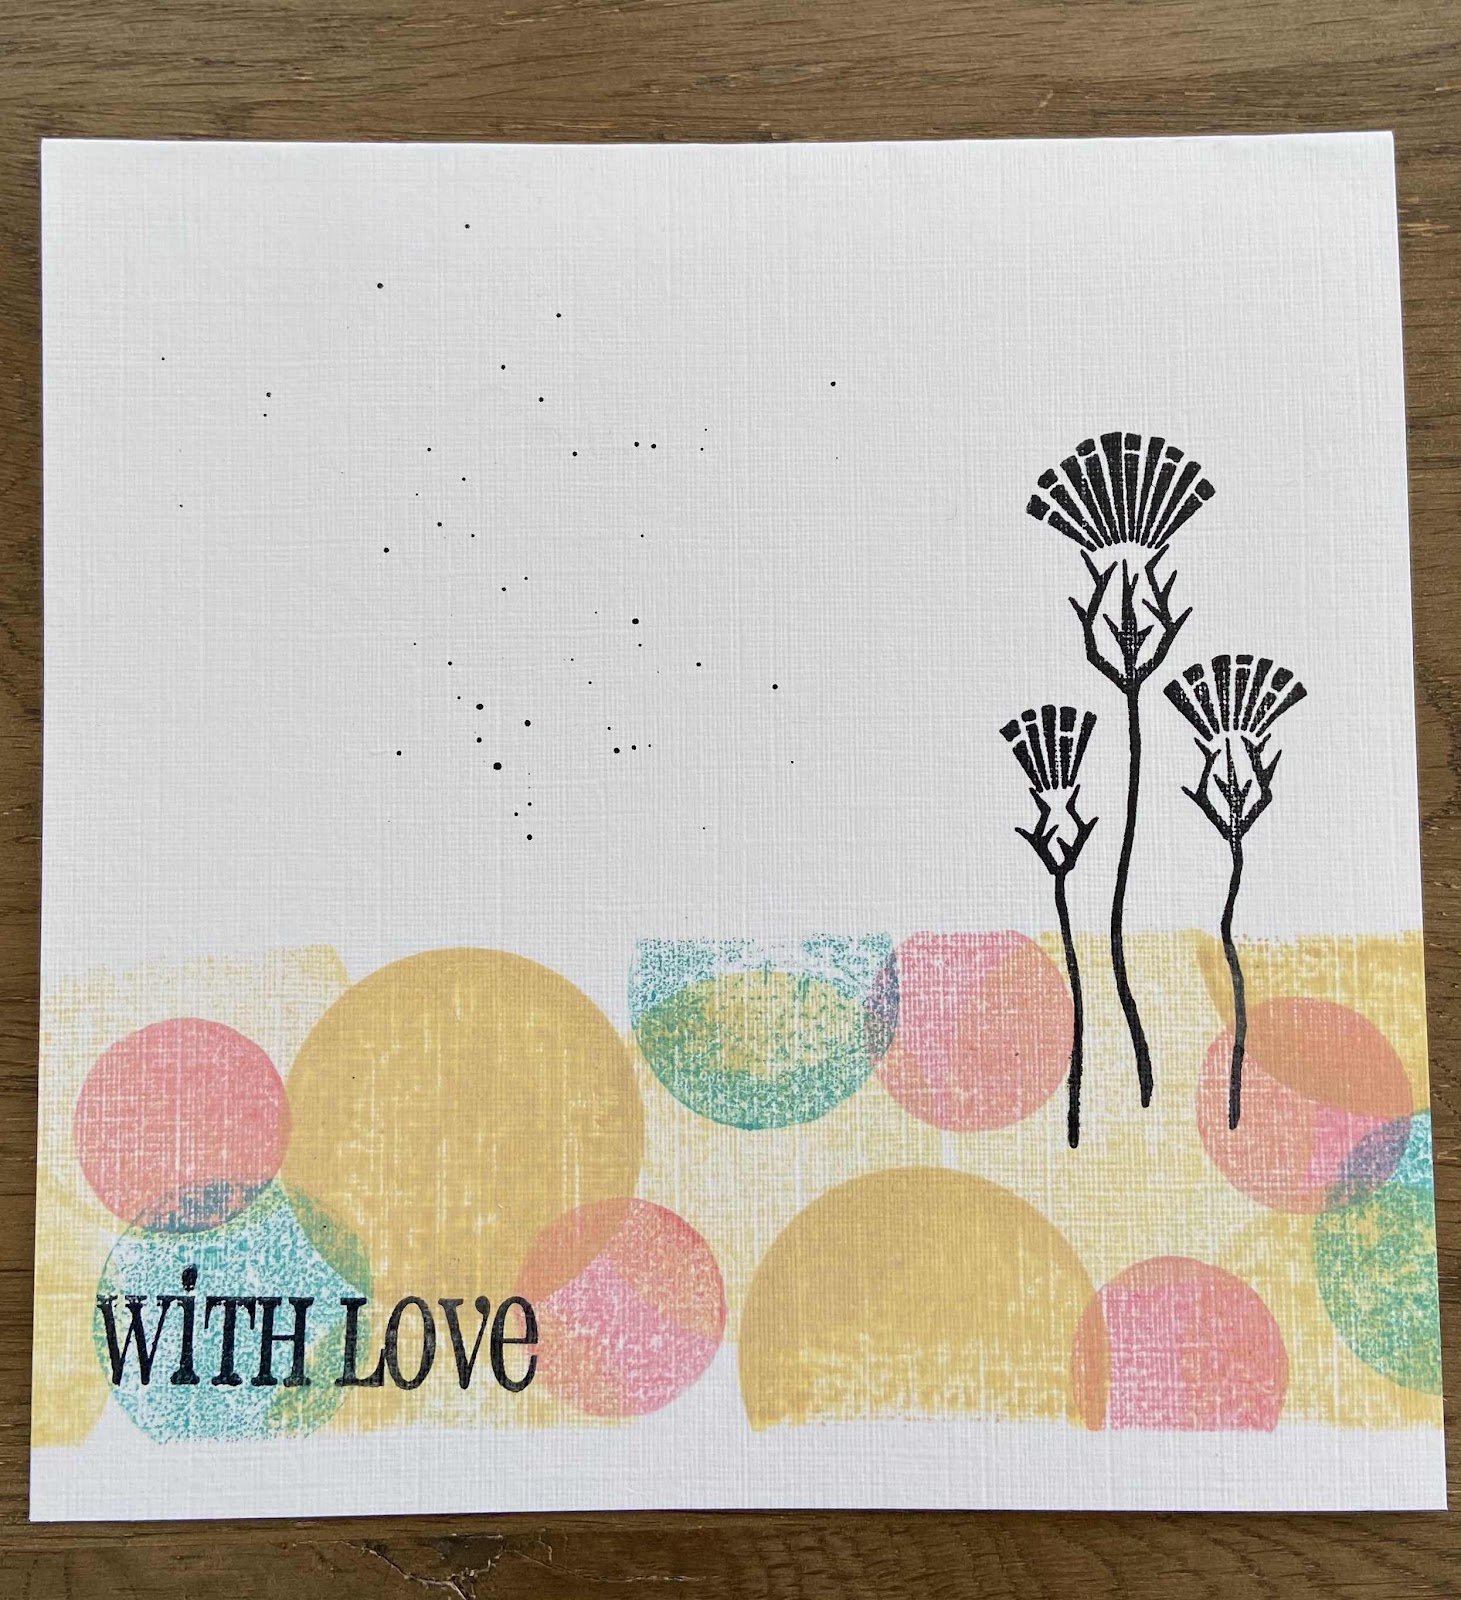
Thank you for visiting today I hope you have enjoyed your visit.

Have a wonderful day xx Zoe xx 

Sunday 30 May 2021

Marked Retro (By Doreen)

                                                                      Marked Retro


Hello Everyone, welcome to my third post for May, Marked Retro uses 3 stamp sets


 Make Your Mark

 https://www.chocolatebaroque.com/make-your-mark-rubber-stamp-sheet-dl.html

Life Is So Much Better 

https://www.chocolatebaroque.com/life-is-so-much-better-rubber-stamp-sheet-a5.html

Retro Florals   These are available by phoning Chocolate Baroque Direct and speaking to David or Lesley, they are not on the website.


Take an A5 piece of glossy card and randomly splash with Distress Inks ( I unscrewed the tops from sprays and flicked the ink in the tube onto the card, please make sure to cover surfaces as this is quite a messy process) Leave to dry. Once dry randomly use the stamps from the Retro Florals set using  Distress Inkpads squished onto a glass surface or messy mat as this will stop you contaminating your inkpads. Then you may wish to use a stamp press to use the Make Your Mark  stamps as you an achieve a really black mark by inking and stamping until you have the black you require.

Leave to one side to dry thoroughly (this will take a while) 

Take a couple of small scraps of card 1 piece of black and I used a rusty coloured piece of scrap but if you don't have a piece to match ink a piece of white card leave it to dry properly before using it to stamp your sentiment. 

Buff the dry topper using a soft tissue until you achieve a beautiful shine. 

 Mat and layer onto a black card blank. Add mat and layered sentiment.


Thank you for looking today

Love Doreen 


Saturday 29 May 2021

Earth mother calling by Rachel

 Hello there,

A few more pieces from me from the April shows. This first card was made using the retro flowers and vases stamps - I first masked off the top and bottom of the card then created a blended background using distress oxides. I then simply stamped onto that in ink and added the sentiment plus a few splats.

Next up I used the succulent stamp from the mother earth set - I stamped this onto black card and then used a dry brush and mica powders to go over the top. I then simply added a sentiment and a piece of silk ribbon and then stuck this all onto a card blank.
This final card started out with stamping the script from the scripts and timepieces stamp set and heat setting in white embossing powder before create a mop up background in distress oxides. Next I used the Make your mark stamp set to do some more background stamping before adding on the shrooms sentiment and the mushroom itself that I stamped separately and fussy cut.
These are my final makes from April. Have a great day! Hugs rachel xx


Friday 28 May 2021

Believe in your Dream by Brenda

Morning everyone, my final post for this month with more shares from the April Craft Store shows. 

For the above card I stamped the leaves from Sow the Seeds onto cardstock which I inked with Oxide Sprays Rustic Wilderness and Twisted Citron, but the out and arranged onto a base piece inked with Oxide Tea Dye onto which I added a few circles using Make your Mark and sentiment from my Life is so much Better inspirational quote set.

A bit of a colour riot here, Dylusions sprayed across the top of a piece of cardstock, spritzed well with water and 'encouraged' to drip down the page. I then simple stamped the large Pinecones from Mother Earth using Versafine onyx black and three words from the same set and Sow the Seeds .

Have a good weekend all.

Wednesday 26 May 2021

Just Useful Numbers (by Lesley Ebdon)

Today sees the final visit this month from Lesley Ebdon. She has created another fabulous masculine card using non traditional colours, showing that cards for men do not have to fit a certain set of rules.

Here is what Lesley had to say:

This card was for my Son-in-Law. Apart from the sentiment all the stamps came from sets Make Your Mark and Just Useful. I randomly inked two colours of Distress Oxide Ink onto the number stamp and stamped it top and bottom then added the bubble wrap marks using one of the colours and the splatter using the second colour. I used Morning Mist VersaClair to stamp the cracks (love that image) and random text (there are many gorgeous text stamps throughout the Chocolate Baroque catalogue) then Nocturne VersaClair to stamp the circles round the numbers (his age). I coloured the two numbers with PolyChromos. I found the perfect piece of co-ordinating paper in a pack included in a recent kit purchased from Chocolate Baroque which I added across the topper then added the sentiment piece. I matted it all onto black card and added it to the card base.

Thank you for your visit, stay safe and I'll see you again soon.


Lesley xx


Monday 24 May 2021

retro notelets


I created two sheets of background card using my craft mat, peeled paint and broken china distress inks and a waterspray. 


I cut pieces to ft the small 4x4" notelet cards and also a larger piece to fit the 6x6" card blank I used as the base for the wallet.

I stamped different flower images from the retro sets  onto the notelets, and also one onto the larger piece along with the sentiment from say it vertically


I also made some tags using the same stamps and sponged and stamped backgrounds and sentiments from Life is so much Better


Sunday 23 May 2021

Groovy!

 Hello

I'm sharing more of my samples from the April show on The Craft Store

These cards feature the Retro Florals and Retro Vases.  If you were lucky enough to get these stamps you will know that there were over 100 stamps! The stamp sheets were filled with flowers, leaves, vases and geometric shapes. Lots of cutting out, but worth it. I've also added sentiments from Life is So Much Better and Say it Vertically.


For this card I first created a background by blending dye inks. I then stamped some circles and over stamped with flowers in a contrasting colour.


For this card I used a 6x6 card base. I then cut a 6x6 panel and used  Chocolate Baroque Draw and Tear Rulers to make the decorative edges. (I used the rulers to draw a line approx a third of the way in. I cut along the line  and used these two pieces as "pages" for the front of my card.) I decorated each piece with the shapes, the vase and flowers and a sentiment before assembling the card


This very simple, but effective card is made by using the different sized circles from the sets and stamping in Oxide inks. 


For my next card I stamped the trio of flowers and added some leaves. I then die cut a window box for them. I pierced a few holes on the bottom corner to give a little detail whilst still keeping the card clean and simple.


Next, I masked off an area on my card blank and blended some dye inks. I used the same colour to stamp some circles. I removed the mask and stamped the vase and stem. I decorated the vase with one of the stamps also in the set and added some white pen for a highlight. I added a sentiment and a couple of butterflies to finish.


For my last card I inked up the vase in light blue archival ink and added a darker shade to one edge to give some dimension.  I added the leaves, a couple of butterflies and a bit of shading under the vases to ground them.


I really enjoyed these Retro stamps.....can you tell? Hopefully I have given you some inspiration.

Sandra xx

Saturday 22 May 2021

Time for Nature (by Judith)

Hello everyone, I hope that you are keeping well. I am sharing my last few projects this month featuring stamps from last month's TV shows on The Craft Store. 

My first card features stamps from the beautiful stamp set Sow the Seeds. These large stamps are perfect for journaling or creating eye catching, distinctive cards for someone special. I love the seed heads, and wanted them to shine in my project. I created a background using my inky plate and soft colours. I stamped the images, and added some pencil where the shading was present. I added extra foliage from Silhouette Grasses, such a useful stamp set.

My next card features the fabulous pine cone from Mother Earth as a focal point. I stamped this three times onto kraft card, using brown ink, and cut it out and scrunched it up to give it added texture. I created a background on a piece of tea dyed drawing cartridge, using stamps from Sow the Seeds and Make Your Mark.

The next two cards are older samples that I posted on my own blog a little while ago, but I will share them with you here. A simple piece of white embossing, and then the image was painted with Koh-I-Noor watercolours:

The leaf was stamped using different colours of ink, and then lightly coloured with pencils to accentuate the shading:

Finally I created a card using the Scripts and Timepieces stamp set, which was only available during the TV shows. I coloured my background with Distress Ink, and stamped the scripts using dark brown ink. I added splatters from the Timeless stamp set. The cental piece was created by stamping onto a piece of stampbord which I had coloured with Distress Ink, and I then added triple embossing for a shiny glaze.

Thankis for stopping by, take care,


Judith xx


Friday 21 May 2021

Retro part 2 by Zoe

Good morning Lovelies and welcome to my second post for this month.

Here are some more of my samples from last months shows on The Craft Store.

The Retro Flowers and Vases sets we’re older Stamps that have been revived after a period of retirement and the pine cone and seed pods were designed by the very talented Kim Moody.

I actually thought the Pinecone made a pretty flower.

I heat embossed and coloured with Watercolour markers the Pinecone cards and the Seed pod projects I used Pan Pastels.


Thank you so much for spending your time visiting today I hope you like my samples.

Have a wonderful day xx Zoe xx 

Thursday 20 May 2021

Moonlight Shroom (By Doreen)


                                                                       Moonlight Shroom


Hello Everyone,

 today I am using the Mother Earth stamp set it contains 2 large image stamps and 3 complimentary words which can be used in many other ways than just with this set.

https://www.chocolatebaroque.com/mother-earth-rubber-stamp-sheet-a5.html


Using 5 PanPastels I have used Green, Blue, White, Silver and Black.

Versafine Onyx Black to stamp sentiment and image. 

https://www.chocolatebaroque.com/versafine-inkpad-onyx-black.html 

Watercolour Card is used for base and the PanPastels work well add your colour in a gentle sweeping action to achieve a smooth effect, use the light colours first adding silver to the moon to give it a sheen, Any stray strokes can be taken away using an eraser and this is how I also achieved the effect of stars. Build the colour by adding more in stages and then the shadows, shape and depth are using the black in the same way , where you want darker shades add the black a little at a time. Finally add Sentiment.

Mat and Layer onto a white card blank. Spray with Pastel Fixative to seal.

Thank you for looking in today,

Love Doreen 


Wednesday 19 May 2021

More Masculine Cards (by Lesley Ebdon)

Hello everyone, Lesley is back with two more beautiful cards to inspire you this week. She wanted to create cards that are not necessarily using traditional male colours, or dark and sport themed. She has chosen images to suit the personalities of her recipients, and the second card is a reminder that Spring is here and the trees are turning beautiful shades of green.

This is what she had to say about appearing on the Design Team blog once again:

Hello everyone,

I was delighted to be asked recently if I would like to do a guest spot on the blog joining so many talented crafters, some of whom have been friends for many years. It's a bit like coming home lol, and it's lovely to be here again. 

This first card was for my Brother who was a draughtsman before he retired, drawing industrial buildings, so Lesley's Wild Cornflower Blueprint was the perfect image for his card. I did some blended stencilling in the background then stamped the main image using Morning Mist VersaClair ink. I used Distress Inks picked up from my craft mat to watercolour the image. I then stamped the building plan onto my card base using a blue VersaClair, matted the topper onto black card and adhered it to the card base. Finally I stamped the sentiment from the recently released Say It Vertically stamp set.


The second card was for my Hubby. 


Again I did some soft stencilling top right and bottom left using Distress Inks onto the base card, and then used the lovely little foliage stamp from my chosen stamp set with first and second generation stamping in the top right corner. I then masked off a narrow border round a piece of card for a topper and softly blended Distress Inks to give an impression of an early morning sunrise. I inked up the image from the Tall Trees set using brush pens so that I could get the variation of shading to the foliage and stamped it onto the topper, grounding it a bit with a little more ink, and added the topper to the base card with foam pads. Finally I stamped the sentiment direct to the card (I like to risk all on the last bit, lol) again from Say It Vertically.

Thank you for your visit. I hope you enjoyed my creations as much as I enjoyed making them and that you might use some less traditional male images and colours for some cards for the men in your life once in a while.

Stay safe and I'll see you again soon.

Lesley xx