Pin It button on image hover
Showing posts with label Steampunk Travel. Show all posts

Wednesday, 13 May 2020

Four Fold Cards (by Carole)

Hello everyone, today sees the first of three posts this month from our Guest Design Team member Carole Cann. Carole has designed a series of beautiful folded cards for your inspiration. 

Carole writes:

Hello everyone.
It is my turn again to show some samples as a guest designer. I always look forward to this and hope you like my three, very different projects.
I have used stamps that were highlighted last year as it is very easy to put them away in your stash and forget about them.
I have started off with a lovely four fold design. I really like this folded card as you can get an interesting finished project.
I decided to do a men's card, using the Eccentric Edwardian set, Steampunk Travel and Punky Expressions. Very good standbys for a men's card.


Make a master sheet for the background paper. Mine was made by just pressing Distress Inkpads onto the card, I usually use two colours, in this case Pumice and Wild Honey.
Spritz the background with water and leave to dry. The inks will bleed slightly and blend with each other.
The elements were stamped with Versafine black and one of the other colours.
The gentleman was stamped onto the card, but the very top of his head was masked so that the hat would sit properly. The hat was on a separate piece of card and cut out.
Finally I used a piece of metal, stamped with Stazon and embossed it to create an embelishment on the front.
Below are two other cards that I have done using this design. One was shown on Hochanda many months ago, but I thought it was worth another viewing for those of you who may not have seen it. The other was a birthday card for a friend using blue as the background.


Love this colour combination.
See you next week with something different.
Thank you for visiting and happy crafting.
Carole

Over on my blog cchotchpotch.blogspot.com there is another sample that I made for my daughter, using Chocolate Baroque stamps and stamps from an Alice in Wonderland range from another company. The flowers went so well with the other stamps I thought to have them as soon as I saw them. I hope you agree.

Sunday, 15 September 2019

Spring into Summer by Penny


Goodly morning peeps, I hope you are all well.  I'm back again with my second post this month and I've chosen four mini projects to share with you today.  Last year Chocolate Baroque added blank calendars (Blank 2019 Calendar/Planner) to their range and I decorated several for Christmas presents and one for myself.  

For the first project I have used stamps from the ButterflyDaisy Collage set, Distress Ink, purple Versafine ink, alcohol pens and a stencil from my stash.  I stamped a large collage image in the center of the picture area, then stamped a couple of daisies and butterflies.  I used alcohol pens to colour all the images.  I then used a stencil and DI to create the background.


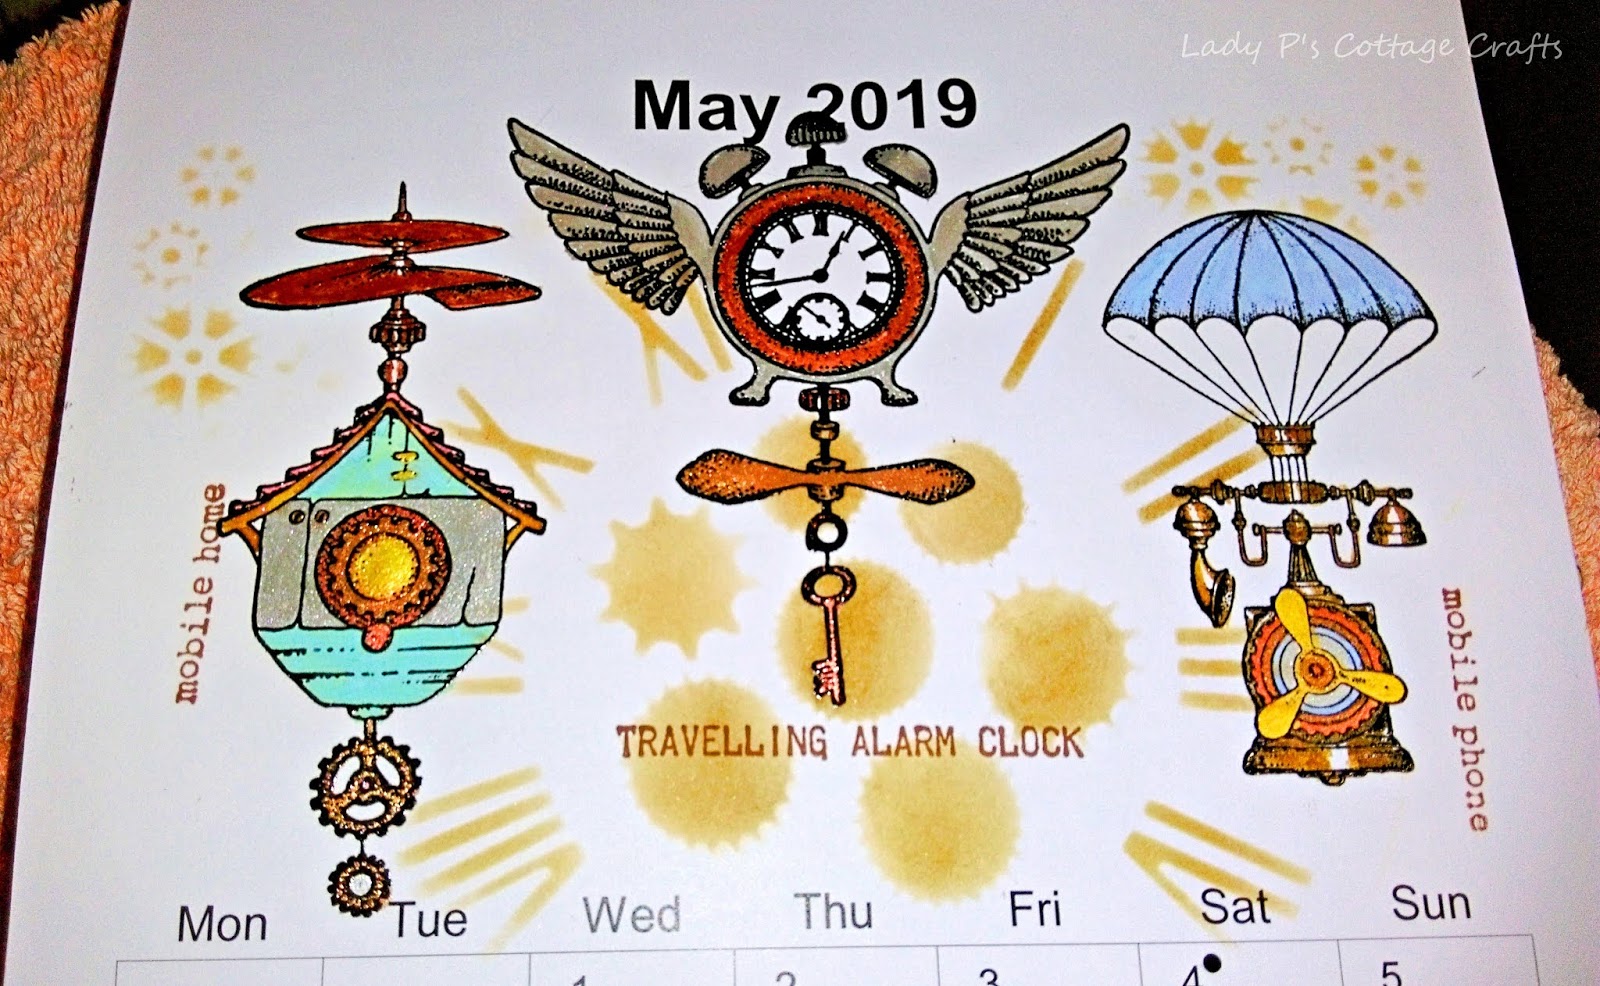
For this one I used stamps from the Steampunk Travel  and Steampunkery sets, metalic paints, Distress Inks, alcohol pens and a couple of masks from my stash.  I stamped several images using black Versafine and embossed them with clear powder.  I used paints, inks and pens to colour them, using metalic paints for the metal parts.  I then used the stencils with a DI to create a back ground.


This project uses stamps from the Underwater Kingdom and Seadragon sets, Distress Ink, Koh-I-Noor paints, black Versafine ink, clear EP and a stencil from my stash.    I began by stamping and embossing all the images and then painting them.  I took a stencil from my stash and applied DI through it to give the picture a watery background.


For this month I decided to go sunny and hot!  (Well I can dream can't I?)  I used stamps from the Indian Elephant and Paisley Elephant sets, Distress inks, black Versafine ink, clear EP and a gold pen.  I stamped and embossed the elephants first then masked them.  I then stamped and embossed the Palace silhouette image between the elephants, and stamped it again in second generation ink.  I then stamped a script image repeatedly across the page and used one of the worker stamps to fill any spaces in the background.  I used a black fine liner pen to ground the Palaces and the elephants then removed the masks and coloured in the elephants.


Thank you for dropping by today, I hope you have found my little collection enjoyable!  I'll be back again next month with more craftiness to share with you  :) 


                                 xx  Penny  xx

Friday, 19 April 2019

Time Flies (by Magda)

As second post  for this month I am proposing for you a Male Card and 2 Bookmarks.

Step by Step:   Time flies card

1. Blend Distress Ink Pad old paper on a white cardstock
2. Let brown and green Brusho watercolor flow on it
3. Stamp the gear set and the flowers of Punky Romance, and randomly
    the sentiment of Steampunk Travel plate with Distress Ink Pad brushed corduroy
4. Highlight with a brown Aquarelle pencil  the shape of some stains.


Bookmarks :

1. Colour the bookmark with Distress Crayons of set 1 and set 2
2. Use baby wipe to blend the colours
3. Stamp with Versamark the set of  Fluttering Hearts and heat emboss  
I used the same technique for the second blue bookmark, but for this one I  just stamped in Jet Black  Archival  the little hearts of Fluttering Hearts and the sentiment of Floral Hearts 


I will be back next month with other ideas for you,  hugs
Magda


Thursday, 30 November 2017

cyclist (by Veronica)

A slightly more cheerful card than my last post, using the same stencil and die cut, but this time with a distress ink and brusho background. I sprinkled grey brusho powder over a square of card and spritzed with water before sponging hickory smoke distress ink through the stencil.
The larger cyclist from eccentric edwardian was stamped in black versafine and the smmaller one from curiosities in grey versafine. I added a corner die cut in black card and a sentiment from steampunk travel before inking round the edges with black versafine and adding to a white card blank

Wednesday, 29 November 2017

A couple of cards (posted by Claire)

Good morning, Claire here with a couple of cards that would fit the bill for male cards, something I always struggle with! The first card was made using stamps from Steampunk Travel.


I began by stamping the words and the two images with versamark on black card and embossed with white embossing powder. Next I used the soft white coal from the Ko-I-Noor White Coals set to create the clouds, just scribbling with the coals and then blending with my finger. I used one of the harder coals to add some whispy clouds and to add faux stitching around the edge. I also added a little colour to to images with the coals.

For this next card I stamped the focal image, from Eccentric Edwardian with black versafine ink, masked it and stamped the script background. I layered it up on red and then black card and added a little twine bow tie and some lace and ric-rac trim.


To make the background I took lots of stamps from the same set and just stamped and masked until I'd filled the card. Again I layered on red and black card. The sentiment is from Punky Expressions I inked up the stamp with bright red ink and then carefully inked with black ink, trying to miss out the word punky so that would be highlighted with red.

Thanks for visiting today
Claire xx

Sunday, 26 November 2017

Time Flies by Brenda


Hello again, I am back with some more of my Steampunk shares from last months Hochanda shows.

The starting point for the card at the top was an embossed background with lots of gilding waxes added. The Scarab Beetle (and as we have horses there are a good few of these, also known as Dung Beetles, if one cares to search !!)from the Steampunkery set has been stamped several times using Vesamark Toffee, lightly coloured, gilding waxes added then placed over the base piece. Several of the sentiments from the new Punky Words have seen stamped and cut out to intersperse between the Beetles.


Like so many of us crafters I reach for my Oxide inks time and again, it's hard to remember life before them although they are relatively new, on this one I used Spiced Marmalade, Fossilised Amber and Twisted Citron. Using Versafine Toffee and masking off parts of the images I stamped clocks from Steampunkery and Steampunk Travel around the edges of the piece and using the same ink the three large images from the same stamp sets. The sentiment is from Birthday Words and a piece of ribbon and buckle tied across the top.


The background of this piece has been painted with Actylic paints and the DI Tea Dye and a stencil used to add some circles. Various elements from Key to my Dreams and Punky Words have been stamped with Versafine Blue on both the background and focal panel and some seam binding and a tassel to embellish.

As always my thanks for your visit today.


Friday, 24 November 2017

Steampunk Travel (by Julie)

Hello, hope you are well. Today I have a couple of Steampunk inspired cards for you which I have created using the rather fabulous Steampunk Travel


For my first card you will need a Kraft card blank. I decided to have a go at a very simple wood grain effect for the background. I started by drawing vertical lines with a ruler and dark brown pencil at approximately 2 cm intervals and then filled in the gaps with white chalk. I set the chalk with a pastel fixative spray and once dry I went around the edge of the card with Walnut Distress ink.
On separate card I stamped out the traveller's hat and sentiment, coloured with pencils and then cut out and attached to the front of the card.


My second card is super simple. I just stamped the winged boot around the card blank before colouring with Polychromus pencils. I went over the background with Distress inks and then spritzed with water, before dabbing off the excess with a kitchen towel and then stamped the sentiment which comes from the rather wonderful Punky Expressions.

Thank you for stopping by and please call back soon for more daily, Design Team inspiration.

Julie xx

Monday, 13 November 2017

Punky Expressions CAS Style (by Judith)

Hello everyone, I am back to share some more projects featured on last month's Steampunk shows on Hochanda. For these three projects, I wanted to focus on the new word plate, Punky Expressions, and the different ways that the stamps could be used.

I created a gelli plate background on a large white card blank, by brayering Distress Ink in shades of blue and brown across the round gelli plate. I used an image from the Steampunk Travel stamp set, stamping straight onto the plate, to take colour away, and not cleaning the stamp in between stamping, so it added colour in various areas as well. I pressed the plate onto the card to ensure that I printed the background exactly where I wanted it to go. I added a few more of the little airships onto the background, using Distress Ink.

I stamped the large gentleman from the Eccentric Edwardian stamp plate using black ink. I added the Eureka! sentiment around the edges, starting at the top and bottom, moving left and right, then simply filling in the gaps.

For my second card, I created another gelli plate background, using blue and green ink, and pressing a dotty tool onto the plate to create a textured pattern. I added some images from the Silhouette Grasses stamp set, using various coloured inks, a little butterfly from the Baroque Meadow stamp plate, and finally, combined two of the stamps from the Punky Expressions stamp set. These new words and phrases are so versatile, and will be very useful for lots of occasions.

Finally, a really quick card, using more of the grasses as before in a different colour option, straight onto a card blank. The butterflies as before, and a variation on the stamp sentiment. This was such a quick card to make using first and second generation stamping to build up depth to the flower field.

I hope that my cards have given you some ideas for these fabulous stamps. I will be back later in the month with a few more ideas to share with you. Thanks for stopping by,


Saturday, 11 November 2017

Fly away by Brenda


A very good morning Peeps, I hope you are ready for another collection of Steampunk samples from Lesley's recent shows on Hochanda.

Now I will be the first to admit that I really struggled this this theme, it's not something I have ever tackled before, but of course that's the challenge to extend ourselves outside our comfort zone which for me is floral feminine and fantasy.

For the card at the top I create a background with Oxide Inks Picked Raspberry and Peacock Feathers, a stencil and regular DI's. Using black Archival ink I stamped the large flying machine from Steampunkery, two small hot air balloons from the same set set and verse from Steampunk Travel and the same DI's to add some colour to the balloons plus a few scattered sequins.


For this one I used an embossing folder and gilding waxes to create the background, then stamped a sentiment from the new Punky Expressions set on a strip of DP, stamped the Penny Farthing from Steampunkery using Versamark and detail copper embossing powder, cut out and placed on the sentiment strip along with some raffia.


Another Oxide ink background overstamped with one of the images from Key to my Dreams, I used second and third generation stamping using DI's to create a subtle effect. Next I stamped three keys from the same stamp set with versamark and detail copper embossing powder, cut them all out and fixed with a chain embellishment I found in my stash to the small winged clock in the Steampunkery set. The sentiment is also from Key to my Dreams.


My final share uses stamps from Steampunk TravelSteampunk Travel and Punky Words, all stamped with Versafine Blue onto squares of cardstock shaded with DI's and matted onto coordinating cardstock. This style is a great way to use up snippets of card so always worth keeping those offcuts.

Hope you all have a good day and my thanks for popping in today.


Thursday, 9 November 2017

Steam Punk Eccentricities (by Julie)


Hi there, I hope you managed to catch one of Lesley's recent Steam Punk shows on Hochanda. If you did you may have seen these cards on the show. 
I have to confess to loving all things Steam Punk. I love the surreal feel Steam Punk gives as well as the stamps being very useful to make male cards, which lets face it we all tend to struggle with.


My first card is created with the Eccentric Edwardian. I love these stamps and would buy the set just for the very useful script stamps.
The background to my card is coloured with Antique Linen, Old Paper and Walnut Stain Distress inks and then over-stamped with the male images using Sepia Versafine. The large script design to the top left of the card was stamped and then embossed with a copper embossing powder and I inked up the smaller script stamp with Sepia Versafine to fill the gaps. The cyclist was stamped onto separate card and coloured with Distress inks as before. I cut around the wheel slightly and then placed my metal, circular die underneath the wheel to cut out the rest of the design before mounting onto the centre of the card with foam pads. The sentiment is from Punky Expressions.


My second project is a gift box and frame card. I have cut both the box and frame on my electric cutting machine, however templates for similar boxes and frames can be found in an internet search.
The gift box is coloured with Squeezed Lemonade Distress ink and then over-stamped with the Air Ship and Boat from Steampunkery. I darkened the edges with Hickory Smoke Distress ink and dry brushed white Gesso over the top to create the clouds. Once the image was dry I glued the box into place.
For the frame I coloured the background with Squeezed Lemonade Distress ink and then overs-stamped with images from Steampunk Travel. I then sponged on Hickory Smoke Distress ink and then dabbed the excess off with a wet wipe.
The central panel of the frame is coloured with Brusho inks and once dry I sponged on Hickory Smoke Distress ink. 
The winged clock is from Steampunkery as before. Here I pressed the stamp into white clay and cut out using a craft knife. I then baked it according to the instructions before colouring with alcohol inks and gold gilding wax. 
Once everything was dry I glued the frame into place and added wire and beads to the back of the clock before gluing into place with 3d glue gel.

Many thanks for looking and please call back soon to see daily inspiration from the Design Team.

Julie xx

Wednesday, 8 November 2017

Setting Sail (by Penny)

I am delighted to welcome Penny back as guest designer for this month and I am sure you will find her first project a real wow.  So here we go, enjoy.


Hi there everyone, Penny here and it is my pleasure to bring you three GDT posts this month.  I'm starting with one of my samples from the fabulous Steampunk shows!  I have used stamps from Steampunkery and Steampunk Travel sets, Distress inks, Sepia Versafine ink, copper and clear EPs.


I began by stamping and embossing the Airship onto white card, then masking it.  I then created a blue colourwash background with Distress Inks.  When dry I added some fluffy clouds with the whitecharcoal and smudged them a little.  I also added some 'cresting waves' along the bottom of the panel in the same way.


I removed the mask and coloured the Airship with Distress Inks before matting the panel onto dark card.  I took a white base card and stamped several words to form a border, then blended ink around the edges.  I then attached the panel to the card.


I stamped and embossed the winged cog several times onto acetate then coloured them on the reverse side with alcohol pens.  To make them pop I painted them with white gesso then cut them out and attached them to the card.  I stamped the verse onto a piece of ivory card in Sepia ink and embossed it with clear EP.  I tore the edges and brushed a little gold marker pen over them to give an aged effect then attached it to the card.  


This design is quite a simple one for me, but the focal stamp and verse are so beautiful that they needed little else.  I hope you've enjoyed this little project, I'll be back next week with another!   

Penny  xx

A real cracking start don't you think. Gorgeous card Penny thank you so much, we can't wait to see what you have planned for us next week.

Until then thank you for popping in and don't forget there is a new project from one our our talented team every day so please join us again soon.


Monday, 6 November 2017

New Horizons (by Magda)

Hi, it is so interesting and lovely to see Lesley from Chocolate Baroque at Hochanda demonstrating Steampunk stamps.
Here I want to share with you the card I made using Steampunk Travel stamp and Steampunkery stamp for the sentiment.

1. Put the stamp underneath the acrylic block  and think about the colours you want to use


2. Colour the acrylic block with Distress Ink Pad


3. Spritz with water


 4. Wipe the acrylic block with a heavy piece of White Cardstock till you are happy with the result


5.  Stamp the image with Versifine black both on the mat and on the card itself, as shown, and glue the sentiment label with Ranger Triangular Collage glue


Isn't that a funny card for a friend who is moving ?
Magda

Sunday, 5 November 2017

Steampunk Travels Pop Up Box (by Anne)

Good morning. I had so much fun creating a fantasy world with the Steampunk themed stamps recently featured on Hochanda. Today I am sharing one of my show samples. I just love this sentiment verse and the fun sentiments that come with these stamp sets.


Materials:
  • Steampunk Travel and Steampunkery stamp sets (also available as a multibuy)
  • Ready made white pop up card blank (approx. 7cm wide box with back panel approx. 16cm high), white stamping card, Kraft card
  • Inkpads: Dye based ink (brown) and Versamark
  • Ink sprays with mica (blue and gold)
  • Alcohol ink pens and coloured pencils (blue, orange, yellow)
  • Fine tipped pen (brown)
  • WOW heat embossing powders (mix of Verdigris and Gold)
  • Dies to cut steampunk cogs and shaped mat for verse
How it was made:
  1. The box was spritzed with inks to add colour and edged with brown ink.
  2. The images were stamped with brown ink and coloured with alcohol pens and some pencil shading.
  3. The verse was cut out with a die and edged with brown ink and faux stitching. The remaining sentiments were hand cut and edged with brown ink. The Steampunk images were cut out by hand.
  4. The cogs were cut from Kraft card, coated in Versamark and heat embossed with metallic powders.
  5. The images, cogs and sentiments were glued to the card layers to give depth. Thin card strips were glued behind some of the elements to add extra support where needed.