Pin It button on image hover
Showing posts with label Folk Art Garden. Show all posts

Monday, 10 January 2022

Three Gardens of splendour by Rachel

 Hello there!

Rachel here today with the first of my posts from the December shows - these samples are all from the show early in December - and involve garden themed stamps.

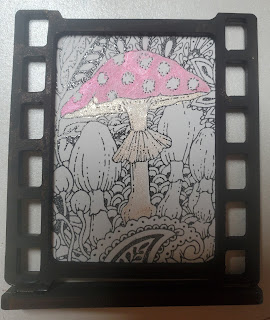
This first one just uses a section of the Toadstool garden and I have put it into a frame from a show many moons ago - the whole this is black and white apart from the main fungi which I coloured using mica powders.


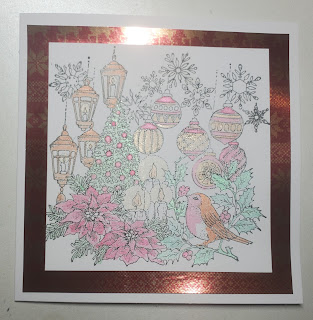
This second sample was simply stamped and coloured using watercolour pencils. Its such a lovely image.


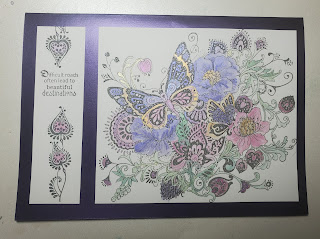
And finally the FolkArt garden - I again coloured this using water colour pencils but I also added some touches of mica powders here and there.


I hope these samples have given you some inspiration in different ways you can used your stamps.
Have a great day!
Hugs
Rachel xx

Thursday, 6 January 2022

Exploring materials: Pop up elements with vellum by Natalie Ballard


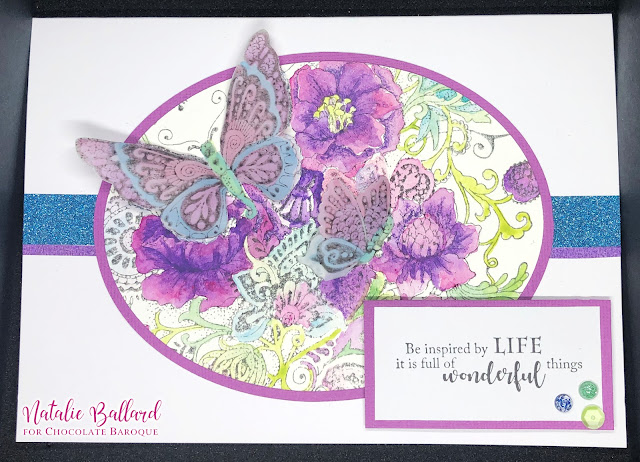
We can use different materials as a way to highlight elements within a design. Here, I used vellum to create a 3D element from out of the stamp. You will need the Folk Art Garden stamp set for this card.

To do this, stamp your design twice; once onto vellum and once onto watercolour card. I used the same watercolours on both the watercolour card and the vellum. You could also use pearlescent paints to add an extra touch of sparkle. On the vellum piece, colour only the butterflies and colour the full design on the watercolour card. When painting on vellum, limit how much water you use to avoid the paper cockling too much.

Set both pieces to one side to dry and resist the urge to heat the vellum to dry it quicker.

Use an oval die to cut the central panel from your watercolour card panel. Nesting dies are great for this project, or you can use an electronic cutter if you have one. Cut a slightly larger oval from some plain coloured card to match the floral elements of your design. Adhere these two pieces together using double-sided adhesive or glue.

Choose a white card blank that fits your oval. Use glitter tape to create a central border for your oval panel to sit on; choose colours from your central design. The oval panel can then be adhered using double-sided adhesive, or use foam for a more dimensional look.

Fussy cut the butterflies from the vellum piece, vellum is quite forgiving when fussy cutting. Fold either side of the butterfly's body on the main butterfly, and down the join in the sideways one. Apply glue all over the body section to adhere it to the card. I wouldn't recommend using tape for this part of the process. I placed a small weight on the body while it was setting in place. Once dried, the wings can then be lifted up away from the card.

Onto a spare piece of white card, stamp your sentiment and mount onto a slightly larger piece in the same colour as the oval border.

Decorate with sequins, pearls or gems.

Monday, 13 July 2020

Follow your heart, it knows where it wants to go (by Miranda


Hi crafty people,

Happy to be back again to share some of my crafty moments with you.

A very true quote ' Follow your heart, it knows where it wants to go. How often I do not listen to that? Do you recognize that?

Well, now on to the less serious part.......

I had a play with the The Folk Art Garden Rubber Stamp sheet - A5. This is such a beautiful and large stamp with lots of beautiful designs in it. So you can imagine that it took me a while to colour every element.......
I did stamp using black Versafine ink on a colorful distress background.

Then I started coloring using my color pencils and using Acrylic markers for accents. I also used some gold accents using glitter pens.


On the photos below you can see the shine of the gold much better.....


Thanks for your visit and always enjoy reading your comments. 
Till next week....

Stay safe and stay creative!


Tuesday, 10 September 2019

Autumn fantasy (by Miranda)


Hello fans of Chocolate Baroque,


Here I am with my 3rd post working with the great stamp sheet ' Folk Art Garden'. I stamped the Folk art garden stamp using a brown colour onto the background. I die cut a large circle out of this background. Then I colored with color pencils for some accents.

But the circle was too large for my card so I did die cut a smaller circle and use the left over piece also. 

Than used a bit of my imagination and stamped some ' dangles' at the bottom of the circle and a flower from the sheet in the circle.........anyway I had a fun time thinking of what to do.......I gave accents with some glitter pens on the ' dangles'.

I embossed the butterfly twice and colored it with watercolor markers, than decoupaged it and attached them to the card....

You can find the ' dangle' stamp on the ' Wisteria' stamp sheet. There is a small and large one on the sheet.


close up to see some shimmer accents........


And here again all tree Autumn posts together, always love these vibrant warm colors!


Well, this was my last post for this guest design episode but I will certainly be back for more in time........I am working on one which has a lot of coloring....will show it soon!
Thanks for your kind comments and till next time,


Saturday, 23 March 2019

Folk Art Garden and more sewing...(by Rachel)

Hello there. Rachel here today with some more samples from the February shows.


This one shows the stunning Folk Art Garden stamp simply coloured using water colour pencils.


In this sample I stamped onto tissue and added this to a painted chunky ATC and then added more paint.


Back to a sample using the sewing room and floral mannequin stamp sets. This one involved brushos and watercolour pencils.


Finally in this layered sample I used the floral mannequins set.

I hope this is gives you some ideas.

Rachel xx

Wednesday, 20 March 2019

folk art 3 ways (by Veronica)

I loved this huge stamp, whcih makes a card on its own.

While it is a very detailed stamp, just crying out to be coloured in, I wanted to try it in monochrome. It was stamped in black versafine ink onto a dull silver card ( using a stamp platform as it is so big) and clear embossed. I then coloured the butterflies and three flowers using white watercolour paint. It was then mounted onto a 8" square white card blank.


My second card has a pale brusho background , image again stmaped using versafine and clear embossing powder. I used brusho to colour the butterflies, flowers and foliage before trimming it down to fit onto an A5 card blank and edging with a black marker pen.


The final version has a brusho back ground again, with the image stamped using a toning distress oxide ink pad. This time it was cut down to fit a 5"x7" card blank, edged with black marker again, and the sentiment stamped in black.  I used one of the chipboard circles to stamp part of the image using black versafine ink, then coloured the flowere with watercolour paints before edging the circle with black marker pen and gluing in place.

Wednesday, 13 March 2019

Give me Wings by Brenda


Morning Peeps, Brenda here with more Sewing Room shares as well as one using the most beautiful Folk Art Garden stamp which Lesley launched on Hochands last month.

My card at the top surprised even me as Steampunk is right outside my comfort zone so when I found myself adding wings to the dressmakers form I was a tad surprised but somehow it seemed to work. I built up the background with Distress Inks and created the circles with lids from embossing powder pots dipping them into inkpads and using them to 'stamp' the circles. I also stamped the lacy edge randomly in blue over the background using third generation stamping to obtain a faded look. The stamping the dressmakers form from The Sewing Room and cutting out and placing over two wings stamped, coloured and cut from Tangled Garden. I added a little chain and buckle and linked to a flower from Floral Mannequins and added a pair of scissors from Haberdashery. Finally some lace ruched up across the top


A little inky indulgence here starting with a Brusho background onto which I stamped Folk Art Garden using Versafine black and heat embossed with detail clear powder and then bleached out some of the colour to add highlights. I tore the edges of the card to give a white edge and added some micro beads along the bottom although they do not show up too well on the photo and then mounted onto a piece of corrugated.


For this one I stamped onto four equal sizes pieces of patterned papers using two dress forms from Floral Mannequins and one  from Haberdashery along with the fancy scissors, mounted them onto a darker piece of paper from the same family and a landscape card and embellished with a die cut leaf and flower.

My appreciation as always for your visit to the Design Team blog today and your kind words of appreciation.