Pin It button on image hover
Showing posts with label Craft Paint. Show all posts

Friday, 29 May 2015

Painted Floral Mannequins


Hi there,

Today another idea  stamping the Floral Mannequins. 
Chocolate Baroque has lovely elegant designs but they are also suitable to use them in mixed media projects. I was visiting a friend and we had a play with some Chalk paints. I like the chalky finish of these paints, but you have to work fast because they dry almost instantly. Of course there are painting mediums which can help but I did not have that.

I worked on canvas paper and that creates a real painted effect. This time I really did paint.......not with a brush but a sponge.

I've made two cards, here they are....


I stamped the dress form using the same paint and stamped some fragments of the lace and the lace flower. The lace flower is also embossed on vellum and I've used 3 matching colors of the WOW embossing powders. The word is from the Artistic Expressions, a sheet that matches this style very much.


And the 2nd one........I decided after I stamped the dress form several times to use the craquele stamp from the Echoes of Italy and a small stamp from the Mini Scripts. I've stamped the lace border at the right edge and pressed it also onto a technique tile which I've triple embossed with WOW embossing powder.(Glacier Mint) I've added also some perfect pearl powder onto it to create some lovely shine. I think it looks a bit like old Turkoois ........wouldn't it be a lovely to create a necklace or earrings with that?
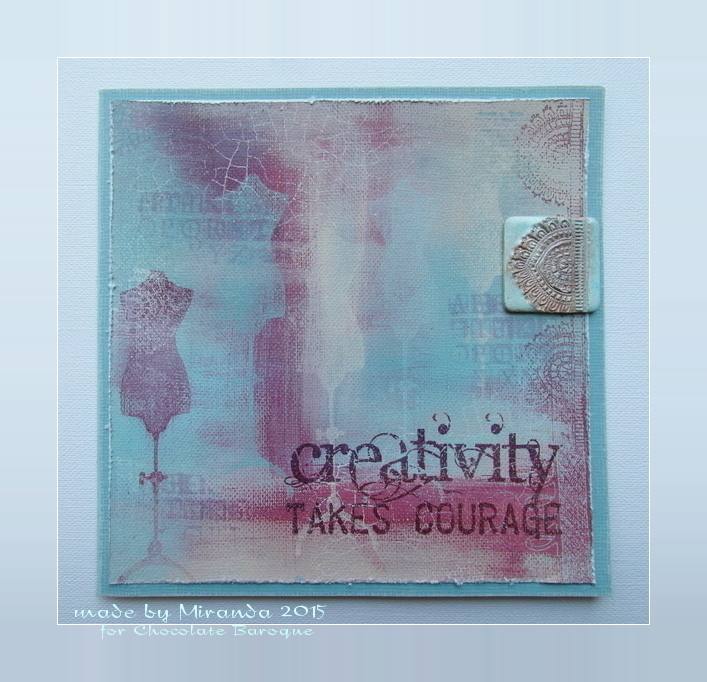


The words are from another favorite sheet of mine called Artistic Affirmations and is even more suitable for Mixed media projects. I distressed the edges of the canvas paper and sanded the card stock beneath for a worn look.

Well, this time another style using these stamps, hope you liked it.........
Thanks for visiting and till next time!


Sunday, 15 February 2015

Sketchy Doodle Flowers - Owl - By Florence

Morning everyone

I hope you are all enjoying the weekend.

Today I would like to share a project I made using the new Sketchy Doodle Flower Rubber Stamps.

This project has a hint of recycling to it so you can imagine how much fun I had making it.


It'll owl be right on the night!


The Base

For the base of this project I used an old LP which I sanded down one side with sand paper and gave the vinyl two coats of Gesso.
*I then applied some paint all over the surface of the LP using the black side of a piece of Cut'n'Dry.
When the paint was dry a gave it a couple of quick spritzes of Spray Ink and let the excess ink run down the surface a little.
To make the circle patterns, I used plastic container tops, dipped into paint and stamped them onto the base as seen.
I gave the surface a quick spray of a fixative to fix the inks.
*An alternative base idea would be to paint and decorate a piece of card and then attach it to the LP using glue.

 The Owl

I colored some white card (cut to approximate sizes to match images) with Distress Ink and stamped all of my images using Black Archival Ink.
I then cut all of the pieces out, added a little bit of Distress Ink to the edges of each piece and gave them a coat of Mod Podge.
I used Silicon to attach my pieces, firstly to the LP and then to build up the layers as seen.

Thank you for looking
Happy Stamping
Florence x


Thursday, 6 November 2014

Mellow Fruitfulness and Autumn - Wooden Box By Florence

Hi everyone

I was so excited when I saw the new Stamps for November especially as, like many of you, I am in the middle of making gifts and stocking fillers for Christmas....I am not quite in panic mode yet though!

If you are making gifts for friends, family or to sell at School and Church Bazaars do check out not only the new stamps but the other stamps in the CB range. The image design and the quality of the stamps with the deep etching allows you to stamp onto not just card but they stamp fabulously on wood and fabric. 

Today I would like to share with you a wooden box I painted and stamped onto which is one of the Christmas gifts I have made for this year.


This really is not as complicated as it may look.  Do give it a go you will have so much fun.

I prepared the box for painting just by removing all hinges and clasps, cleaning it and sanding it down.

I then Painted the base and lid of the box, inside out, with 2 coats of Gesso.


I then painted the base and lid of the box, inside and out, with 3 coats of white craft paint sanding lightly between coats. I like to use 3 coats in case I need to remove any paint as mentioned in later stages below.


I diluted some blue craft paint with some water (to a milk consistency) and applied it to all of the outside edges of the box base and lid using my fingers.

Tip:  If you do put too much paint on or you do not like the look you have created quickly take the paint off with a wet wipe but do leave to dry before adding any more paint.

So when you have base coated the box in white and added the distressed blue edges you are ready to stamp.


Mix a small amount of blue paint (say, a tea spoon full) with equal parts of Stamping Medium (details can be seen on my craft blog HERE). You can mix more paint as and when required.  
 The stamping medium is optional.  I like to use the mix because I find it gives me a better stamped paint image.

Using a bathroom sponge, apply the paint mix to your rubber stamp and then start stamping.  

Tip:  I would recommend that you start stamping at the front of the box, both on the lid and the base.  That way you can alter any stamping at the back.

Tip: If you do make a mistake stamping or you do not like the position of the image you have stamped, as mentioned above, take it off with a wet wipe.  Do leave it to completely dry before you stamp onto the area again.


To create the crackle effects, I painted on one coat of Weather Wood Medium and left it to dry.  
I then painted on one coat of One Step Crackle Medium and left to dry.
This was a happy accident and I was pleased with the results.  
You can just use one coat of One Step Crackle Medium and leave off the Weathered Wood Medium if you wish.

I then diluted some paint with water and rubbed this over the surfaces of my box, in small areas at a time, just with my fingers, taking off any excess with a piece of kitchen paper towel.

Tip: If you rub/paint on too much paint and if some paint drys you can remove it by very gently wiping it over with a wet wipe.  Please do leave the surface dry before reapplying any more paint.

To seal the decorated box I use two coats of Gel Medium.  
An alternative to this would be to use household wood varnish or Mod Podge.  As this surface has been stamped in water base craft paint you can use most mediums. 


Thank you for looking.
Happy Stamping
Florence x

Saturday, 19 July 2014

Tangled Fragments - By Florence

Hi everyone

As some of you know this month we are featuring Chocolate Baroque's new background stamps Tangled Fragments and Harlequin Fragments.  The DT have been busy making amazing projects.  If you have missed any of the posts or are new to the blog do check them out.  Lots of inspiring ideas as always.

Today I would like to share a couple of cards I made using the Tangled Fragments Stamps.  I hope you like them.


For my first card I stamped onto cream colored card stock using green craft paint.  I then applied some green distress ink all over the stamped piece of card using a sponge.  I removed some of the ink from the center of the circles in the pattern using a damp paint brush and paper towel.

Using another of the stamps from the Tangled Fragments stamp sheet, I stamped the image onto two pre-cut square pieces of coated card stock, using Blue Archival ink and adding a touch of green to the pattern using a felt pen.

I stamped my fishes onto coated card stock using Black Archival ink and then colored them in with felt pens.

I made up the card as seen, using foam pads to add dimension.


I kept to a fish theme for my second card


I dabbed some Distress Ink onto a plastic file wallet, spritzed it with water and then swished a piece of coated card stock around on it, picking up the different colors and left it to dry.

I then stamped the background pattern using one of the Tangled Fragments stamps and Archival Ink.

On a separate piece of coated card stock, I stamped the fish from the "Something Fishy" rubber stamp set using Black Archival Ink, cut them out and colored them in using felt pens.

I used a stamp from the Artistic Affirmations stamp set and stamped onto my prepared stamped piece of card with the sentiment using Archival Ink.

I made up my card as seen using foam pads behind the fish to make them 3D.

Thank you to everyone for leaving such lovely comments on the posts.  They are very much appreciated.

Take care all and happy stamping.

Florence x

Sunday, 6 July 2014

Tangled Fragments - By Florence

Hi everyone

I hope everyone is having a great weekend.

Today I would like to share some cards made with the new Tangled Fragment Stamps.  Ooooo! I was so excited when I saw these.  There are endless possibilities with these stamps.

The quality of the stamps is second to none.  Chocolate Baroque stamps are deeply etched so when you stamp with them they give a perfect image every time.  This also allows you stamp onto paper, fabric, or wood and also to stamp into and with different mediums not just ink.
 I got out the (water based) craft paints for these and had so much fun.


Tip:  When stamping with craft paint have a bowl of warm soapy water to hand to pop your stamps into after stamping.  If, the paint has gone a little dry, no problem you can clean them in soapy water and either a small tooth brush or nail brush.

This is a great way to use all of that card you have, that you don't really want to throw away but it is such a dubious color it just gets left in the draw.

I started off by coating small pieces of very violent fuscia pink card with Mod Podge.  This isn't necessary but all will become clear in a moment.


I then painted over the Mod Podge with different colored paint...yellow, white, light pink.

I then started to take some of the paint off with a damp tissue and added scratches for texture using a piece off sand paper.  The Mod Podge protects the base card.  So, if you are not keen on what you have painted...take it off.

When the card was dry and I was happy with the background, I covered the stamp with paint using a piece of bathroom sponge and stamped onto the prepared card stock.  This is where CB's deeply etched stamps come into their own.


For the last card, I prepared my piece of card in the same as mentioned above but this time I used a a piece of yellow card as my base and a mask for extra dimension.  I removed some of the paint to reveal the yellow and then stamped over the top.

Just to share, before I leave you, I have just made cards for today projects but these stamps would be ideal for journaling, altered art or any craft projects.  Do also check out the other stamps in Chocolate Baroque's huge range.

Tat tar for now and happy stamping.

Florence x