Pin It button on image hover
Showing posts with label March Fairy. Show all posts

Sunday, 21 March 2021

Spring Perfume ( by Magda)

 Good Morning,

Are you already feeling the nice warm spring air ?                                                                                       Here below I share with you my Step by Step of  "Katya is smelling the Perfume of the Spring Air" 

1.  Blend on the Journaling Page a red colour of  Distress Ink Pad                                                                                2.  Cover all with white gesso and let dry                                                                                                        3.  Blend several blue colors of  Distress Ink Pad  on the gesso                                                                       4.  Rub a baby wipe on Katya stamp to have the perfect humidity before stamping                                       


5.  Stamp Floral Perfumery with Versafine on a white cardstock,  colour the stamp with
     watercolors and cut the contour                                                                                                                                                  6.  Stamp  with Archival  the words  Perfume from  Floral Perfumery and Spring                                             
     from March Fairy on a piece of scrap cardstock colored with the same color                                                        
     of the flower of point 5                                                                                                                               7.  Glue the decoupage cuts on the journaling page and stamp little butterflies in black                                      
     around Katya,  as shown and don't forget to use a nice ribbon as label holder.


I hope you had a spring inspiration from my page and  thanks for passing by, hugs
Magda


Tuesday, 9 March 2021

Flutter with me (by Magda)

 Hello girls,

I like to see the first butterflies flutter in the mild spring air and this feeling of joy inspired                       me to create these three cards with Chocolate Baroque stamps. 


Happy Dance 

On a blue Brusho colored white cardstock I stamped Butterfly Dress and colored it with                          Pan Pastel. The little butterflies and the decoupage butterfly are in Just Butterflies, while                        you can find the sentiment in the Butterfly Perfumery plate. I used Distress Ink pad   for                    coloring the butterfly, blending through the stencil and stamping the sentiment Happy Dance. 


Hello

Here I just played with Distress Ink pad   for the background wash, stenciling several                       layering with matching and contrast colors and for coloring the butterfly. You can find                                the butterfly in the big selection of Just Butterflies and the sentiment in                                                Butterfly Flourish Swirls


Spring

For this card I prepared several stamped script paper pieces, I cut them randomly and glued                     on the cardstock.   
I blended with different green and red shades of Distress Ink pad  and colored the decoupage            butterfly of Just Butterflies with watercolor pencils. 
"Spring" of March Fairy was for me perfect to be used for the label 


I hope you liked my butterflies card of today, I wish you all a very nice spring, hugs
Magda


Sunday, 31 March 2019

Swirly Mannequin by Penny

Goodly morning peeps, I hope you are all well.  This is my last post this month and it features another sample from the CB shows.    I have used stamps from the Haberdashery, March Fairy, and Artistic Affirmations sets, Distress Inks, black Versafine ink, clear embossing powder, silver pen and alcohol markers.


I stamped the swirly mannequin in black Versafine ink and embossed it with clear powder.  I then masked it off so that I could create the background.  I also stamped and embossed a pair of cotton reels, then coloured and masked them as well. 


To create the background I blended three shades of pink Distress Inks, then stamped a few worker stamps randomly over the panel, using the same inks.  I added black ink around the edges, then matted the panel onto black card.  I removed the masks and attached the panel to a white base card.  I then stamped and embossed a pair of scissors onto acetate, coloured them on the reverse with a silver pen, and cut them out.  On a spare piece of card I stamped the word 'Create' in black and embossed it with clear EP.  I edged the word panel with pink ink before matting it onto black card.  I then attached the word panel and the scissors to the card.


Thank you for taking time out to read this post, I hope you enjoyed it and found it inspiring.  Stay safe and well everyone, and I'll see you in April with another project,  


                          xx  Penny  xx  

Monday, 18 June 2018

Faerie Garden (by Deborah)

Hello everyone, here is the second post this month from our new Guest Design Team member Deborah Wainwright. Deborah has created a fantasy journal piece using a mixture of stamp sets.


Hello everyone, Debs here with my second Guest Design piece. This week I'm using my 8" x "8 journal. I blended the colours from the Little Birdie chalk paint set, Faded Denim, Muted Teal and Tattered Lace, to form the base of my background. Then with an Olive Archival ink I lightly stamped the leaves from Big Bold Leafy Background and heat dried it. Using Koh-I-Noor watercolour paints in light green I painted the leaves.


The next layer was a repeat of the last, using black Archival ink, again heat set and painted in shades of green. I then stamped the small fairies from May Fairy, as well as the butterflies. I placed them where they would be looking at my centre focal point, which was the fairy  from the March Fairy stamp set, stamped onto watercolour paper and fussy cut out. She was again painted with the watercolours, building the colours with layers to create shades and lights.


I also stamped some flowers from March Fairy and leaves to surround the focal point, and add some interest. I used a different hue of blue for the leaves so as not to blend with the background greens. To finish, I created a black border using the swirl stamp from March as a guide and then filled in from the stamp to the edge of the page. This created a series of ups and downs which looks random but in fact was quite deliberate.

I hope you enjoyed my second project and I look forward to seeing you all next week.

Hugs, Debs xx

Tuesday, 6 June 2017

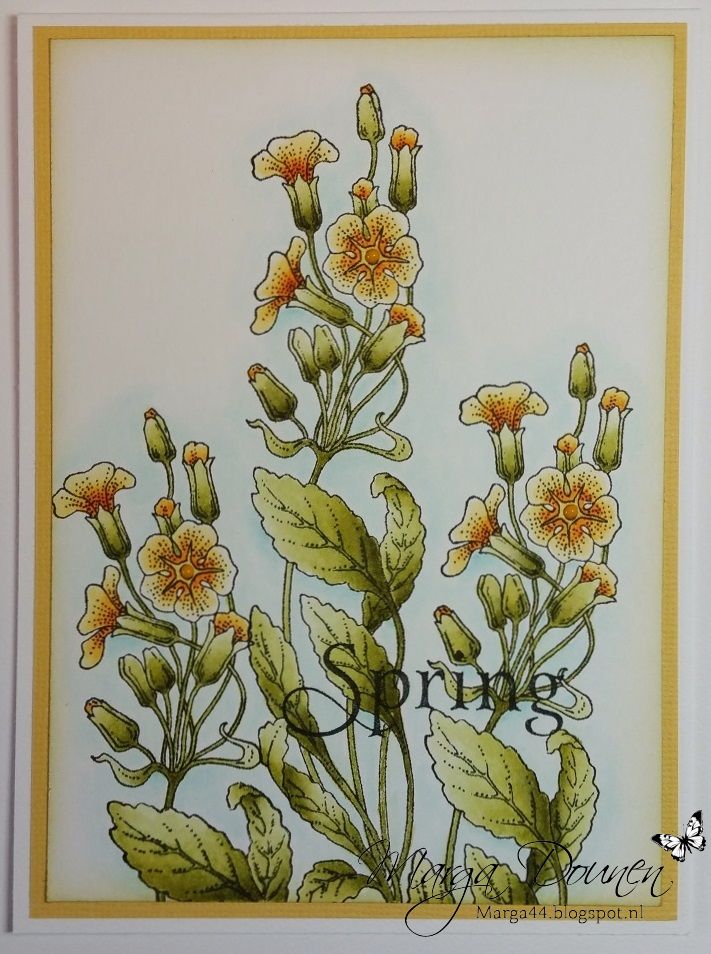
Spring (by Marga)

Today it's my turn to show you a new card I made.


I stamped the flower stamp thee times and coloured it with Distress Ink. Also for the shadow around the flowers I used Distress Ink. 
Stamps I used are from the March Fairy set.

Hugs Marga


Saturday, 27 May 2017

Magical Fairies (by Julie)

Hi there! Today I have my last two cards for this month and they are both Fairy designs.


My first card is stamped with  April Fairy and to start off I stamped Pegasus towards the top of the card with Onyx Black Versafine and then with a mask I created from a circle die cut, coloured in the moon with Distress inks. The background was created with a wide brush and water colour inks, so I blotted out the colour with a wet wipe where I wanted to stamp the fairy and once dried stamped her with grey permanent ink, before colouring with brush markers. I inked up the leaves of the little bird design with Olympia Green Versafine and stamped around the edge and then finished off with acrylic pen dots and Crystal Stickles.


This second card is stamped with the March Fairy designs. I stamped the fairy with grey permanent ink onto watercolour card and also stamped a second image onto copier paper to create a mask. Cut the mask out and place over the fairy. Once in place spritz the card with green and yellow spray inks and then remove the mask. Once dry colour the fairy with brush markers. I have used the butterflies from both the March and April Fairies to create the background. Just stamp a few of the butterflies onto spare card, colour with Distress inks then cut out and adhere with 3d glue gel. The edge of the design has been sponged with white gesso and once dry, coloured with Distress inks. To finish off I mounted the panel onto a white card base.

Thank you for stopping by and please call back tomorrow for some more Design Team inspiration.

Julie xx

Friday, 26 May 2017

Fairy Bookmarks (by Magda)

Hello
Everyone likes fairy tales, the children who listen to them and moms who read them. So I thought, that a nice bookmark would be very useful and a good friend between the pages of the "Goodnight Fairy Tales" book.
For this collection I used the the following products you can find on the Chocolate Baroque website:

1.   A4 White Cardstock 250 gsm to cut into a bookmark size 5cm x 13.5 cm
2.   Distress Paints for the background and Distress Ink Pads for colouring
3.   Versafine Inkpad Onyx Black
4.   March Fairy rubber stamp set, Fantasy Castles rubber stamp set
5.   Stickles - Crystal
6.   Rayon Seam Binding 14 mm coloured with Distress Ink
7.  A light coat of Dina Wakley Media Gesso White at the end, on top of the left bookmark with the
     castle to obtain a foggy atmosphere


Have always fun in reading  Fairy Tales, and thank you for reading my post today.
Magda


Tuesday, 23 May 2017

Mystic Night (by Anne)

Good morning. Here is another of my samples for the recent TV shows on Hochanda featuring the Spring Fairies stamp sets. I had so much fun with these.

Materials:
  • Spring Fairies Collection (March Fairy, Butterflies from March, April and May)
  • Floral/foliage stencil and circle template
  • 13.5 X 18cm card blank, card (black, turquoise glitter and white stamping)
  • Watercolours with mica (green, pink)
  • Watercolour pencils (flesh, blue, green, pink)
  • Clear sparkle pen
  • Stickles glitter glue (Star Dust)
  • Glitter paste (turquoise)
  • Versafine (Onyx Black)
How to make it:
  1. Apply glitter paste through the stencil onto black card using a palette knife. Leave to dry.
  2. Paint the background and moon using sparkly mica paints. Use a circle template to help (I used a circle die to draw around). Glue mats and layers to the card front.
  3. Stamp the fairy and butterflies onto white stamping card and cut out. Colour with pencils and paints with mica. Shape and glue to the card front with 3D glue gel.
  4. Finish with Stickles for added sparkle.

Sunday, 21 May 2017

Magical Birthday (by Asha)

Good morning friends! Here's one more Fairy focused card for you using the Spring Fairy Collection Multi-Buy DL sheets. I've created a simple meadow scene with lots of sparkle and pearl dots to make it extra magical.

The fairy and flower are from the March Fairy DL sheet, which I coloured with water colour pencils. For the hills, I did some masking wth torn paper and applied Distress Ink.

The sentiment is from Words to Sparkle and Dazzle A6 sheet, stamped with VersaFine Black Onyx.


Thank you for stopping by today and I hope you will have an amazing day too! Be sure to swing by often for more magical makes by the rest of the team.

Beijinhos, 
Asha

Saturday, 13 May 2017

Journaling Tag ( by Magda)

Journaling is very popular and I think you know already how to do it.
Well in this Giant Nr. 12 Manila Tag I mixed blending, stamping, colouring and doodling, using the following items:

Distress Ink Pad  ( instead of Dylusions Ink Spray) for the background
Dylusions Stencil 5" x 8" Dotted Flowers
March Fairy Rubber Stamp Sheet
May Fairy Rubber Stamp Sheet
Fantasy Castles Rubber Stamp Sheet
Floral Notes  ( for the sentiment)
Versafine Inkpad Satin Red
Versafine Inkpad Onyx Black
Stickles - Star Dust
White and Black Fineliner


I hope you liked the project I have proposed this week and have fun in creating your Tag.
Magda

Tuesday, 22 April 2014

Magic Happens (posted by Claire)

Good morning, I hope you've all enjoyed the Easter Weekend. It seems to have gone so quickly but although Easter is over Spring is well and truly here and the Springtime Edges stamps are perfect for so many different projects.   I've used them with one of the beautiful Spring Fairies for this card she is from the March set


I began by stamping the fairy with Memento Tuxedo Black ink and masked her with Masking Tissue to stamp the lovely primrose edge in the background (this time I used Memento Bamboo leaves). I left the mask in place while I created the background. Using PanPastels I added some shades of green to the foreground of the scene and then took shades of Yellow to create a sunny effect behind the image. I sealed the PanPastels with hairspray and used distress inks through the Lucious Leaves Dylusions stencil. I removed the mask and coloured the fairy and the primrose edges with Graph'It Markers. To finish off I added some tiny die cut flowers and stamped the sentiment which is from Fairyland Words.

Thanks for visiting today
Claire xx

Thursday, 27 February 2014

New stamps: Fantasy Castles and Magical Landscapes (by Glenda)

If you've checked the New Stamps section of the website this week, you may already have spotted our gorgeous new stamps.

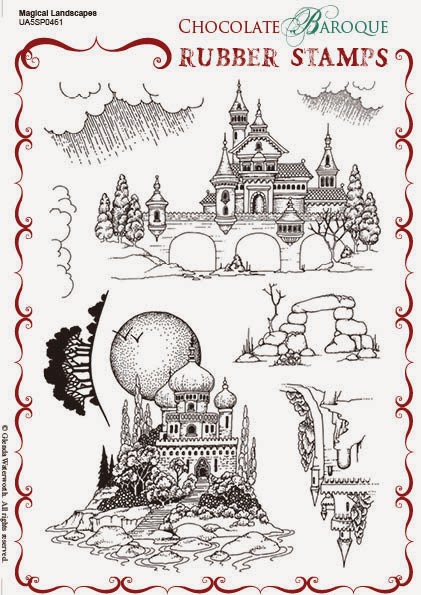
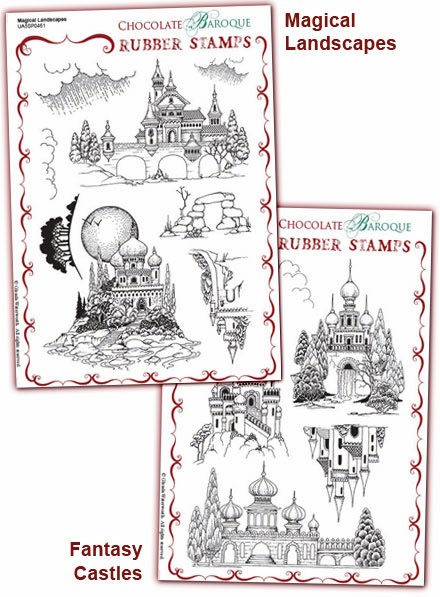
Firstly we have Magical Landscapes

http://www.chocolatebaroque.com/Magical-Landscapes-Unmounted-Rubber-stamp-sheet--A5-_p_5873.html

which go perfectly with Fantasy Castles

http://www.chocolatebaroque.com/Fantasy-Castles-Unmounted-Rubber-stamp-sheet--A5_p_5874.html

and of course we have a multibuy

http://www.chocolatebaroque.com/Magical-LandscapesFantasy-Castles-Unmounted-Rubber-stamps-Multi-buy--A5-_p_5875.html


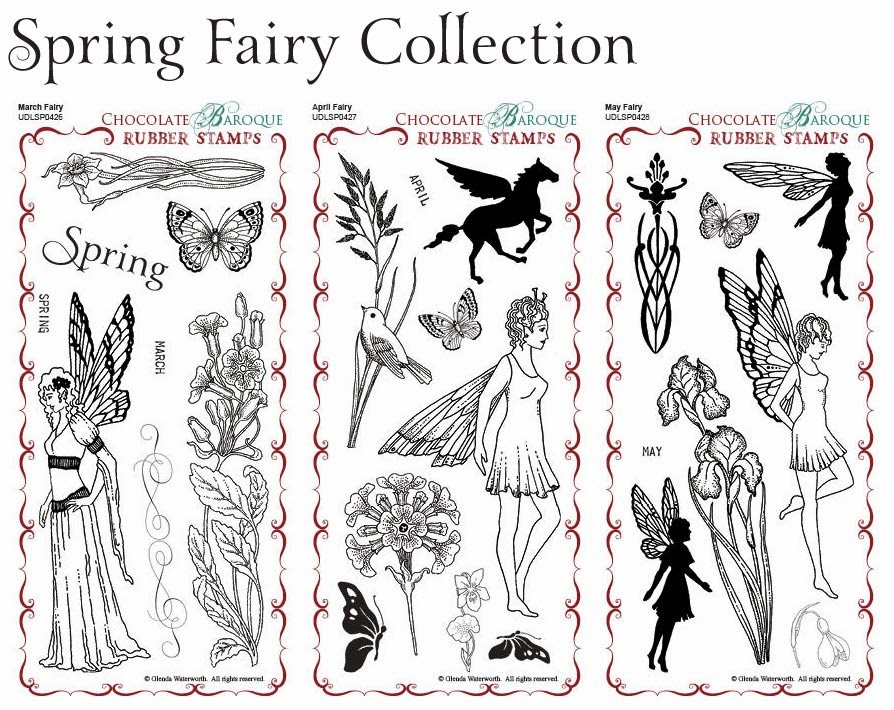
We are also launching our Spring fairy stamps comprising March, April and May, available individually or as a multi-buy.  

http://www.chocolatebaroque.com/Spring-Fairy-Collection-Unmounted-Rubber-Stamps-Multi-buy--DL-_p_5553.html


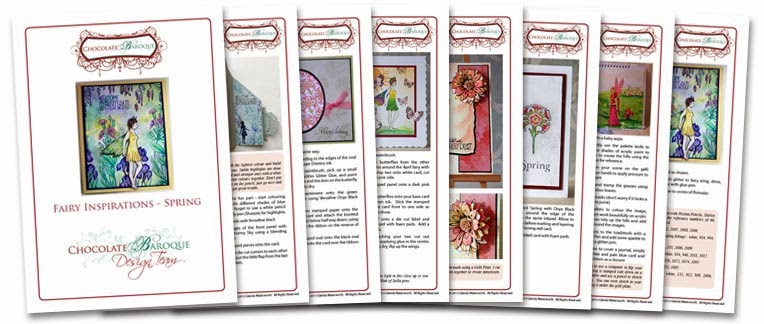
As with our previous Autumn and Winter fairy collections, we've put together a Fairy Inspirations Leaflet which is free for a limited time when you purchase the Spring Fairy Collection.


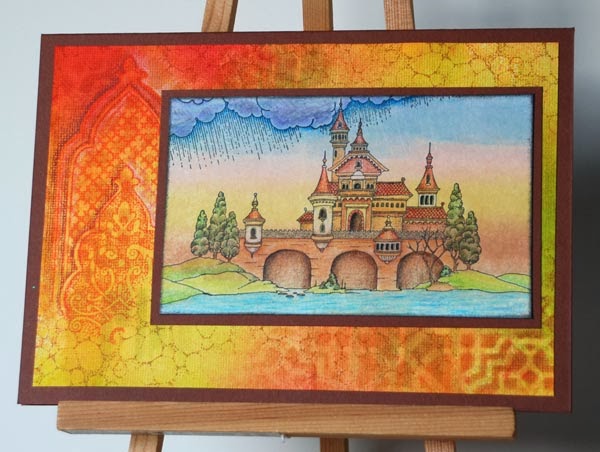
The card above has been stamped onto a brayered background using a home made kaleidacolour inkpad (I inked the strips with Distress Reinkers) and I brayered onto a matte card rather than the usual glossy or silk.  After stamping the image, I continued some of the lines of the hills out to the edge of the card, then masked off the roof and stamped the clouds.

There are two sets of clouds on Magical Landscapes with rain going in different directions, so I simply rotated the small one and stamped it so the angle of the rain is the same as the large.  The scene is coloured with Coloursoft pencils.

The background is Dylusions sprays with a little stencilling and stamping and I've used a nutmeg brown card for the base and layer.

At the moment you can find all these stamps in our New Stamps department and until the end of March, they are all at fantastic introductory prices.

I can see lots of possibilities for these stamps and you'll be delighted with what the DT come up with over the next month so stay tuned.

And if you don't already know, we reward our loyal commenters each month with a Chocolate Baroque gift voucher, and the more often you comment, the more chances you have of winning, so why not leave a kind word or two for the girls - it means a lot.


PS - talking of Design Team, yes we have selected our new team members and we will be introducing them in a couple of weeks once they've settled in!