Pin It button on image hover
Showing posts with label Butterfly Daisy Collage UA4SP0237. Show all posts

Sunday, 15 September 2019

Spring into Summer by Penny


Goodly morning peeps, I hope you are all well.  I'm back again with my second post this month and I've chosen four mini projects to share with you today.  Last year Chocolate Baroque added blank calendars (Blank 2019 Calendar/Planner) to their range and I decorated several for Christmas presents and one for myself.  

For the first project I have used stamps from the ButterflyDaisy Collage set, Distress Ink, purple Versafine ink, alcohol pens and a stencil from my stash.  I stamped a large collage image in the center of the picture area, then stamped a couple of daisies and butterflies.  I used alcohol pens to colour all the images.  I then used a stencil and DI to create the background.


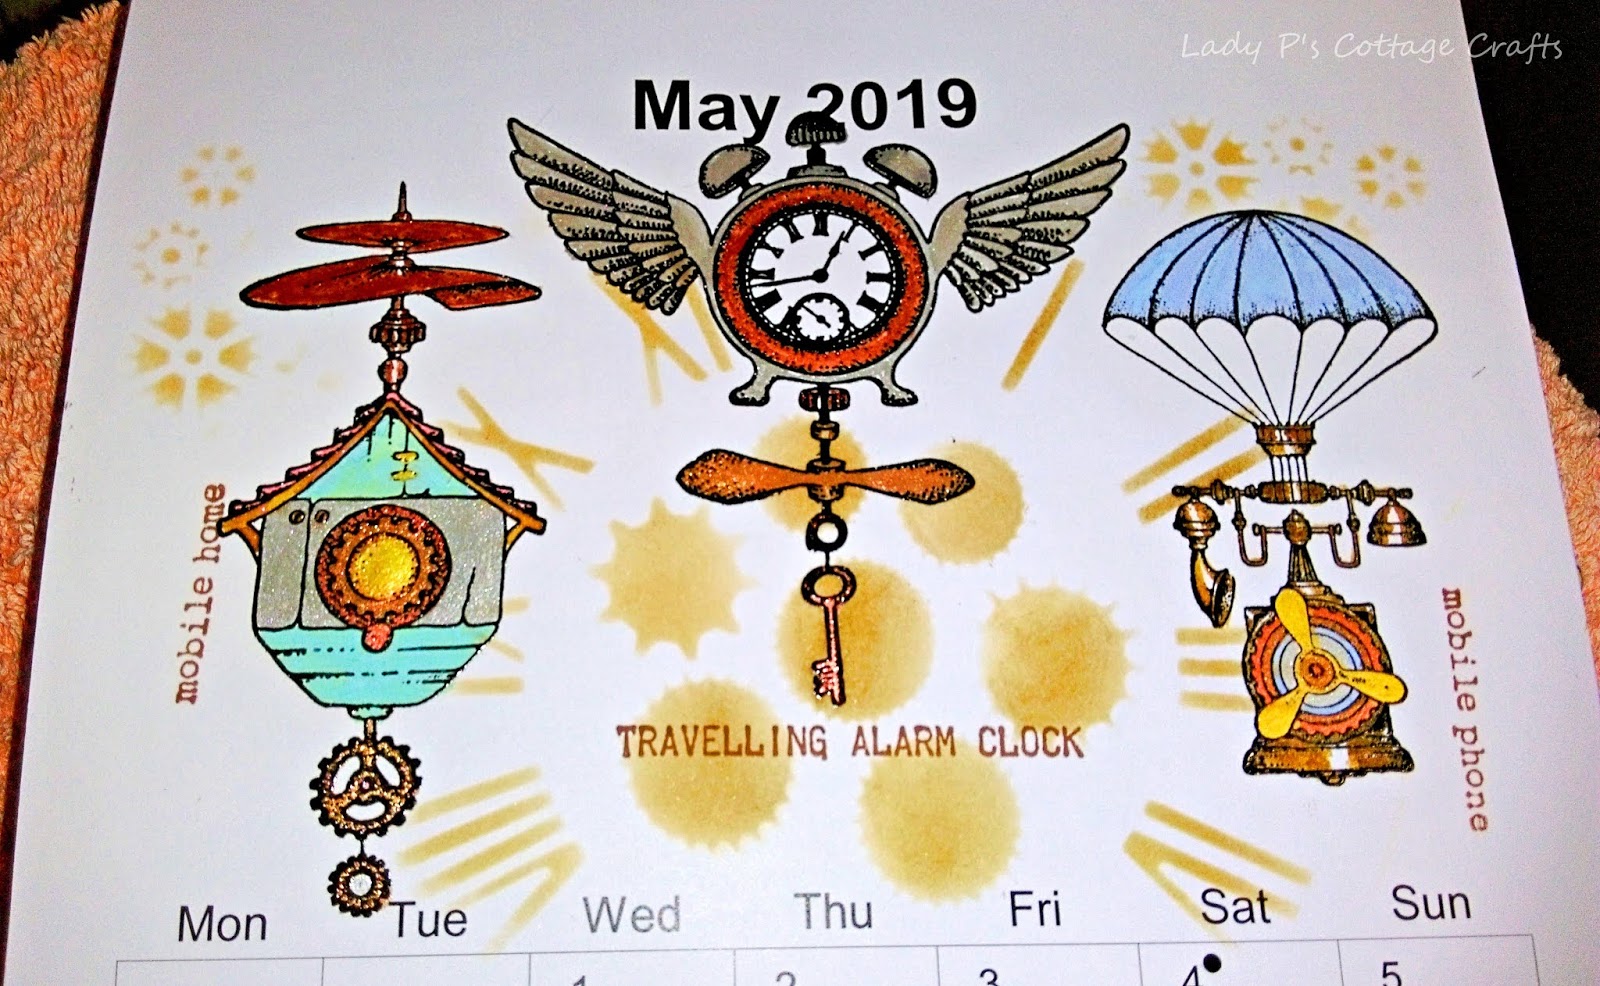
For this one I used stamps from the Steampunk Travel  and Steampunkery sets, metalic paints, Distress Inks, alcohol pens and a couple of masks from my stash.  I stamped several images using black Versafine and embossed them with clear powder.  I used paints, inks and pens to colour them, using metalic paints for the metal parts.  I then used the stencils with a DI to create a back ground.


This project uses stamps from the Underwater Kingdom and Seadragon sets, Distress Ink, Koh-I-Noor paints, black Versafine ink, clear EP and a stencil from my stash.    I began by stamping and embossing all the images and then painting them.  I took a stencil from my stash and applied DI through it to give the picture a watery background.


For this month I decided to go sunny and hot!  (Well I can dream can't I?)  I used stamps from the Indian Elephant and Paisley Elephant sets, Distress inks, black Versafine ink, clear EP and a gold pen.  I stamped and embossed the elephants first then masked them.  I then stamped and embossed the Palace silhouette image between the elephants, and stamped it again in second generation ink.  I then stamped a script image repeatedly across the page and used one of the worker stamps to fill any spaces in the background.  I used a black fine liner pen to ground the Palaces and the elephants then removed the masks and coloured in the elephants.


Thank you for dropping by today, I hope you have found my little collection enjoyable!  I'll be back again next month with more craftiness to share with you  :) 


                                 xx  Penny  xx

Monday, 7 September 2015

Graduating from Halloween! (by Judith)

Hello everyone, I have a card to share today using this month's Halloween stamps, but in a way that shows how they be used for a purpose other than Halloween.

I have created a clean and simple graduation card using one of the book images and the starburst on a diamond die cut to represent a mortar board. I added a tassel underneath from the Baroque Eggs stamp set. I coloured the images with pencils. I coloured the centres of the starburst image with a gold Wink of Stella pen for a bit of sparkle. I added a flourish in the corners of the card from the Butterfly Daisy Collage stamp set, and finally stamped a sentiment from the Loving Sentiments stamp set onto a small tag.

Keep checking back throughout the month for more great inspiration from my Design team mates. Thanks for stopping by, Judith xx

Wednesday, 21 May 2014

Guest Post - Butterfly Dance by Mary Woolley


This week's guest post has been provided by Mary Woolley who has designed a beautiful card featuring two of our A4 butterfly themed stamp sets.


I am delighted to share a card I have made using the Butterfly Daisy Collage and Butterfly Poppy Collage stamp sheets.

I started by colouring a piece of white card using chalks.  I then stamped 3 butterflies in black ink and coloured with pencils.  In the background I stamped a smaller butterfly in a co-ordinating coloured ink and using clear embossing ink and clear embossing powder I stamped sections of the harlequin and text stamp. I finally added 2 mats of co-ordinating stock together with 2 black mats and the card is finished.


To find out more please visit my blog: blackflowercreative.wordpress.com/ or pinterest.com/mary4819/ or Twitter@Mezzy1306.

A big thank you to Mary from the Chocolate Baroque team for this lovely design. We'd love to read your comments and don't forget to visit Mary's blog and her pinterest page to see more of her creations.


Saturday, 9 November 2013

Nature Fragment with a Butterfly (by Shirley)

Hello everyone, I hope you are enjoying the weekend.

I have a card design today using the fantastic new Nature Fragment set along with a pretty butterfly from Butterfly Daisy Collage and sentiment from Birthday Words.


The background is watercolour paper that I used to 'mop up' inks from a previous card.    It's actually the watered down version of the Blue cards you saw last month :)   I spritzed a little water and added a little sea salt that created the spots.   When dry I stamped with the flourish fragment from Nature Fragments using Peacock Feathers Distress Ink.

I embossed the Butterfly from Butterfly Daisy Collage with Silver, cut it out and attached.   When the card was finished I added stickles.   The matting and die cuts are in dark brown (hard to tell in the photo) and I stamped the greeting with brown Dye Ink.

Dies used:    Cheery Lynn- Cuties 1 B149 (border which can be made into a flower) and Mini Flourish One B170.


Thanks for your visit !
Shirley

Sunday, 3 November 2013

Fall Colours with Texture (by Shirley)

Hello everyone, I hope you are doing well.

It's hard to believe but here we are into November already.    I made this card when the Fall colours were in their prime,  which inspired this design.     I used the new fabulous Abstract Fragments together with several other stamp sets.


Stamps sets used:    Abstract Fragments, Gothic Fragments, Fancy Flourishes, Butterfly Daisy Collage and Artistic Expressions.

I also used Crealie- CL CS 24 die cuts and TCW Stencil - Cubist.

The background is Marmalade, Mustard and Wild Honey Distress Inks using the Acrylic Block technique.   I added the cube design with the TCW Cubist Stencil and Wild Honey Distress Ink.   I stamped 'Art' and the Flourish from Fancy Flourishes at the bottom with Walnut Distress Ink.    I stamped the bricks from Abstract Fragments and Window from Gothic Fragments with Rusty Hinge Distress Ink.

Next I embossed the flowers from Butterfly Daisy Collage with Copper on purple designer paper, cut them out, attached them to the background with the Crealie die cuts and added metal medallions that were hanging out in my stash.


Thanks for stopping by.  I hope you can visit often to see what my talented teammates have created.

Have a great day!
Shirley

Wednesday, 10 July 2013

Poppy Mirror (posted by Claire)

Good morning folks, Claire here with a recycled mirror using the beautiful 'Poppy Meadow' stamps


I created the background by giving the mirror a couple of coats of cream acrylic paint and then dry brushing pale blue acrylic paint. I stamped the images with black stazon ink and used Derwent Inktense pencils and a waterbrush to colour them. I edged the mirror with some gold gilding wax and made some glittery butterflies and a bee to finish off. These were very easy to make - just stamp the images (Butterfly Daisy Collage and Honey Bee) from  on heat resistant acetate with versamark and emboss with gold embossing powder. Add glitter to the back (you can either use a quickie glue pen and dry glitter or stickles) and once they are dry cut them out. I sealed the frame with some spray sealer before attaching the acetate embellishments

Thanks for popping by
Claire xx

Friday, 22 March 2013

Stamp(s) of the Week - Butterfly Collage Sets


Next weekend is Easter, so I've planned ahead and I'm doing two sets of stamps on offer for two weeks instead of the usual one week only deal.

Even better than that, we've set up a multi-buy for the two, so you can make an even bigger saving if you want to.

The stamps are Butterfly Daisy Collage and Butterfly Poppy Collage - both large A4 sets packed with lots of images.


The card above was made with watercolour pencils.  I changed my mind about the colouring of the butterfly so I decoupaged another one over the top.  The sentiment is stamped over a brayered background - I stamped the daisy harlequin in Versamark onto glossy card, then brayered colour over the top and the stamped image resists the ink and shows up white.

Here's a closer look at the two sets.  The large flower shapes on these sets are perfect for making paper roses and I love all the variations Sue (our wonderful stamp artist) has managed to get in the different butterflies. 
 
 
So both sets are on offer until Friday 5th April 2013 after which they will go back up to full price. 

Happy stamping!


Monday, 31 December 2012

Poppy Heart by Debbie

I was delighted to see the Baroque Hearts as they are ideal for lots of occasions. I have made a feminine card using the Poppy Baroque heart.
The heart is stamped with Memento Black ink and coloured with Promarkers then triple embossed with clear embossing powder. The embossing definately intensifies the colours of the heart. For the background, I used the crackle stamp from Echoes of Italy and my all time favourite corner flourish from the Butterfly Daisy Collage. The flowers are hand cut and coloured with Tattered Rose distress ink the same as the background and stamped with the crackle. Thanks for visiting Debbie

Saturday, 28 May 2011

My Shoe...tique! (posted by Lesley)

Happy Bank Holiday to everyone,

When Glenda issued the Design Team with this challenge I have to confess to a sinking heart, lol!  This sort of thing is not normally my cup of tea at all but I decided to give it my best shot and guess what? ...............  I had so much fun!  I had no preconceived ideas of what I wanted to achieve, I just started with a particular paper or a set of stamps and let it flow and this is what I came up with.

For two of my shoes I changed the shape of the toe to a 'chisel'.


For this 'sandal' I printed Glenda's lovely paper design onto Sticky Backed Canvas which I then stuck to co-ordinating card before cutting out the pieces of the shoe.  I then stamped different flowers from the Big Flowers set onto Grungepaper, cut them out, inked them with Distress Inks before shaping, layering and positioning on my shoe and finally adding some Stickles to the centres and petal edges and a few punched leafy branches.


For my second shoe I went back to the pointy toe (that takes me back to my teens I can tell you and it was a loooooooonnnnnnnggggg time ago, lol) and went for Parisienne Chic.  I also gave my shoe a little heel.

After cutting out the pieces of the shoe from plain card, I blended Distress Inks all over and then overstamped with images from the Paris Postcard A6 plate.  Over the toe piece I stamped and gold embossed the lovely script stamp from the Antiquities plate and then assembled the shoe.

 
I stamped just a small section of the Notre Dame Cathedral image from the Paris Secrets plate onto a 1" Stampbord tile and used this as an embellishment together with some trim I found in a charity shop from which I made the flower.

This final shoe was my favourite bit of frivolous nonesense.  I used two paper designs from the Peacock Summer Party cd printed onto a heavyweight paper.  I stamped a lovely lacy border onto tissue paper, trimmed it and arranged it in a frill on the shoe.


I stamped a dragonfly  onto Angelina Fibres and repeat stamped the flower from Butterfly Daisy Collage to make the roses.  I also used some wire stemmed flowers from my stash together with ribbons to create the little arrangements in and on the shoe.


I think I'm going to make one of these with a little tag inside instead of a birthday card for my Mum.  It's just the sort of thing she will appreciate.

I hope you've enjoyed your trip around my little Shoetique and thanks for looking.

Hugs
Lesley  Xx