Pin It button on image hover
Showing posts with label Bird of Joy. Show all posts

Sunday, 27 March 2022

Butterflies And A Bird Of Joy (By Tracy Thompson)


This is my final post for this month sharing some of my makes for February's TV shows.  The above creation is using the Butterfly Mind's set,  so I started with the base card/background, I used stamps from the set and a Versafine Clair Morning Mist ink pad so it was subtle.  I randomly stamped with a butterfly and the splodges.  For the main image I stamped it then masked it, I used Brusho's to colour the background sprayed with water.  For the Butterflies I stamped some separate and coloured and fussy cut them to decoupage onto the main image.


My next creation is using the Bird Of Joy stamp, which I coloured with pencils, and inked around the edges.  For the base I took the sentiment stamps Words Of Comfort And cheer, and stamped some of the words and a bird from the set, in morning mist ink, then edge the card in ink.  A simple card but I wanted to really show the bird off.

Thank you for looking
Happy crafting
Tracy x


Friday, 25 March 2022

Flowers, Birds and Butterflies by Sandra

 Hello everyone

I am sharing some more of my cards from the February shows on Create and Craft

 My first cards use stamps from Words of Comfort and Cheer.  

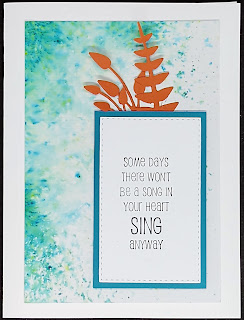
I started with an A4 sheet of watercolour card and sprinkled Brushos down the centre length ways and width ways. I then spritzed with water and let the magic happen! I left it to dry naturally as I think the colour stays more vibrant. Once it was dry I cut the sheet down into 4 pieces and added one of the sentiments from the set to each piece. I added some orange die cuts as a contrast to the Turquoise Brusho. 


My next card uses the Butterfly Mind stamp set.....one of my favourites. For this card I used some of the element stamps. First I stamped the film strip, butterflies and splatters. I then stamped, coloured and fussy cut some of the butterflies and layered over the stamped ones. I finished by adding a sentiment from the set..


On my next card I stamped some splatters  and the large butterfly from Butterfly Mind. I added some fibres over the butterfly with tacky glue. I then stamped the butterfly again, fussy cut it out and layered over the stamped butterfly.  Adding a cut out butterfly over a stamped image means I don't have to worry about cutting out those fiddly antennae!  I finished by adding a sentiment and some gems and mat and layered onto a 6x6 card base.


I stamped the  Wish Flower in Memento Ink and coloured with alcohol markers. A beautiful stamp that can be coloured in many ways.

I have stamped Bird of Joy with archival ink onto Kraft card. I then used pencils to colour and added some gems. I layered onto some mirror card and then onto an 8x8 card base.


 I stamped Floral Delight onto some black card and embossed with gold powder. I have coloured the flowers with shimmer paints, beautiful to use - difficult to photograph! I then mat and layered onto some gold card and onto a 7x5 card base.


Thanks for looking

Sandra x

Tuesday, 22 March 2022

Mosaic Circles (by Judith)

Hello everyone, I hope that you are keeping well. I have a project to share with you today showcasing stamps from last month's TV shows.

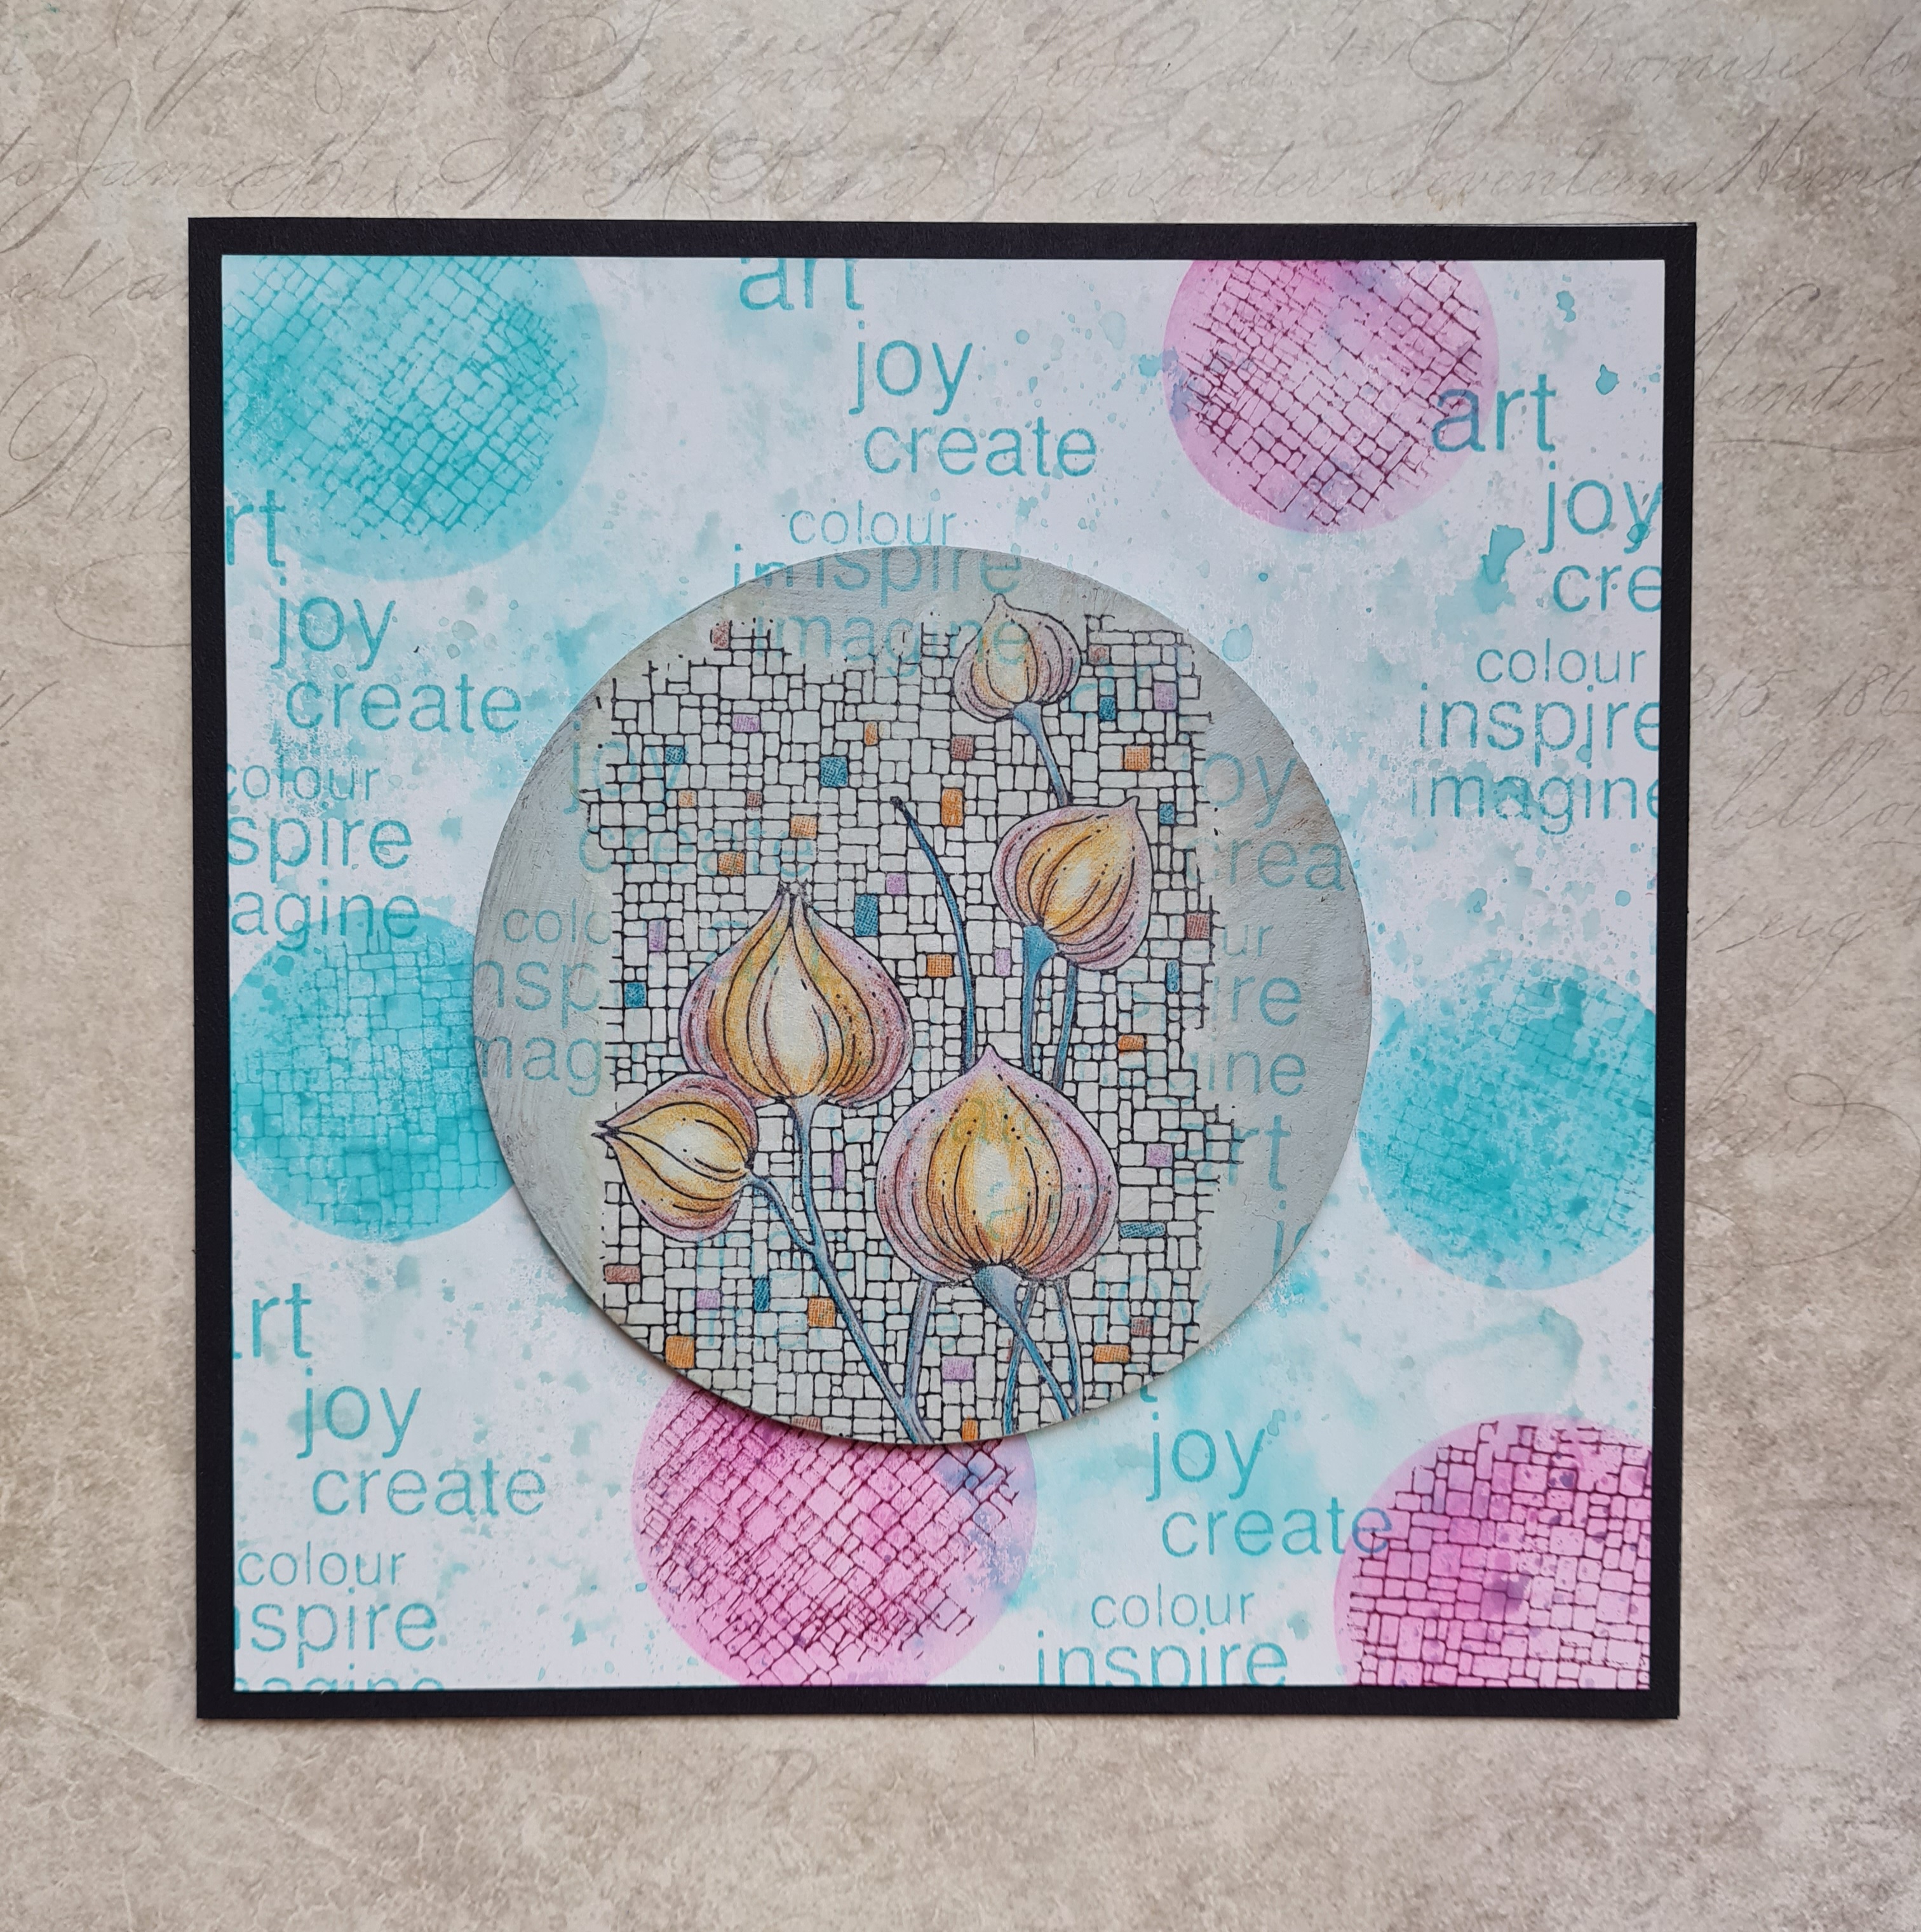
I created a background using Distress Oxides, and then used a stencil to apply colour over the top with blending brushes, and stamped On The Tiles through the stencil with a corresponding colour in Archival Ink. I added some words from the Bird of Joy stamp to the background to finish.

I painted a chipboard circle with acrylic paint, mixing white with a dark green to get the colour that I wanted. I added the same words that I had used on my background over the circle. I stamped the Mosaic Flower onto a piece of tissue paper, and coloured it with pencils, before sticking it to the circle with Matte Medium. I then attached the circle to my background, and used a piece of black card as a mat before adhering the background to a card blank.

I will be back next month with more projects to share with you. Thanks so much for stopping by, take care,

Judith xx


Wednesday, 16 March 2022

Colourful Song Bird (by Caroline)

Hello everyone.

This is my second post for this month and this card is a bright one. I used the Bird of Joy stamp and coloured the bird and flowers with pencils and a white pen. I didn't use all of the image, as the words I used are different than what was on the bird stamp. I used a sentiment from the Words of Comfort and Cheer stamp set. As you can see, I cut the kraft card down close to the image to make a smaller card.

Hope you're all having a great week, and I'll be back next week for my last blog post. Bye for now,

Caroline xx
 

Saturday, 5 March 2022

Glorious Floral Delights (By Tracy Thompson)


This is my first post for this month using the fantastic stamps that were shown on one of the February's shows.  So first I would like to show a book I created using the following stamps - Mosaic Flower, Bird Of Joy, Floral Delight, Wish Flower and Glorious.
So all my images were layered onto black card and added to the book, for the front cover I stamped the Mosaic Flower but upside down so it looked like the Chinese lantern plant, I stencilled in the background and coloured the image with pencils.  I added the words and did some highlights with a white gel pen.


The above pages and the ones below were done very much the same as the cover, only when I did my stencilling I masked down each side and only stencilled in the centre.  I wanted to stamp my images to the side for a different look and to get the benefit of the stencilling.  Each image was coloured with pencils in co=ordinating colours to the stencilling.  

For my next creation I made a large tag, using a die I cut the tag set which is a base, top layer and the eyelet covers.  


I coloured the base tag in Distress Oxide in a matching colour to the the colours in the top layer.  The top layer I smooched several colours for the background, then using the Butterfly Mind stamp set I stamped the main image, then stamped again on spare card, coloured the butterflies then cut them out.  On the background I added words from the set and splatters too.  I added the Butterflies, decoupaging onto the main image.  And finally some glitter was added to the Butterflies.

I will be back later in the month with some more creations from the Chocolate Baroque show, thank you for taking a look.

Happy crafting
Tracy x

Wednesday, 19 February 2020

The Joy of Creating (by Doreen)

Hello everyone, Doreen is back with her second post this month; a colourful card, combining stamps, background papers, and papers from her own crafty stash.

Doreen writes:

This card is a fairly quick make using the latest of Chocolate Baroque's fabulous background splash designer papers, stamped. I then used a background of my own making, stamped, cut out, coloured and using 3D glue gel, mounted onto the background and left the glue to dry. It only needs one hour before it can be safely popped into an envelope but I do err on the side of caution and leave for longer. Of course, if you are in a rush, then you can use foam pads instead.

Products used in the making of this card:

Chalk Ink pads and clear sparkle pen to paint
Nocturne Versafine Clair inkpad
5" x 5" card blank
Base layer of variegated blue paper from stash 


Thanks for looking

love Doreen


Friday, 27 July 2018

Be grateful (by Miranda)


Hello there,

Today my 3rd and last guest DT post for now. Again I have used the lovely Crafty Individuals patterned paper pad 6"x6" (weekend in Seville) and coloured them using color pencils.


This time I have used the 'Bird of Joy' stamp. I stamped direct onto the patterned paper and coloured it using color pencils. After attaching it to the right front flap I decoupaged it.
When I mounted this stamp I cut of the words from the bird so I can use them separately. But it is a risky job.......


Here you can see the card........


On the left flap I stamped one of the beautiful Art deco floral corners
Also coloured with pencils. Than I stamped the words from the 'Words of Gratitude' and die cut it.


On the inside of the card I used the full paper because it has such a beautiful framed pattern. Only stamped the sentiment from the Words of gratitude onto it. Such a beautiful and true sentiment.


And here the card from another point of view.......when it's closed.....


Well, I hope you liked it and maybe you get some inspiration to take out your patterned papers and have a play!
Thanks for your visit and always appreciate your comments,

Till next time,


Friday, 20 July 2018

Wish flower (by Miranda)


Hi there,

Today my second guest DT post and it was fun to play more........

This time I coloured using alcohol based  markers. And I have stamped the ' Wish flower' onto Crafty Individuals patterned paper. Than I have stamped again onto marker paper, coloured the flowers with alcohol based markers. I have decoupaged the flowers and put them on the patterned paper.

Than put it all on the front of the card and decoupaged again. The open squares are a die cut from Crealies and attached on mica sheet. 

On the inside of the card some lovely patterned paper from Crafty Individuals which I stamped on using the words from the ' Wish flower' and the ' Bird of Joy'. It was a precise job but I cut the words from the bird and the flower stamp so I could use them separately.


And here is my card........


Thank you for your visit and hope you liked it,
till next time,


BewarenBewarenBewarenBewaren

Wednesday, 11 July 2018

Inspire and Create by Penny

Good morning everyone, I hope I find you all well and keeping cool! I am loving this weather  but I am also careful to spend time in the shade and keep hydrated.  I'm doing all my crafting in the garden at the moment  :)  
I have a piece of mixed media for you today featuring the beautiful Captivating Cacti stamp and some of the words from Bird of Joy  I have also used some clear texture paste and a stencil from my stash, and some gilding wax.


I began this project with a greyboard substrate and painted it with black gesso.  When dry I stamped and embossed the beautiful cacti image in gold, then painted it with pearlescent paints.  I took a stencil from my stash and some clear texture paste which I added through the stencil to create a textured background.  I left it to dry naturally before rubbing gilding wax over it to accentuate the pattern.  I edged the art work with a gold pen.


I then took a piece of white card and stamped the words using black Versafine ink, and embossed them with clear powder.  I die cut the words into two panels, one an oval and one a banner, and attached them to the art work in 3D.  I punched two holes at the top of the panel and threaded Baker's Twine through them to hang it up by.  A lovely little wall hanging to cheer up any room  :) 

Thank you so much for dropping by today, I hope I've inspired some of you to try a bit of mixed media yourselves. 

                                                                          Penny  x

Sunday, 25 February 2018

Beautiful Bird and Fanciful Flowers by Penny


Hi there - Penny here again with three projects to inspire and hopefully encourage you to have a go at creating them yourselves.  The first is a little mixed media canvas featuring the gorgeous Bird of Joy stamp, a couple of stencils including the Useful Leaves, and some metallic paints and texture paste from my stash.
I took a small canvas and painted it with black gesso.  When dry I stamped and embossed the image using clear ink and powder in the centre of the canvas.  I then painted it with acrylic paints,  adding gold paint around the words to make them pop.  I added some more paint using a sponge to give the piece more texture, then stencilled some glitter texture paste over the sponged areas.
I used the Useful Leaves stencil across the top of the canvas and attached some die cut foliage as well to frame the focal image.  To complete the piece I punched a couple of holes in the top and threaded some cord through to be able to hang the canvas up.


My second project for you today is a pretty, romantic card featuring the lovely French Heart stamp, a small heart from the Harlequin Rose set and a sentiment from the Loving Sentiments set, colouring pens, Distress inks, the Useful Leaves stencil, a tag die, a script stencil and and some ribbon from my stash.
I began by stamping the heart in grey ink onto colouring card and coloured it with pens in muted colours.  I die cut the image into a tag, embossed it and added ink around the edges.  I stamped a sentiment onto the tag, then punched a hole at the top and threaded some ribbon through.  I added some glitter to the flowers and set the tag aside to dry.
On a white base card I created a background of leaves and script with inks through the stencils, and stamped some small hearts randomly over the card.  I blended some ink around the edges of the card and attached the tag.


My final project for you today is a mixed media card featuring the beautiful Medici Flower stamp, plus images from the Gothic Fragments and Butterfly Poppy Collage sets, Distress inks, white charcoal, grey Versafine ink, colouring pens, texture paste, a die cut, gold Liquid Pearls and a gold pen from my stash.
I stamped the Medici Flower in grey ink onto colouring card and coloured it with the pens.  I die cut and embossed the image with a circle die, added ink through the die like a stencil and edged it with a gold pen.  I put dots of gold pearl drops into the middle of the flowers as stamens then set it aside to dry.  Next I created a background on a piece of white card, blending a few Distress inks together.  I then stamped some Gothic windows and Latin script randomly over the panel, faux bleached parts of the windows and added highlights with white charcoal.  I used gold pen around the edges of the panel then matted it onto black card.
On a white base card I applied black texture paste through a brickwork stencil to compliment the Gothic windows, and let it dry.  I then stamped a sentiment onto a spare piece of background card, cut it into a panel, edged it with gold pen and added some gold pearl drops.  When everything was dry I attached the background panel to the base card then added the focal and sentiment panels in 3D onto the card.

I hope you have all enjoyed these projects today, they are all great fun to create and can all be adapted with different colours to suit any requirements.  Thank you for dropping in, I'll see you again soon,

                                                         
Penny

Friday, 16 February 2018

Create Art (by Magda)

I am happy to share with you some projects made with the new stamps from Chocolate Baroque:

Wish Flower
Mosaic Flower
Bird of Joy


I used various products for these projects:

Watercolor Pencils
Distress Ink Pad
Brusho
Stencils
Archival Ink
Stickles Crystal
Mesh wire
Wire
The sentiments  Words to Dazzle and Sparkle and Loving Sentiments

As you see the result of each card is different, which one do you prefer ?
Have a nice day and happy colouring
Magda

Saturday, 10 February 2018

Book of Flowers (by Judith)

Hello everyone, I have a project to share with you today showcasing all of the beautiful stamps featured in the Anniversary shows in January on Hochanda. I hope you managed to catch the shows, they seemed to go in a flash, and Lesley and I were overwhelmed by your enthusiasm for all of the products that we brought to share with you!


My project is a concertina book, made with two pieces of whiteboard for the covers, which I have covered with some lovely patterned paper by Crafty Individuals. I stamped one of the images, minus the words onto the cover, and coloured it with the woodless pencils that we also featured on the show.

I created some pages for the book using smooth watercolour paper, but the cartridge paper that is available on the website would work equally as well. Each page measures 10.5 cms x 14 cms, and I allowed an extra panel to join the sections together each time. I decorated the back of the pages using Distress Ink, and stamped the words from several of the images on top, creating a tone on tone effect.

On each page front, I stamped a different flower image, and coloured these with Distress Inks, keeping to a common colour theme throughout.

As I assembled the book, I added some ribbon, which allowed the book to be tied shut with a bow. This was such a fun project to make, and would be a lovely keepsake for someone special.

Thanks for stopping by,

Judith xx


Wednesday, 7 February 2018

Bird of Joy / Wish Flower ( by Marga)

Hello lovely people today it's my turn to show you something that I made.
Today I want to show you two cards that I made for the January Hochanda TV shows.


Both of the cards I stamped with Versafine Onyx Black Ink and I coloured both of the cards with my pencils.

Stamps I used are: Bird of Joy and Wish Flower.

Hugs Marga

Tuesday, 6 February 2018

Floral Joy (by Julie)

Hello, hope you are well. Today I have a couple of cards created with the new and rather fabulous individual stamps that come from a collection of six individual A6 size designs.


My first card is stamped with Bird of Joy. I simply stamped the design onto water-colour card, using Onyx Black Versafine ink, before colouring with water-colour paints. Once the main image was dry I then went around the design with a light brown water-colour and then splatted with blue and red water-colour paint. I  cut the water-colour card to fit my card blank, before edging with blue Distress ink and mounting onto my card that had been dabbed with matching blue Distress ink.


My second card has been created with Floral Delights
I started by applying masking tape around the edge of my card blank, before stamping the main image. The background has been coloured with Distress ink and the smaller flowers were coloured with pencils. 
I then inked up the stamp again, but making sure permanent ink such as Staz-on was used and stamped onto acetate. Cut out the three large flower heads and colour the reverse side with blue and purple glitter glue.
Remove the masking tape and when the glittered flowers are dry, mount onto the front of the card with 3d foam pads.

Thanks for stopping by. Please call back for daily Design Team inspiration.

Julie xx