my final share this month is the small concertina book, with flowers on one side and underwater bits on the other. I risked sanity by playing with editing effects and managed to brighten the photos up a bit, but the colours look a bit pale now.
I cheated and used the strip of ready scored drawing cartridge from the craftalong pack as the base , and coloured both sides using distress oxides and water on my craft mat.
I cut pieces of drawing cartridge for the panels and covers, and inked the covers to match the base piece.
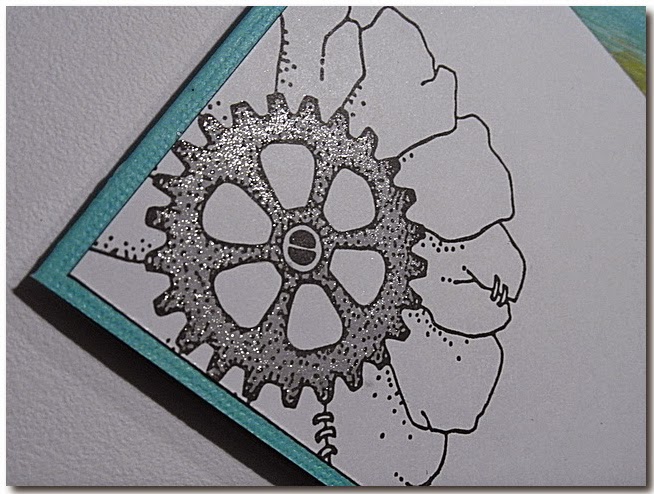
Images stamped in black versafine ink and coloured with watercolour pencils , apart from the cog image which was randomly inked with distress oxide pads.
You will be relieved to hear that the scanner is now talking to the computer - well, I am anyway!- so better pix next time.
Showing posts with label Steampunk Sea World. Show all posts
Friday, 31 January 2020
Thursday, 23 January 2020
Imagination meets reality by Brenda
I'm here with some more Steampunk inspiration starting above with a triptych style creation using the birds from Steampunk Birds, all stamped onto an Distress Oxide background with some stencilling added. The birds have been coloured with pencils and some cogs added around the edges using stamps from Punky Romance.
A small shoal of fish here along with a pink Octopus - well it is fantasy! An Oxide background, stenciling and repeat stamping across the bottom using stamps from Steampunk Sea World and the fishes are all from Steampunk Funky Fish along with a sentiment from Punky Expressions.
My favourite Cockerel again from Steampunk Birds, this time stamped onto a piece of inked artboard and then covered with three coats of UTEE. The base layer has been stamped with several images from Steampunk Sea World and Timeless and a focal element mounted onto a piece of corrugated.
Have a lovely day everyone.
Wednesday, 22 January 2020
Sailing Underwater Steampunk Style (by Pat)
Hello everyone, here is the second post this month from our Guest Design Team member Pat. She has created a fabulous steampunk themed card, great for those men in your life.
Pat writes:
Hi everyone, I'm back with my second post for this month and I decided on something more masculine this time, although it doesn't necessarily have to be. I have used the Steampunk Sea World set of stamps, a sentiment from the Punky Expressions set, brown and blue permanent inks, clear gloss embossing powder, brushos in turquoise and orange on stencilled background, Distress Inks using a brown, orange and a blue for everything else, a waterbrush, a blending tool, and a stitched circle die.
I started by stamping the sailing ship using brown permanent ink and heat embossed with the clear embossing powder. I masked it to add the stencilled background using the brushos shaken sparingly on to the stencil itself and spritzed with water before pressing it on to the card. The colours have combined to make a pretty green, but as you can see with touches of orange remaining. I watercoloured the ship and added the blended blue over the background fading it towards the centre.
I then made a background using two more of the stamps from the same set again using brown permanent ink and clear heat embossed, then watercoloured with the brown. I finished by blending the same blue over the background making it darker around the edges and added a sentiment from the Punky Expressions set using the blue permanent ink which I clear heat embossed.
Thank you for joining me today and I will be back again next week with my last post.
Best Wishes,
Pat.
Pat writes:
Hi everyone, I'm back with my second post for this month and I decided on something more masculine this time, although it doesn't necessarily have to be. I have used the Steampunk Sea World set of stamps, a sentiment from the Punky Expressions set, brown and blue permanent inks, clear gloss embossing powder, brushos in turquoise and orange on stencilled background, Distress Inks using a brown, orange and a blue for everything else, a waterbrush, a blending tool, and a stitched circle die.
I started by stamping the sailing ship using brown permanent ink and heat embossed with the clear embossing powder. I masked it to add the stencilled background using the brushos shaken sparingly on to the stencil itself and spritzed with water before pressing it on to the card. The colours have combined to make a pretty green, but as you can see with touches of orange remaining. I watercoloured the ship and added the blended blue over the background fading it towards the centre.
I then made a background using two more of the stamps from the same set again using brown permanent ink and clear heat embossed, then watercoloured with the brown. I finished by blending the same blue over the background making it darker around the edges and added a sentiment from the Punky Expressions set using the blue permanent ink which I clear heat embossed.
Thank you for joining me today and I will be back again next week with my last post.
Best Wishes,
Pat.
Saturday, 18 January 2020
Punky flowers, fish and birds by Rachel
Hello there. Rachel here again with a few more samples from the December shows.
In this first one I used an image from the Punky flowers sheet and teamed it with a sentiment from the punky expressions sheet. The flowers were coloured with water colour pencils.
In this one the background was created by brayering ink on a round gelli plate and printing it. Then I added a punky flowers image and coloured it with pencils before adding a sentiment from the punky expressions sheet.
This one has a brushos background tht I stamped the bird over - I then coloured it in using inks then painted the water before finally adding punky expression sentiment.
My canvas was a bit of a labour of love - the background was done mainly using foam and my fingers with acrylic paints from various sources! Once dry I added the funky fish and steam punk sea world stamps that I had stamped, coloured and fussy cut. I added them and overpainted using a gloss medium.
Finally my free standing piece - for this I used the funky fish and some punky flowers on a monolith - both images were coloured using acrylic paint.
I hope this has given you more ideas as to how to use your stamps!
Hugs
Rachel xx
Thursday, 16 January 2020
Sea Air - (by Magda)
Hi,
it is still Winter, but I am waiting impatiently for the Summer and the holidays at the sea side, therefore I propose to you some projects that smell of sea air, I created using Chocolate Baroque plate " Steampunk Sea World ".
The images are stamped with Archival Jet Black and the various colours of blue, green and brown of Distress Ink Pad for the backgrounds, allowed me to travel with my fantasy in the depths of the sea.
it is still Winter, but I am waiting impatiently for the Summer and the holidays at the sea side, therefore I propose to you some projects that smell of sea air, I created using Chocolate Baroque plate " Steampunk Sea World ".
The images are stamped with Archival Jet Black and the various colours of blue, green and brown of Distress Ink Pad for the backgrounds, allowed me to travel with my fantasy in the depths of the sea.
I hope you liked my posts, thanks for reading, xx
Magda
Sunday, 12 January 2020
Curios Adventures and Imagine What Lies Beneath by Penny
Goodly morning peeps, I hope you have all settled into the New Year by now. I'm here today with my first DT post of 2020, and I'm delighted that it features some of my all time favourite CB Steampunk stamps!
Curiosity and Adventure.
For this mixed media piece I have used the beautiful stamps from the Steampunk Funky Fish, Steampunk Sea World and and Punky Expressions, metalic acrylic paints, Distress Inks and a variety of stencils from my stash.
I painted an MDF panel with a coat of white gesso then a coat of blue chalk acrylic. I then used several stencils and different colours of Distress Inks to create a layered background. When everything was dry I took some gold Soft Form Paste and added it through a stencil along the bottom for texture and the sea bed.
I stamped and embossed the fish, sea creatures and two machines onto black card, painted them and cut them out. I coloured them with metalic paints because they suit the Steampunk, industrial aspect of the images. Three of the images have 'sand' or 'sea bed' attached to them, so they went along the bottom of the panel attached with 3D glue gel. After shaping the other images I attached those to the panel with 3D gel too. I stamped and embossed some sentiments and attached them as before. To complete this mixed media piece I punched a couple of holes on the top edge and added cord to hang it up with.
Imagine What Lies Beneath.
A card this time featuring stamps from the Steampunk Funky Fish, and Steampunk Sea World sets,
pearlescent spritzers, Distress Ink and an embossing folder from my stash.
I began by creating the background, I spritzed a piece of white card with pearlescent inks. When it was dry I embossed the panel in a folder that I think expresses underwater currents. I then matted the panel onto black card. I took a white base card and stamped one of the larger images around the edges with DI, then attached the background panel.
I stamped and embossed several fish and a sea creature onto black card, painted them with metalic paints and cut them out. I shaped them and attached them to the card with 3D gel. I then stamped and embossed a sentiment onto white card and attached it with 3D gel as before.
Thank you for popping by today, I hope these samples have tickled your crafty mojo a little! I shall be back later in the month with some more crafty fun.
Until next time,
xx Penny xx
Wednesday, 8 January 2020
Strut your Punky Stuff by Brenda
Morning Peeps, today I have a few more shares using the Steampunk stamps Lesley showcased recently on Hochnda TV.
I adore the Punky Cockerel featured on Steampunk Birds as he rather reminds me of one of our own! An Oxide background with stenciling and a die cut corner, the Cockerel stamped with Versafine Clair and coloured and a few 'coffee stains' stamped using an image from Timeless.
More Oxides and stencilling to create an underwater scene and various images stamped from both Steampunk Sea World and Steampunk Funky Fish and a little watercolour added here and there.
This one has a background created using the Gelli Plate and acrylic paint, some rays added with Distress Ink and one of the images from Steampunk Sea World repeat stamped across the bottom and a sentiment from Punky Expressions added.
My thanks as always for popping in today and I hope I have offered a little inspiration.
Tuesday, 7 January 2020
Thingummybob (by Sandra)
Hello
I hope you all had a lovely Christmas and wish you a happy new year.
The house looks very bare now that all the decorations are down, but time to get back to crafting!
My cards are from the December show on Hochanda.
All my cards are made with stamps from Steampunk Funky Fish and Steampunk Sea World.
I think these two sets work so well together.
For this card I made a background using Distress Inks and stamped the Jellyfish and the Thingummybob .
I cut out 2 sets of the bubbles and added some gloss to them.
On my next card I made a background with Distress Oxides and stencils. I stamped the images and coloured with watercolour pencils.
My next card, I made a" porthole" on my cutting machine, added some "bolts" and painted it to look like rust. I made a background with Distress Oxides and coloured the fish with pens. This was then put onto a background paper of weathered wood, like an old ship.
My final card for today is the Airship. A lovely, fun stamp. Here I have put it onto an embossed background which compliments the Steampunk, Industrial feel.
Thanks for looking and I'll be back in a couple of weeks with a few more cards to share
Sandra x
I hope you all had a lovely Christmas and wish you a happy new year.
The house looks very bare now that all the decorations are down, but time to get back to crafting!
My cards are from the December show on Hochanda.
All my cards are made with stamps from Steampunk Funky Fish and Steampunk Sea World.
I think these two sets work so well together.
For this card I made a background using Distress Inks and stamped the Jellyfish and the Thingummybob .
I cut out 2 sets of the bubbles and added some gloss to them.
On my next card I made a background with Distress Oxides and stencils. I stamped the images and coloured with watercolour pencils.
My next card, I made a" porthole" on my cutting machine, added some "bolts" and painted it to look like rust. I made a background with Distress Oxides and coloured the fish with pens. This was then put onto a background paper of weathered wood, like an old ship.
My final card for today is the Airship. A lovely, fun stamp. Here I have put it onto an embossed background which compliments the Steampunk, Industrial feel.
Thanks for looking and I'll be back in a couple of weeks with a few more cards to share
Sandra x
Sunday, 5 January 2020
Under The Sea (by Julie)
Hello, I am kicking my New Year blog posts off with an under the sea theme.
My first card has been stamped with the wonderfully versatile Steampunk Sea World set.
I started my card by stamping all of the images using Onyx Black Versafine, before colouring with Polychromus pencils. I then added in the watery background by sponging Distress inks along a piece of scrap paper to create the rays of light.
My second card has been stamped with Steampunk Funky Fish with the sentiments coming from Punky Expressions
I simply stamped the three under-water creatures with Onyx Black Versafine before colouring with polychromos pencils. I then stamped my sentiment before colouring the background with various shades of blue Distress inks. I then went over the background with the Distress inks applied through a dotty stencil along with some dabs of white acrylic paint.
Thank you for stopping by
Please call again soon for more Design Team inspiration.
Julie xx
Wednesday, 10 July 2019
Steampunk Fun (by Doreen)
Hello everyone, today sees the first of three posts this month from our Guest Design Team member Doreen. She has created a delightful Steampunk themed project for your inspiration. Doreen writes:
This post is a little bit of self indulgence if I am honest, personally I love steampunk, to me it is a bit of quirky fun.
For this card I have used the following products:
Steampunk Sea World
Punky Expressions for the sentiment
Drawing Cartridge, black and white
Gelli Plate and brayer
Acrylic paints
Koh-I-Noor Polycolor pencils
Silver and White gel pens (for highlighting)
Jet Black Stazon inkpad
Firstly using the gelli plate for the background I used acrylic paints a little pale and dark blue for the area of the sea, then dotted some pink and yellow into the mix for the sky area. Mix the colours by brayering dots of paint to blend them. If you feel the blue is moving too far down then clean your brayer onto a piece of scrap paper and continue with the blendng of the sky area.
Use your white drawing cartridge paper and whilst the paper is wet lay the paper over and smooth firmly over the paper, you can then pull your print.
Whilst this should be dry wait a few moments and then go ahead with your stamping. I advise the use of Stazon as other inks take a little longer to dry on the acrylic in my experience.
Once stamped you can highlight wherever you feel it needs lifting a little using the polycolour pencils, and the white pen is perfect for the sails of the boat. I used the silver gel pen for the fish and to enhance areas of the boat that I felt should have a metallic look about them.
Add your sentiment of choice and with a fineliner pen draw a few birds in.
Mount onto a piece of black card slightly larger than your topper and mount onto a card or even into a frame if you want to make a gift of your artwork.
This post is a little bit of self indulgence if I am honest, personally I love steampunk, to me it is a bit of quirky fun.
For this card I have used the following products:
Steampunk Sea World
Punky Expressions for the sentiment
Drawing Cartridge, black and white
Gelli Plate and brayer
Acrylic paints
Koh-I-Noor Polycolor pencils
Silver and White gel pens (for highlighting)
Jet Black Stazon inkpad
Firstly using the gelli plate for the background I used acrylic paints a little pale and dark blue for the area of the sea, then dotted some pink and yellow into the mix for the sky area. Mix the colours by brayering dots of paint to blend them. If you feel the blue is moving too far down then clean your brayer onto a piece of scrap paper and continue with the blendng of the sky area.
Use your white drawing cartridge paper and whilst the paper is wet lay the paper over and smooth firmly over the paper, you can then pull your print.
Whilst this should be dry wait a few moments and then go ahead with your stamping. I advise the use of Stazon as other inks take a little longer to dry on the acrylic in my experience.
Once stamped you can highlight wherever you feel it needs lifting a little using the polycolour pencils, and the white pen is perfect for the sails of the boat. I used the silver gel pen for the fish and to enhance areas of the boat that I felt should have a metallic look about them.
Add your sentiment of choice and with a fineliner pen draw a few birds in.
Mount onto a piece of black card slightly larger than your topper and mount onto a card or even into a frame if you want to make a gift of your artwork.
Thank you for looking,
love Doreen
Wednesday, 22 May 2019
Under the Sea (by Pat)
Today sees the final post this month by our Guest Design Team member Pat. She has created a watery themed card to inspire you.
Pat writes:
Hi there everybody, this week I decided to go underwater, not literally though, the sea down here is still far too cold for that. I love the fun images found on the Steampunk fish sets- Steampunk Funky Fish and Steampunk Sea World, and I also used bubbles from the Floral Heart, Distress Inks and a white Posca Pen.
I started with the background using a piece of acrylic sheet to transfer the spritzed inks to the white card, building up the colour and drying in between the layers until I got the coverage I wanted. I then stamped the images, the bottom ones in green, and the seahorses and nautiluses in blue. In order to keep it uniform I extended the outlines of the seabed by using some green ink on the end of a pokey tool which worked quite well, as a black pen would have been too dark. I know strictly speaking you should heat emboss over Distress Inks if you are going to watercolour, but I didn't want hard lines, and in the few places where the lines were blurred a little I used a bit of coloured pencil to fill them in. I did on the other hand make sure that the waterbrush was just damp and not overly wet.
I finished by stamping the bubbles and darkened the edges with a bit more blue ink, and used the Posca Pen to add some white to some of the bubbles and the eyes of the seahorses and nautiluses.
Thank you for taking a look today, and as this is my last Guest Designer post for now I'll say cheerio, but will be back later in the year.
Best Wishes,
Pat x
Pat writes:
Hi there everybody, this week I decided to go underwater, not literally though, the sea down here is still far too cold for that. I love the fun images found on the Steampunk fish sets- Steampunk Funky Fish and Steampunk Sea World, and I also used bubbles from the Floral Heart, Distress Inks and a white Posca Pen.
I started with the background using a piece of acrylic sheet to transfer the spritzed inks to the white card, building up the colour and drying in between the layers until I got the coverage I wanted. I then stamped the images, the bottom ones in green, and the seahorses and nautiluses in blue. In order to keep it uniform I extended the outlines of the seabed by using some green ink on the end of a pokey tool which worked quite well, as a black pen would have been too dark. I know strictly speaking you should heat emboss over Distress Inks if you are going to watercolour, but I didn't want hard lines, and in the few places where the lines were blurred a little I used a bit of coloured pencil to fill them in. I did on the other hand make sure that the waterbrush was just damp and not overly wet.
I finished by stamping the bubbles and darkened the edges with a bit more blue ink, and used the Posca Pen to add some white to some of the bubbles and the eyes of the seahorses and nautiluses.
Thank you for taking a look today, and as this is my last Guest Designer post for now I'll say cheerio, but will be back later in the year.
Best Wishes,
Pat x
Tuesday, 30 December 2014
Octopus hugs (posted by Claire)
Good morning, I hope you're all enjoying the Christmas break (and grabbing lots of bargains in the Chocolate Baroque sale!!). It's Claire here with a card made using the fun new stamps Steampunk Funky Fish and Steampunk Sea World. I've made a theatre style card by taking two rectangular pieces of card, scoring at 2cm and 4cm in from either end. When you join the two end sections it gives a really fun card that still folds flat to post.
To decorate the card I cur a circular aperture in the front section and used a stencil and texture paste to create the brick effect. Once the paste was dry I added some colour with distress inks in Tea Dye and Vintage Photo.
On the back section of the card I stamped the steampunk bubble machine three times and embossed with gold embossing powder and added some colour with markers before inking around the images with Tumbled Glass distress ink.
The octopus was stamped with memento tuxedo black ink and coloured with Graph'It markers. I cut the octopus out and mounted it on some acetate. I folded a flap over at the top of the acetate and stuck it to the back of the card. I love this technique, I first saw Glenda demonstrate it years ago and it's great for giving your image some movement. Here's pic to (hopefully) show the acetate strip.
Thanks for visiting today
Claire xx
Monday, 29 December 2014
Steampunk Funky Fish/Steampunk Sea World By Florence
Hi everyone
I hope you have all had a wonderful Christmas.
Today I would like to share some cards made using some of the fabulous little creatures from the Steampunk Funky Fish and Steampunk and Sea World Stamp sets
These stamp sets are so addictive and such great images to craft with. The more I use them the more I love them.
The stamps really work in lots of styles whether you want a more simple style of project or whether you want to get inky and create an imaginary underwater scene.
The images also work so well with other Chocolate Baroque Rubber Stamps so you can mix and match the stamps to create your own unique little master pieces.
I made all of these cards in the same way.
If you are new to stamping these cards may look complicated but they are not when you know the order of layers of the colors and stamping.
First stamp your main images that you wish to appear at the forefront of your project ie., the sea monster or the jelly fish.
Mask the images with either a paper or a liquid mask.
Leave the mask on until the near the end.
Using some Cut-n-Dry foam, colour the whole piece of card (over the masked image) with Distress Inks of the colors of your choice. Start with a lighter color and then build your colors up.
Take a stencil or mask and place it over the piece.
Take a darker or a complimentary colored Distress Ink and sponge (over the mask) in areas of your choosing and leave to dry.
Now you can start stamping other images ie., the cogs or background patterns.
If you wish to multi-stamp ie., stamp the same images over the top of each other then it is best to start stamping with a lighter coloured ink first and then use a darker ink to stamp over the top. This helps to create a little bit of depth. Please see the top of the first card above as an example.
When you have added all of the color and all of the additional stamping you can then take the masks off and color your images and add the highlights.
Tip: Optional - I fix my ink with a spray fixative and then I add a coat of Mod Podge before I add the high lights. The Mod Podge makes the colors more vibrant. It also stops the colored ink from contaminating your high lights.
Please feel free to case any of the projects on this post if you wish to.
Thank you for looking.
Wishing you all Health and Happiness for 2015
Florence x
Wednesday, 24 December 2014
Steampunk CAS Style (by Shirley)
Seasons Greetings, I hope you are enjoying a wonderful festive season.
I have a quick make to show today featuring the fabulous fantasy ship from the new Steampunk Sea World set.
I created a mask using a large cog die. I blended Lavender Distress Ink and then using the TCW Cog stencil I blended Salty Ocean Distress ink over top. The ship was stamped with Cobalt Archival ink, coloured with pencils and highlighted with a white pen. Just a note is from Mackintosh Sentiments.
Wishing you a happy and creative 2015!
Shirleyx
I have a quick make to show today featuring the fabulous fantasy ship from the new Steampunk Sea World set.
I created a mask using a large cog die. I blended Lavender Distress Ink and then using the TCW Cog stencil I blended Salty Ocean Distress ink over top. The ship was stamped with Cobalt Archival ink, coloured with pencils and highlighted with a white pen. Just a note is from Mackintosh Sentiments.
Wishing you a happy and creative 2015!
Shirleyx
Tuesday, 23 December 2014
Set Sail (posted by Judith)
Hello everyone, this is my final marine themed post for this month. I have really enjoyed working with these stamps, and have lots more ideas for them.
My project this time around uses the large ship image, which I wanted to portray sailing through a forest at the bottom of the ocean. I stamped the images and then embossed some cogs from the Punky Flowers stamp sheet. I coloured the background using Distress Inks, and then stamped a cog fragment from the Steampunk Butterfly stamp set over the top.
I coloured the images with Inktense pencils and added some fronds at the bottom of the page using the legs from the octopus taken from the stamp of the month set. Finally, I added a sentiment taken from the Steampunkery stamp set.
Thanks for stopping by, Judith xx
My project this time around uses the large ship image, which I wanted to portray sailing through a forest at the bottom of the ocean. I stamped the images and then embossed some cogs from the Punky Flowers stamp sheet. I coloured the background using Distress Inks, and then stamped a cog fragment from the Steampunk Butterfly stamp set over the top.
I coloured the images with Inktense pencils and added some fronds at the bottom of the page using the legs from the octopus taken from the stamp of the month set. Finally, I added a sentiment taken from the Steampunkery stamp set.
Thanks for stopping by, Judith xx
Monday, 22 December 2014
In the dark deep sea......and some CAS cards....by Miranda
Today my last creations of this batch made with the Steampunk sheets. And again I've used both sheets, Steampunk Funk fish and Steampunk Sea world. In the right bottom corner you can see a fragment of the Seaside dreams. The sentiment is also from that sheet.
I've used one of my many already finished backgrounds waiting to be stamped on.......This is a very dark one, made with fluid inks( like Ecoline) and some silver spatters.......you can see that in the close-up. I've stamped the images with Versafine black and coloured them with my pencils. I did take photos in the evening with artificial light because you can better see the lovely shimmer in the background but also of the metallic Pan Pastels on black and the gold embossing of the gears.
Than I've embossed some black card using an embossing folder with a gear pattern. First I pressed the embossed pieces into my Versamark pad and than I' ve added several Metallic Pan Pastels over it. And also some hints of blue and purple Pan Pastel to reflect the colors of the background and the card. I also die cut some gears and did some triple embossing with clear and gold embossing powder. I had a tiny left over piece of the embossed paper and used it to create a small card. I've embossed the gear with several embossing powders. And the sentiment is from the Mackintosh sentiments.
Of course it's also possible to create a simple but effective card with these stamps. So onto the clean and simple style now.............I always admire cards with a lot of white space but somehow I can't often manage to left some white space LOL so that's a challenge for me.
I will show you some possibilities........
These cards are made using the colors of the 6th colourchallenge. You can see my other cards on the CB color challengeblog. These cards are very easy and quick to make, lots of white space(very difficult for me) but sometimes you need to create something different and I enjoyed it too!
I die cut a circle template and sponged with several Distress inks, spattered some waterdrops and after drying I stamped the seahorses with Versafine black and gave some accents with the Wink of Stella brush markers. Only added a lovely swirl from the Artistic Expressions. The text is from the Artistic affirmations. I layered the white card on a black one and voila finished!
These cards are made using the colors of the 6th colourchallenge. You can see my other cards on the CB color challengeblog. These cards are very easy and quick to make, lots of white space(very difficult for me) but sometimes you need to create something different and I enjoyed it too!
I die cut a circle template and sponged with several Distress inks, spattered some waterdrops and after drying I stamped the seahorses with Versafine black and gave some accents with the Wink of Stella brush markers. Only added a lovely swirl from the Artistic Expressions. The text is from the Artistic affirmations. I layered the white card on a black one and voila finished!
the sparkly effect of the clear Wink of Stella marker.......
On the next card I used masking tape to create my working area. I only swiped some diagonal strokes with Distress paints and spattered with water. After drying I stamped the steampunk ship with Versafine black and again some accents with the Wink of Stella marker and a white belly pen. I've combined it with some steampunk flowers from ' Punky flowers'. The gears are coloured with the silver Wink of Stella marker.
The Wink of Stella markers have a beautiful sparkly shine which shows best in sunlight and halogen light. I use them often........ At both cards I used a black fineliner(005) to outline the coloured area.
Well hope to have inspired you with these simple and quick cards. Thanks for visiting and I always enjoy to read your comments.
Wishing you all joyful days and till next time!
Labels:
Steampunk Funk Fish,
Steampunk Sea World
Subscribe to:
Posts (Atom)