Pin It button on image hover
Showing posts with label Flora Musica. Show all posts

Monday, 26 April 2021

brusho flowers (by Veronica)


This was experimental, but I liked the result and decided to repeat it using all the floral stamps from this month's show

.

The first was a card using the crackling rose stamp, just stamped onto white card using black versafine and clear embossed before sprinkling with grey brusho powder and spritzing with water. A black mat, and a base card sponged with grey distress ink and randomly stamped with part of the rose stamp in the same grey.


The base of the concertina was an A3 sheet of gold card cut to give 3 panels 5x7". The four main images were stamped in black and clear embossed before adding the grey brusho powder. On the last two panels the crackling rose was stamped in grey in the corners , and sentiments stamped using black versafine.


Saturday, 24 April 2021

Florals in Reds and Golds (by Judith)

Hello everyone, I have a few more projects to share with you, featuring stamps from last month's TV shows. 

My first card was created using a Brusho background, I have lots of these in my stash, waiting to be used when I need them. I make a batch in lots of different colours, which I can pull out when I need them in a hurry. Very handy when I am making DT samples!

I stamped a leafy sprig from the Autumn Poppy stamp set randomly over the background. It is not an exact match to the main image, but is close enough. I coloured the image with pencils, choosing a lovely olive green and soft red.

I die cut an oval and stamped the Flora Musica image, adding a bit of Distress Ink around the edges to soften the whiteness of the card. I coloured the image with pencils once more, coordinating with the colours of the background. I chose some toning ribbons to pull the project together. 

To create my second project I made a wrinkle free distress background, using Distress Inks on a craft mat, which I mopped up with a piece of drawing cartridge. I stamped around the edges with the Large Crackle Background, and added the splatter stamp from the Timeless stamp set. 

I die cut a rectangle and stamped the Crackling Rose which I coloured with pencils. The sentiment comes from the Life is so much Better stamp set.


The stamp from my final card was not actually featured on the show Song Thrush, its silhouette companion made an appearance. I made this card and so will share it as you could create something very similar. I used a tea stained background, and stamped a leafy image from Brocade Backgrounds over the top.

I stamped the main image twice, and coloured the images with pencils. I decoupaged some of the flowers before matting the layers onto brown card. The sentiment once more is taken from Life is so much Better

I had so much fun this month working with a lot of these older stamps. For some of you they will be brand new. It was great to revisit the images and get to use them again, mixing them with newer stamps that were not around when the stamps first came out. I hope that you have seen lots of inspiration from the rest of the Design Team as well. 

Thanks for stopping by, stay safe and take care,


Judith xx

Tuesday, 20 April 2021

Live, Laugh, Dream by Brenda


Brenda here again for more shares of work from last months Hochanda shows. 

I went for a bit of bold contrast with the above creation using Flora Musica stamped onto an oval and coloured in with Koh-i-Noor paints and placed over the edge of a card. The border to the left is from Harlequin Rose, a strip of red ribbon to carry the colour of the blooms and a sentiment from my Life is so much Better inspirational quote set which featured in the show.


I have used one of Lesley's new Say it Vertically sentiment sets down the side of this one and Landscape Collage stamped in black and colour added just to the sun with matting and layering to carry that colour.

May thanks for your kind visits and words of encouragement.

Saturday, 17 April 2021

flower power (by Veronica)

One of my favourite stamps was in the shows last month, the lovely flora musica and i have two versions to share today. The first is a very CAS card, simply stamped onto a  square of white card. The stamp was inked with distress marker pens and stamped using a stamping platform. I used a damp brush to draw the cololur out into the flowers and leaves and stamped the sentiment from birthday words in the bottom corner. The card was edged with ablack marker pen before mounting onto a white card blank.
The second version was again stamped using marker pens, this time edged with distress ink and mounted onto a dark red car. The background panel was sponged with matching distress inks, and randomly overstamped using just the flowers and a swirly music stamp from the music fanfare set. The same sentiment was stamped onto spare card and cut out using a punch,

the next cards use the harlequin bouquet  stamp, the first stamped in grey versafine onto white card and then again using black versafine onto spare white card, The first piece of card was coloured using wild honey distress ink and water on a craft mat, and the harlequin part of the stamp stamped randomly using the same distress inkpad to create the background. The flowers and leaves on the second image were coloured with marker pens, cut out and glued over the first images.
The base card was sponged with hickory smoke distress ink, then the image stamped randomly using the wild honey distress ink
The second version is more muted, inked first with distress markers then overstamped qwith black versafine. Background card sponged with hickory smoke and a pink distress oxide 
( probably worn lipstick, but not sure!) then randomly stamped with the harlequin part of the stamp using the grey.
Sentiment from say it vertically


My final card uses the floribunda stamp, stamped in versamark onto kraft card and white embossed. I sprinkled truquoise brusho powders over the flowers and spritzed with water. Mounts were white and turquoise card onto a square card blank , and the sentiment stamped in turquoise ink onto a scrap of white card edged with the same inkpad and matted onto a scrap of kraft card


Saturday, 10 April 2021

Musica and Harlequin (by Rachel)

 Hello there - Rachel here today with some samples from the March shows.

In this first make I used the flora musica stamp and one of the black and white papers that Lesley produces. I started by stamping the image onto the paper and colouring the flowers using alcohol pens. I then used the paper almost as rice paper and adhered it to a 6x6 inch piece of greyboard. Next I added the sentiment then used some resin to seal the whole thing. Once dry (this took a couple of days) I added the whole piece to a piece of paper and added this to a card blank. Finally I added the sentiment.


For this second card I used the Harlequin Bouquet stamp - I created an alcohol ink background on yupo paper then inked up the stamp with lift ink - I removed the ink and used the piece with the removed ink to form the topper background. With the ink I lifted I stamped on the card blank I was going to use. Next I cleaned the stamp and then used it to stamp in black ink onto a piece of white card. I then fussy cut this image and added it to the topper which I layered onto black card as a mat. Finally I added more stamping to the background card using summeritme ink and also black ink.

I hope these samples have given you a few different ideas.
Have a great day!
Hugs
Rachel xx


Monday, 25 September 2017

Falling Leaves (by Asha)

Good morning, friends! The leaves are falling, the air is cooler and the days are getting shorter... hellooooo Autumn!

It's my turn to show and tell on the DT Blog and I've created an art journal page with a seasonal theme. Just so you know how wonderfully versatile Chocolate Baroque stamps are, I'm featuring a stamp not usually associated with autumn: the Flora Musica rose.


The falling leaves are cut out of gold tissue paper and I've layered them for texture and dimension. The floral image is stamped directly onto the background using Plum Ranger Archival Ink and I've coloured it with polychromos and alcohol markers.
 
As always, I have details of the tools and products used on my blog. Thank you for stopping by and drop in soon for more designs by the team.

Beijinhos,
Asha

Sunday, 10 September 2017

a floral bouquet (by Veronica)

 Today I have several floral cards to share, made for the show on Hochanda last month -  and one card doesn't have brusho on it!
The first uses the lovely flora musica stamp, stamped with versamark on white card and white embossed before adding brusho powders. The dark brown card background was randomly stamped with the rose part of the image and gold embossed,. and the mats are dark brown and gold.
 The second uses the crackling rose stamp, stamped in black versafine ink and clear embossed, rose covered with masking fluid and then sprinkled with black brusho powder. Once dry, die cut using an oval die and mounted onto a white card blank stamped with the gold embossed sentiment from loving sentiments.
I think this would be a suitable card for a lot of times, when you just need a general cheer-up card....
Crackling rose again for this one with masking fluid and brusho, this time torn round the edges befor sticking onto a dark blue background embossed with the crackle stamp and white embossed.
the greeting from loving sentiments was stamped and embossed with gold, die cut and edhes with more gold EP.
 The final brusho one is again crackling rose, stmaped in black and clear embossed before colouring with brusho powders. It was fussy cut out and mounted onto a background using distress oxide inks, with the sentiment in black.
My final card features the floribunda net stamp, and as promised has no brusho!
I stamped with versamark onto craft card, and white embossed it, tore round the edges  and coloured the roses with marker pen, mounted onto black and gold card at an angle onto a base card randomly stamped in wild honey distress ink, with a gold embossed sentiment.
The roses were made from a Tim Holtz die using the same dull gold card used for the mat, with a darker gold for the leaves.

Friday, 8 September 2017

A Quartet of Flowers (by Judith)

Hello everyone, I have some floral projects to share with you today, that were featured on last month's TV shows on Hochanda. These cards were made using the individual floral stamps from the shows, and I used a range of techniques to create the cards.

For my first card, I coloured the background with Distress Ink, and then stamped over the top using a stamp from the Harlequin Fragments stamp set, again using Distress Ink. I stamped the Harlequin Bouquet individual stamp onto a die cut oval, using purple ink, and coloured the image using Distress Inks and a water brush. I added a sentiment to the background from the Loving Sentiments stamp set.


For my second card, I created a background using Brushos and kraft card. I stamped the Floribunda Net individual image onto another piece of kraft card, and embossed it using white embossing powder. I coloured the image using Brushos and a water brush. I stamped the setiment from the Loving Sentiments stamp set onto a smaller piece of kraft card, again using white embossing powder. I have inked the edges of each piece of card using red ink.

For my third card, I coloured the background again using Distress Inks, and used the Large Crackle Background for added texture. I cut a postcard sized piece of card, and stamped the Crackling Rose individual stamp, adding images from the Mail Art stamp set, to create a postcard effect. I created a small sentiment strip using words from the Loving Sentiments stamp set once again.


Long term viewers of the blog will have seen a rendition of this final project, which I remade for the TV show. I hope that you will not mind seeing it again, using the Flora Musica stamp set:

My Team mates have made some beautiful projects using these lovely stamps. Do keep checking back this month to see their designs. Thanks for stopping by, Judith xx

Wednesday, 6 September 2017

Flora Musica (by Brenda)


Good morning all you crafty Peeps, I hope you week is going well.

Today I have some creations to share using the stamps that Lesley showcases on Hochanda in August, the first show featured a wonderful collection of Vintage inspired floral stamps and the second show was all about Winter and Christmas. I will share a few of my samples for both shows with you next week.

Starting with the card at the top which features Flora Musica which I stamped onto a Distress Oxide background and the used DI's to colour the image. Using Decorative Edges I stamped some random harlequins using the same Oxide inks, a little Butterfly from Just Butterflies and sentiment from Words of Inspiration which I think is my all time favourite Chocolate Baroque sentiment set.


For this card I again created an Oxide ink background and the overstamped with the holly from Winter Birds using Versafine blue ink. The central panel has a sentiment from the new Christmas Word Plate and again the same holly around the edges.


This one was a bit of an experiment !! Yet another Oxide ink background............yes I am a bit obsessed with them and over stamped with Harlequin Bouquet which I stamped with Versafine black and coloured in with the same DI's. I then covered the whole piece with three layers of  Versamark and heat embossed each layer with detail clear poweder and then the madness set in..........I cut the piece into seven piece and rearranged onto a piece of coordinating cardstock, but do quite like the finished effect.


For my final card I used Kraft card, a mask and a white inkpad to create the Christmas bauble shape and with the mask still in place stamped the house from New England Winter using Gathered Twigs DI and finally the little sentiment set from Frosty Trees and a white bow to finish.

As always my thanks for popping in today and I hope I have inspired you to go check out the lovely stamps from the shows.


Tuesday, 5 September 2017

Flowers with backgrounds (by Marga)

Hello all, today it's my turn to show you something. 

This time I have two cards to share with you.


The first card is made with Distress Inks and some colouring with pencils.
I also used the stencil Seasonal Elements in the corners.

The stamp I used is Harlequin Bouquet


The second card is stamped with Versafine Ink and I have coloured the flowers with pencils.

The stamp I used is Flora Musica.

Hugs

Marga

Monday, 4 September 2017

Floral Beauties (by Julie)

Hello, today I have two pretty floral cards to show you. These stamps are so easy to work with and make beautiful cards completely by themselves. 


My first card is stamped with Harlequin Bouquet. I started by stamping the design in the centre of the card and colouring with Magic Pencils. To create the faded background, I inked up the Harlequin Bouquet with a very pale brown dye ink and stamped around the coloured image, before adding Distress inks over the top. I finished off the card with a sentiment from Loving Sentiments.


My second card is stamped with Flora Musica and made in a similar way to my first, however this time I stamped the main floral image onto separate card and cut out using a die cutting machine and an oval die, which I then mounted onto blue card.
The base card was stamped with Flora Musica and a very pale blue dye ink pad. I inked the edges with Squeezed Lemonade Distress ink and finished off with a sentiment from Loving Sentiments

Thanks for stopping by and please pop back very soon for more Design Team inspiration.

Julie xx

Saturday, 2 September 2017

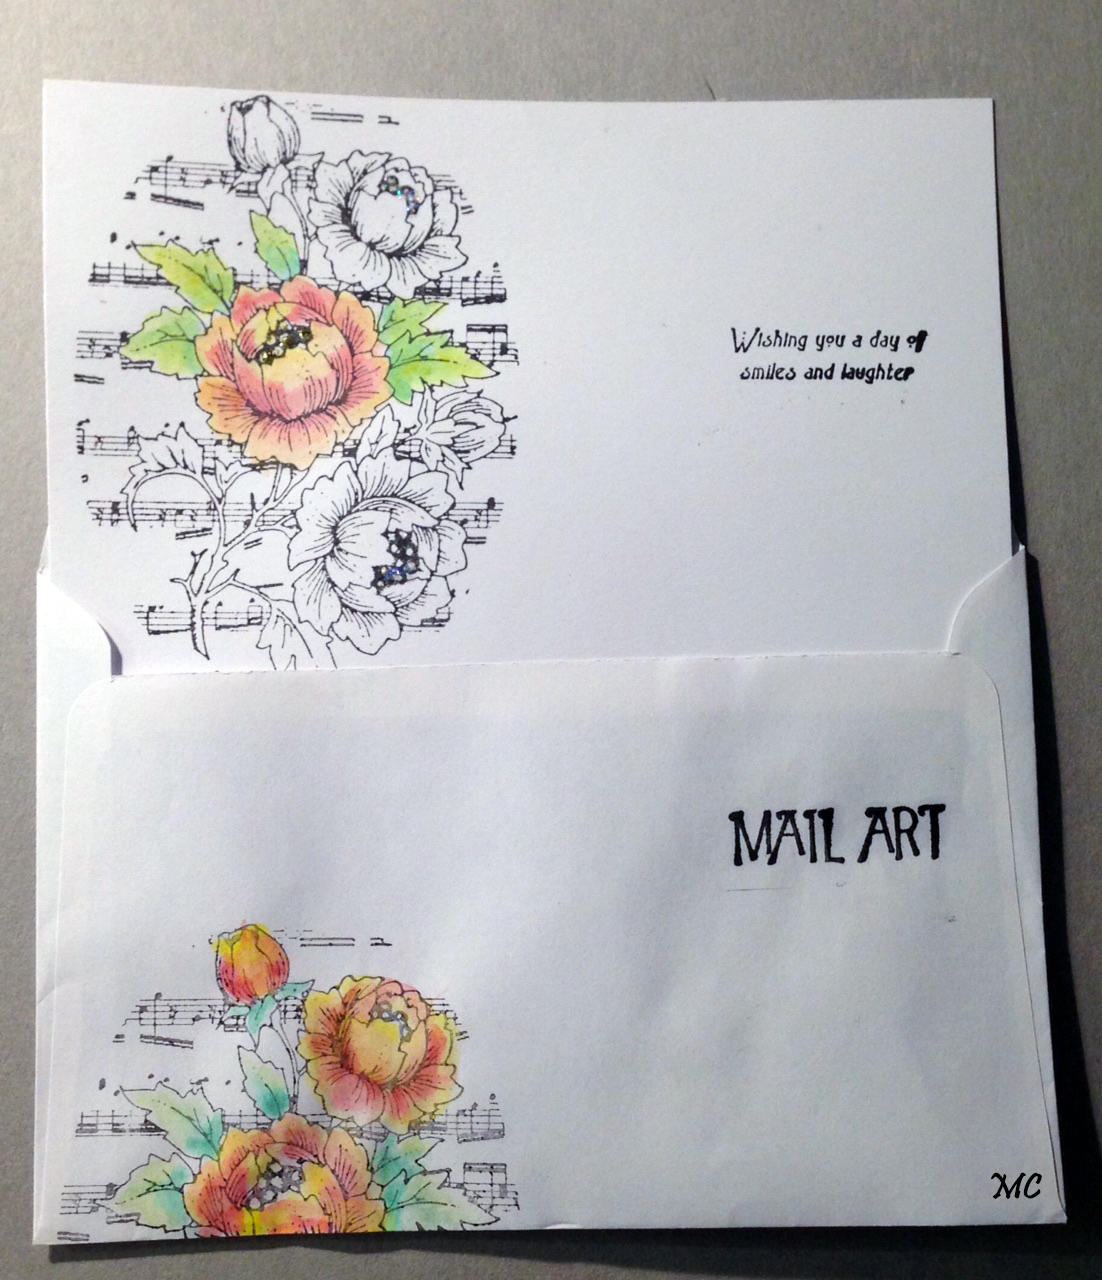
Post Art ( by Magda)

What do you think about Post Art ?
I hope that my friend will be thrilled when she receives this greeting card for her birthday, as it isn't so popular here to decorate an envelope.
Flora Musica is one of the lovely single Floral Backgrounds stamps of Chocolate Baroque.  Here is the easy step by step for a simple project with great effect.

1.  Stamp the front and the back of an envelope with Versifine Onyx Black, as well as the card
2.  Colour the stamp with a water brush  using Faber Castell Aquarelle Pencils
3.  Decorate the envelope with the sentiment of Mail Art stamp sheet set and the card with the
     sentiment of the stamp sheet set  Amazing Mackintosh Words


I hope that my project has tempted you to send a "Mail Art",  let me know 
Magda

Friday, 30 September 2016

Fifteen Minute Cards

Hello everyone, welcome to our second Fifteen Minute Blog post of the month. In these posts, we aim to bring you lots of ideas that are simple and quick to make, but still have lots of style and creativity that will please and impress the recipient. We will give you lots of tips alongside our projects and links to our own blogs where you can see the projects in full. We are joined by members of the Guest Design Team each month, who also share lots of their beautiful designs with us.

Anne has created three pretty floral cards for us this time, using delicate blues and lilacs to enhance the images, creating a soft water-coloured effect:


Dominike has used vibrant yellow tones to create gelli print backgrounds, adding stamped images, and leaving lots of white space for a classic CAS feel to her cards:


Rachel has made two beautiful cards for us using some of our bird stamps. She has used water based markers, stencils and Distress Inks to complete her cards:

I have made a card using stamps from the Butterfly Blush stamp set to create a background, and then added a co-ordinating image from the Just Butterflies stamp set, you can find further details here:
Vronnie has created a fun steampunk card using images from the Steampunk Birds stamp set. The muted background draws the eye to the vibrantly coloured birds:

We have two delightful tags from Magda to share with you. The first is a pretty floral tag, using Dylusions to create the background:
The second is a textured Christmas tag:
Brenda has created some beautiful cards again for us this month. The first was made by creating a background using Brushos. She then stamped a sentiment from the Words of Inspiration stamp set and a focal image from the Butterfly Flourish Swirls stamp set, using gold embossing powder:
She created another Brusho background for her second card, onto which she repeat stamped leaves from the Autumn Poppy stamp set, and heat embossed with copper embossing powder. Using the same ink and powder, she embossed a sentiment from the Words of Inspiration stamp set onto a strip of vellum, and embellished the card with some twine and two leaves die cut from offcuts of the background.

For her third card, she created a background using an acrylic block which had gridlines, inking with different colour Distress Inks, and spritzing with water before stamping and overlapping the colours. She then stamped an image from the Glorious Spring stamp set and added a sentiment from the Words of Inspiration stamp set with Black Archival Ink.

She stamped the Flora Musica image with Versafine Onyx Black Ink, and embossed with clear embossing powder. She coloured the image with sparkly pens and inked the edges with Distress Inks. She matted and layered the image with co-ordinating card and tied some organza ribbon.

Creating a background with Distress Crayons, she then randomly stamped sections of the harlequin stamp from the Decorative Edges stamp set and added a sentiment from the Words of Inspiration stamp set. She stamped and cut out an image from the Tangled Butterfly stamp set and coloured it with the same Distress Crayons.
With the remembrance season drawing near, Breanda has created a lovely Poppy card for us, and we have so many poppy images on the website that could be used for this idea. She masked a circle and a sun, and brushed Distress Inks to create a background. She stamped a poppy image and coloured with sparkly pens and stamped a sentiment from the Words of Inspiration stamp set. After matting onto co-ordinating cardstock, she added black seed beads to the centres of the poppies.
Zoe has created a series of floral cards for us, all using gelli plate backgrounds:


Thank you so much girls for your beautiful projects.

We hope that you have enjoyed our selection of designs, and please do visit the individual Design Team members' blogs for more detailed explanations of their cards and tags. We will be back next month with more short cuts and time saving tips for you.

Thanks for stopping by,