Pin It button on image hover
Showing posts with label Awesome Orchids. Show all posts

Sunday, 26 April 2015

Brusho and template (by Maria)


Hello crafters, I have another sample to show you today,  I hope you like it and will try it too.


I made this card with a stamp from Awesome Orchids clear stamp sheet, a flower template and some Brusho. I took some smooth white paper, stamped my image and stamped it again on masking paper. I cut it out and put the mask on the flowers, then I placed my template over the top and sprayed a tiny bit of water over it. You do need to be careful not to use too much water otherwise it goes under the template and you get a messy background. Then I took my orange Brusho and sprinkled a tiny amount all over the background. I took away the template and the mask and dried the card with a heat tool. Normally you have a white card with the orange flower background, but I wanted more colour, so I coloured it with some orange Distress Ink. I coloured my flowers with some alcoholic markers and I gave them some accents with a yellow gelly pen to look like daffodils. I hope you will try this project.
Have a wonderful day and a lot of fun!

Greetings,
Maria

Wednesday, 22 April 2015

Awesome Orchids - 10 min card by Florence

Hi everyone

Thank you for calling in.  

Always great to have your company.

Today, I have a really quick and easy card to share with you.

For this card, I have used one of the flower heads and the sentiment from the Awesome Orchids set.


For my main piece, I stamped the flower head randomly onto a piece of coated card stock using Orange Blossom Archival Ink and trimmed the piece to size.
Using a hole punch, I punched out half circles on both sides of the stamped piece.
I wrapped a piece of gold thread around the card, using the punched out half circles to hold the thread in place and then secured it on the reverse with some tape.
I cut out a small tag and stamped onto it the sentiment. 
I attached the tag to the thread using a little jump ring and secured the tag to my stamped piece using a foam tab.
I then made up the card as seen.

Happy Stamping
Florence x

Sunday, 19 April 2015

All Tiled Up (by Asha)

Good morning fellow crafters! Inspired by tiles, I made 2 cards, both featuring the Awesome Orchids stamp set, but with different results.

My first card is influenced by the Dutch Delftware - the distinguished blue on white pottery renowned for its simple elegance.  I started by scoring a piece of white heavy weight watercolour paper into equal rectangles before stamping the flower heads with Memento Ink. With a fine brush and water I pushed the colour into the flowers, taking care not to blur the outlines. I inked the edges of each tile with distress ink and drew a line through the score lines with a white gel pen for a grouted finish.  


Here's another fun way to incorporate tiles into your card project. This time I'm using bright bold mosaic inspired background to showcase the Awesome Orchid stamp. I started by colouring a piece of heavy weight watercolour paper with Gelatos and cutting it up into little squares. Then I put them back together on a piece of white card stock before adhering the fussy cut orchid on the finished background. With a little Glossy Accent on each tile we get the perfect finish for these tiles.


Thank you for stopping by today. I hope you are having fun with your new stamps. As always, details of tools and products used are available on my blog. Don't forget to swing by often for more exciting ideas from the rest of the design team. Have a beautiful Sunday!

Beijinhos,
Asha 

Saturday, 18 April 2015

Orchid Trio by Glenda

Hello everyone - I've got a quick card to show you today, inspired by Lesley's recent card (which you can see here).

I have used the clear Awesome Orchids set to create a card in sepia tones.


I stamped the flower heads first, then carefully placed the stems to connect up with the flowers.  I used Adirondack Espresso ink on watercolour paper and just touched a wet paintbrush to the image in the areas where I wanted some shading.

I cut each flower to the same size and layered each one onto dark brown card.  The card background is stencilled with a delicate stencil (called North Star) using the same Espresso inkpad and a large stencil brush.

I stuck the stamped panels on to the ivory card base with foam pads and stamped the sentiment with Versafine Vintage Sepia ink at the bottom.

Not all inks will react with water like this so you need to know which of your inks bleed and which don't.  Adirondack and Distress will definitely give up their colour even after they have dried.  Memento will bleed a little if you do it straight away, but the longer you leave it, the more fixed the colour becomes.  Archival doesn't work at all, and Versafine is also waterproof once dry.

If you find inks confusing, why not make some little swatch card and test each one out.  You need to try it on different types of paper or card because that can make a big difference too. 


Hope you're enjoying the blog, the team are certainly cooking up some gorgeous projects for you, aren't they!  Don't forget to check out our Shop Blog too where you'll find even more to inspire you.

Happy creating!


Friday, 17 April 2015

I love flowers and colours too! (by Maria)


Hello everybody, today I have some colourful examples for you, just the way I like them.


I have made a card to show you and four ATC's. I took some watercolour paper and my favorite Dylusions ink. I sprayed some water over my paper and then took some green and pink Dylusions sprays and sprayed them over the paper. For the card I used the pink and green part of the paper, for the ATC it was only the green area. The final ATC has a bit of blue too. Then I sprayed some salt, here and there and let everything air dry. When the paper was dry, I stamped the flower from the Awesome Orchids stamp set first, masked it and then stamped the stalk. I stamped the flowers again on some other paper that I had coloured with Dylusions ink and cut them out. With some 3D foam I placed them on the stamped flower on the card.

For the ATCs I did the same with the bottom two, but on the top two, I took away the colour with some bleach and coloured them again with alcoholic markers.
I hope you like my samples, and try out the techniques some time, it was real fun!

Greetings,
Maria

Wednesday, 8 April 2015

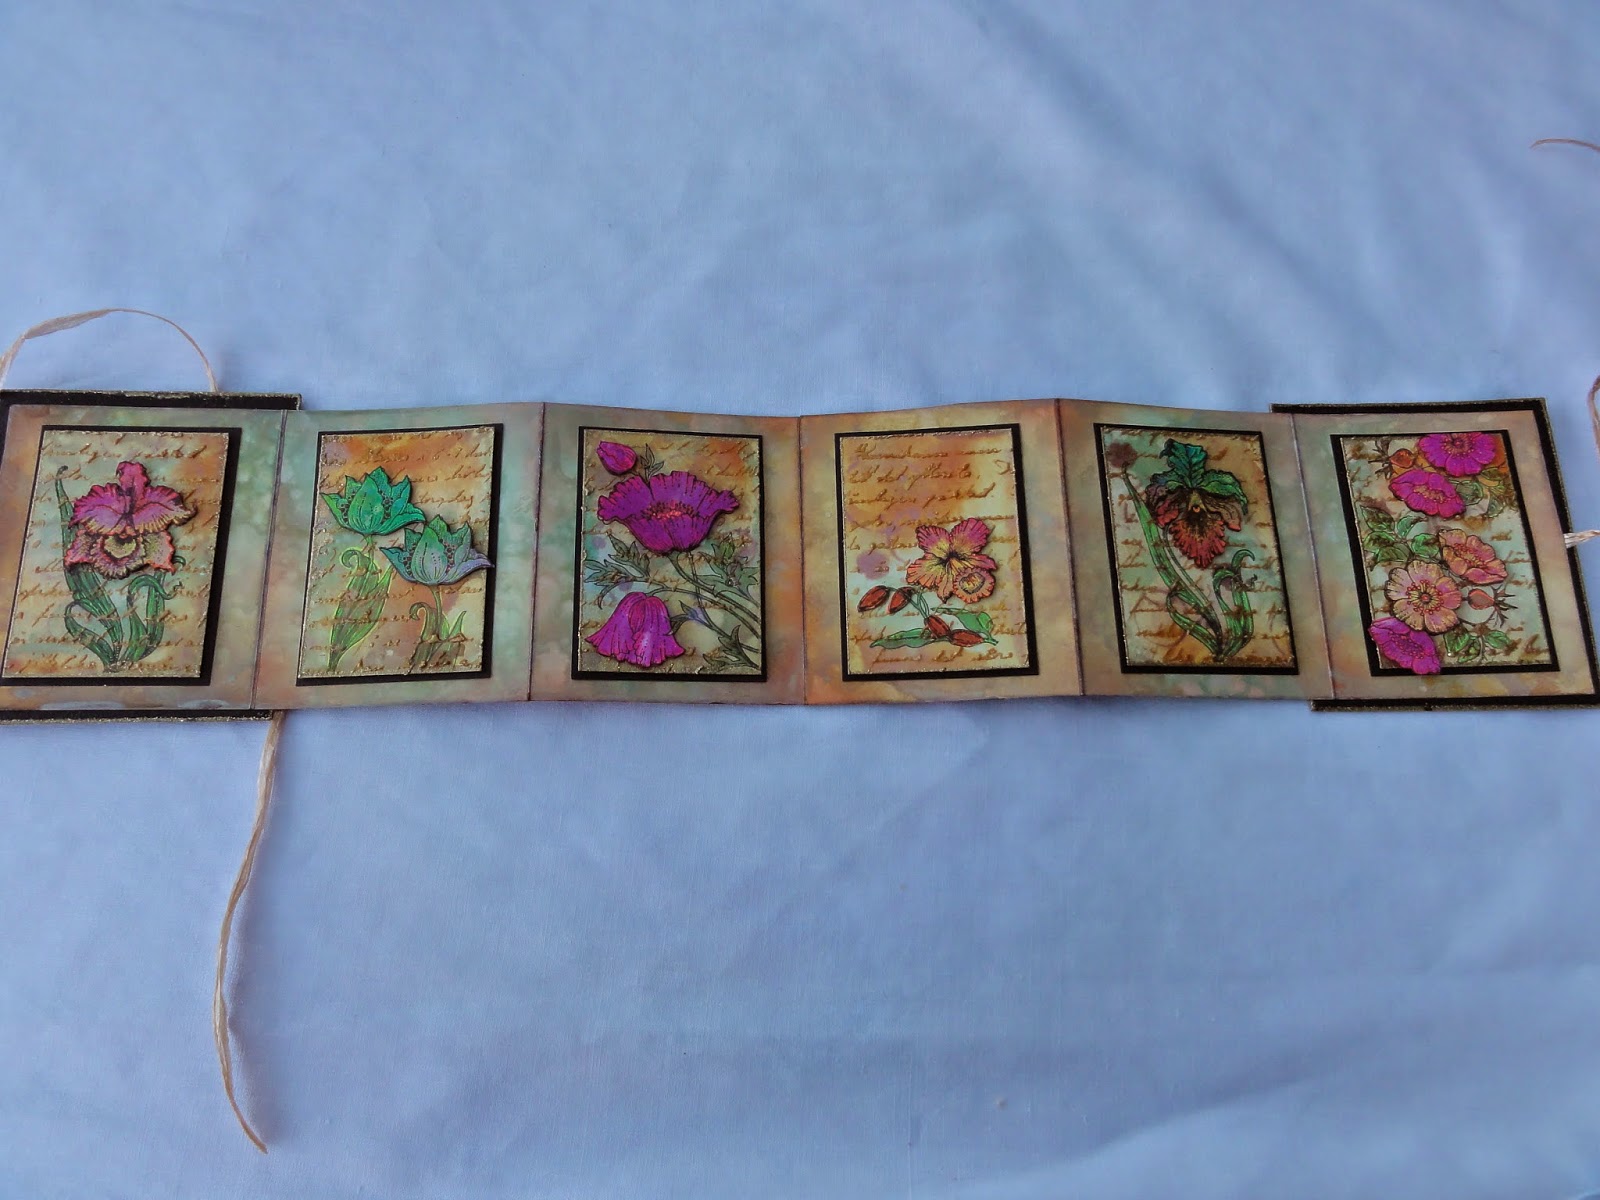
ATCs themed book "FLOWERS" (by Maria)

Hello everyone, I hope that you are enjoying the new stamps available on the website. Today I am going to show you how to make an ATC book using both new and old stamps. I hope you will enjoy it.

I made this ATC book with the following stamp sets :
Awesome Orchids clear stamp sheet, Poppy Meadow stamp set, Pretty Birdcage stamp set, Spring is in the air stamp set.


The products I used  are: Distress Paint Antique Linen, Distress Stain Spiced Marmelade and Distress Spray Stain Cracked Pistacchio. For the golden text I used a mask and some metallic gold embossing paste.
The flowers are cut out of a paper that I coloured with Dylusions and metallic spray. I made this paper a long time ago, and so I cannot remember the colours. I added some accents with yellow, orange, rose and green gelly pens.


White paper (10.5cms x 30cms) x4
Golden embossing powder, Versamark and heat tool
Black card stock 6 x (8.9cms x 6.4 cms) for the ATCs
Black acrylic paint

Instructions:
I started with my backgrounds; I put some Distress Paint on my craft sheet and with my Distress Spray Stain I sprayed some green on the paint. I added some orange Distress Stain further down, and I sprayed some water all over it. I took my white paper and went through the paint and the stains, covering my white paper. I sprayed some water over the whole paper while drying it with my heat tool. When everything was dry, I did it again to have more variation on my background.
I did the same with my second paper, so that my colours where almost the same, then I cut out 6 pieces of 8.5cms x 6cms, these pieces became my coloured parts of the ATCs. The two other papers (10.5cms x 30cms) I coloured on both sides in the same way.

Now the ATCs: I first stamped my flowers with black Versafine ink on the ATCs and added some colours. I used a stencil and with some embossing paste I gave some structure to the ATCs. I took the paper that I had coloured with Dylusions and metallic spray and stamped the flowers on the areas where I liked the colours the most. I cut the flowers out and placed them onto the ATCs with some 3D foam.
With some golden embossing powder I made a small border around the ATCs, then I took my gelly pens and added some nice accents here and there. Then I glued the ATCs on the black cardstock with some double sided tape.

Then I started with my book (9cms x10.5cms) x6. I took the two other pieces of coloured paper (green and oranges) and scored at 9cms, 18cms, and 27cms, I did this on both papers. I then glued them together to make a long strip, with one of the left over 3cms, placing it behind the other panel so that the front looked neat. I cut away the second 3cms strip. I took some orange Distress Ink and went around all of the edges, so that everything blended together.

For the covers I took some cardboard (10cms x 11.5cms) x2 and painted them with black acrylic paint. I dried them with my heat tool. I also put some embossing powder on the edges. I placed a ribbon in the middle of my last page on the outside of the book. Both sides of the ribbon were the same length. I did this also at the other end of the book. I placed the book in the middle of the cover, and then added the other cover on the other side of the book. To decorate the front of my book, I made another card (8.5cms x10cms) and placed it on my front cover.

I hope you enjoy making this project, it was a lot of work, but worth the end result.

Have a nice stamping time,
Maria


Monday, 6 April 2015

Awesome Orchids (by Shirley)

Hello everyone, I hope you had a great Easter.

I have a few designs to show today using the beautiful new Awesome Orchids clear stamp set.


I used the new Abandoned Coral along with Picked Raspberry Distress Inks in the background (using an Acrylic Block & water).   Next I added texture with white acrylic paint, a small stencil and a bottle cap.  The little dots were created using the 'snow' stamp from the Frosty Trees set.   I painted the pretty little Orchid with Inktense pencils.

I used the same colour theme below:


I used the same background technique as the first card.  I stamped the Orchid stem & leaf image three times onto the background, and one of the flower heads on separate card stock.   I coloured the leaves and flowers with the same Distress Inks along with Seedless Preserves, cut them out and attached.

And the last design is a quick CAS card:


Using a circle cut from cardstock as a mask, I blended the new Cracked Pistachio and Mustard Seed Distress Inks over top and used a stencil for the texture.  I coloured the image with pencils.

Thanks for stopping by.  I hope you can visit often to see the beautiful designs by my talented teammates.

Shirleyx

Saturday, 4 April 2015

Awesome Orchids - Cards By Florence

Hi everyone

Thank you for stopping by.

I hope you are enjoying the weekend.

Today I would like to share with you two cards made using the new Awesome Orchids clear stamps.

These stamps are an absolute joy to work with.  

A great little set to cover all occasions.


For the card above, I have teamed the Awesome Orchids Set up with the Wisteria Lane Rubber Stamp Set to create the background.


The beauty of the clear stamps is that it is so easy to position the image exactly where you want it to be stamped which works wonderfully when creating borders or edges.
For the background panel, on the card above, I have used the beautiful Damask Panel from the Cling Singles Range.


Thank you for looking

Happy Stamping
Florence x

Wednesday, 1 April 2015

Pretty Awesome Orchids! (by Asha)

Good morning, all. Hope you're having fun with the brand new stamps. These orchids are pretty awesome, wouldn't you agree?

I have 2 cards to show you today, both featuring the Awesome Orchids clear stamps and the same vintage inspired colour combos, but with different results.

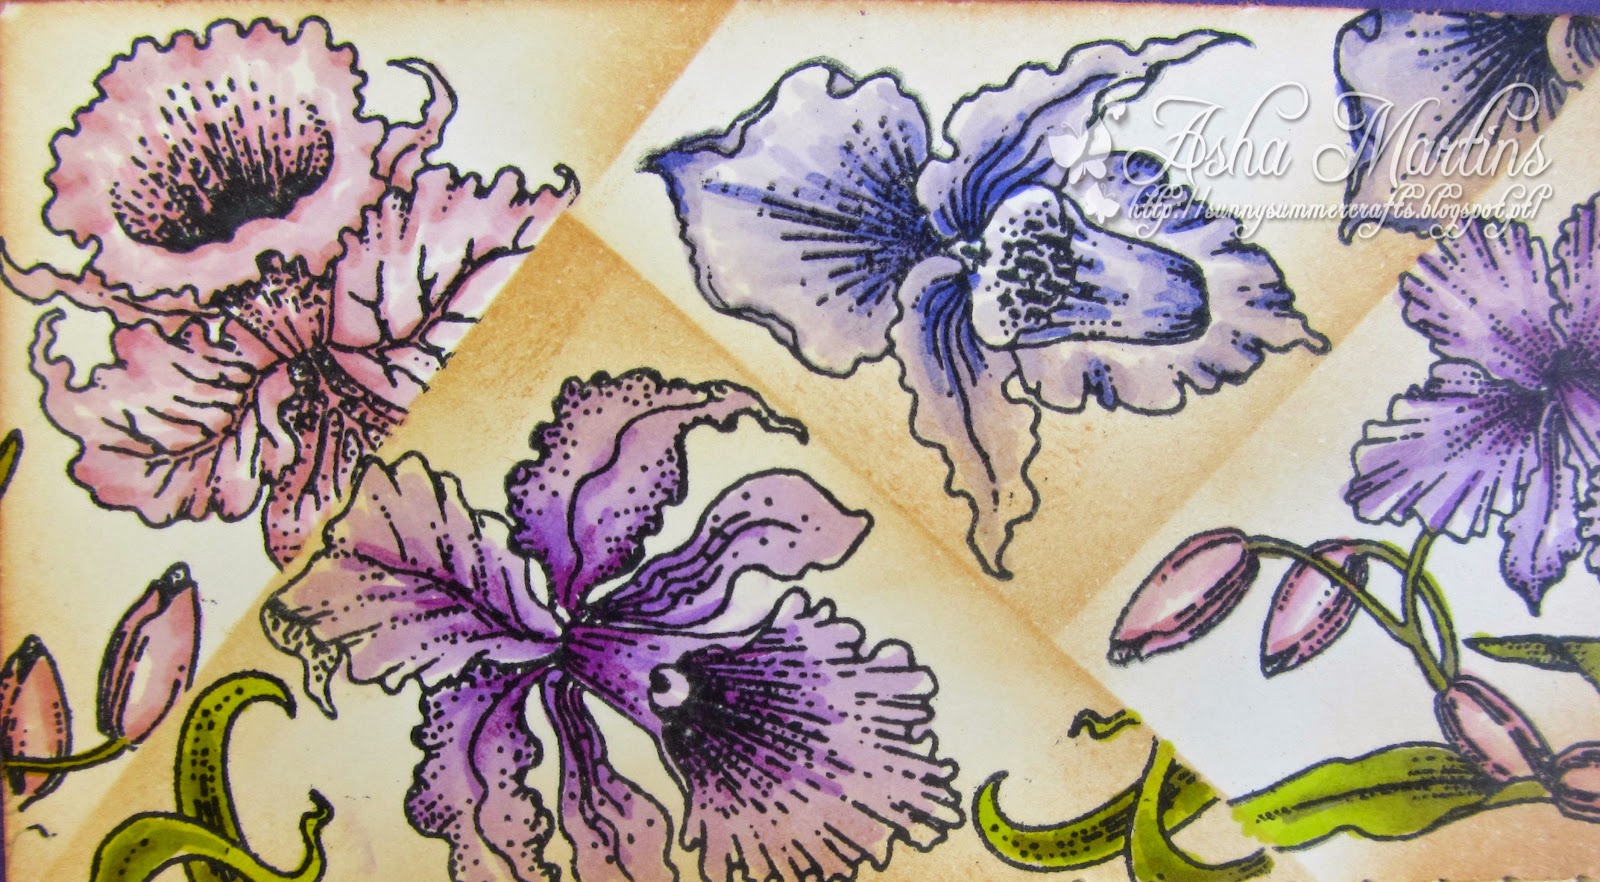
On the first card, I'm using the orchids to create a background that really stands out. With the partial retiform technique in mind, I masked off segment on a piece of alcohol marker friendly paper with post-its and inked the edges of each segment separately. Then I stamped the orchids in each segment, but making sure there are no overlapping into the neighbouring segments. You will need more post-its to mask the areas. Then I coloured the images with alcohol markers. It looks like bits of patterned paper, cut into random pieces and put together - but it's all done on one piece of card stock.

The greeting is from Birthday Words and I finished the card with a couple of sequins.  


Here's a closer look at the inked segments:


For my second card, I started by dry embossing and inking the background. Then I stamped, coloured and fussy cut several of the flower heads and leaves. I wanted to fill the card base with random clusters of the orchids and that meant some snipping, pruning and training to get the orchids to grow as shown below! :)

The greeting from Loving Sentiments, heat embossed in black on vellum, is a great way to obscure the "modifications" while still allowing the artwork of the stamps to come through.


Thank you for stopping by today. As always details of supplies used for these projects are available on my blog. Happy stamping!

Beijinhos,
Asha


Thursday, 26 March 2015

Stunning new stamps launched today (by Lesley)

It is almost the end of another month so today is the launch of our April stamp sets and are you in for a treat.

When we launched our first individual cling mounted stamps back in December the response was terrific and now we are adding four more to the collection.

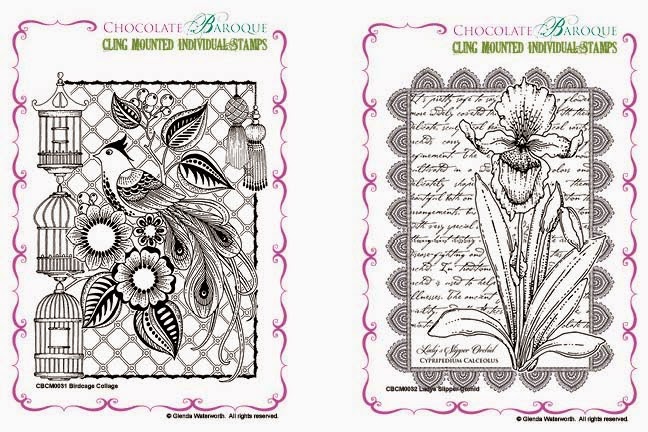
First we have Birdcage Collage and Ladys Slipper Orchid


All four stamps are available individually or as a money saving multi-buy.

Here is a stunning card made by Glenda using the Birdcage Collage


Stamped and then painted you can see this design is ideal for colouring and many of the elements are crying out to be decoupaged. And coming soon on the Shop Blog will be a post from Glenda on how she made this beautiful card, so watch out for that.

Our other stamp launch for April is an A5 clear set entitled Awesome Orchids.

This clever set features two orchid flower images and a sentiment plus a single stem and four individual orchid heads. Now you can design your own flower, how cool is that?
Here I have created three mini cards using the single stem and a selection of the orchid heads, which have then been coloured with watercolour pencils. The backgrounds have been stamped with the crackle and speckled patterns from the Natural Eggs set and the ART letters are from our Newsprint Alphabet clear set.

I just know you are going to have fun with these new stamps and keeping checking back on a daily basis for some truly inspiring projects created especially for you by the Design Team. 

Told you you were in for a treat.