Good morning, fellow Chocoholics. I know you are loving the new stamps Flowerhead stamps. They are seriously gorgeous and I cannot wait to get them inked up. However, with under a month left to get your Christmas cards in the mail, I believe a little Festive Interlude is in order.
Today I am revisiting Chocolate Baroque's older Christmas stamps to make a couple of shaker cards. These are quick projects - NO fancy inking, blending or colouring BUT guaranteed to get squeals of delight from the recipients.
My first project showcases the Peace On Earth set. I heat embossed the image with WOW Ebony Embossing Powder and stamped the greeting with VersaFine Majestic Blue. To give a little depth, I inked the around the image with Shaded Lilac Distress Ink. I added a few pale sequins in the shaker window and mounted the whole piece on sparkly silver card stock. To finish, sheer blue ribbon tied in a knot.
For my second card I stamped the snow covered cottage from the Snowy Scenes stamp set with VersaFine ink and lightly sponged around the image with Chipped Sapphire Distress Ink. The shaker element is the window in a die-cut ornament. I stencilled the scripty background with Picked Raspberry Distress Ink directly on the card base and adhered the ornament shaker piece on it. The sentiment is from Christmas Magic released last year.
I hope you are inspired to use some of your small stamps from your large sheets to create these whimsical and fun cards. And, it is so satisfying to breathe new life into much-loved older stamps.
Be sure to stop by soon for more fun makes from the rest of the DT. As always, details of full list of supplies used is available on my blog.
Beijinhos,
Asha
Showing posts with label Snowy Scenes. Show all posts
Tuesday, 3 November 2015
Friday, 26 December 2014
Time to Say "Thank You" (by Asha)
Happy Boxing Day / St Stephens Day, my friends! I trust everyone had a wonderful Christmas day with good food, good company and lots of presents. And now it's time to say "Thank You" for those gift vouchers, perfumes, hats, socks, pyjamas, scented candles and ugly sweaters!
My "thank you"s come in the shape of little 3.5" square notes cards. These cards are the perfect size for those little stamps on most Chocolate Baroque stamp sheets which are often overlooked or dismissed to the background on a standard sized card. It's time for these little guys to take centre stage.
I try to keep my thank you notes simple, quick to make and fast to reproduce. But I also make sure there are some that look more elaborate which I save for a few very special people.
The sentiments used in these projects come from the Pretty Poppies A5 sheet, as they are just the right size for note cards ... and, believe it or not (and to my horror!), I don't have any gratitude themed stamps by Chocolate Baroque!
The first card features the little robin from the Snowy Scenes A5 sheet. I heat embossed the snowflakes in WOW Silver and the "thanks" in WOW Bright White. The image is quickly coloured with alcohol markers (no fancy blending) and fussy cut - an activity I find very therapeutic!
This card features the little baubles from Hearth and Home - which I am using for the first time. Like I said, these little stamps are often forgotten. Here they are heat embossed in WOW Gold Pearl and given a little colour with watercolour pencils. I also embossed the greeting in WOW Bright White. The corners are rounded and together with the oversized die-cuts, the card is taking on a different shape, which I thought was fun.
My last sample is the easiest of the lot and you can churn these out in no time. I blended Distress Inks for the background and stamped the little tree from the Pears and Baubles A4 sheet. I made little dots with a Versamarker pen and did some heat embossing in WOW White Pearl for the falling snow. And for a pop of colour, I made 2 slits at the tree trunk, threaded some red ribbon through it and tied a knot. Voila!
So there you have it - my thank you cards for this year. With three different styles and colours, I hope you'll take away some ideas from here to make yours. You'll find details of how I made these cards on my blog. Remember, you don't have to make them fussy, fancy or elaborate. It's the thought that counts and a simple gesture can mean so much.
Continue with the fun and merriment, friends and I'll see you again soon with some new stamps! In the meantime, drop by the DT blog often because the girls are having such fun with the December release stamps ... oh so gorgeous!
Happy Holidays and here's to a Fun and Prosperous 2015 to all!
Beijinhos,
Asha
My "thank you"s come in the shape of little 3.5" square notes cards. These cards are the perfect size for those little stamps on most Chocolate Baroque stamp sheets which are often overlooked or dismissed to the background on a standard sized card. It's time for these little guys to take centre stage.
I try to keep my thank you notes simple, quick to make and fast to reproduce. But I also make sure there are some that look more elaborate which I save for a few very special people.
The sentiments used in these projects come from the Pretty Poppies A5 sheet, as they are just the right size for note cards ... and, believe it or not (and to my horror!), I don't have any gratitude themed stamps by Chocolate Baroque!
The first card features the little robin from the Snowy Scenes A5 sheet. I heat embossed the snowflakes in WOW Silver and the "thanks" in WOW Bright White. The image is quickly coloured with alcohol markers (no fancy blending) and fussy cut - an activity I find very therapeutic!
This card features the little baubles from Hearth and Home - which I am using for the first time. Like I said, these little stamps are often forgotten. Here they are heat embossed in WOW Gold Pearl and given a little colour with watercolour pencils. I also embossed the greeting in WOW Bright White. The corners are rounded and together with the oversized die-cuts, the card is taking on a different shape, which I thought was fun.
My last sample is the easiest of the lot and you can churn these out in no time. I blended Distress Inks for the background and stamped the little tree from the Pears and Baubles A4 sheet. I made little dots with a Versamarker pen and did some heat embossing in WOW White Pearl for the falling snow. And for a pop of colour, I made 2 slits at the tree trunk, threaded some red ribbon through it and tied a knot. Voila!
So there you have it - my thank you cards for this year. With three different styles and colours, I hope you'll take away some ideas from here to make yours. You'll find details of how I made these cards on my blog. Remember, you don't have to make them fussy, fancy or elaborate. It's the thought that counts and a simple gesture can mean so much.
Continue with the fun and merriment, friends and I'll see you again soon with some new stamps! In the meantime, drop by the DT blog often because the girls are having such fun with the December release stamps ... oh so gorgeous!
Happy Holidays and here's to a Fun and Prosperous 2015 to all!
Beijinhos,
Asha
Sunday, 14 December 2014
Little Gifts For Christmas (by Asha)
Good morning, everyone. We are now a fortnight away from Christmas. Ideally all your cards should be in the mail and it's time to look at finalising the gifts. I've got 3 projects to help you make those pressies extra special.
1. Gift Card Holder
Gift cards make perfect presents ... when you run out of ideas! It can be a special gift when housed in a beautiful box. And you can't beat the wow factor of heat embossing.
Red and Gold - always a striking combo. That magnificent tree is from the Turtle Doves A5 sheet, heat embossed in gold and matted on gold card stock. I also did some tone-on-tone stamping in the background with the little snowflake from the Snowy Scenes A5 sheet with Versamark.
This is a top opening box, revealing a pocket for the gift card in a slide-up mechanism. The sentiment is from the Christmas Magic clear stamp set, heat embossed in gold. I have link to a video tutorial for this project on my blog.
2. Gift bag
If you're super organised and have all your gifts ready for giving, how about making gift bags to house them. The WRMK Gift Bag Punch Board, available from the Chocolate Baroque store, makes light work of it. Here's one I prepared earlier:
Water colouring is easy and very forgiving - just what you need when in a hurry. Trust me, it really is that simple. Just lay down the colour as shown below and, using a fine brush, let the water do all the work. No fancy blending or shading. I have details of the colours used on my blog.
3. Gift Card and Treat Box
And when you want to spoil someone - go for the double whammy: Gift Card and a treat - all in one box.
I decorated the top of the box with the wreath from Hearth and Home A4 sheet, coloured with alcohol markers. Keeping it simple with just some ribbon.
The box opens revealing the gift card in a pop-up mechanism with room for a few golden nuggets! I've got details on how to make this box on my blog.
Three project ideas to help you with your festive preps: elegant, playful and extravagant - there's something for everyone. I hope these projects inspire you to play with your Chocolate Baroque Christmas stamps.
Thanks for stopping by. The rest of the Design Team are having fun with the gorgeous December release stamps, so please stop by regularly for more crafty ideas.
Beijinhos,
Asha
1. Gift Card Holder
Gift cards make perfect presents ... when you run out of ideas! It can be a special gift when housed in a beautiful box. And you can't beat the wow factor of heat embossing.
Red and Gold - always a striking combo. That magnificent tree is from the Turtle Doves A5 sheet, heat embossed in gold and matted on gold card stock. I also did some tone-on-tone stamping in the background with the little snowflake from the Snowy Scenes A5 sheet with Versamark.
This is a top opening box, revealing a pocket for the gift card in a slide-up mechanism. The sentiment is from the Christmas Magic clear stamp set, heat embossed in gold. I have link to a video tutorial for this project on my blog.
2. Gift bag
If you're super organised and have all your gifts ready for giving, how about making gift bags to house them. The WRMK Gift Bag Punch Board, available from the Chocolate Baroque store, makes light work of it. Here's one I prepared earlier:
I made the medium sized box and the main star is the jolly man from the Santa Baby A5 sheet. He is coloured with water-colour pencils, fussy cut and popped up with foam tape in front of heat embossed snowflakes from the Snowy Scenes A5 sheet.
3. Gift Card and Treat Box
And when you want to spoil someone - go for the double whammy: Gift Card and a treat - all in one box.
I decorated the top of the box with the wreath from Hearth and Home A4 sheet, coloured with alcohol markers. Keeping it simple with just some ribbon.
The box opens revealing the gift card in a pop-up mechanism with room for a few golden nuggets! I've got details on how to make this box on my blog.
Three project ideas to help you with your festive preps: elegant, playful and extravagant - there's something for everyone. I hope these projects inspire you to play with your Chocolate Baroque Christmas stamps.
Thanks for stopping by. The rest of the Design Team are having fun with the gorgeous December release stamps, so please stop by regularly for more crafty ideas.
Beijinhos,
Asha
Thursday, 21 August 2014
Merry Chrismas in August! (by Maria)
Hello there everyone!
I hope it's still warm enough because I bring you some coolness with some Christmas cards using the
"Snowy scenes" "Turtle Doves" stamp sets" and I hope you like them.
The stamps were already introduced in July so high time to show you, my samples. I made my cards with not such traditional colours but I hope you can enjoy them anyway. I think Christmas cards don't always need to be in red and green, I love them in bright colours too!
Greetings!
Maria
I hope it's still warm enough because I bring you some coolness with some Christmas cards using the
"Snowy scenes" "Turtle Doves" stamp sets" and I hope you like them.
The stamps were already introduced in July so high time to show you, my samples. I made my cards with not such traditional colours but I hope you can enjoy them anyway. I think Christmas cards don't always need to be in red and green, I love them in bright colours too!
Greetings!
Maria
Wednesday, 20 August 2014
Guest post - Tonal Christmas by Pauline Orr
Here is the second in our series of guest posts from Pauline. This week she has used the Snowy Scenes stamp set to create her tone on tone Christmas card.
For my 2nd Guest Design Team spot I thought I'd keep it
simple. These stamps allow you to get great results without too much
effort (shhhh I didn't just say that!)
Materials
Stamping card and Kraft card
Distress inks - Vintage Photo and Old Paper
Diamond Stickles
Seam Binding ribbon
Rectangle dies
- I used a 6" x 6" card blank and cut a craft card layer slightly smaller, then a layer of stamping card cut slightly smaller
- I used Old Paper Distress ink and coloured the Stamping card using cut and dry foam. I then randomly stamped the snowflake with Old Paper Distress ink to create a background.
- I did another layer using layering dies with Kraft card and Stamping card and coloured the Stamping card with Vintage Photo and Old Paper again using cut and dry foam. I then over stamped in the same colours using the same snowflake stamp
- On to my topper. I used different layering dies to cut the card and the Kraft card topper layer and stamped the snowy scene stamp in Vintage Photo. I used a paint brush and water to pull out the colour of the stamped image in places.
- I highlighted with Diamond Stickles to make it twinkle (and it looks fab, Diamond Stickles is my fav and is available from Chocolate Baroque website)
- Finally I stuck all the layers together and added a ribbon
Simple as that..
Crafty hugs
Paulline x
Another great card Pauline, thank you for this week's beautiful contribution. I know you will want to share your comments with Pauline and visit her blog to see more of her crafty creations.
Monday, 18 August 2014
Christmas and Daisies (posted by Claire)
Good morning, how are you getting on with those Christmas cards? This months new stamps are a real inspiration to get ahead and make a start on your Christmas cards. I've got a couple of samples to share today, the first features stamps from Snowy Scenes and the second uses the lovely daisy stamp from Honeysuckle Butterfly.
I created the base layer by stamping the cottage and adding some colour with Derwent pencils. The top layer was stamped with the robin and the stag and again coloured with pencils. I used a spellbinders die to cut the aperture, carefully cutting round the images to slot the die behind them so they weren't die cut. I used a zig glue pen around the edge of the aperture and on the cottage scene and sprinkled with glitter. I added one of my favourite Christmas sentiments and then mounted the top layer on 3d foam, adding a white bow to the top of the aperture.
My second card is much more summer, daisies are one of my favourite flowers so I couldn't resist using this pretty stamp.
I began by creating a distress ink background and overstamped with the daisy in versamark and embossed with a white embossing powder. I stamped the focal image with Memento Tuxedo Black ink and coloured with Graph'It markers. I die cut the image, layering it up over a scalloped oval die cut. I added a bow and a paper daisy and a die cut swirl.
Thanks so much for visiting today
Claire xx
Sunday, 17 August 2014
Honeysuckle Butterfly and Snowy Scenes - By Florence
Hi everyone
I hope you are all have a wonderful weekend.
Today I would like to share two cards I made using the Honeysuckle Butterfly set and the Snowy Scene set.
I dabbed some dye based ink onto a large stamp block. I didn't dilute the ink, I just let the ink separate naturally on the block.
I then placed a piece of white coated card stock, lightly, onto the inked block.
I then stamped the Honeysuckle image onto the inked card, using black Archival Ink.
I added a little bit of extra color, to certain areas, using a damp paint brush and some ink left on the block.
I then mat and layered as seen.
For my second card I took a piece of white card and laid it over the top of it a mask and dry embossed it using a light box and a embossing tool.
I then removed the mask and attached it to the raised embossed side of the card, matching it up to the embossed pattern, and colored it using a sponge and some ink.
I cut the green ornate square of card using a die and punched out a square of plain white card, just trimming it slightly.
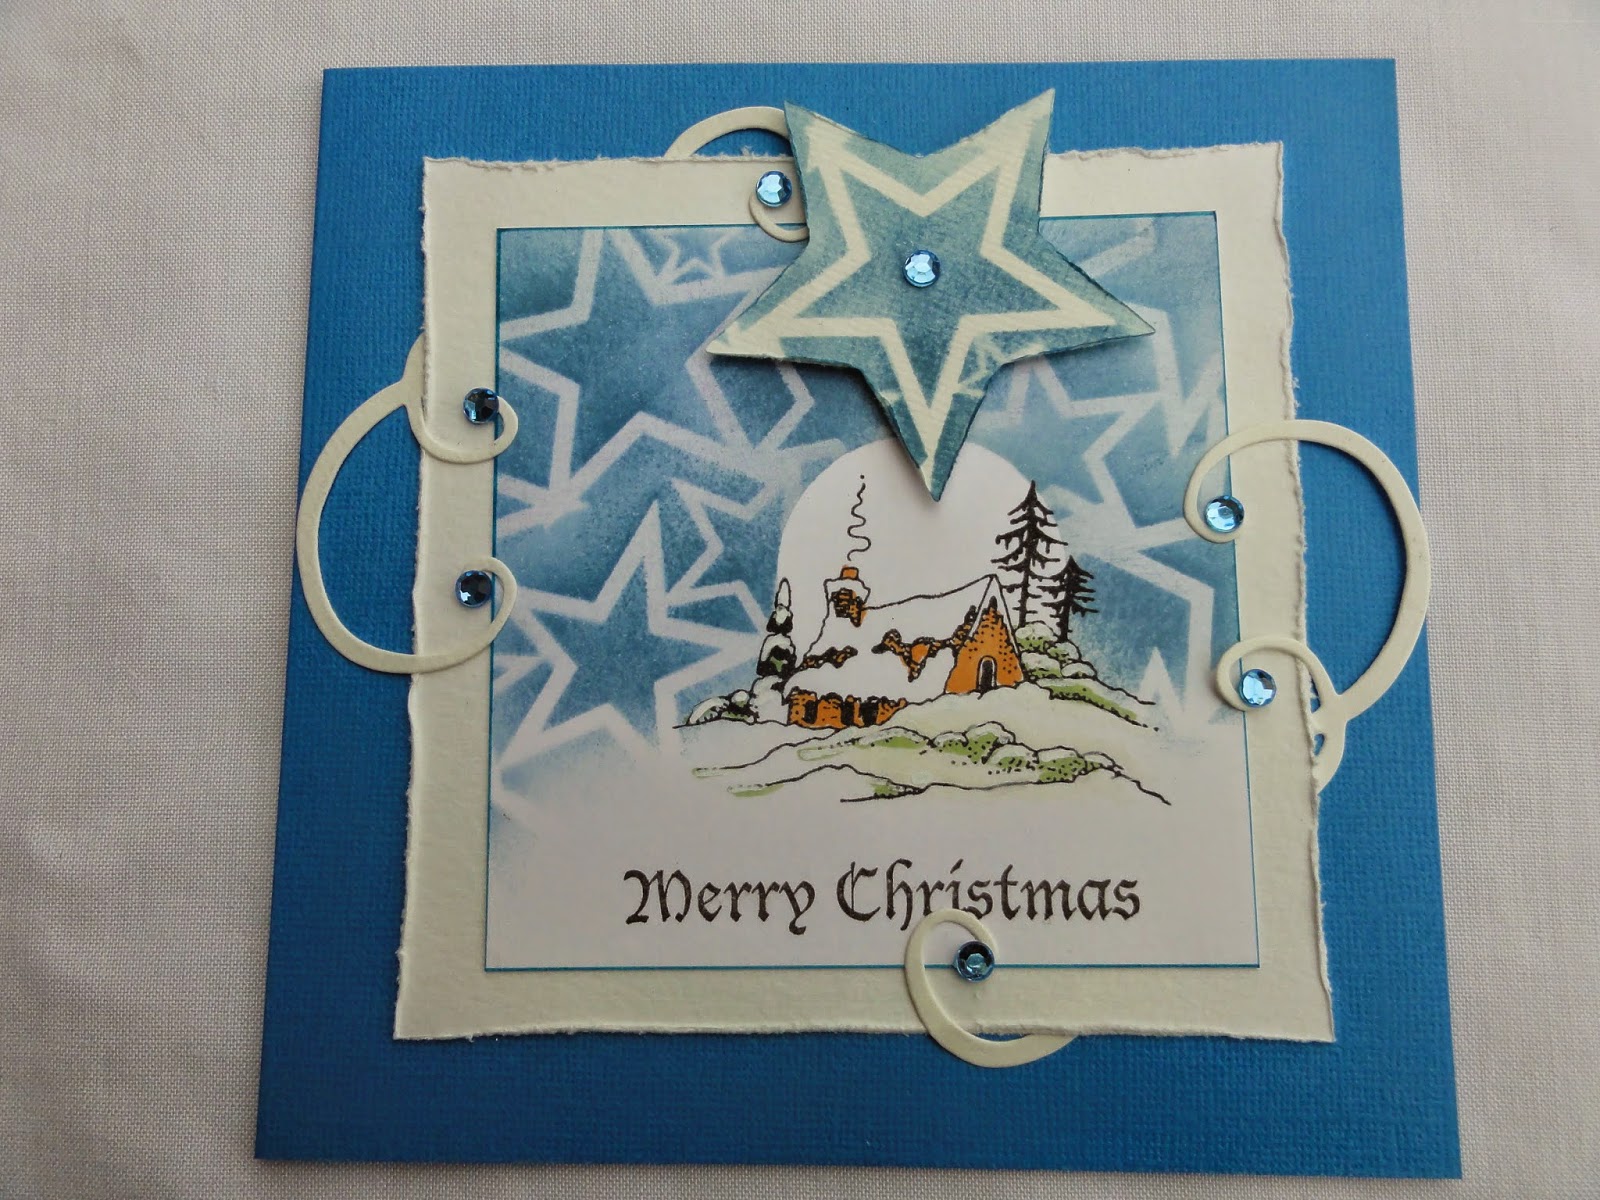
I then stamped my pretty little house onto the smaller white square using green Distress Ink, colored it in using a damp paint brush and ink and then edged the square with more Distress Ink.
I then assembled the card as seen adding a little gem.
Thank you for calling in. Do check out the fantastic projects made by the Design Team.
Happy Stamping
Florence x
Thursday, 14 August 2014
Snowy Scenes in August (by Shirley)
Hello everyone, I hope you are doing well.
I'm back with a couple more Christmas designs featuring the beautiful new stamp set Snowy Scenes. I love winter landscapes they can be so beautiful.
The background above was created with Dylusions inks - Turquoise and Midnight. When dry I stamped and embossed Big Bold Background Snowflake Outline with silver. I stamped the church scene from Snowy Scenes with Cobalt Archival ink and then added a wash of Midnight Dylusions to the sky to darken it and blend with the background. The actual colours are more purple than the photo shows, it's so difficult to photograph the purple. I painted the rest of the scene with Inktense pencils, added lots of glitter and the beautiful die cut snowflakes by Joy.
I combined a few stamps from Snowy Scenes for the card below:
I stamped the images - house in the snow, bird on the fence and the beautiful sentiment, "All hearts" with black Archival ink. I used Dylusions inks as a wash for the background and coloured the images with Prisma pencils. I stamped a little snowflake from the set with Lilac Distress Ink. Again I added some pretty snowflake dies cuts from Joy and lots of Stickles, glitter and bling.
Thanks for stopping by and I hope you have a great day,
Shirley
I'm back with a couple more Christmas designs featuring the beautiful new stamp set Snowy Scenes. I love winter landscapes they can be so beautiful.
The background above was created with Dylusions inks - Turquoise and Midnight. When dry I stamped and embossed Big Bold Background Snowflake Outline with silver. I stamped the church scene from Snowy Scenes with Cobalt Archival ink and then added a wash of Midnight Dylusions to the sky to darken it and blend with the background. The actual colours are more purple than the photo shows, it's so difficult to photograph the purple. I painted the rest of the scene with Inktense pencils, added lots of glitter and the beautiful die cut snowflakes by Joy.
I combined a few stamps from Snowy Scenes for the card below:
I stamped the images - house in the snow, bird on the fence and the beautiful sentiment, "All hearts" with black Archival ink. I used Dylusions inks as a wash for the background and coloured the images with Prisma pencils. I stamped a little snowflake from the set with Lilac Distress Ink. Again I added some pretty snowflake dies cuts from Joy and lots of Stickles, glitter and bling.
Thanks for stopping by and I hope you have a great day,
Shirley
Wednesday, 13 August 2014
Guest Post - Christmas Robin by Pauline Orr
This week sees the first of three contributions from Pauline Orr using our brand new Christmas stamps, Snowy Scenes and Turtle Doves. So sit back, relax and enjoy this tutorial.
This is an 8"x 8" card
Materials
Turtle Doves and Snowy Scenes stamp sets
Chocolate Baroque Christmas sentiment
Black matt card, craft card and stamping card
Small tag
Distress paint
Distress ink
Archival Jet Black
Gold acrylic
Alcohol markers
Diamond Stickles
Distress Rock Candy glitter
Tim Holtz die
Raffia ribbon
- First I matted and layered black card onto an 8"x 8" card blank.
- Next I cut a smaller craft card layer and painted it with gold acrylic.
- My next layer was a piece of black matt card on which I stamped the corner branch from the Turtle Doves in gold acrylic. When it was dry I added Diamond Stickles to the berries to give it a little more Christmas bling.
- I then cut a stamping card layer roughly 6" x 6"
- I splodged Distress paints onto my craft sheet and spritzed with water and dragged through the stamping card until I got a satisfactory covering (I did leave a little white card in places). I also dragged my tag through the paint so they matched.
- When this was dry I over stamped with the snowflake stamps in contrasting Distress ink and gold acrylic paint and did the same on the tag.
- Moving onto the tag, I stamped the sentiment in Archival Jet Black and heat set it.
- Using the fab little robin stamp from the Snowy Scene stamp plate I stamped onto stamping card using Archival. I then used a combination of Distress ink and a tiny bit of alcohol markers to colour. Shouldn't really use archival with alcohol pens but I was careful so as not to contaminate it. I then cut out the robin.
- After gluing all the layers I positioned my tag and then glued the robin in place. I used a white pen to go around the robin and highlight the sentiment, just to make it pop a little more.
- I added a poinsettia and a raffia bow and finished off with a little rock candy glitter.
So there you have it. I thoroughly
enjoyed using these stamps, always get a wonderful response from
recipients and they are so easy to use. Being a huge Glenda Waterworth
and Chocolate Baroque stamp fan I was honoured and excited to be asked to
do this GDT.
You can see more pictures of this card on my
blog
Crafty Hugs
Pauline xxx
Thank you Pauline for this gorgeous Christmas card, and for the in depth tutorial. I hope you can show your appreciation by leaving a comment and don't forget to pop over to Pauline's blog for more inspiration.
Subscribe to:
Posts (Atom)