Hello everyone, I have three projects to share with you today using the stunning
Captivating Cacti stamp featured on last month's Hochanda TV shows. This super image has been an absolute pleasure to work with, and I hope that my very different projects will give you lots of ideas.
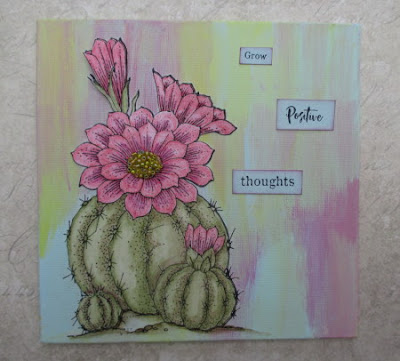
For my first project, I decided to create a little mixed media piece, and used a 6" x 6" canvas as the base for the design. I chose three colours of acrylic paint, and mixed them directly into blobs of white gesso, and applied each colour onto the canvas with a large wet brush. I was not too precise about this coat, as it was simply a base for further layers of paint. I dried the layer with a heat gun. I applied the next layer of paint with a baby wipe, and used long strokes, blending the colours into each other, to get a soft effect. I dried the layer again. While I had the paint on my craft mat, I used some to paint a watery wash onto some drawing cartridge to use later.
I stamped the
Captivating Cacti image onto drawing cartridge three times, (I also stamped the image once onto the canvas). I coloured parts of the images with watercolour pencils and a water brush. I added darker colours for shading to create depth and then I cut out the images. I glued yellow seed beads to the centre of the smallest piece of flower head and let this dry thoroughly. I adhered the cacti image to the canvas, building up the layers. I added some shading to the base of the image on the canvas, to 'ground' the picture, again using watercolour pencils and a water brush.
I stamped a sentiment from the
Blossom and Grow stamp set onto the spare piece of drawing cartridge. I masked the words so that I could stamp each word separately, using masking tape before I inked the stamp. I cut each word out and edged the pieces of card with Distress Ink, before adding the sentiment to the canvas.
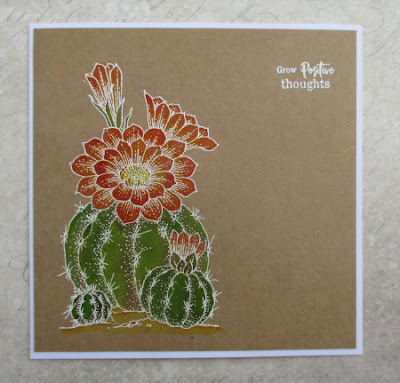
My second project was a much quicker design! I used a piece of kraft card, and stamped the image using Versamark and white embossing powder. I painted the image using
Koh-I-Noor paints. The image pops off the background, and the paints work really well on kraft card. I have used the same sentiment, but in one piece this time. This card would make a great pick me up for a friend who is down.

Finally, I made a little brooch using Soft Form Relief Paste. We often tell you on the blog and on the TV shows how versatile Soft Form Relief Paste can be; how you can use the medium for so many things, that you can sew it onto your bags and mixed media projects, etc. I decided to make a practical demonstration of how this can be done. I coloured some Pearl Soft Form Relief Paste with some purple Brusho powder, and spread it over the main flower head of the image that I have been using throughout this blog post. I then left the paste to cure overnight. Once the paste has set into a film, I peeled it from the stamp, and trimmed around the flower image. I adhered the image to some felt, using some strong double sided tape, then sewed some seed beads to the centre of the flower. I also added a brooch back at this point.
I
very carefully dry brushed a tiny amount of paint onto the brooch to add some extra color to the flower, using red and teal tones. If you add too much liquid to the Soft Form Relief paste when it is a film, you will dissolve the film, so a light touch is essential.
I will be back later in the month with some more projects for you, but in the meantime, do keep checking back for inspirational projects from my Team Mates. Thanks for stopping by,
Judith xx


