Pin It button on image hover
Showing posts with label Baroque Meadow. Show all posts

Saturday, 25 December 2021

I'm Grateful (by Judith)

Hello everyone, I'm popping in with a Christmas wish for you all today. Normally Lesley would be here today wishing you all the best for the festive season. As you probably know, our lovely Lesley has very recently been ill, and is currently at home recovering, being looked after by David. Lesley will need to take things slowly for a while. I am sure like myself, you wish her a speedy recovery.

I spoke to Lesley yesterday morning, and a thought for this post had already formed in my mind, two words, 'I'm grateful', grateful that Lesley made it through her heart attacks, and that she is still here with us. We have a lot to be grateful for, don't we? We might moan about the state of the world right now, with Coronavirus, lockdowns, rising food prices, etc., but we still have friends, family, crafting, a smile, our pets, there is always something that we can be grateful for. 

I have not made anything new to share with you for this blog post, but I looked through my old blog posts, and found these projects to share with you:
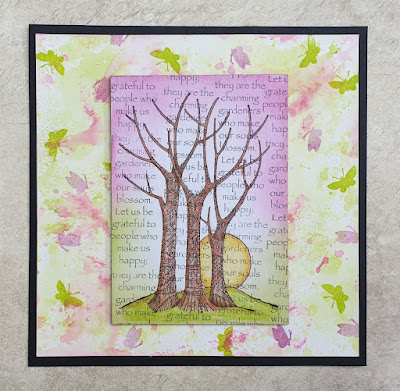
I have used a sentiment from the Words of Gratitude stamp set to create a background, (very apt on this occasion), for the Tangled Birch tree. I used soft pinks and greens on the whiteboard panel and the larger background behind. The little butterflies are from the Baroque Meadow stamp set.
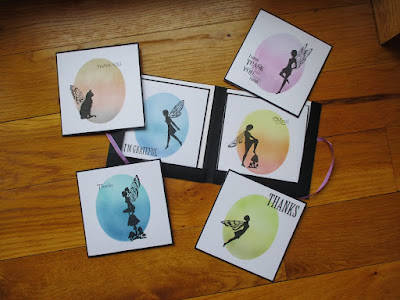
Here is a very quick set of thank you cards using the same Words of Gratitude stamp set of sentiments, plus a variety of fairies across the whole range of fairy stamp sets from Chocolate Baroque. These are perfect for any time of year but great for sending out after Christmas.

Thank you to all of you, our customers, for supporting us this year, for visiting the blog and Facebook Group, buying our stamps and other products, watching the TV shows, and leaving so many friendly supportive comments. We appreciate every single one of them.

Thank you to the rest of the Design Team for your hard work over the past year, your beautiful samples and support, you help make Chocolate Baroque shine. 

Finally because I can, I want to commend David and Lesley on their hard work this year, ensuring that the stamps have been top quality and the service to you the customer has been first class. They work so hard to make Chocolate Baroque an outstanding business, but they make us feel part of the family too.

Wishing all of you health and happiness over the coming season and for the year ahead. Sending lots of love to Lesley as she rests and starts to recover.
 

Friday, 17 July 2020

In the Background


Hello everyone

I have a couple of more cards to share with you from the Hochanda show in June.
The stamps I have used are Baroque Meadow and Words of Inspiration.


For my cards, although similar, I have used different tools for the background.

The first card I used a soft rubber brayer. This enables the colours to blend seamlessly together, from the rich red down to the yellow.

My second card uses a roller. Although I graduated the colours similar to before you can see a lot more texture in the background. The roller is very forgiving and I love it!
These silhouette stamps are made for background techniques.

Hope you have fun with your backgrounds
Sandra x

Thursday, 9 July 2020

Baroque Katya and Sunshine Meadow

Good morning everyone, I'm here with my first post of this month featuring the fabulous Chocolate Baroque stamps from last month's tv shows.  

Baroque Katya.

For my first project I have used stamps from the Katya, Baroque Meadow and Words of Inspiration sets; spray inks, black Versafine ink, clear EP, Versamark ink, white EP, white texture paste, CB Stencil - Russian Spires.


On a piece of Drawing Cartridge I stamped and embossed Katya then masked her .  I used a couple of spray inks to create a colourful background then added interest by using white texture paste through a stencil on one side of Katya and stamped and embossed the meadow flowers in white.   


I removed the mask and painted Katya.  I added some gems to her headdress and edged the panel with gold pen.   I then matted the panel onto a piece of embossed and gilded card and attached them both to a white base card, and added a sentiment tag.


Sunshine Meadow.

For the second project I used stamps from the Baroque Meadow and Words of Inspiration sets; 
Kraft Card, Distress Inks, Versamark ink, white EP and a stencil from my stash.


On a piece of Kraft Card I stamped and embossed the meadow flowers in white.  I then applied yellow Distress Ink through a stencil of sunrays and blended green ink  along the bottom of the panel to ground the flowers.  I blended ink around the edges of the panel then matted it onto green card and attached it to a base card.  I created a sentiment panel and added that to the front of the card.


Thank you all for dropping by today, I hope you've enjoyed my post and perhaps I've helped to spark your Mojo!  I shall be back later in the month with more crafty fun so until then stay safe and stay well,


                                x x Penny x x

Monday, 6 July 2020

Looking at Backgrounds (by Judith)

Hello everyone, I hope that you are all keeping well. Even in times like these, I hope that you have been able to find some enjoyment in your crafting, in whatever form that has taken. A lot of you have been saying that your mojo has taken a walk, but hopefully the inspiration here on the blog, on the Facebook Group, and Lesley's daily Facebook live posts are continuing to provide you with lots of ideas.

I have created a card for you using the lovely Katya, and stamps from the Timeless stamp set. I used a piece of card from my stash that had been washed with a tea bag dipped in warm water. This gives the card a lovely aged feel, perfect for the look I wanted. It's a very quick way of colouring a background.

I stamped Katya using dark brown Archival ink, and covered the image with masking tissue, before adding the large image from the Timeless stamp set a couple of times. I then added lots of the smaller images using second generation stamping to fill the rest of the space, and overstamping the other image as well. I used sepia tones, keeping in with the general colour palette.

I removed the mask, and coloured Katya with Koh-I-Noor Polycolour pencils, these blend really well, and add a pop of colour to the main image. I felt that the main decorative piece on Katya's headdress reminded me of a cog, and so she fitted so well with the 'Timeless' theme, a lady from a bygone era.


To create my second card, I added Distress Inks to a piece of Drawing Cartridge with some water, and then stamped the little butterflies from Baroque Meadow across the background using toning colours of Versafine Clair inks. I used a whiteboard postcard, and stamped a sentiment from Words of Gratitude across the background using grey Archival Ink. I added some shading around the edge of the postcard using Distress Ink and stamped the Tangled Birch over the top, which I coloured with pencils as before.


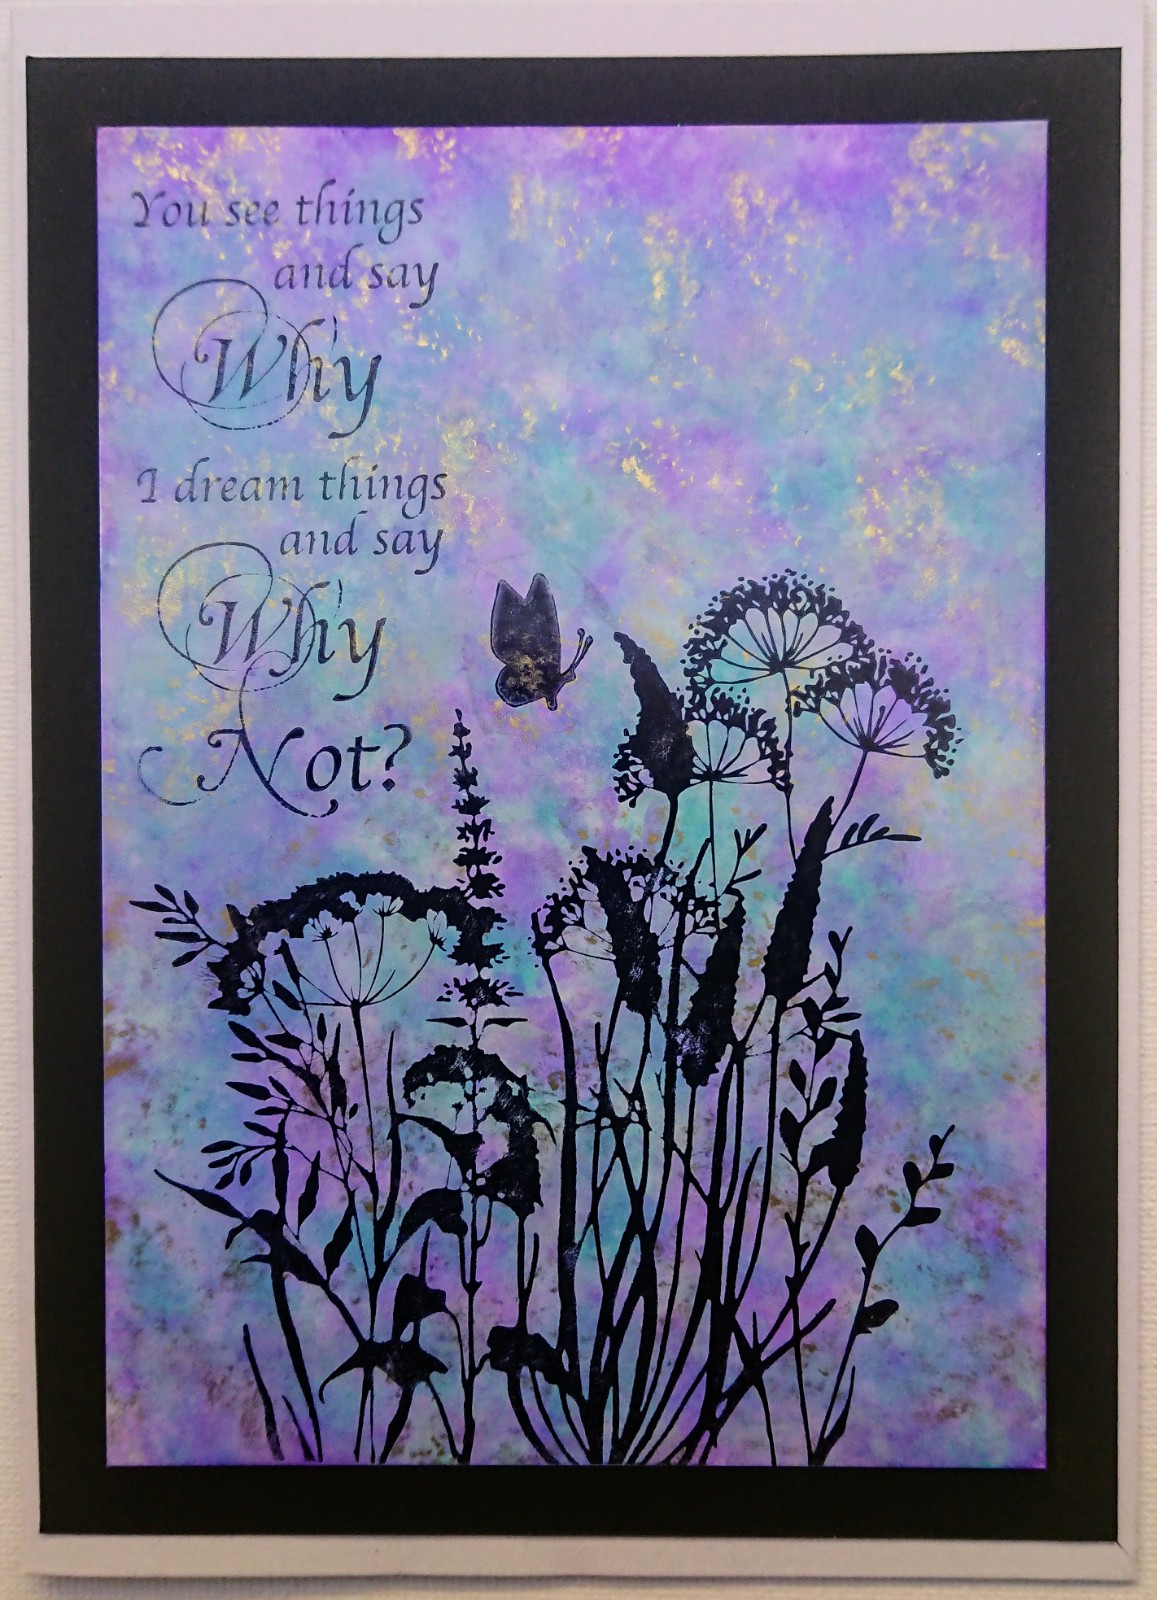
My final card, which I shared at the time of the TV shows was a really quick card, a simple Brusho background with the same wording added. I then stamped the images from Baroque Meadow in black ink, and added a piece of black ribbon, before mounting the project onto black card.


These lovely stamps are so versatile, always a pleasure to create with. I will be back later in the month with more ideas to share with you. Take care for now, and stay safe,

Judith xx

Wednesday, 1 July 2020

Baroque Meadow

Hello

I hope you are well.

Today I am sharing some of my cards from the Hochanda show in June.

The  stamps I used were Baroque Meadow, a lovely silhouette stamp and Words of Inspiration which has some lovely sentiments. There are 4 sets in the "Words of..." range and you can see them here.

My first card is simply stamped in Archival and a stencil has been used in the background. Distress inks are used around the edge to frame the image.


My second card uses the same meadow stamp with a different sentiment from the Words of Inspiration set. This time my background is done with alcohol inks on some satin card. I chose some pastel colours to give a summer feel to the card.


For my final card today I coloured the stamp with water based marker pens, I then spritzed the stamp with water before stamping.  This gives a lovely water colour effect.


Hope you enjoyed looking at these and I have a couple more to share with you soon.
Sandra x

Friday, 17 August 2018

Baroque Butterflies (by Doreen)

Hello everyone, it is time for the second post from our Guest Design Team member Doreen this month. She has created a lovely delicate card, featuring flowers and butterflies. 

Products used:

Chocolate Baroque Smooth White Paper
Baroque Meadow stamp
Chocolate Baroque Mask- Kaleidoscope of Butterflies
A little heavy gesso
Distress inkpads: Mowed Lawn, Chipped Sapphire and Wild Honey, applied using soft blending brushes
Sentiment from Essence of Nature stamp set
Black Archival inkpad

Thank you for looking,

Love Doreen

Sunday, 17 June 2018

Mostly Masking (by Judith)

Hello everyone, I have several projects to share with you today showcasing the lovely stamps featured on the May TV shows on Hochanda. We also took Masking Tissue onto the show, and a lot of my projects reflected the use of this product.

For my first card,  I created a Pan Pastel background, tearing strips of paper to create hills, and adding a green colour at the bottom half of the card, toning in some grey as I moved up the card, to represent hills in the distance. I created a sky using blue and pink pastel coloured tones.

I stamped the floral spray from the Lords and Ladies stamp set repeatedly across the lower half of the card, varying the height of the stamp. I added a stamp from the Silhouette Grasses stamp set using second and third generation stamping for this stamp, to create some depth, as if there were a meadow of flowers. Two little butterflies from the Baroque Meadow stamp plate, and a sentiment from the Words to Dazzle and Sparkle stamp set completed the card. All of the stamping was done with a green Versafine ink, and the images were coloured with watercolour pencils.


I wanted to create a one layer card that would be cheap to send in the post, but still have the look of a multi layered card. Using a piece of masking tissue, I coloured a piece of drawing cartridge with Distress Ink, first around the outside of a central panel, adding shading, and then stamped over the background using the Square Bubbles stamp. I then removed the mask, and added the corresponding reverse mask, leaving the central panel uncovered, and inked the edges of that area with the same background colour as before.

I stamped the foliage stamp from the Rose Duo stamp set using first and second generation stamping in blue and green dye based inks, then ensured that all of the ink was completely dry. I stamped and embossed the foliage image with Versamark Ink and copper embossing powder. An optional extra at this point was to edge the background with Versamark and tip copper embossing powder over the edges, before embossing the foliage.

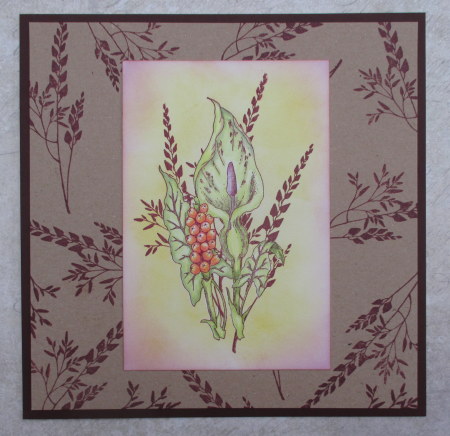
My next two cards are based on a very similar colour scheme to each other, and use the lovely Cuckoo Pint image from the Lords and Ladies stamp set. For the first card, I created a background using the foliage stamp from the previous card, stamping onto kraft card with a plum coloured ink. I created the main image by stamping the Cuckoo Pint, masking the image, and again stamping the foliage, again using plum coloured ink for stamping. I coloured the flower with pencils. adding Distress Ink to the background for a soft finish.

The next card was created by adding Brushos to kraft card and spritzing them with water. I added some toning hessian, a button and ribbon to the background. To create the focal piece, I stamped the Cuckoo Pint, and masked the image before stamping the On The Tiles image. I coloured the image with Distress Inks and a water brush. The two images have been coloured in similar colours, but the different mediums give a very different effect.

I hope tht you are enjoying the DT's projects with these lovely stamps, do keep checking in for more inspiration. Thanks for stopping by, xx

Tuesday, 22 May 2018

Wishes and Honey by Penny

Morning everyone, I hope you are all well and enjoying the lovely weather we have had lately.  It is my pleasure to bring you a couple of projects today, a couple of cards from the 'Bee' shows on tv last month.  

Make a Wish


For this card I have used stamps from the Rose Tree and Honey Bee sets, Distress Inks, silver sparkle embossing powder, Versamark ink.  On a piece of white card I blended the Distress inks to create a background, I stamped several small floral images randomly over the card plus a small bee, using the same inks.  I then stamped and embossed the Dandylion image a few times and added the seed heads  as if they were floating away on the breeze.


I took a white base card and stamped a floral image and the seed heads around the edges using one of the Distress Inks then matted and layered the focal panel onto it.  I blended the ink around the outer edges, then stamped a sentiment from the Words to Dazzle and Sparkle set.  I die cut the sentiment, added ink around the edges and attached it to the card.


Honeycombe

This time I have used stamps from the Honey Bee and Baroque Meadow sets; Distress Ink, Versamark ink, white embossing powder, white gesso, pearlscent paints, a stencil and a die from my stash.  


On a piece of Kraft card I stamped the Honeycombe image and embossed it in white.  A little way below I added white gesso through a honeycombe stencil.  I trimmed away the bottom edge of the Kraft card to accentuate the honeycombe pattern.  I painted the bees then matted the panel onto yellow card.


On a white base card I stamped the grasses in yellow Distress Ink along both side edges then attached the focal panel.  I took a spare piece of Kraft card and stamped one of the bee images onto it then embossed it in whiteas before.  I coloured and cut out the bee then added it to the card.  I used another piece of Kraft card and a die from my stash to create a large bee embellishment and added it to the card.  I then stamped and embossed the words onto Kraft card and cut it into a panel before attaching it to the card with 3D foam.  To complete the project I added a couple of metal embellishments that compliment the honeycombe patterns on the card.


Thank you for popping in today and joining me, I hope you have enjoyed these projects.  Take care and happy crafting till next time,


                                                             Penny

Monday, 13 November 2017

Punky Expressions CAS Style (by Judith)

Hello everyone, I am back to share some more projects featured on last month's Steampunk shows on Hochanda. For these three projects, I wanted to focus on the new word plate, Punky Expressions, and the different ways that the stamps could be used.

I created a gelli plate background on a large white card blank, by brayering Distress Ink in shades of blue and brown across the round gelli plate. I used an image from the Steampunk Travel stamp set, stamping straight onto the plate, to take colour away, and not cleaning the stamp in between stamping, so it added colour in various areas as well. I pressed the plate onto the card to ensure that I printed the background exactly where I wanted it to go. I added a few more of the little airships onto the background, using Distress Ink.

I stamped the large gentleman from the Eccentric Edwardian stamp plate using black ink. I added the Eureka! sentiment around the edges, starting at the top and bottom, moving left and right, then simply filling in the gaps.

For my second card, I created another gelli plate background, using blue and green ink, and pressing a dotty tool onto the plate to create a textured pattern. I added some images from the Silhouette Grasses stamp set, using various coloured inks, a little butterfly from the Baroque Meadow stamp plate, and finally, combined two of the stamps from the Punky Expressions stamp set. These new words and phrases are so versatile, and will be very useful for lots of occasions.

Finally, a really quick card, using more of the grasses as before in a different colour option, straight onto a card blank. The butterflies as before, and a variation on the stamp sentiment. This was such a quick card to make using first and second generation stamping to build up depth to the flower field.

I hope that my cards have given you some ideas for these fabulous stamps. I will be back later in the month with a few more ideas to share with you. Thanks for stopping by,


Monday, 27 February 2017

Sparkling Meadows (by Judith)

Hello everyone, I have a couple of projects to share with you today incorporating the 'Caught in Crystal' technique and using some of the lovely silhouette flowers from both the Silhouette Grasses stamp set and the individual Baroque Meadow stamp.

I created a large piece of caught in crystal background, and you can find the full instructions on my blog. I then stamped the Baroque Meadow image, adding the three little silhouette butterflies, using a permanent black ink. I trimmed the piece of background to size, and matted it onto black card.

I found a larger piece of wrinkle free distress background in my stash of left over backgrounds, which was a lovely bright orange, and simply added some pink Distress Ink around the edges so that it toned in with the caught in crystal panel. I added a sentiment from the Words to Dazzle and Sparkle stamp set, and adhered the background to a large black card blank.

I had a piece of the crystal background left over, and die cut an oval piece from what was left. I stamped an individual flower and one of the little butterflies onto the oval, before matting it onto black card as before. I created a background using Pan Pastels, and added some foliage using Versamark, and Pan Pastels over the top. Finally, I added a sentiment from the Words to Dazzle and Sparkle stamp set.

Thanks for stopping by, Judith xx

Friday, 24 February 2017

Word Cloud Meadow (by Julie)


Hi there, thanks for stopping by. I have a bumper, three card post for you today using the fabulous stamps that Lesley recently demonstrated on Hochanda. If you managed to catch her shows you may have seen Lesley demonstrate a card using this technique so if you did you will be ahead of the game lol!

For the word cloud I have used the sentiments from Words to Dazzle. Basically you need to choose your sentiments and then arrange them onto an acrylic stamp block. Ink them up and test stamp them onto scrap paper. When you like the appearance of your stamped arrangement you are ready to stamp onto your project.

My first card also uses Baroque Meadow and Silhouette Grasses. The base card is the Silhouette Grasses inked up with Moss Green Versafine and then Fired Brick Distress ink was added over the top. The topper was created by stamping the Baroque Meadow in a very pale dye based ink before over-stamping with the word cloud. For this card I coloured the sentiments with brush markers. Don't worry about the ink drying before you are ready as you can reactivate the ink by giving a good huff onto the rubber before stamping. Before mounting the topper onto the card I edged it with Distress inks.


My second card is almost an exact copy of the first but I have used very muted colours. If you find you do not have any pale inks then you can get around this by using your brighter inks but stamping them onto scrap paper before stamping onto your project. Also known as second generation stamping.


Finally for my third card...I have used the same word cloud arrangement as before, however I have inked up the Silhouette Grasses using yellow, purple and grey dye based inks and stamped onto plain white card. I managed to do this without creating any ink splodges so decided to leave the crisp white card background as it was...lol!

Thanks for taking a peek. Please pop back and visit again very soon as there is Design Team inspiration everyday!

Julie xx

Monday, 6 February 2017

Our Fragile Earth Kingfisher Scene Card (by Anne)


Good morning. Today I am sharing another of my samples made for the recent TV shows on Hochanda using the lovely new Kingfisher and scene building sets. These are still exclusive to Hochanda for a few more days – then they will also be available from Chocolate Baroque.

This sample started out to be a bit of a disaster. I used Soft Form Relief Paste to make the textured embellishment but while preparing we had no electricity for 12 hours. It was only 5 degrees in the house and unfortunately it made my embellishment go hard and brittle (where it is normally flexible and soft) – so I accidently smashed and cracked it! Aaaargh! But then I thought about a theme …… ‘our fragile earth’ …… and this design resulted. Tee hee.
 
Materials:
How to make it:
  1. Cover the Baroque Meadow stamp with a layer of Soft Form Relief Paste and leave to fully dry (1-2 days). Gently peel away from the stamp and trim away rough edges with scissors. Rub over the surface with Stazon ink. Mine snapped across due to the cold conditions. Usually this stays flexible so you will need to cut across with scissors.
  2. Using a sponge and the circle mask apply yellow ink to create the earth shape. Remove the mask and lightly spritz with the blue ink. When dry apply a layer of clear sparkle over the earth.
  3. Edge the card with Distress Ink and glue down the meadow embellishment and sentiment strips. Glue to the card front with 3D foam.
  4. Stamp the Kingfisher scene with Versafine ink. You only need to partially ink the stamp – cut out the Kingfisher. Colour with sparkle pens. Dot a little highlight into the eye with the white pen and when dry add Glossy Accents. Shape lightly and apply to the card with 3D glue gel.

Sunday, 5 February 2017

Baroque Meadow (by Asha)

Good morning, friends! Have you seen the beautiful new stamps by Chocolate Baroque showcased by Lesley on Hochanda recently. These new stamps are exclusive for purchase through Hochanda for a few more days but they'll soon be available at Chocolate Baroque online store.

I'm featuring 2 of the new A6 stamp sheets: the image from Baroque Meadow and the sentiment from Words To Dazzle and Sparkle. I love the detail on the grassy silhouette image.

The background is mix of Distress Inks and I masked off the moon with a circle die-cut. Instead of stamping the image in black I decided to go with green to contrast the moody background. And to brighten the scene I added white and glossy accent dots.


I've got more details of tools and products over at my blog. And make sure you swing by the DT blog often because at the rest of my talented teamies are creating projects that will amaze you. Thank you so much for stopping by today.

Beijinhos,
Asha